
How to make Finn’s New Granny Square Blanket…


This post contains affiliate links. Affiliate links cost you nothing, but when purchasing through these links you help me earn a small commission. This supports me and my family and my continued efforts to bring you free patterns.
Intro
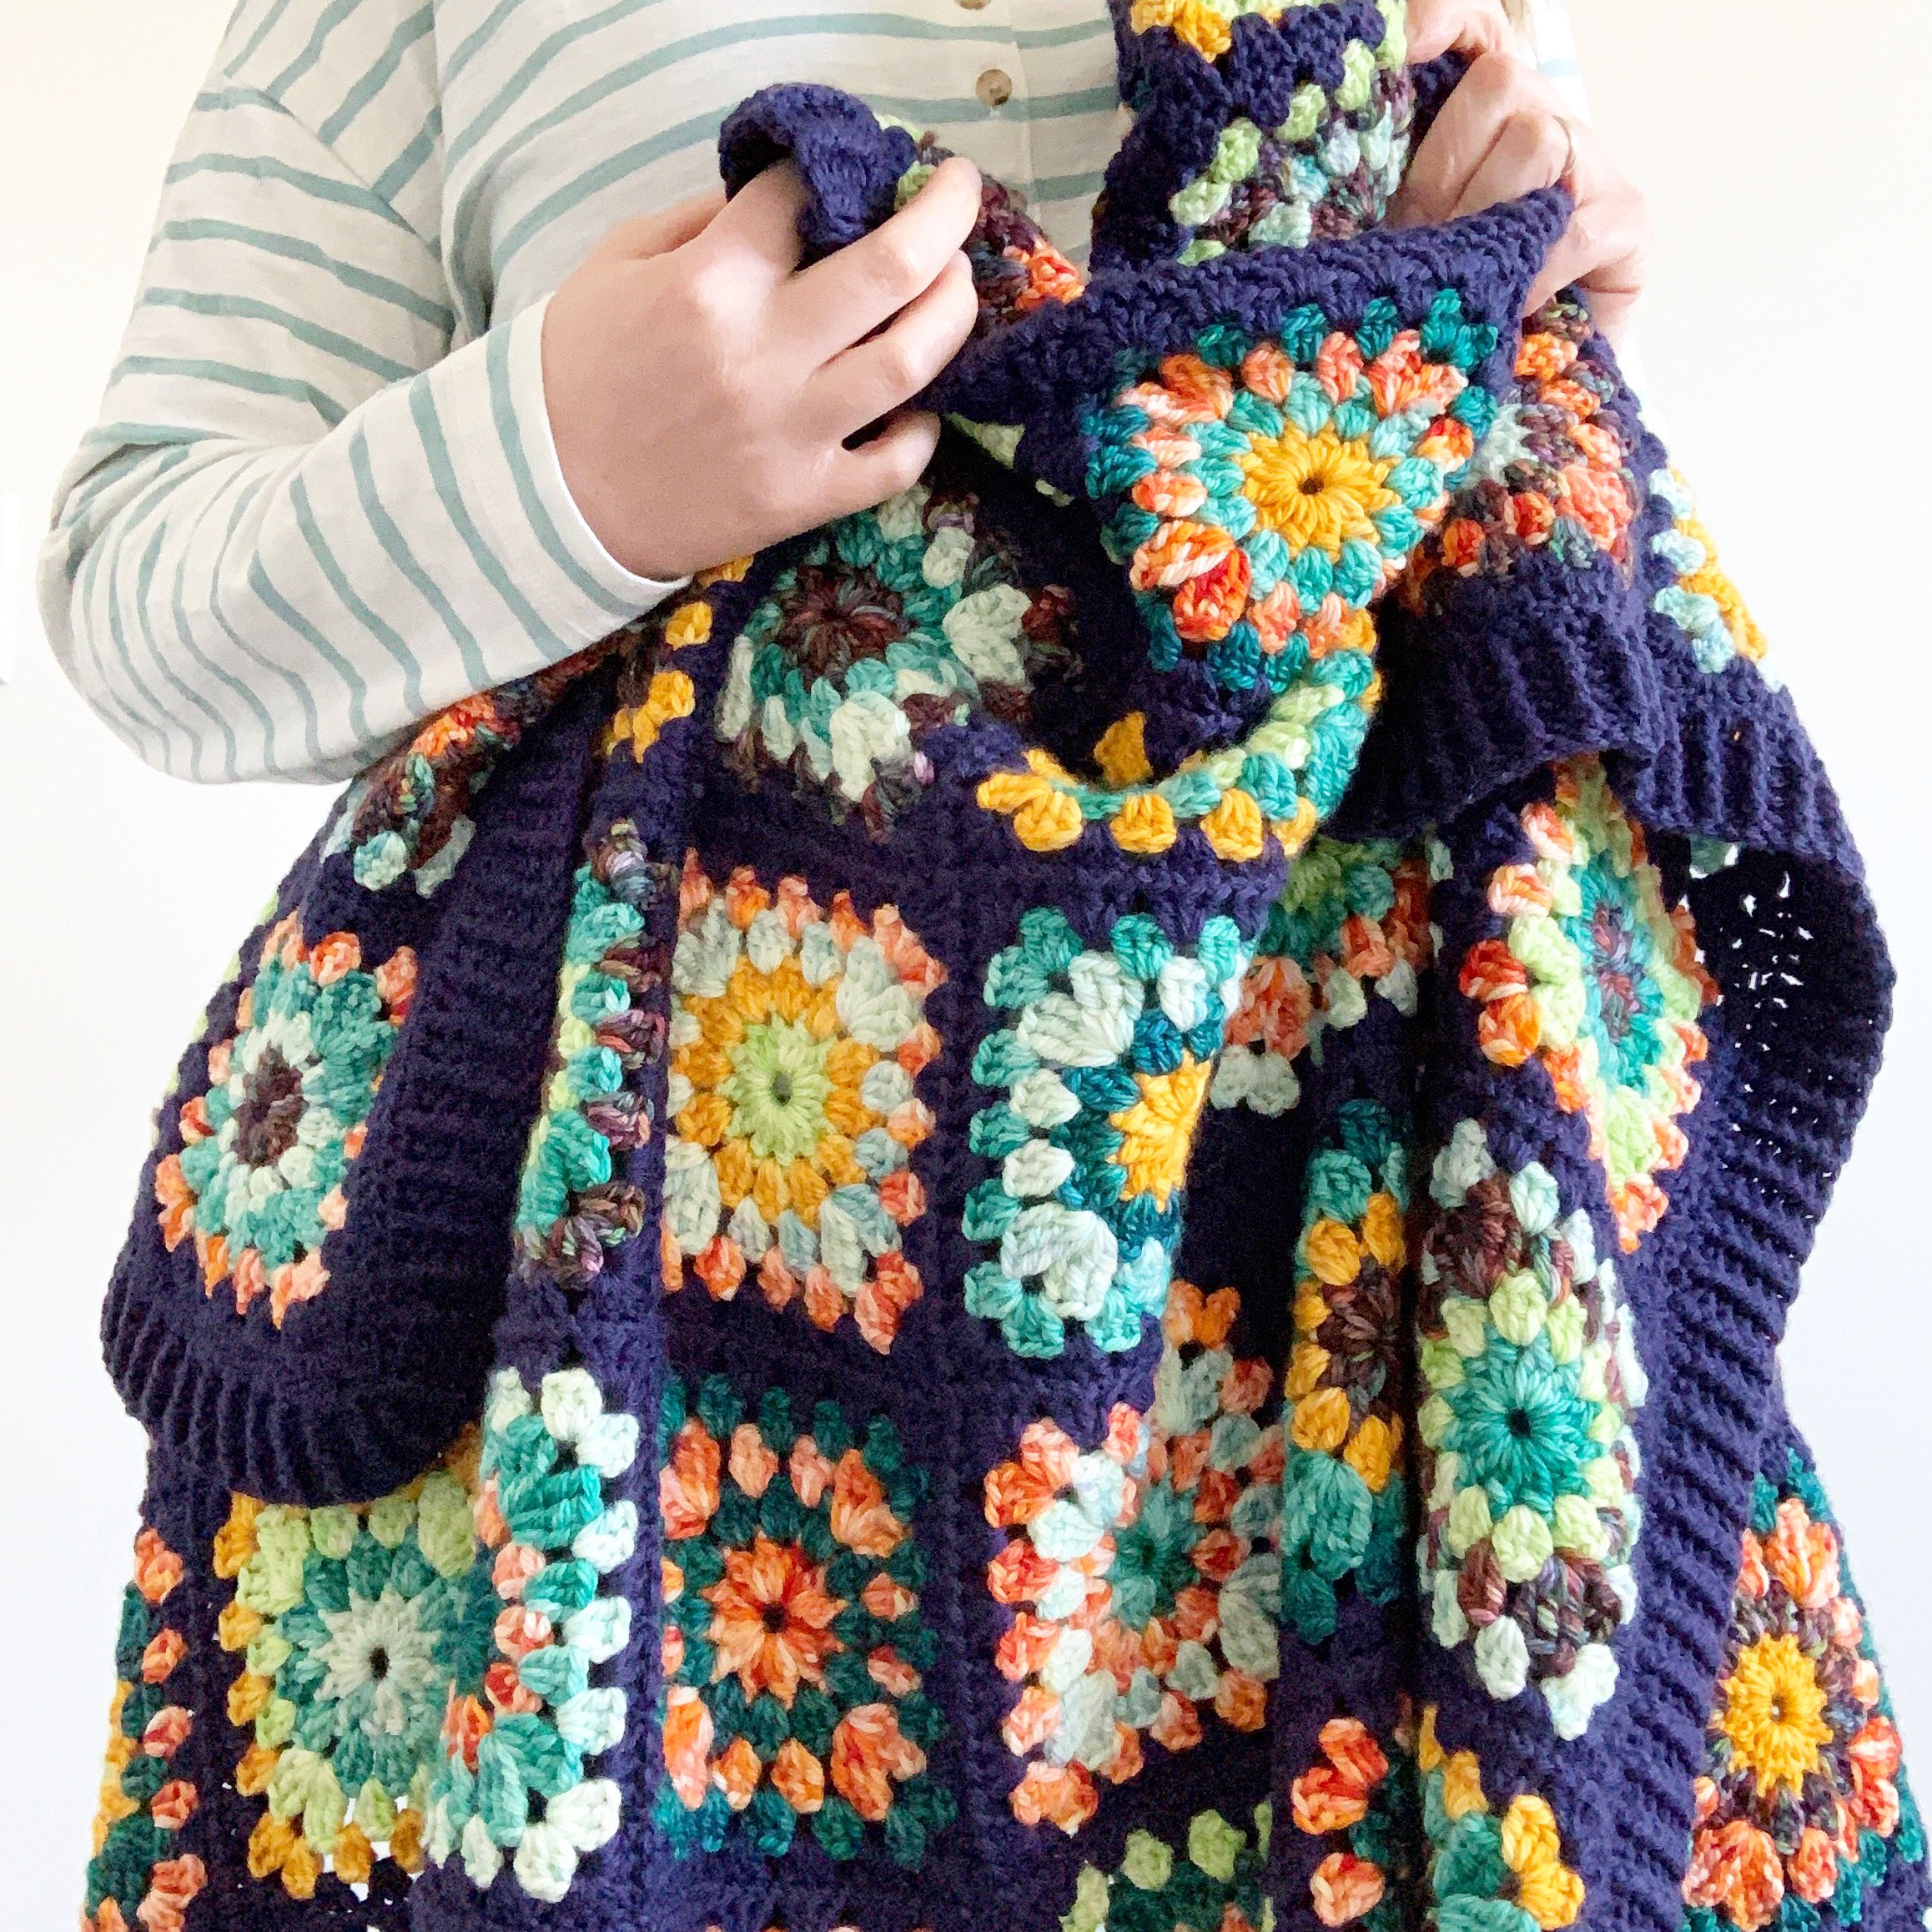
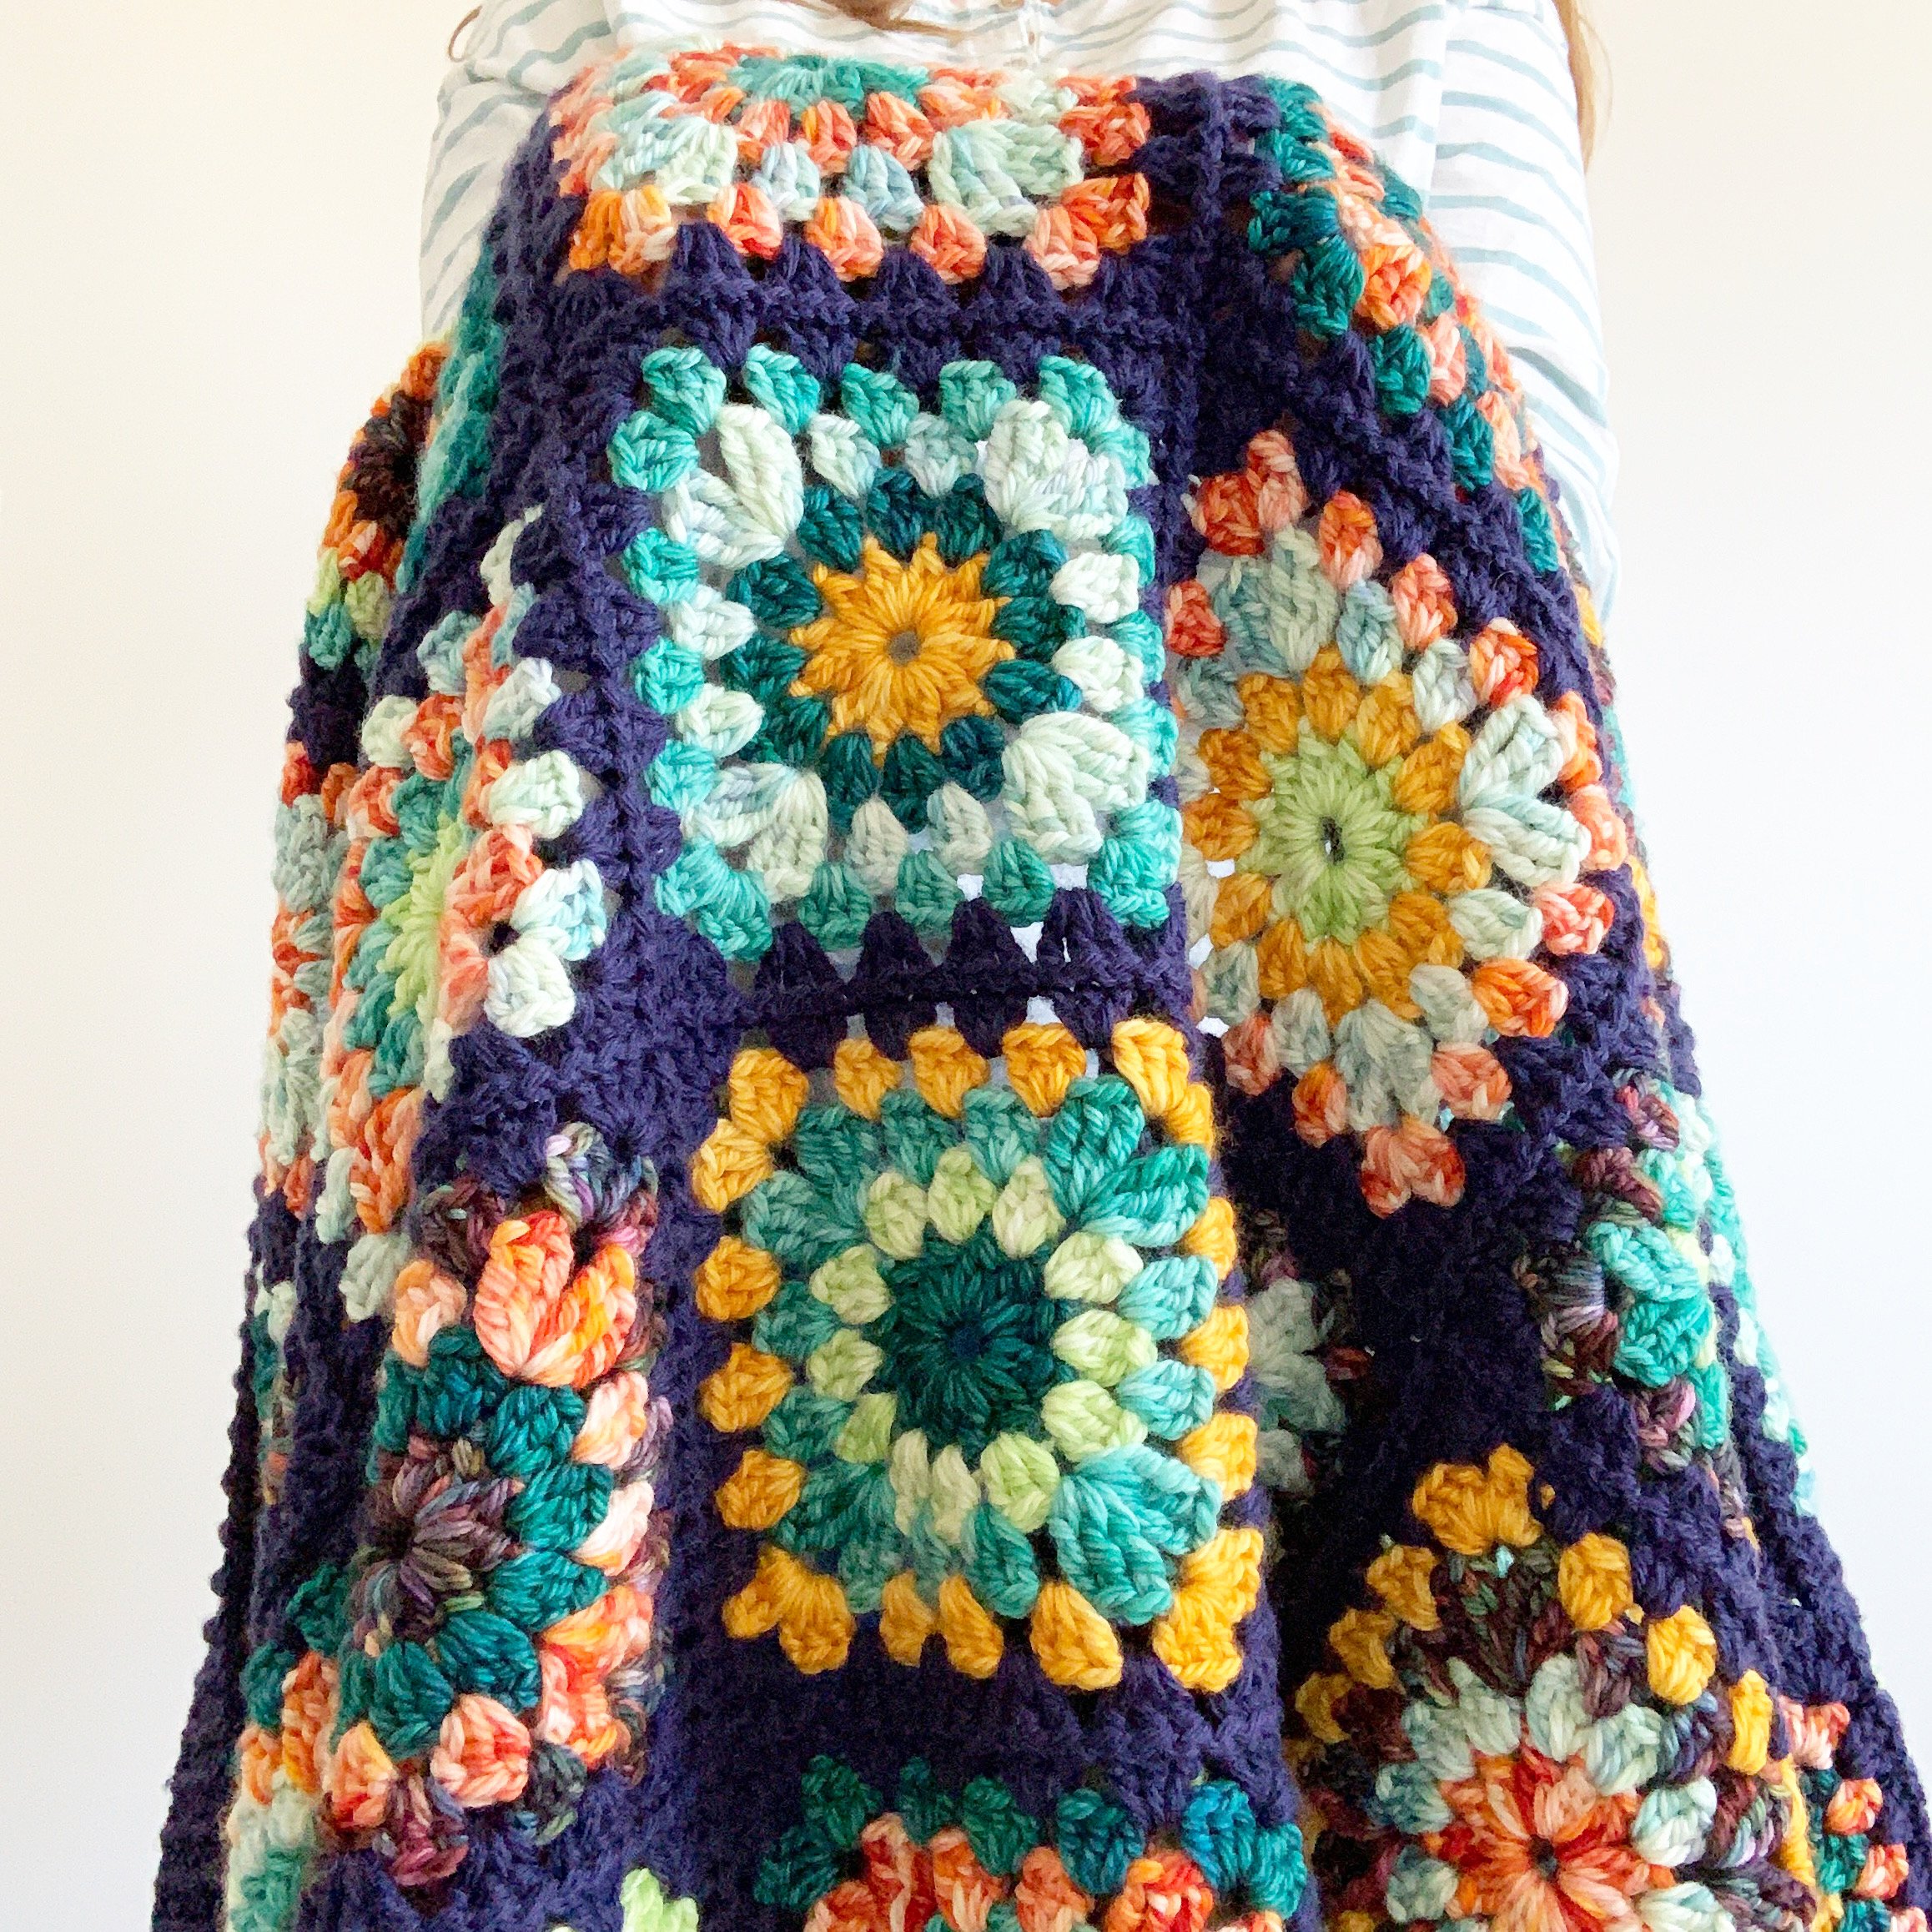
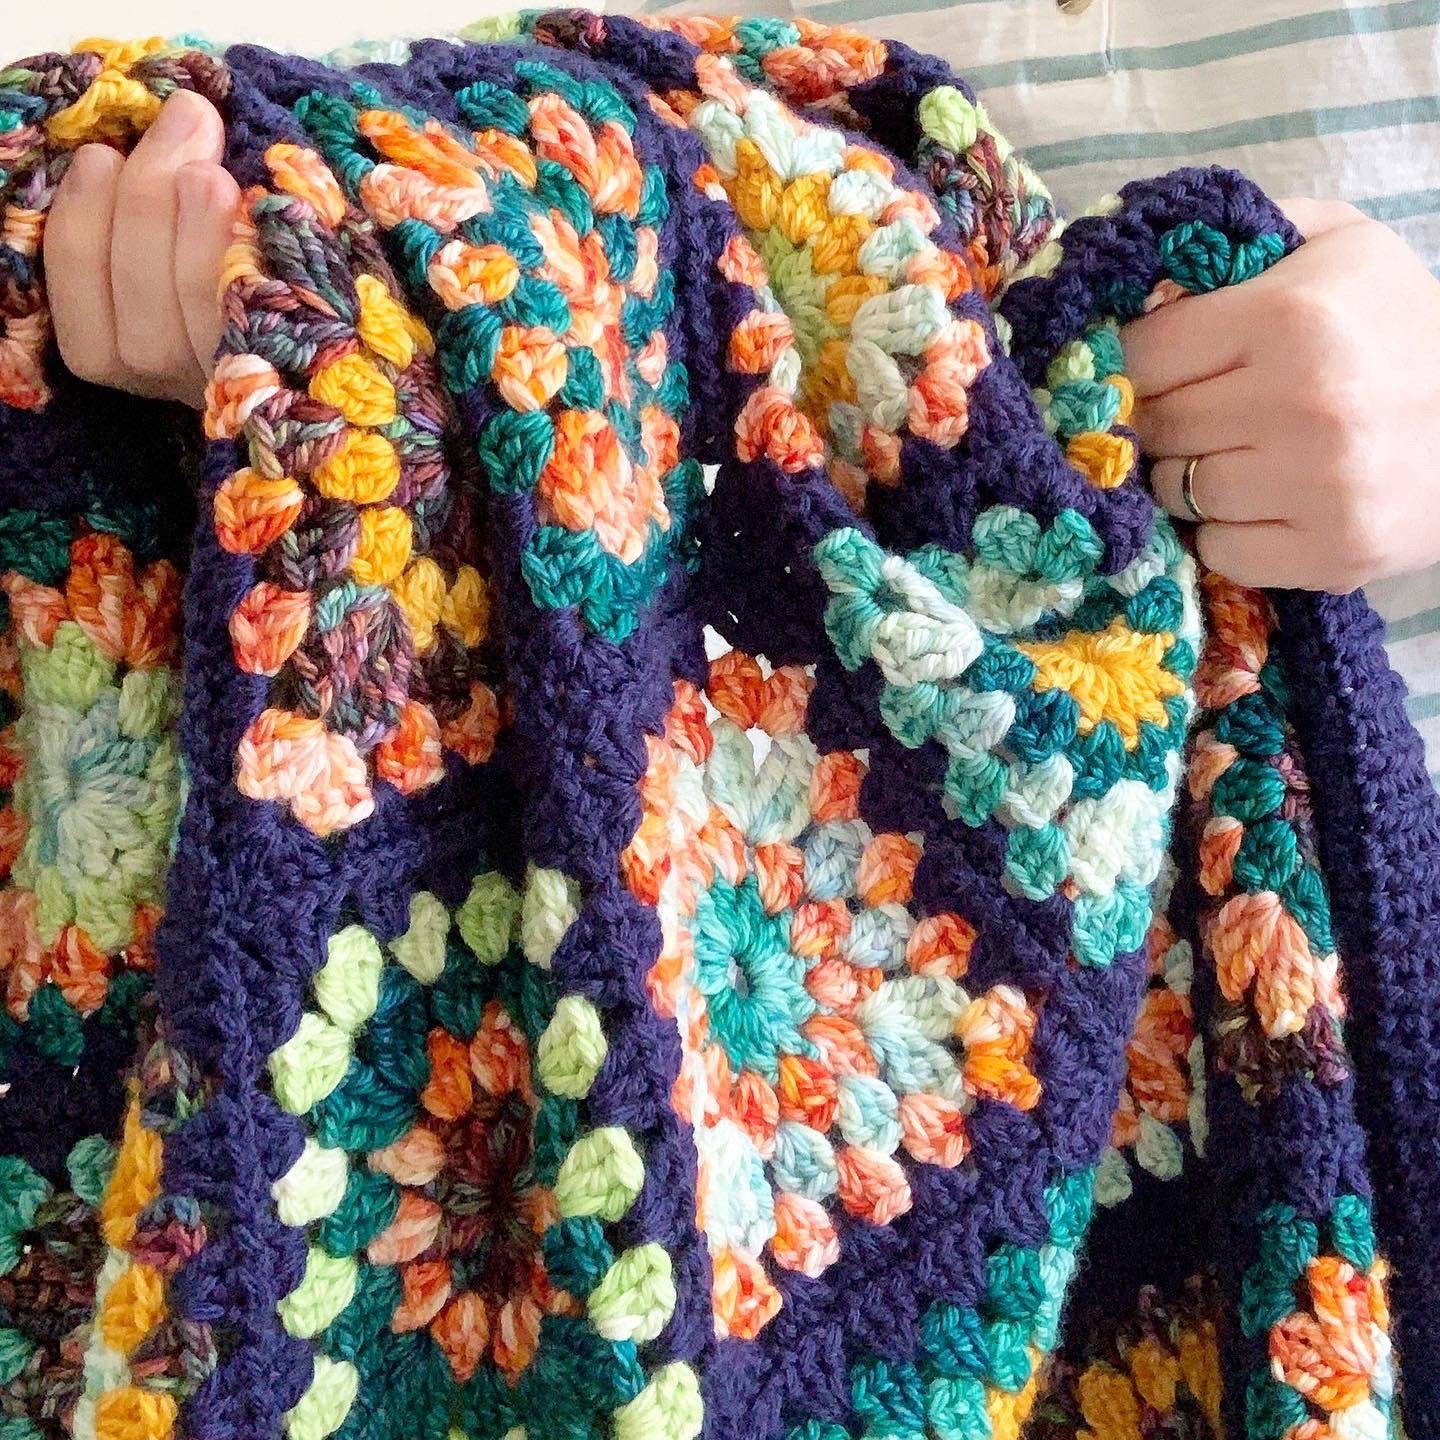
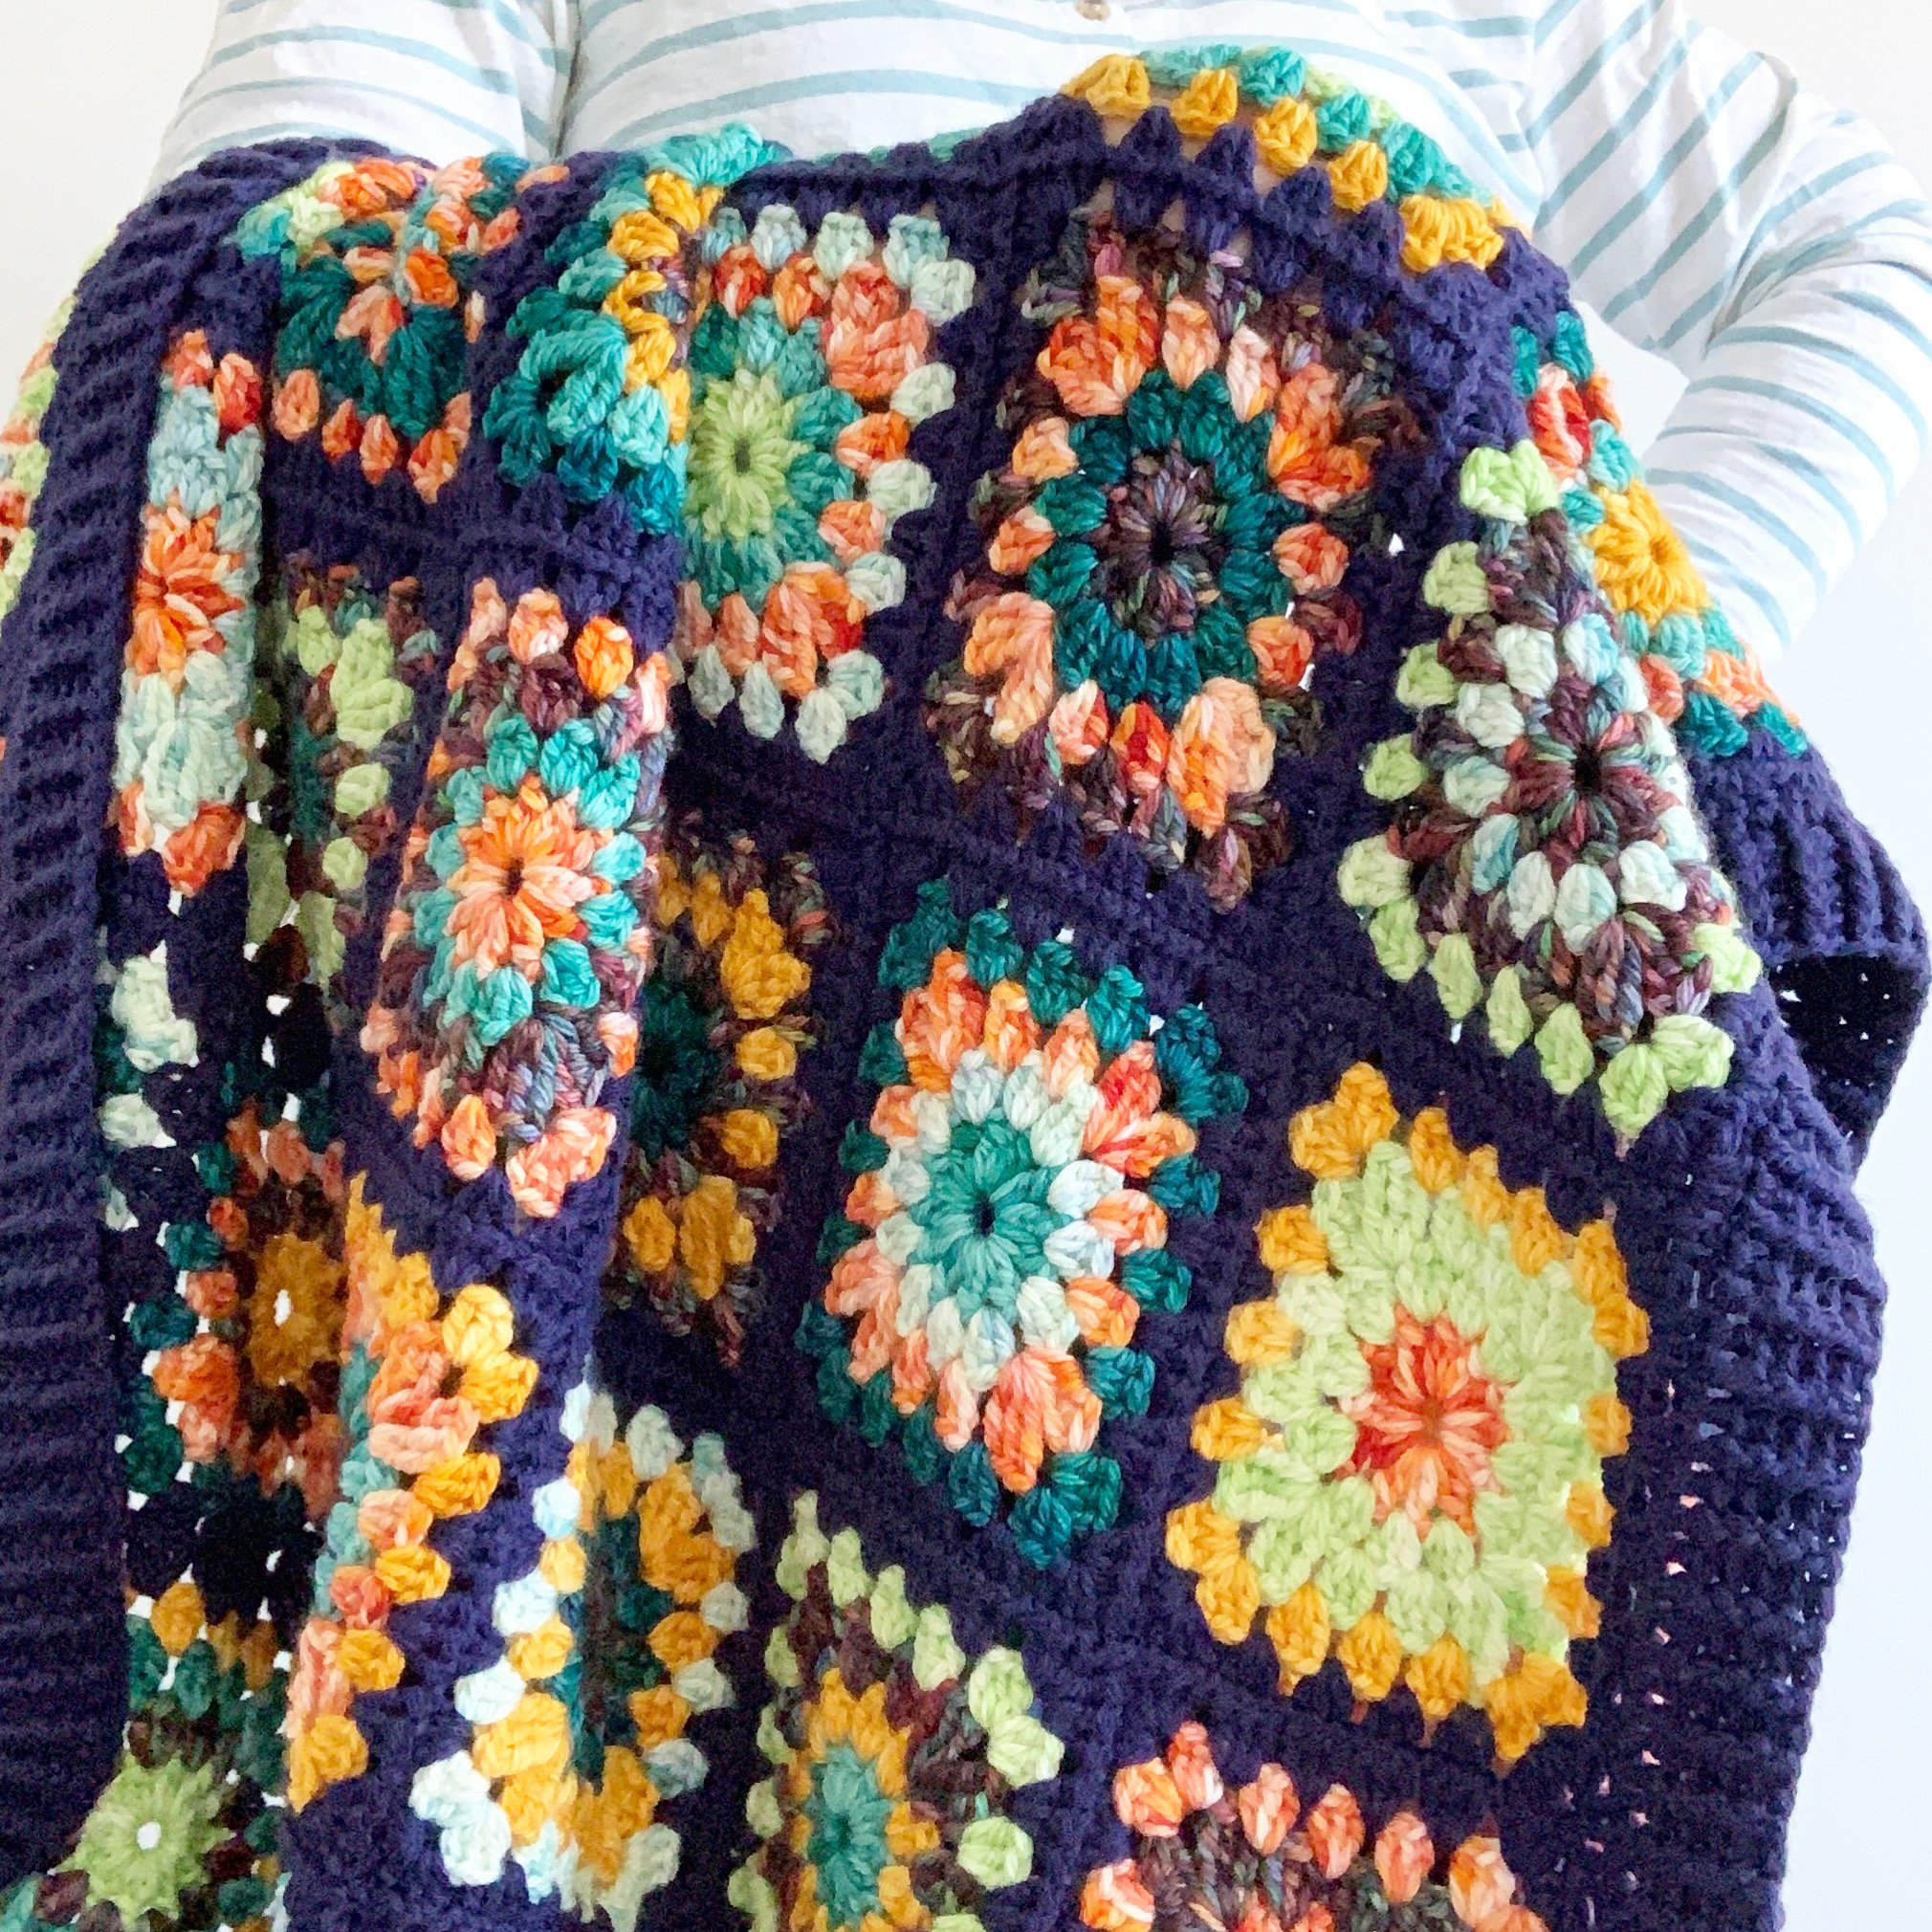
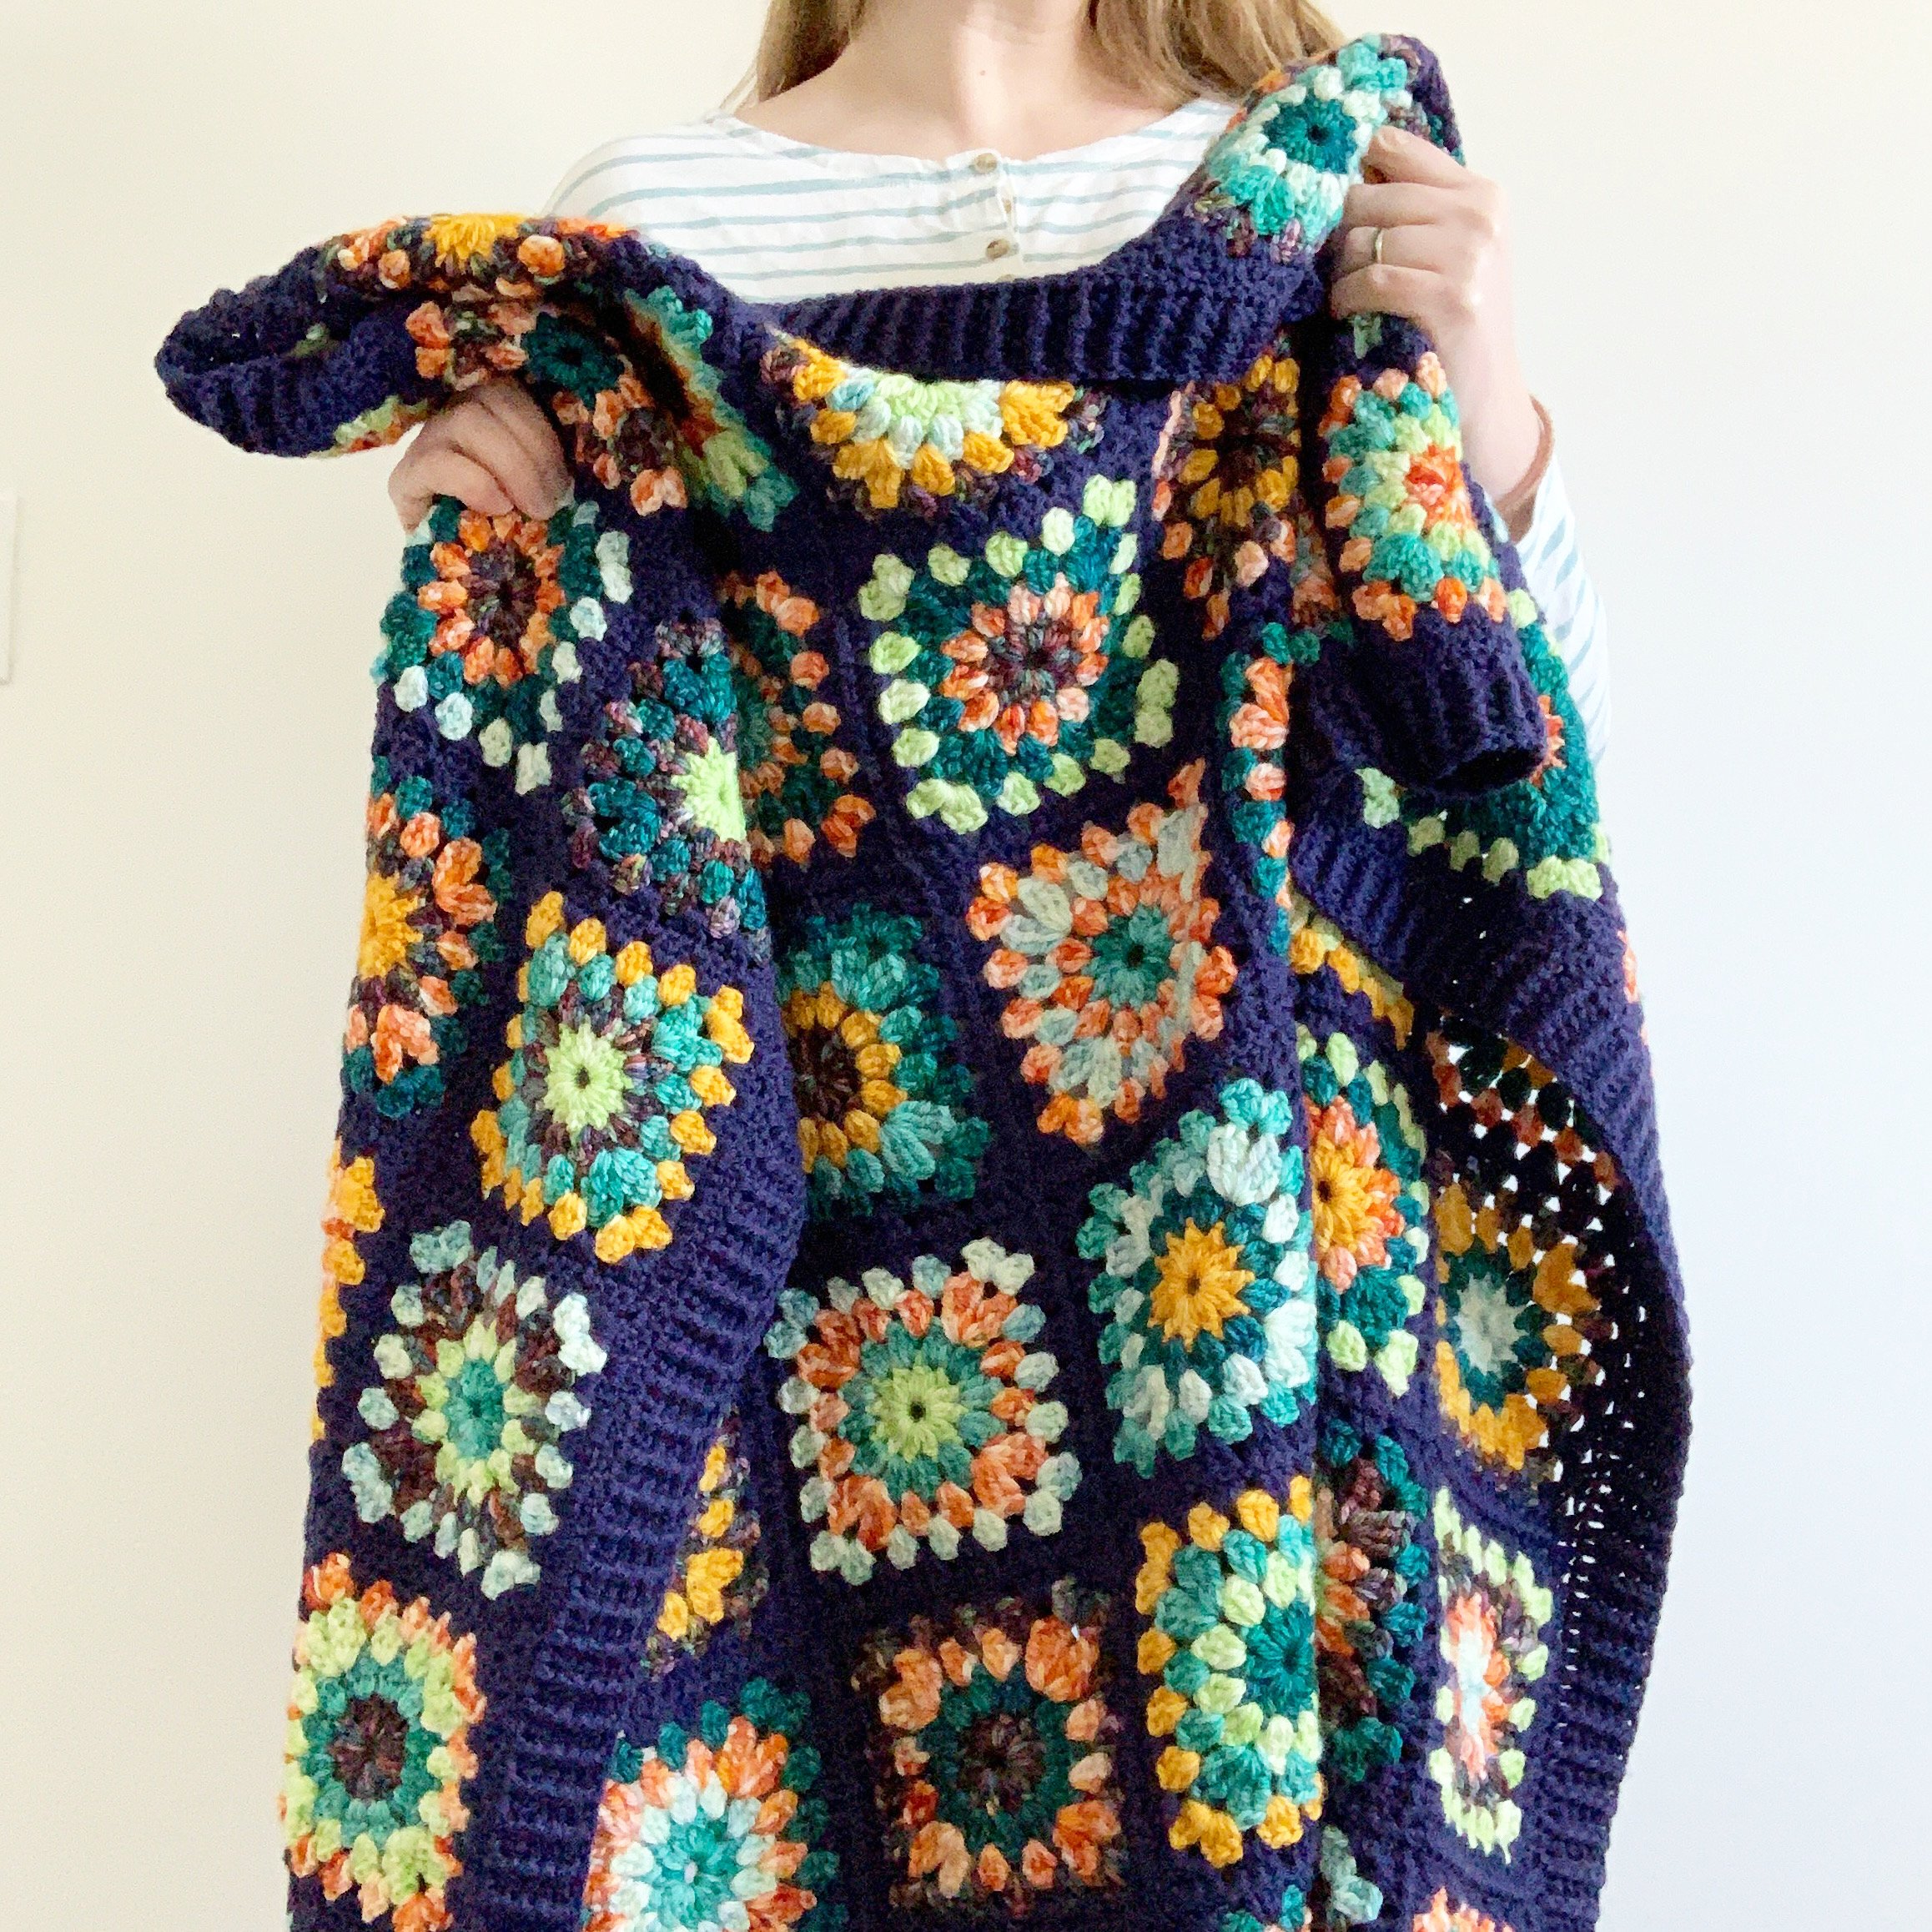
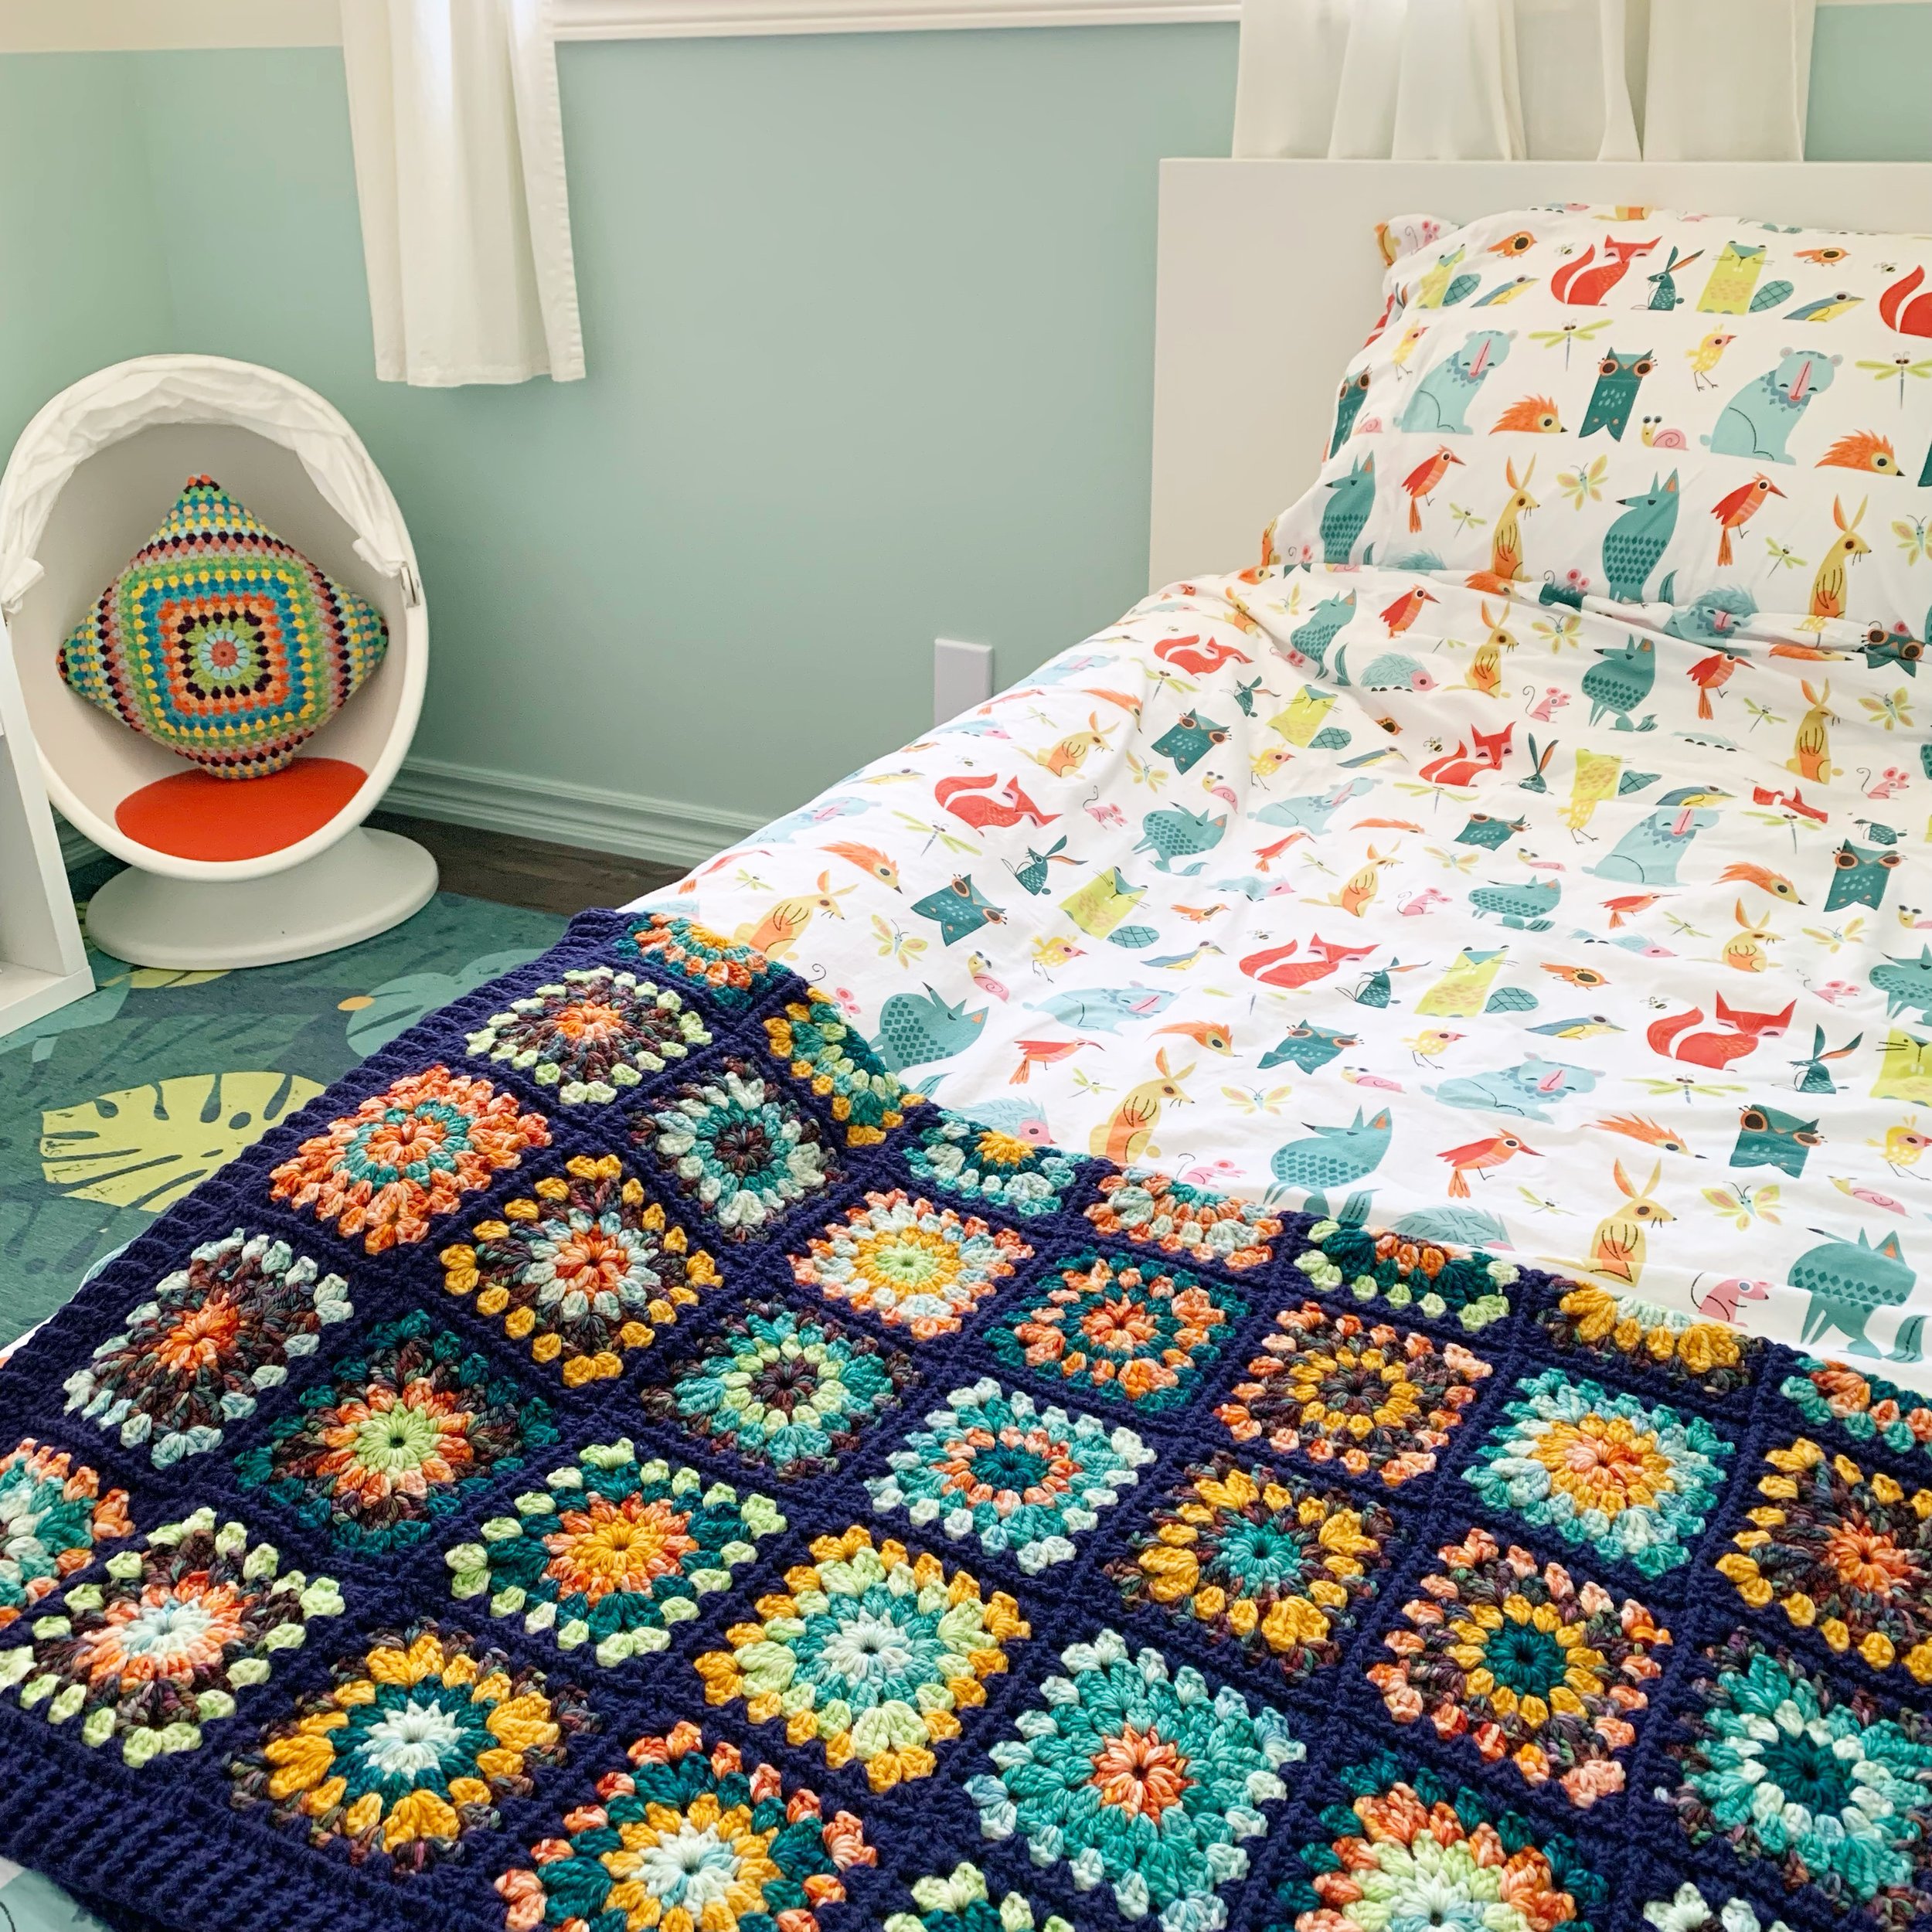
Finn asked for an updated version of his Finn Granny Square Blanket. The original pattern can be found on ETSY or RAVELRY.
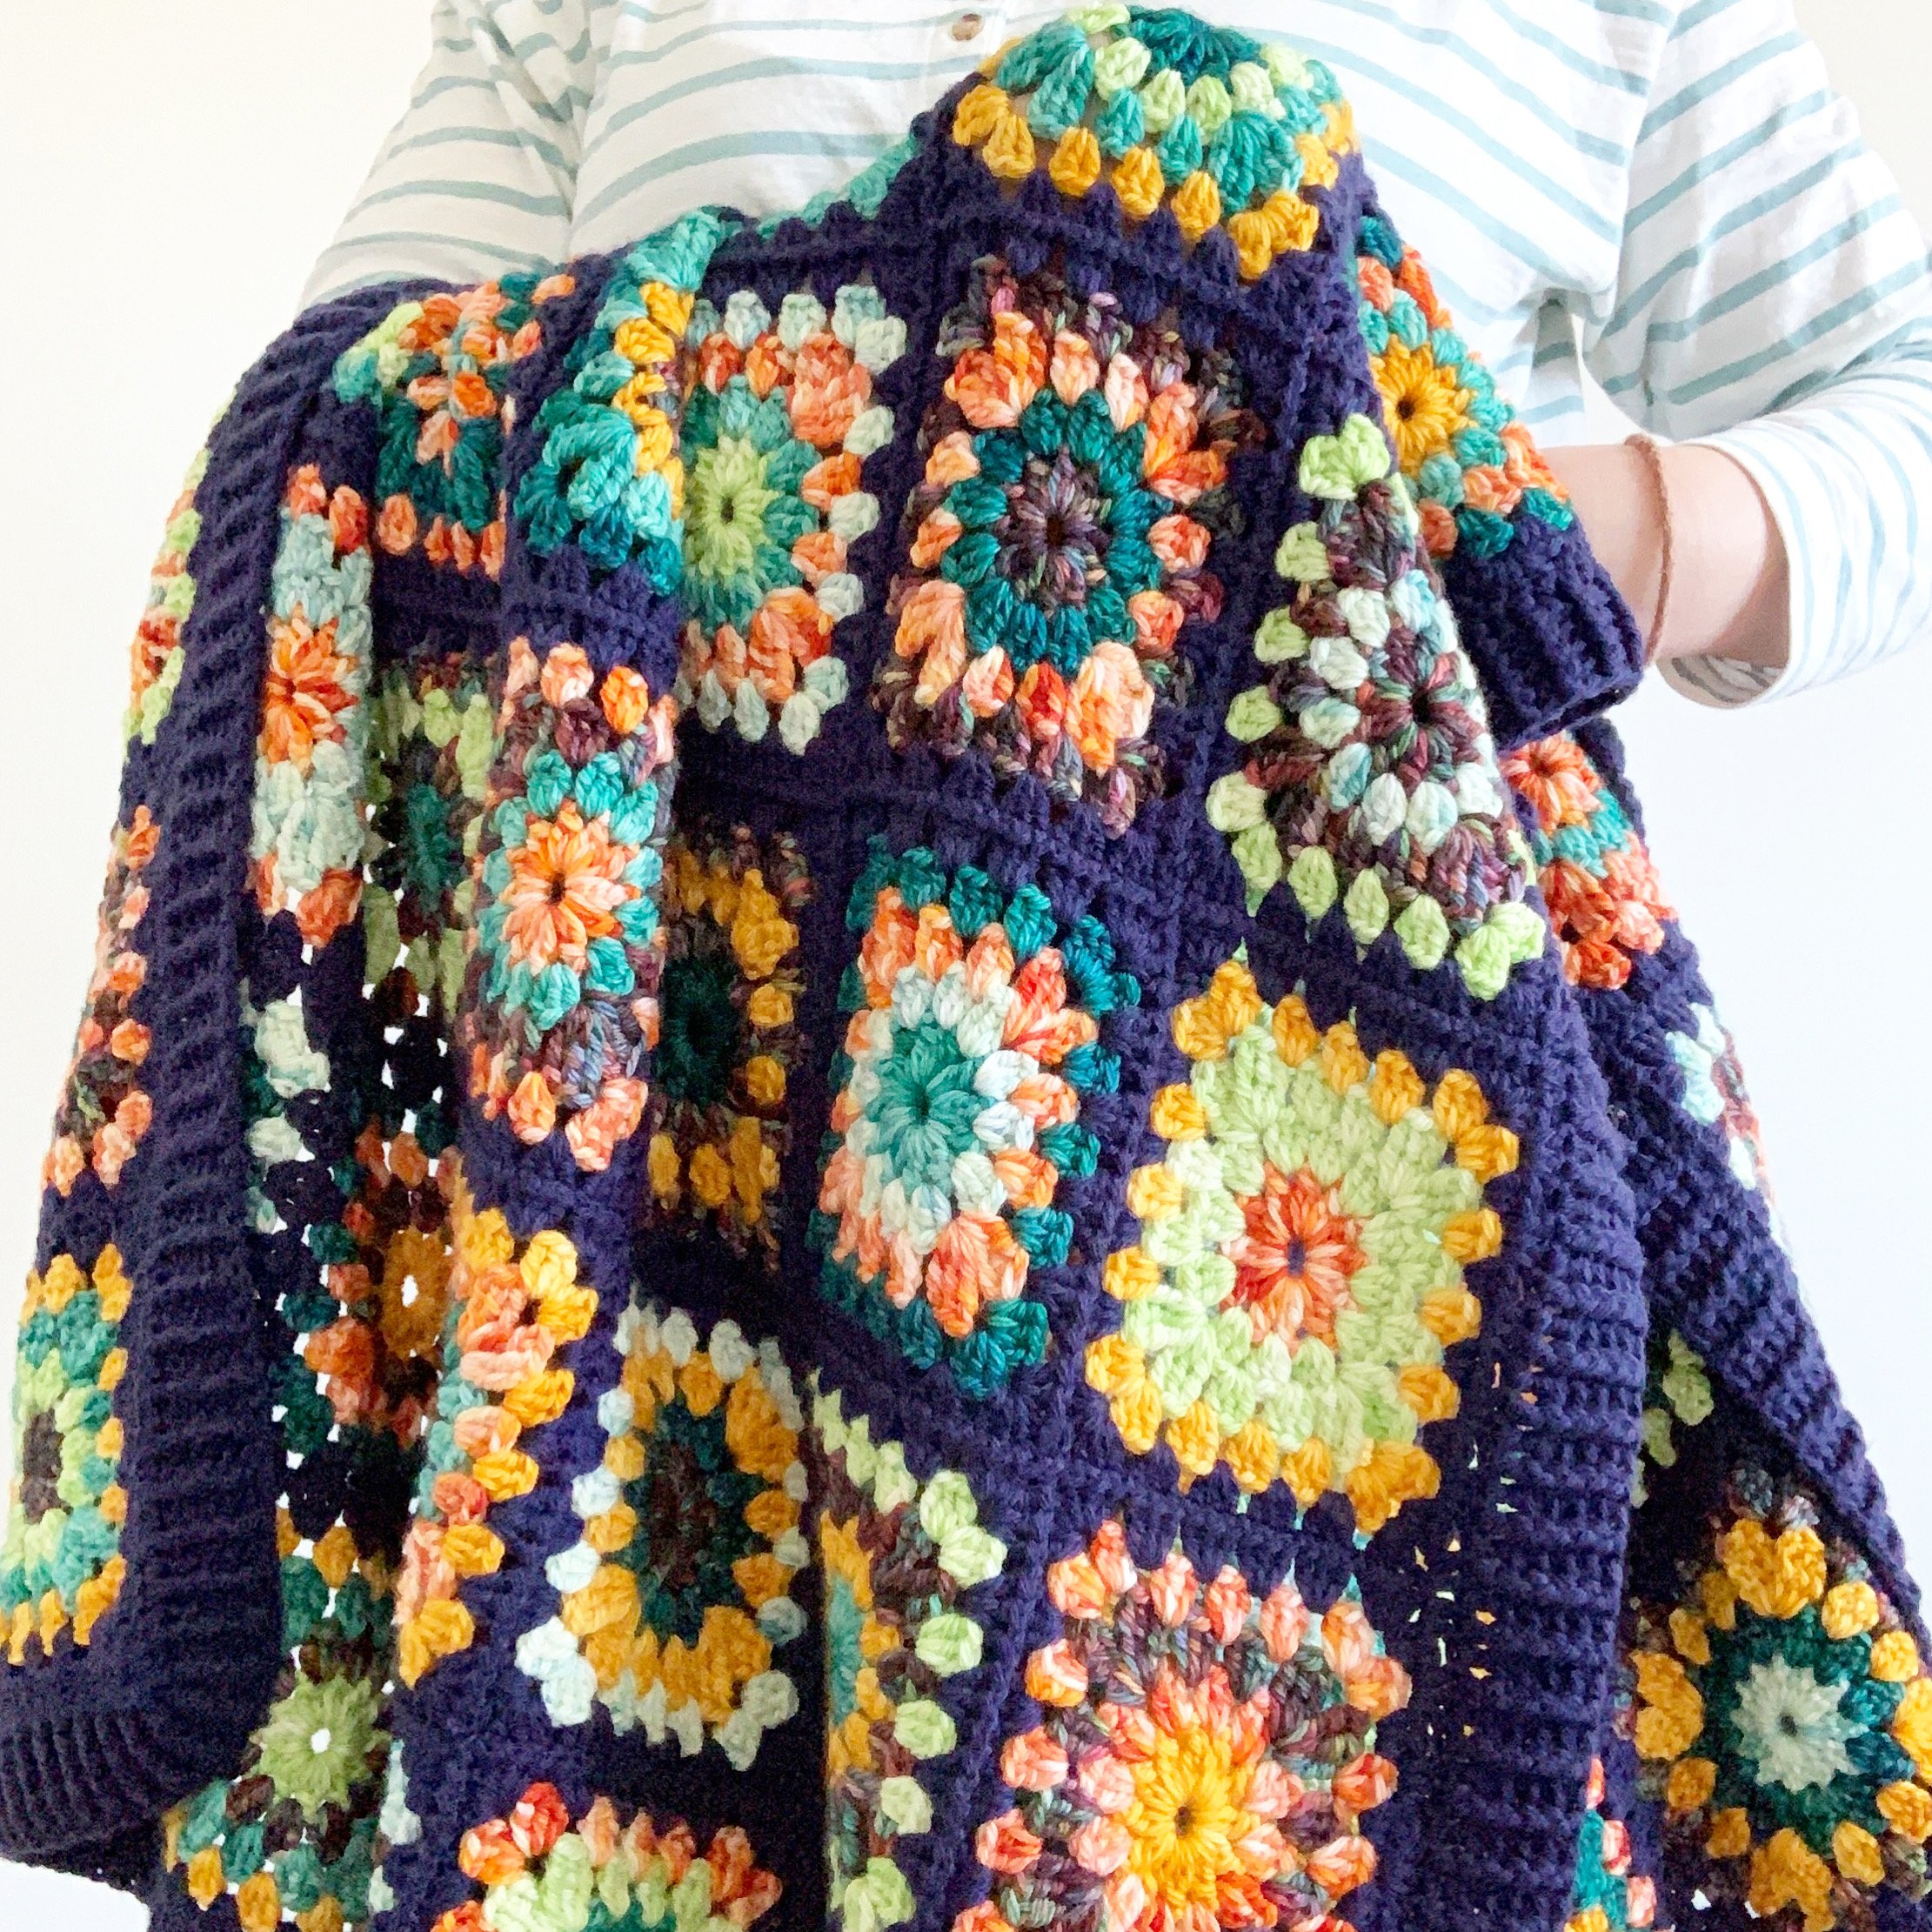
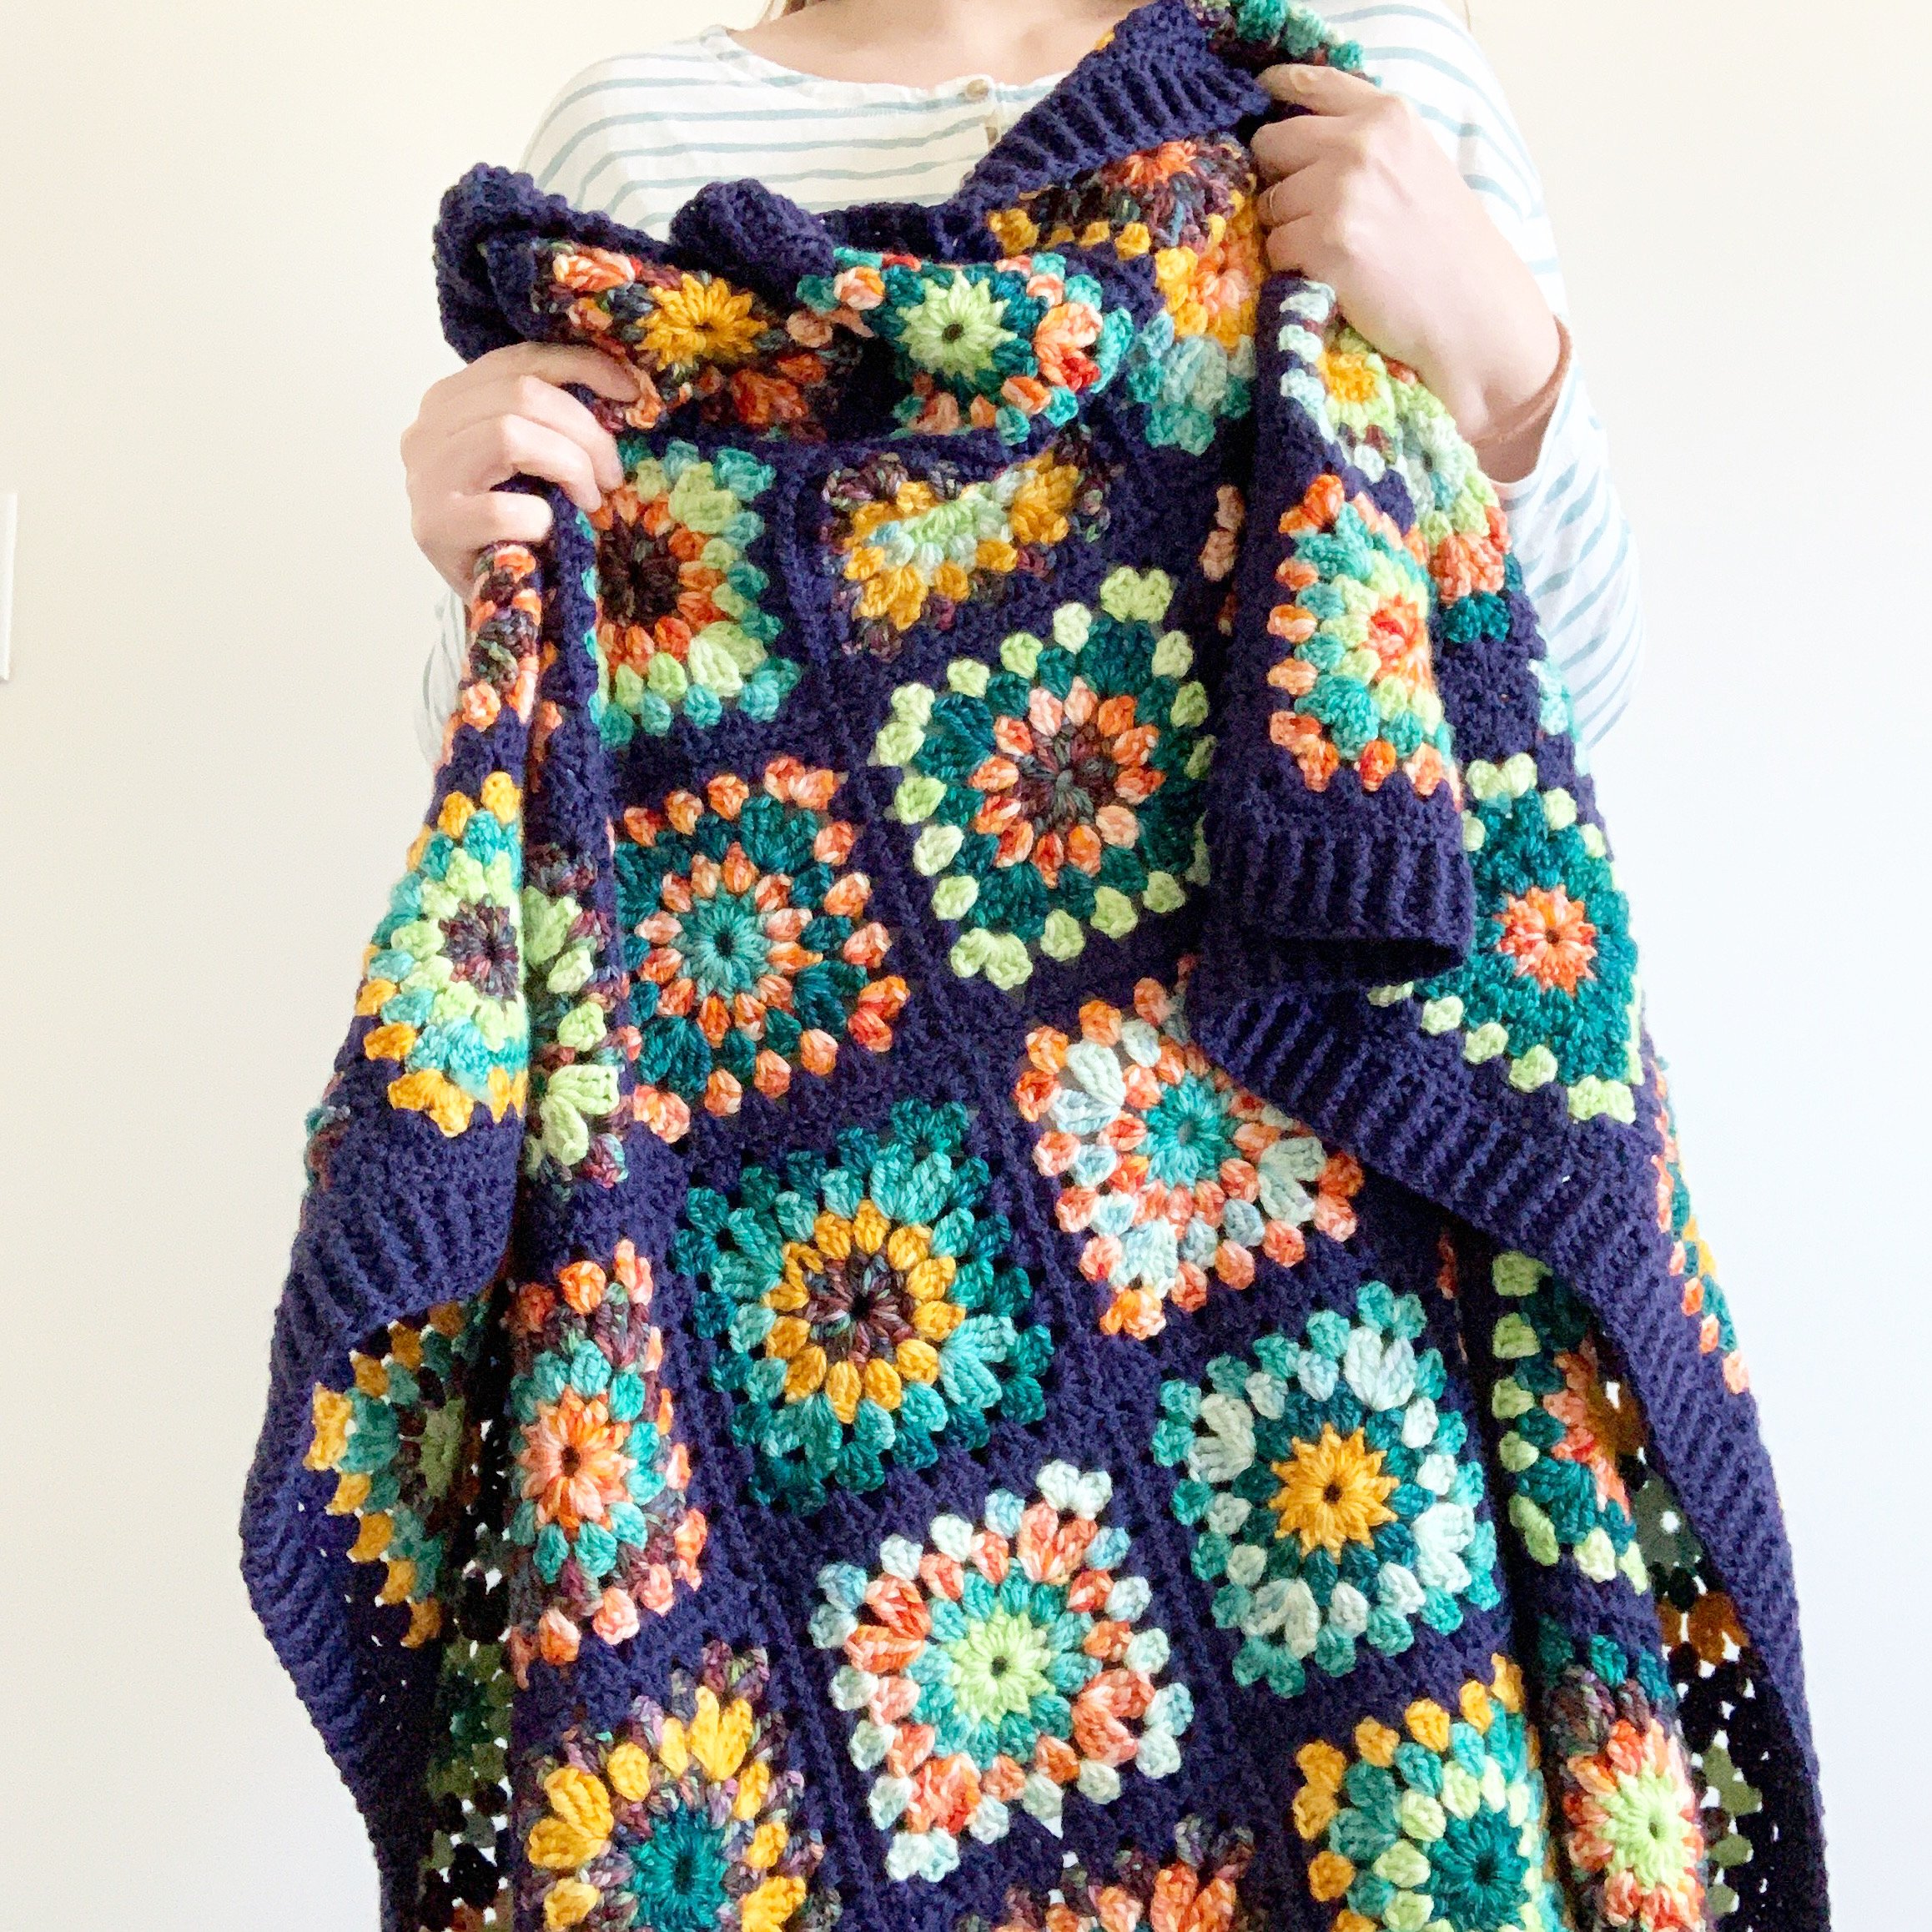
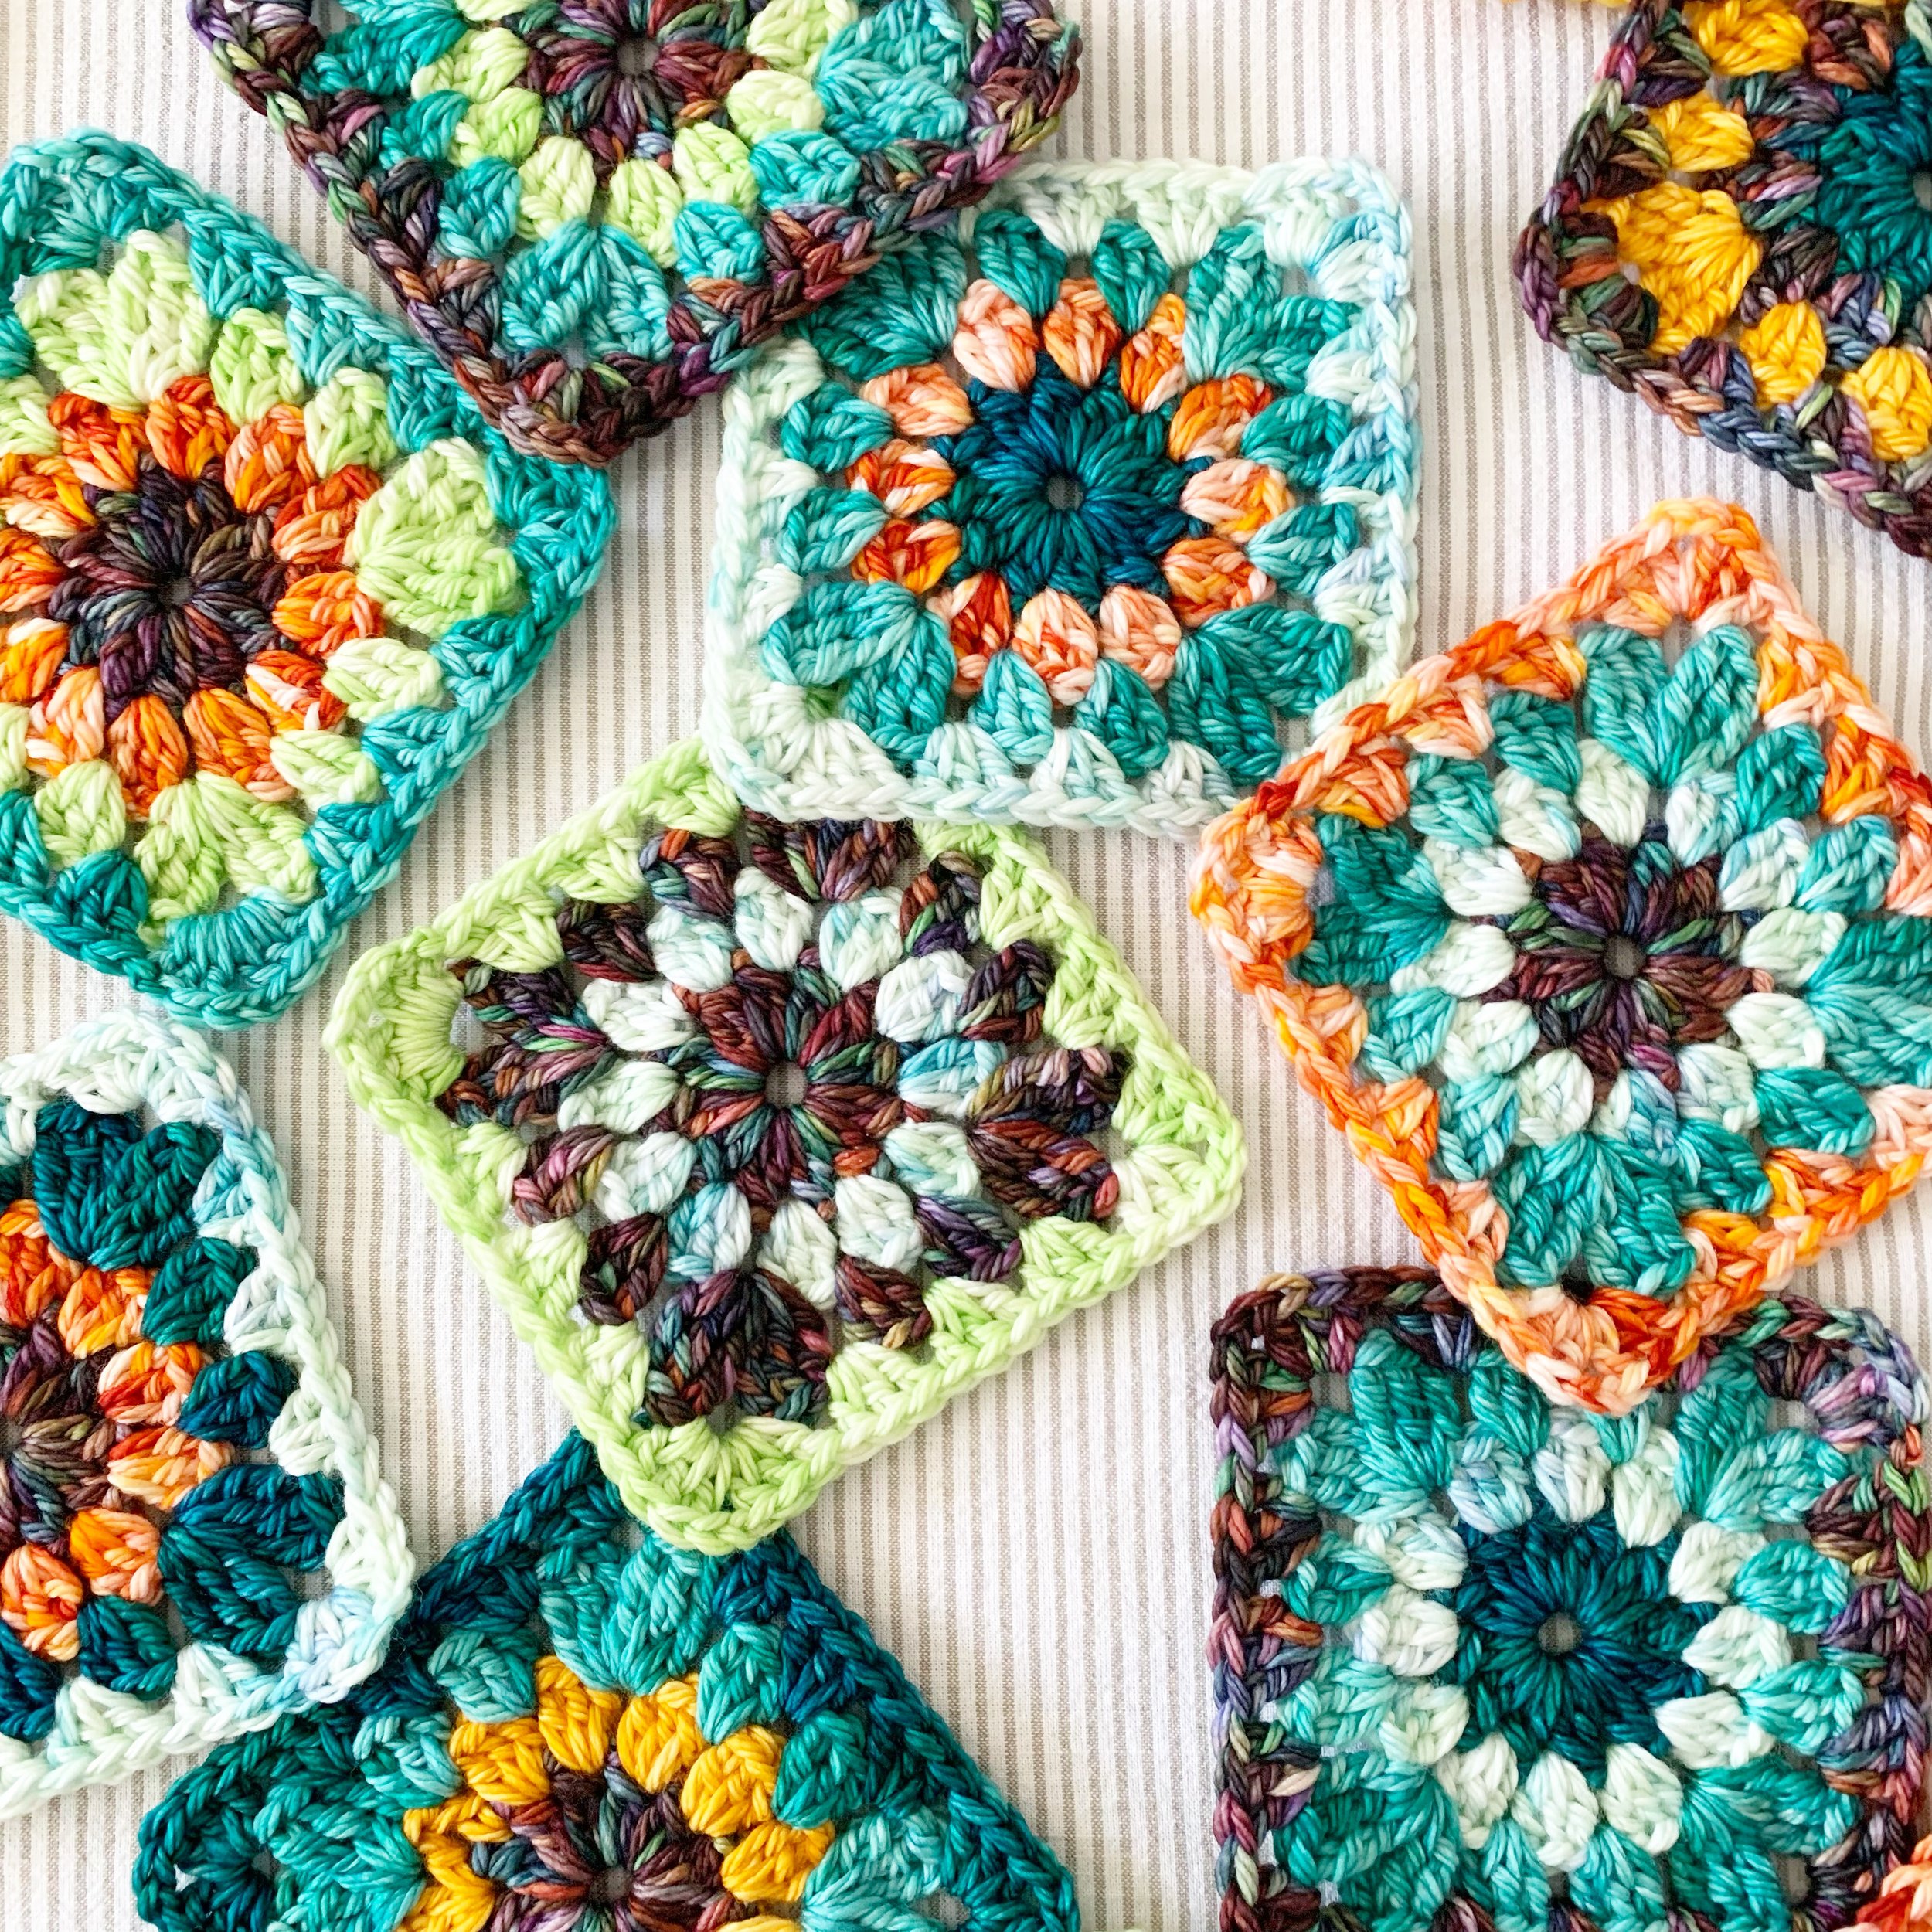
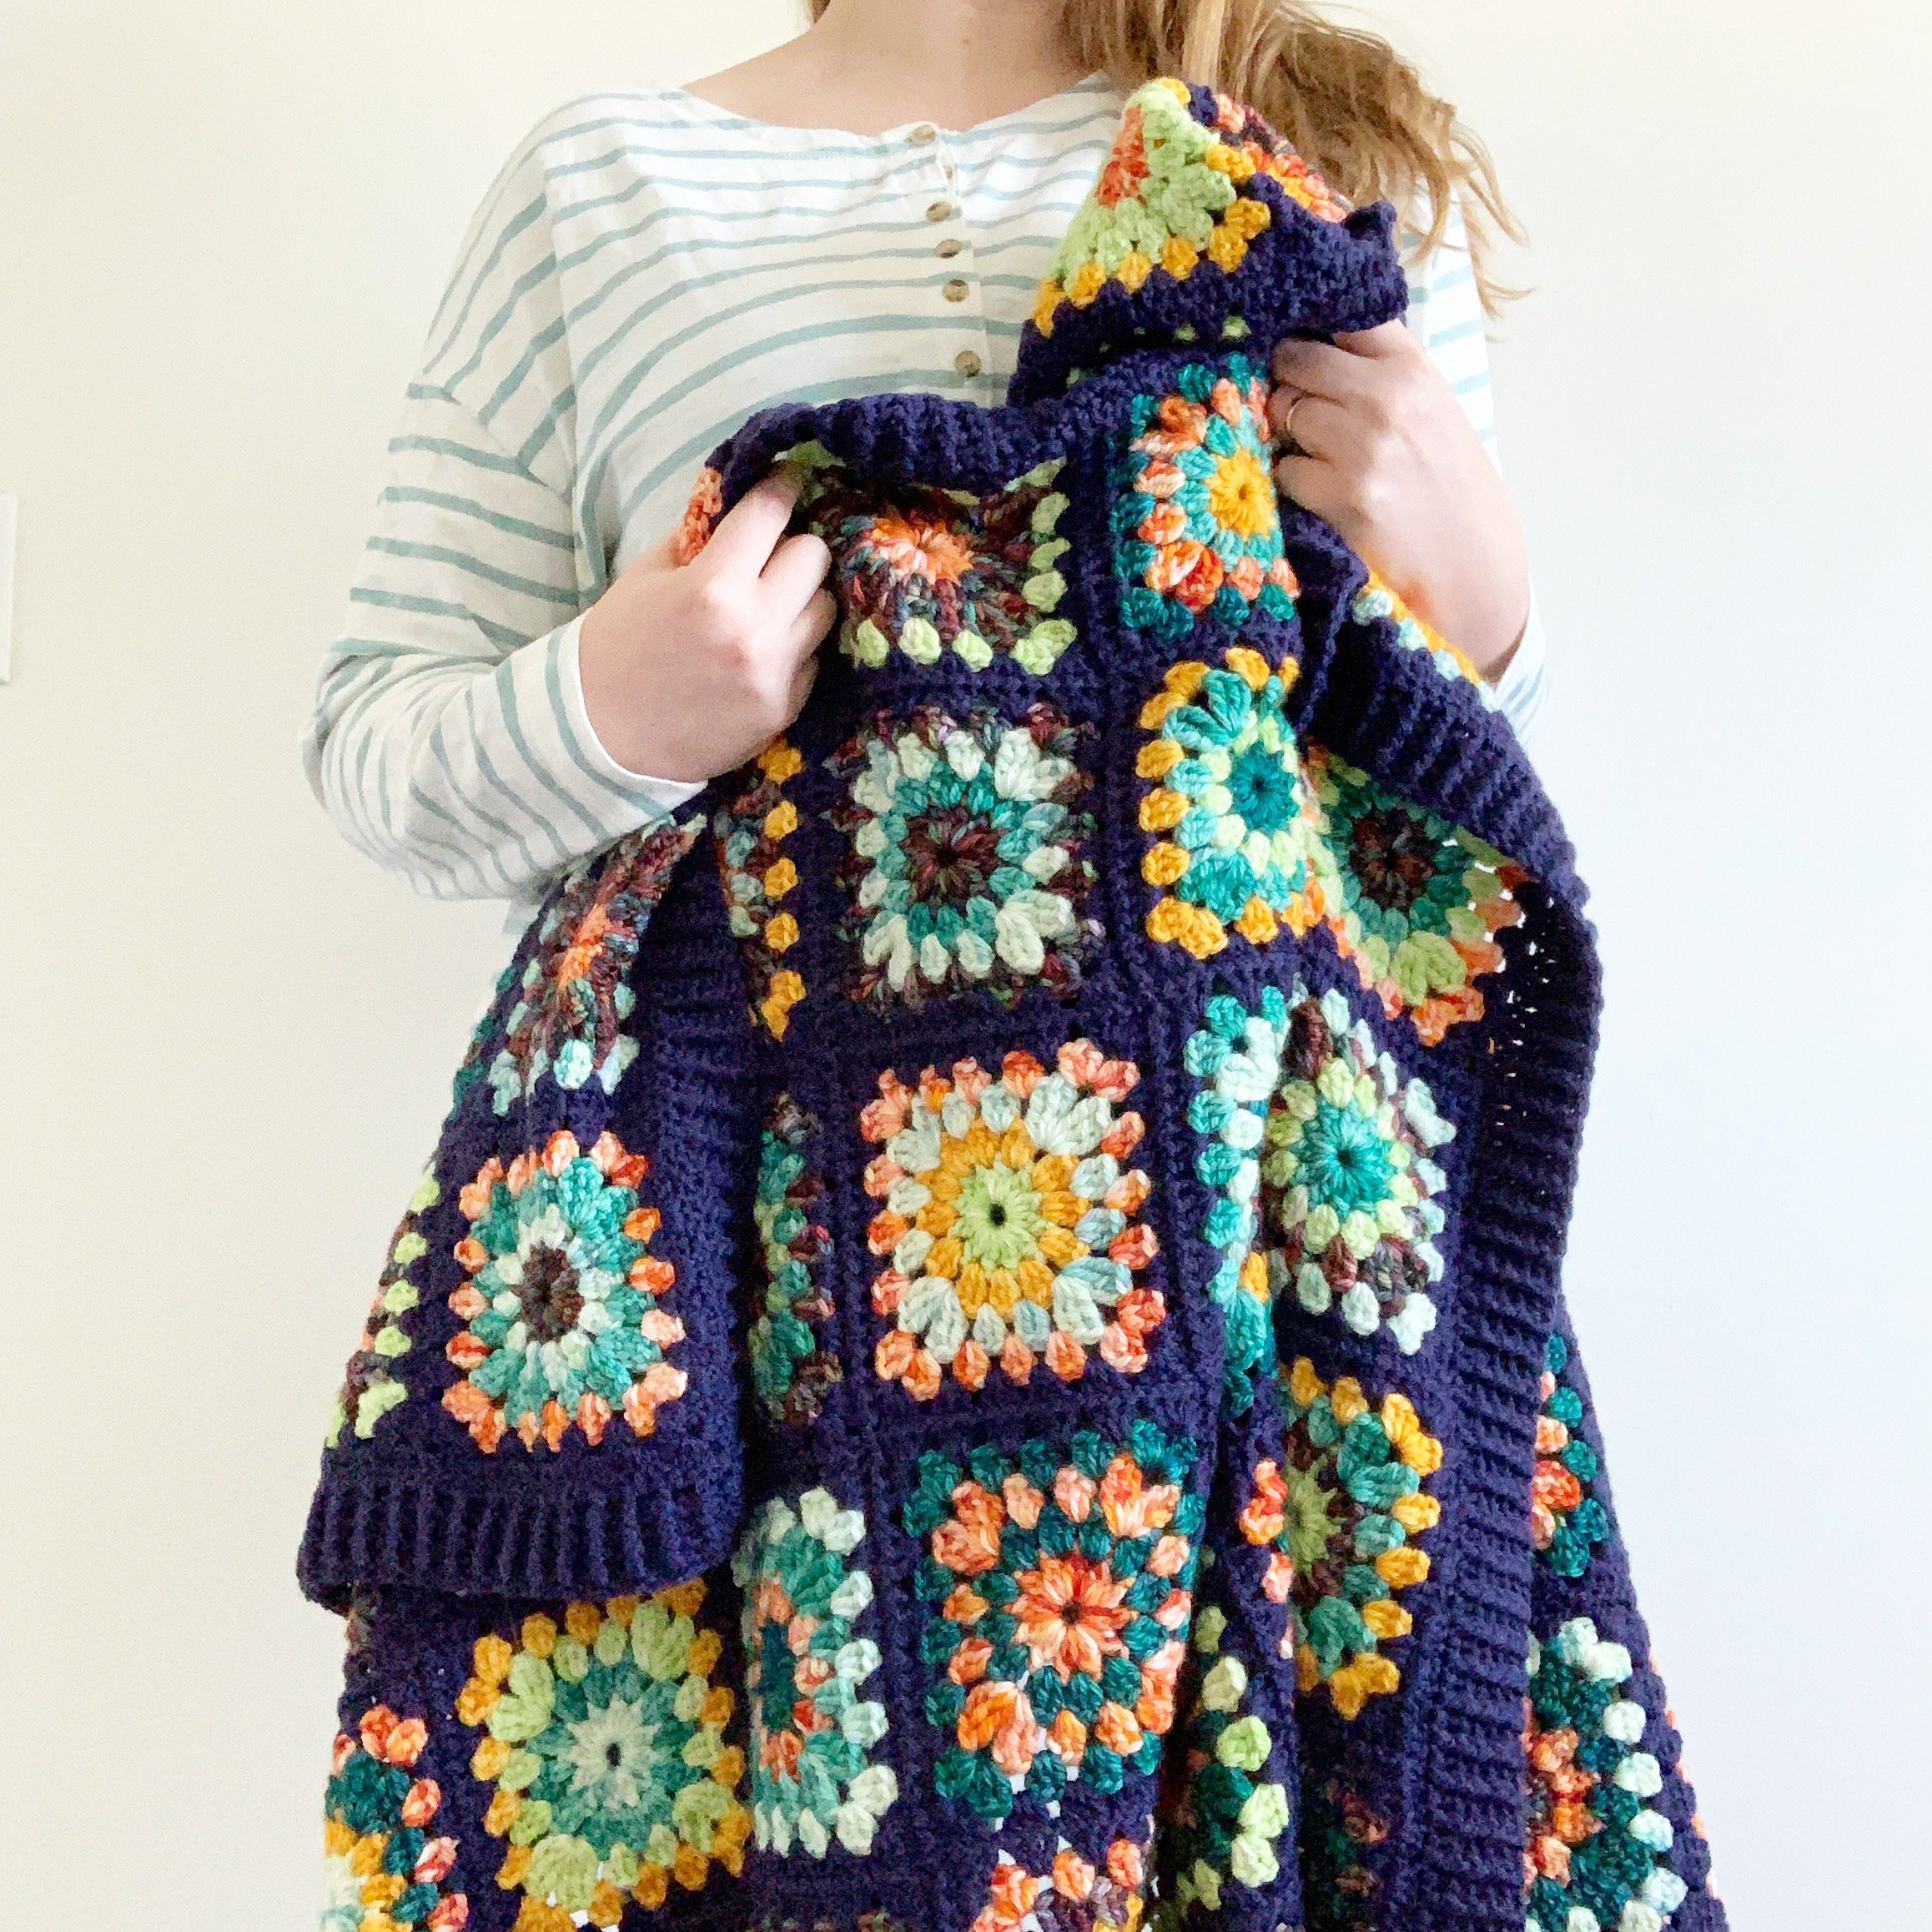
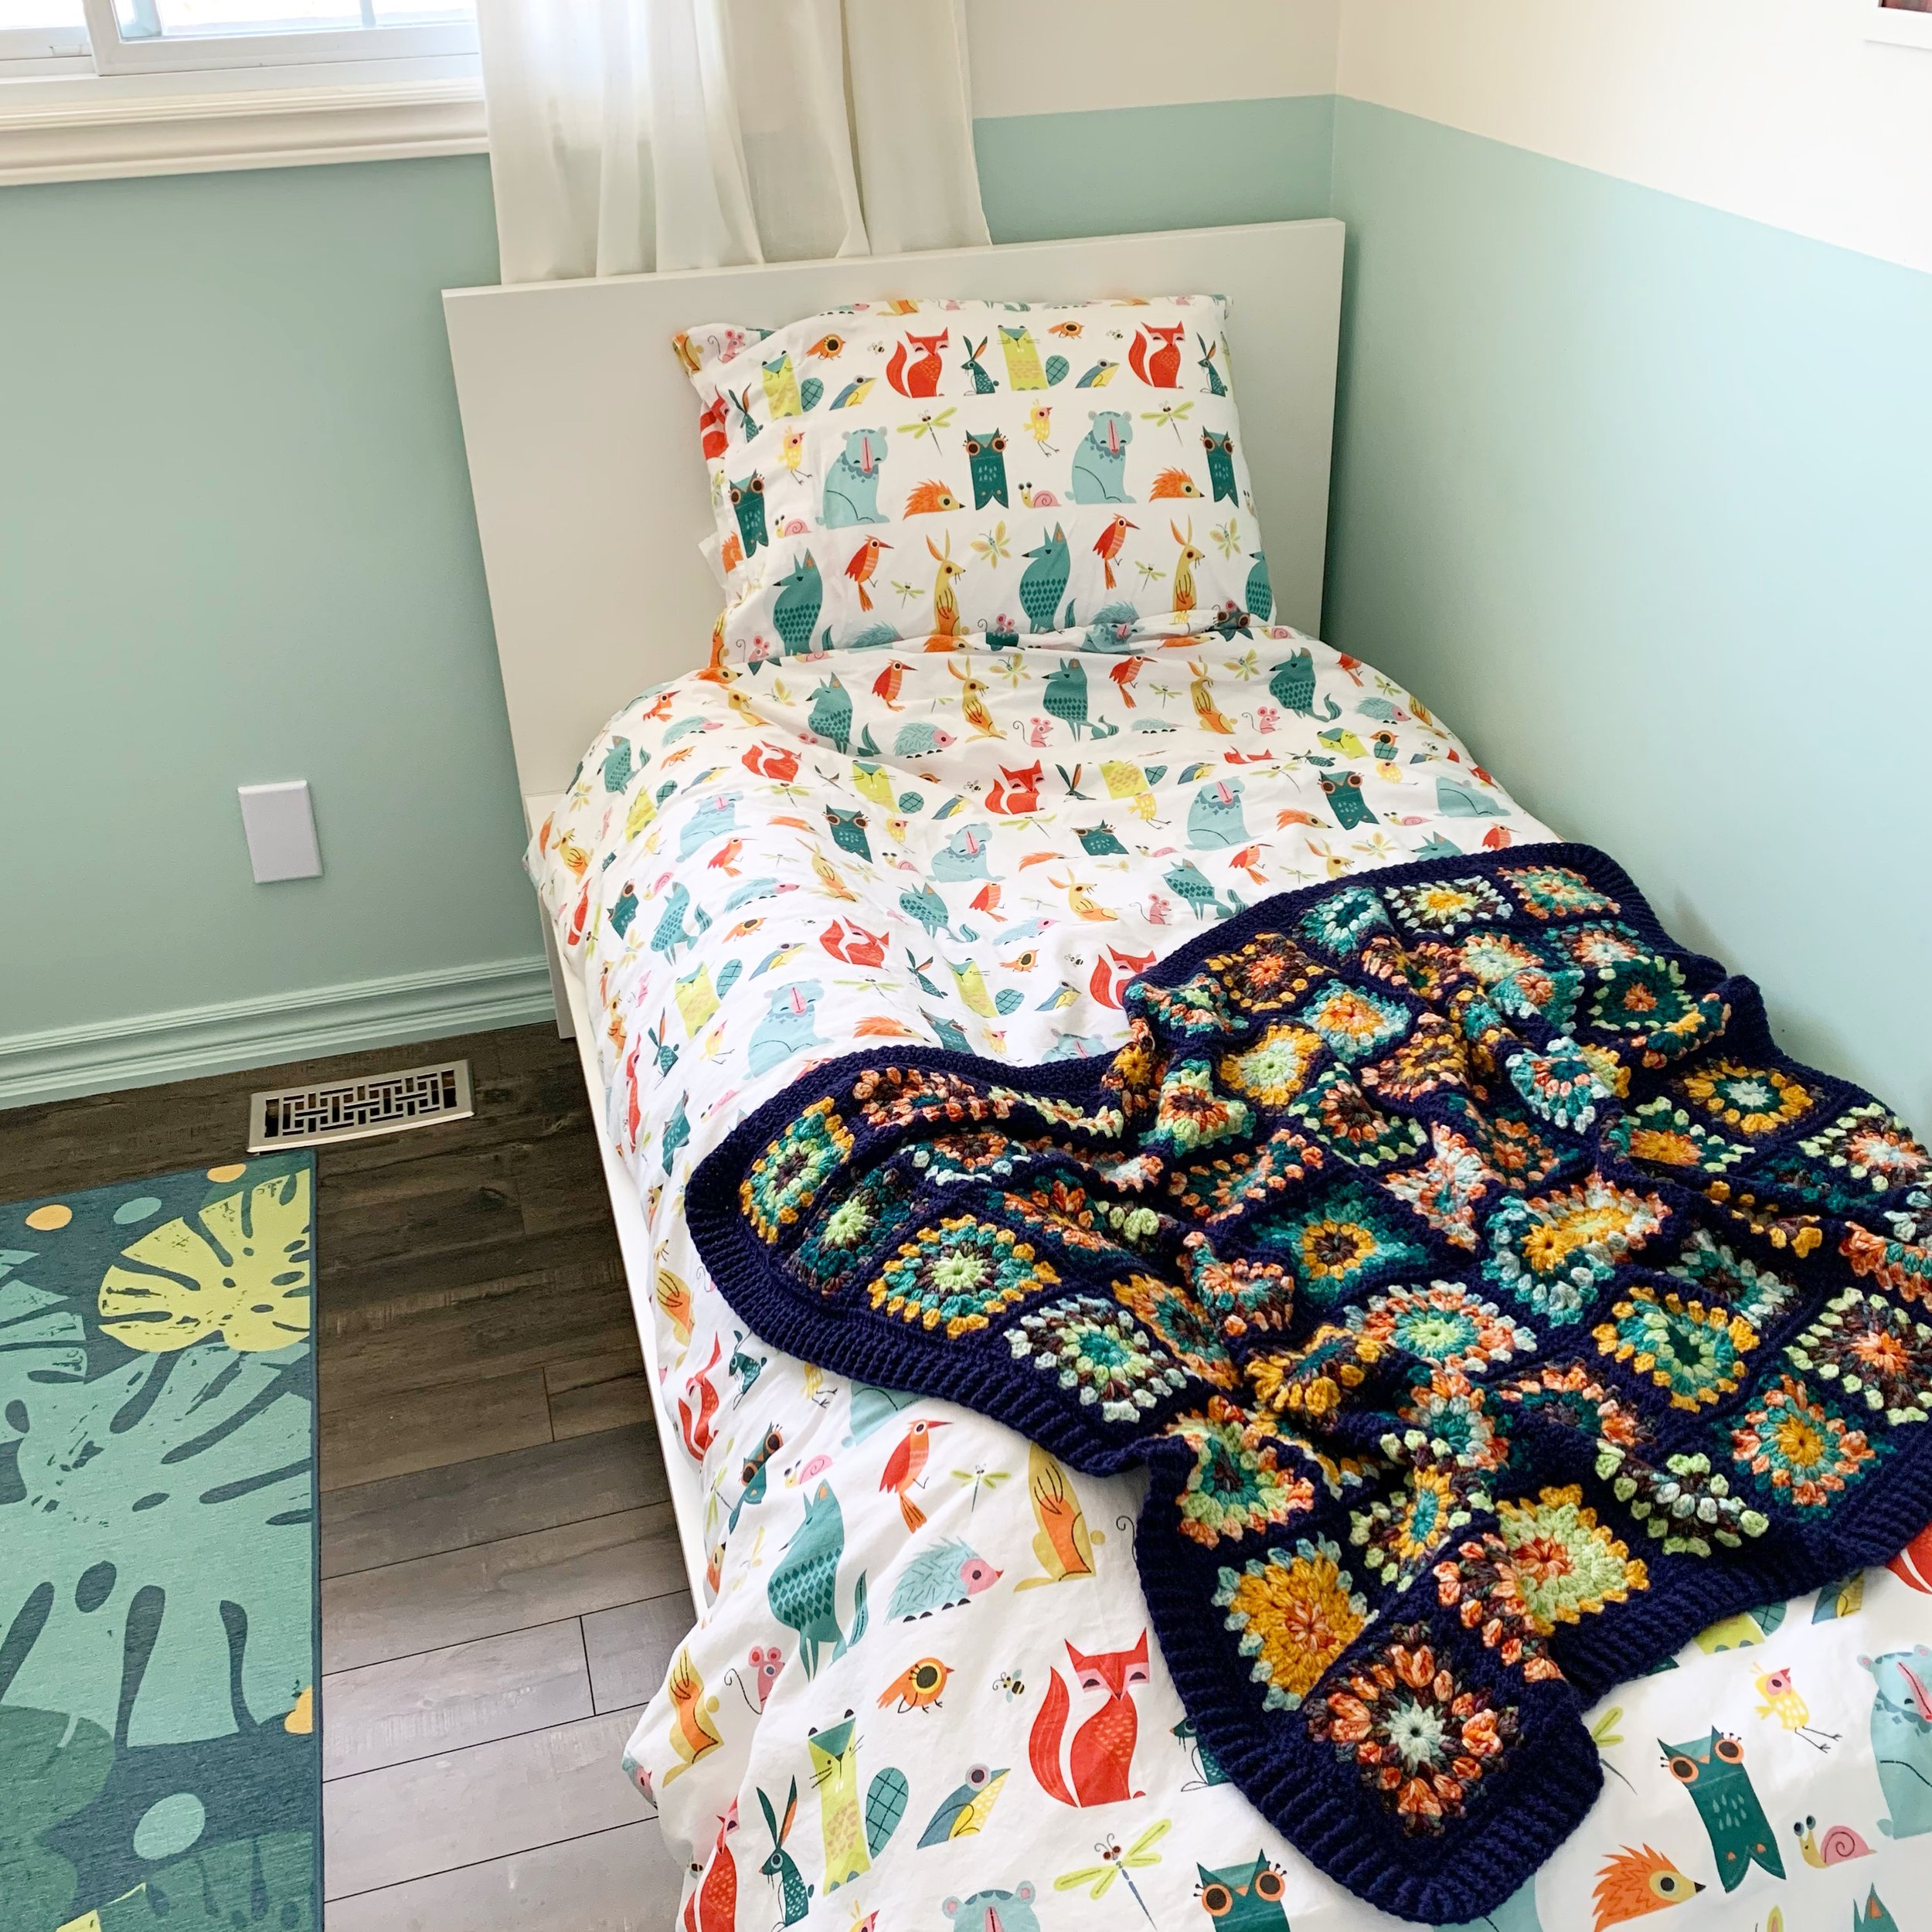
For this blanket update I chose a similar scheme to the original—but added in more orange (because Pumpkin love is a real thing around here) and a darker colour called “Return of the Light” to give it a more “outer space” kind of vibe. We also wanted it to match his bedroom and duvet which features his favourite colour, Teal.
In the end—I had to use the Worsted/Aran from Ravenswood Fibre Co. because it’s the softest thing I’ve ever felt and I had several of the teal’s from her shop sitting on my shelf already. To join the blanket and keep costs down I did my tried -and- true method of using Swish by (WeCrochet or KnitPicks).*affiliate link. —It’s 100% superwash merino wool and comes in DK, Worsted, Bulky and Bare. All of a sudden I can make my endeavor here a much more affordable one.
Not only does the Swish line come in an amazing array of colours—but it comes in all the weights you’ll need too. What’s even better? It comes in a “bare” version as well. This means you can buy a gorgeous “non-dyed” skein in the perfect soft white colour in 100g hanks—and it’s even less money than their regular line. —Sign me up!! ******I should mention that the Bare Swish is now only available through KnitPicks (it used to be both KnitPicks and WeCrochet, but there seems to have been some rearranging).
While I won’t be writing out the colour combo’s for you all in this post (because some of the colours used are no longer available, and because I already have a blanket pattern with colour combos written out for you)—I will provide fun substitutes if you want a similar looking blanket.
Love,
M

Materials
5mm hook
needle for sewing in ends
Yarn
Ravenswood Fiber Co. Aran/Wosted (181 yds/100g) 100% SW Merino Wool
Return of the Light (311yds/ 172g) 2 skeins (no longer available but a super fun alternative is a colour called “Fireflies” or any dark blue/darker purple)
Orange Multi (310yds/ 171g) 2 skeins (no longer available but a great alternative would be “Paprika” which I almost chose for the blanket).
Sea Glass (172yds/ 95g) 1 skein
Slice of Lime (161yds/ 89g) 1 skein
Curry (168yds/ 93g) 1 skein
Nautical (181yds/ 100g) 1 skein
Oceanic (159yds/ 88g) 1 skein
WeCrochet Swish Worsted (110yds/50g) 100% SW Merino Wool *affiliate link
Mimic (949yds/ 431g)- 9 skeins

Finished Size
7x9 square blanket measuring approximately 38”x50” inches with border.
Glossary (using US Crochet Terminology)
st- stitch
sts- stitches
ch- chain
ch sp- chain space
sl st- slip stitch
yo- yarn over
sc- single crochet
hdc- half double crochet
dc- double crochet
fpdc- front post double crochet
bpdc- back post double crochet
shell- a group of stitches all worked in the same space
jaygo- continuous join as you go
cl st(s)- cluster stitch(es)
2 dc cl – 2 dc cluster stitch
How to Crochet the 2 dc cl (2 dc cluster stitch):
yo, insert hook into center of circle.
yo and pull up a loop.
yo and pull through 2 loops on hook.
yo and insert hook into center of circle.
yo and pull up a loop.
yo and pull through 2 loops on hook, yo and pull through 3 loops on hook.
ch 1.
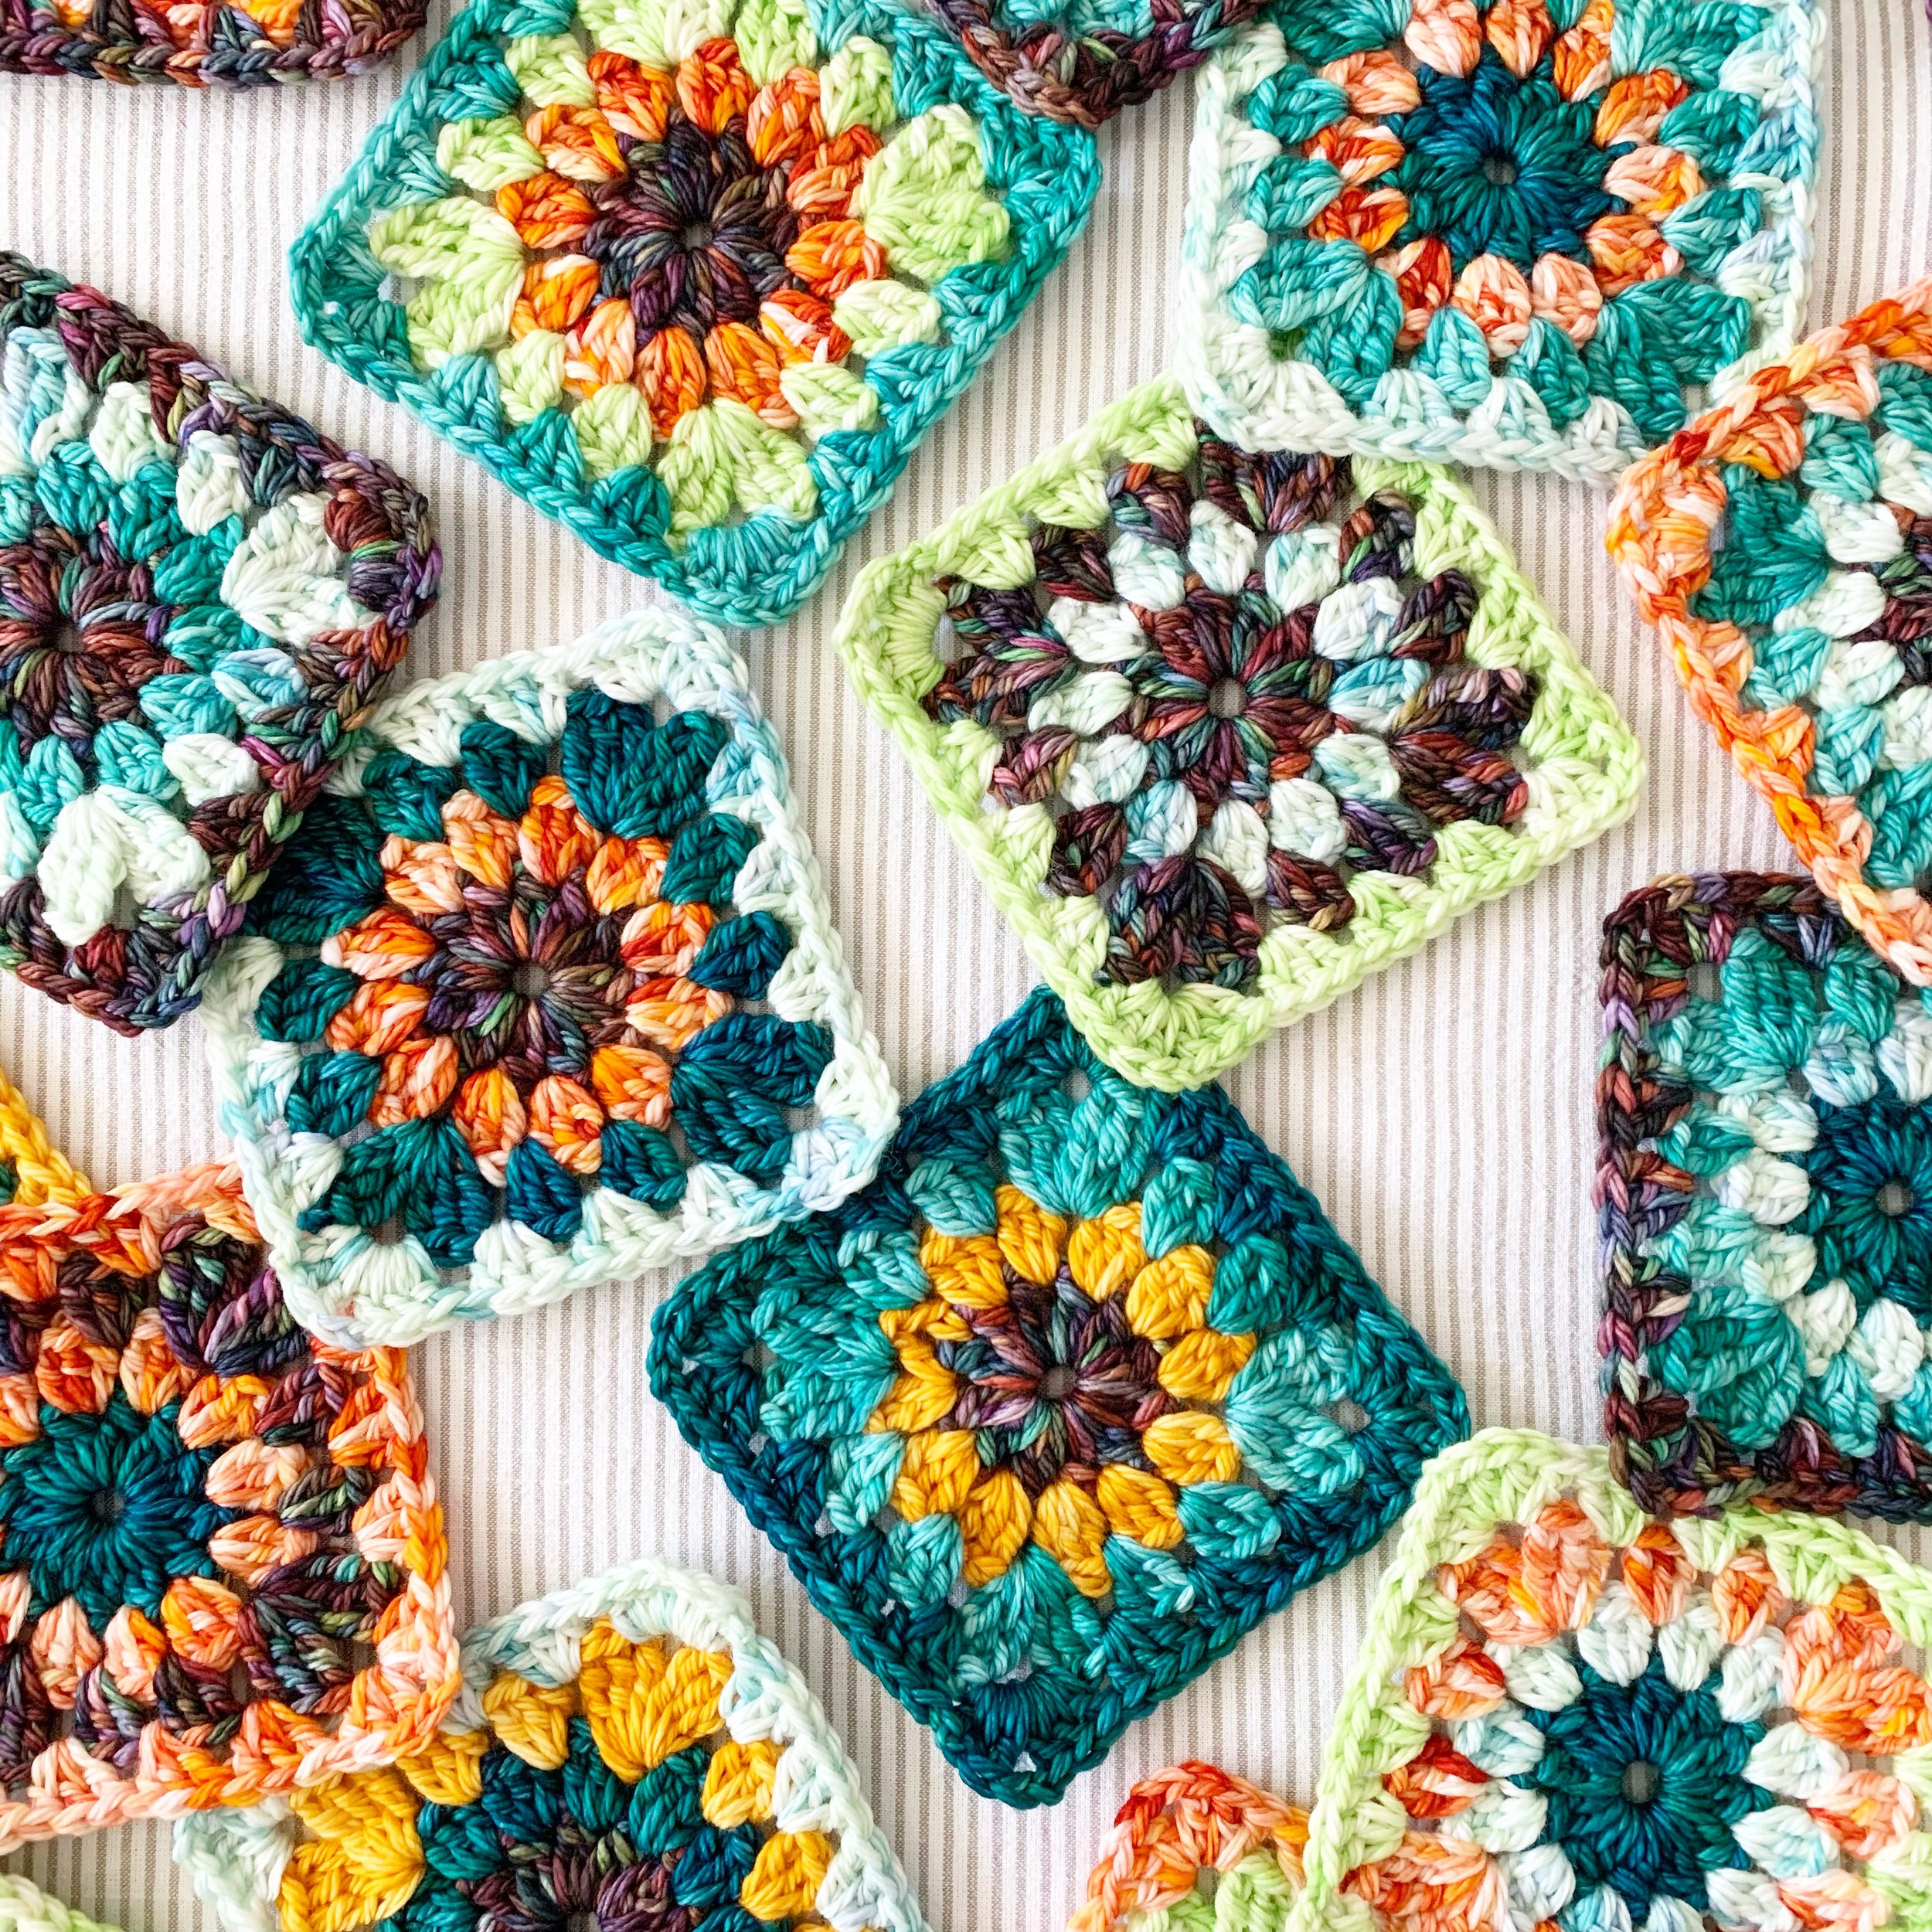
Pattern- Finn Blanket Square
Round 1
With first colour Ch 5.
Sl st into 5th ch from hook to create centre ring.
Ch 2, work 1 dc into centre ring, ch 1 (this counts as first cl st).
Work eleven 2 dc cl sts into the centre of the circle (12 cl sts total).
Join with sl st to the sp between the first and second cl sts at beginning of round.
Fasten off.
Round 2
Join second colour into any sp between 2 cl sts.
Ch 2 (counts as first dc), work 2 dc into same sp.
Work 3 dc into every sp between cl sts (36 dc sts total).
Join round with sl st into the top of the first dc (not the ch 2).
Fasten off.

Round 3
Join third colour into any sp between 3 dc groups (shells).
Ch 3 (counts as first tr), work 2 tr, ch 2, 3 tr into same sp (creates 1st corner of square).
Work 3 dc into next sp between shells.
Work 3 dc into next sp between shells.
In next sp between shells, work 3 tr, ch 2, 3 tr (creates 2nd corner of square).
Work 3 dc into next sp between shells.
Work 3 dc into next sp between shells.
In next sp between shells, work 3 tr, ch 2, 3 tr (creates 3rd corner of square).
Work 3 dc into next sp between shells.
Work 3 dc into next sp between shells.
In next sp between shells, work 3 tr, ch 2, 3 tr (creates 4th corner of square).
Work 3 dc into next sp between shells.
Work 3 dc into next sp between shells.
Join round with sl st into the top of the first tr (not the ch 3).
Fasten off.
Round 4
Join fourth colour into any corner sp.
Ch 2 (counts as first dc), work 2 dc, ch 2, 3 dc into corner sp (1st corner).
Work 3 dc into next sp between shells.
Work 3 dc into next sp between shells.
Work 3 dc into next sp between shells.
Work 3 dc, ch 2, 3 dc into corner sp (2nd corner).
Work 3 dc into next sp between shells.
Work 3 dc into next sp between shells.
Work 3 dc into next sp between shells.
Work 3 dc, ch 2, 3 dc into corner sp (3 rd corner).
Work 3 dc into next sp between shells.
Work 3 dc into next sp between shells.
Work 3 dc into next sp between shells.
Work 3 dc, ch 2, 3 dc into corner sp (4 th corner).
Work 3 dc into next sp between shells.
Work 3 dc into next sp between shells.
Work 3 dc into next sp between shells.
Join round with sl st into the top of the first dc (not the ch 2).
Fasten off.
**Please see the video tutorial below on how to make these squares:
Assembling Blanket
To join this blanket I used a tight continuous join as you go.
Please see the video tutorial below on how to join the squares for this blanket:
Border
Round 1
Into the first corner sp of blanket, ch 2 (counts as first dc).
Work 2 dc, ch 2, 3 dc into the corner sp.
Continue working 3 dc into each space between granny clusters around the border of blanket.
Into each join (where two squares meet); work 2 dc on either side.
Work 3 dc, ch 2, 3 dc into each corner.
To join round, sl st into the top of the first dc (not into the ch 2).
Do NOT fasten off.
Round 2
Ch 2 (counts as first dc).
Work one dc into each st around the blanket.
In the four corners of the blanket work 3 dc sts.
Join round with sl st to top of first dc (not the ch 2).
Do not fasten off.
Round 3
Work fpdc around first dc.
Work bpdc around next dc.
Alternate fpdc and bpdc all around border of blanket.
In the 2nd dc st of the corners; work 3 sts around the post (alternating just as you did throughout blanket).
*I found the YouTube tutorial by Daisy Farm Crafts to be helpful when doing the fpdc/bpdc ribbed border.
Round 4
Alternate fpdc and bpdc all around the blanket border ensuring that the fpdc are on the fpdc sts and the bpdc are on the bpdc sts of the previous round.
Round 5
Repeat Round 4
Round 6
Repeat Round 4
Fasten off and weave in ends.
~ The End ~
The pattern, the photographs and video tutorials in this document are the property of Nautikrall Crochet. You may sell items you make from this pattern; but may not sell, reproduce, or distribute this pattern, in whole or in part, as your own.
Copyright © 2022 Nautikrall Crochet – All rights reserved.
