

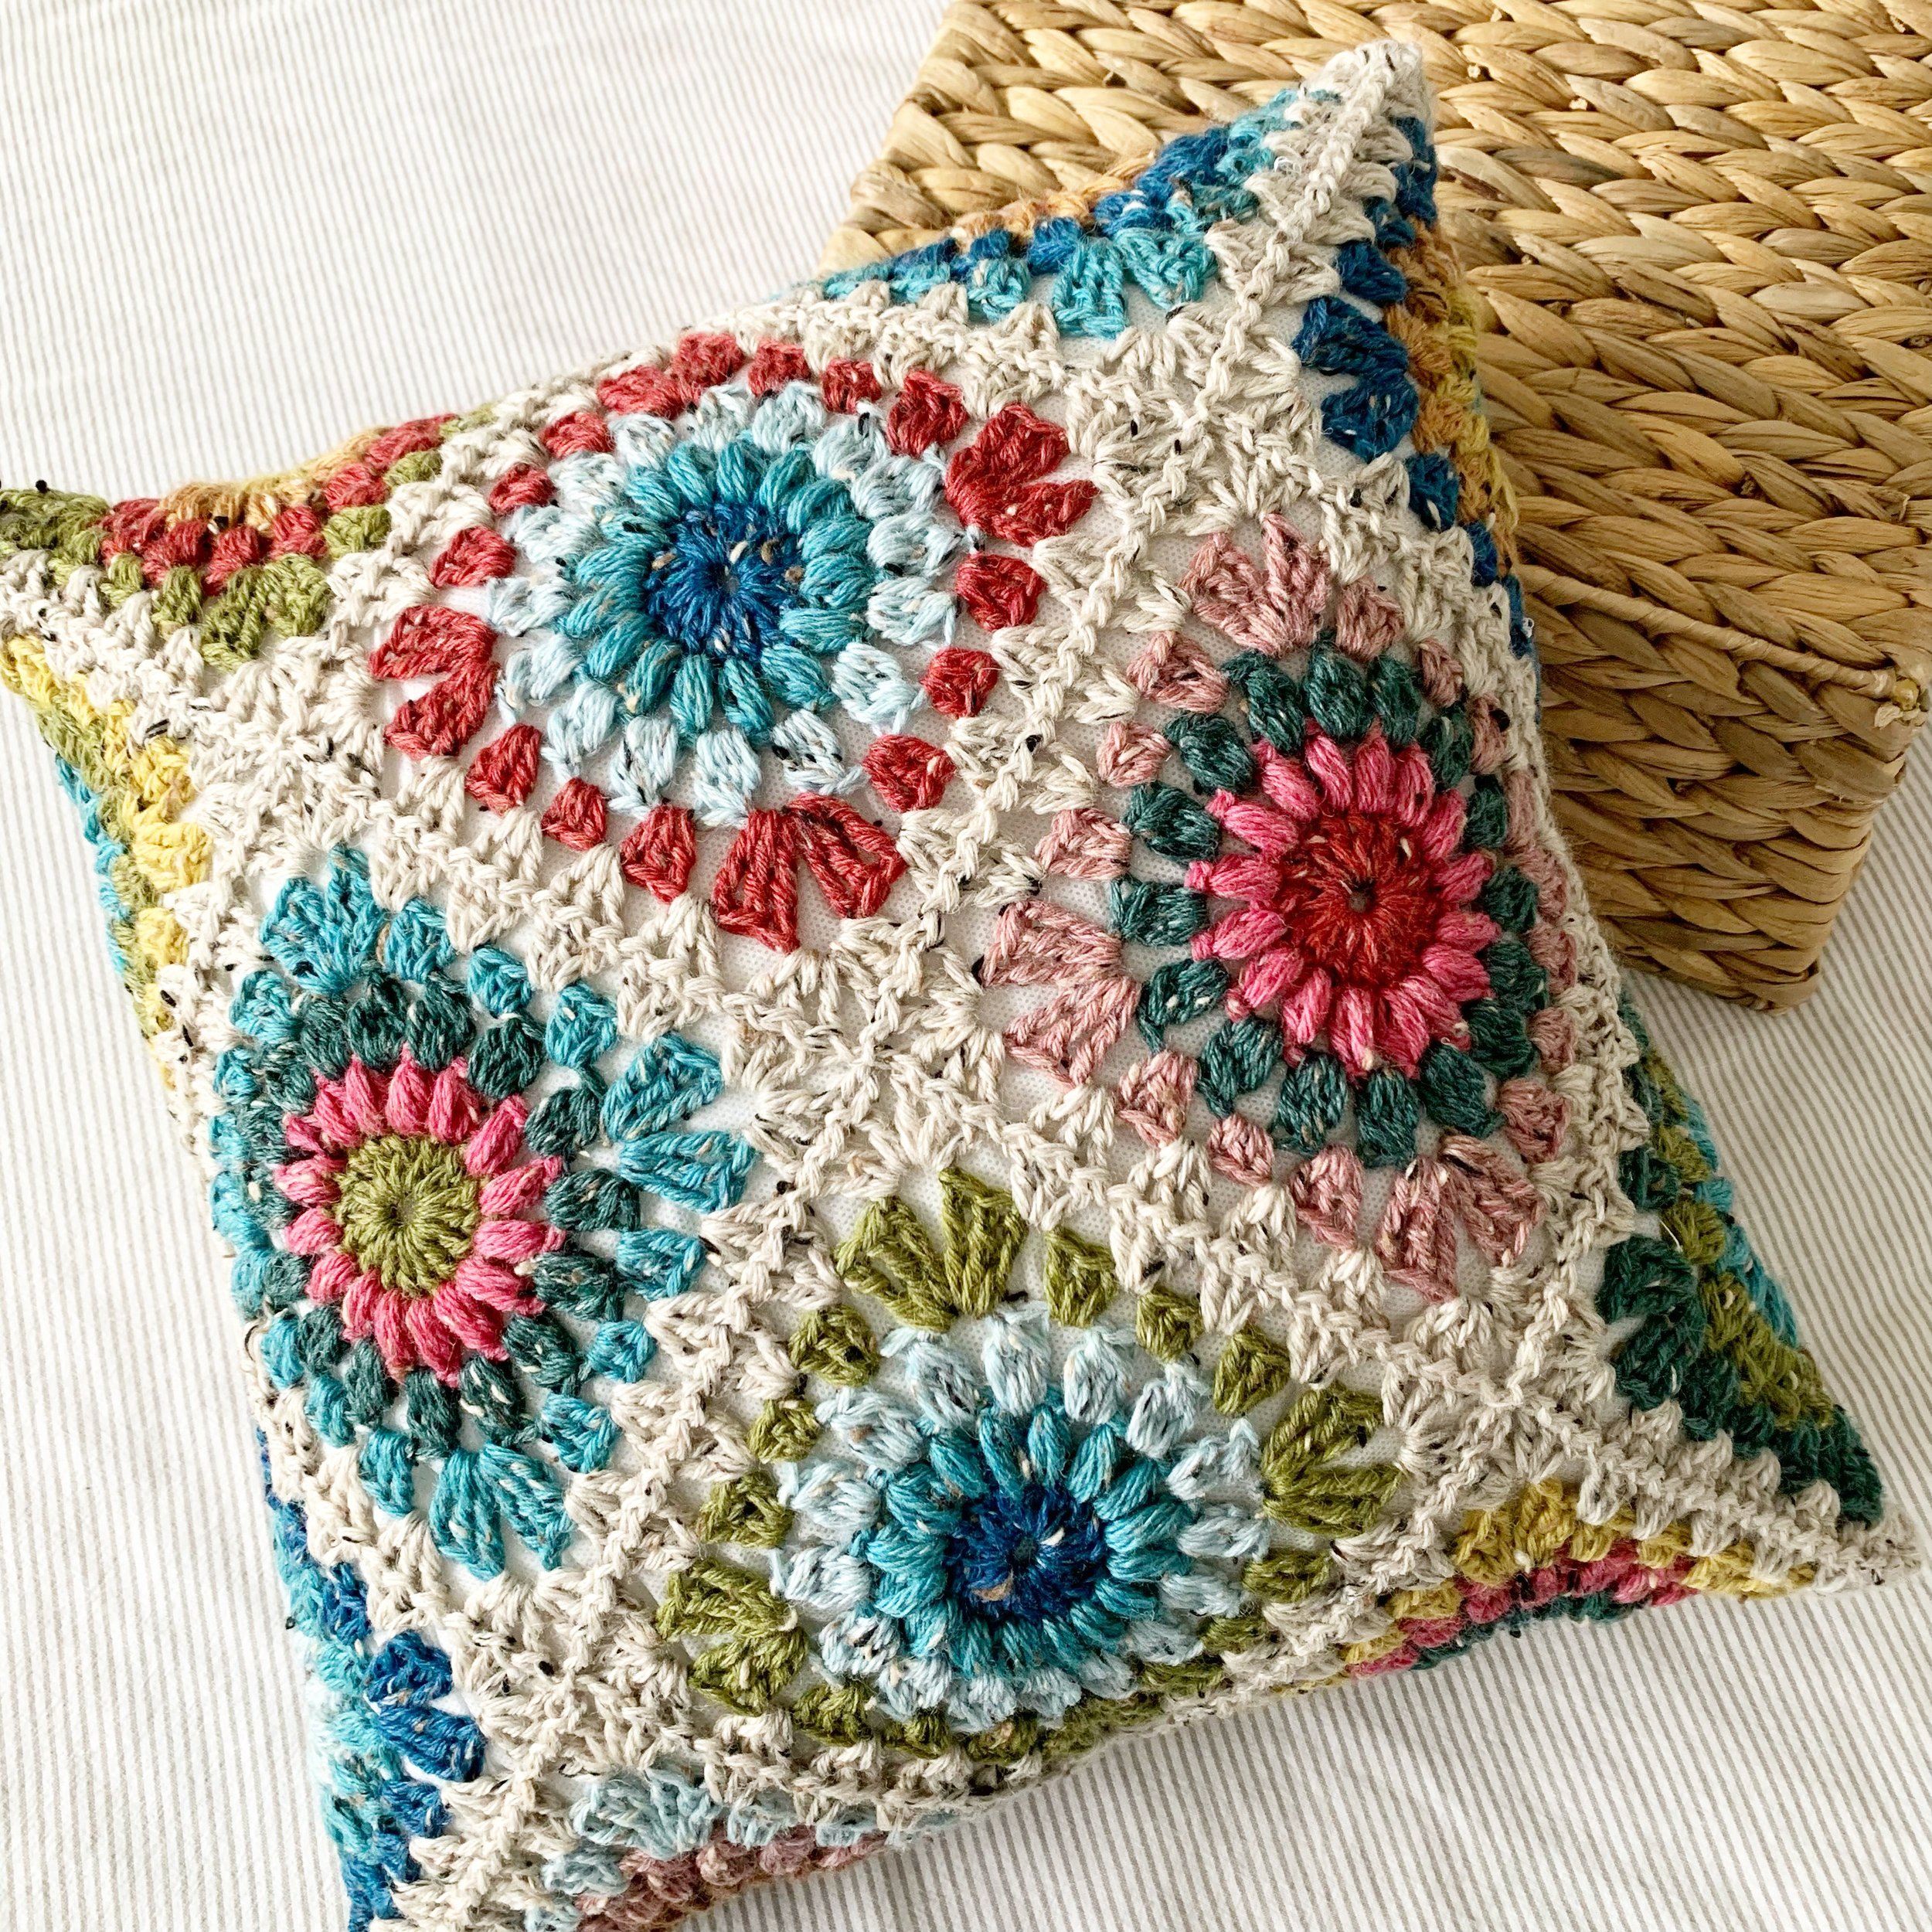
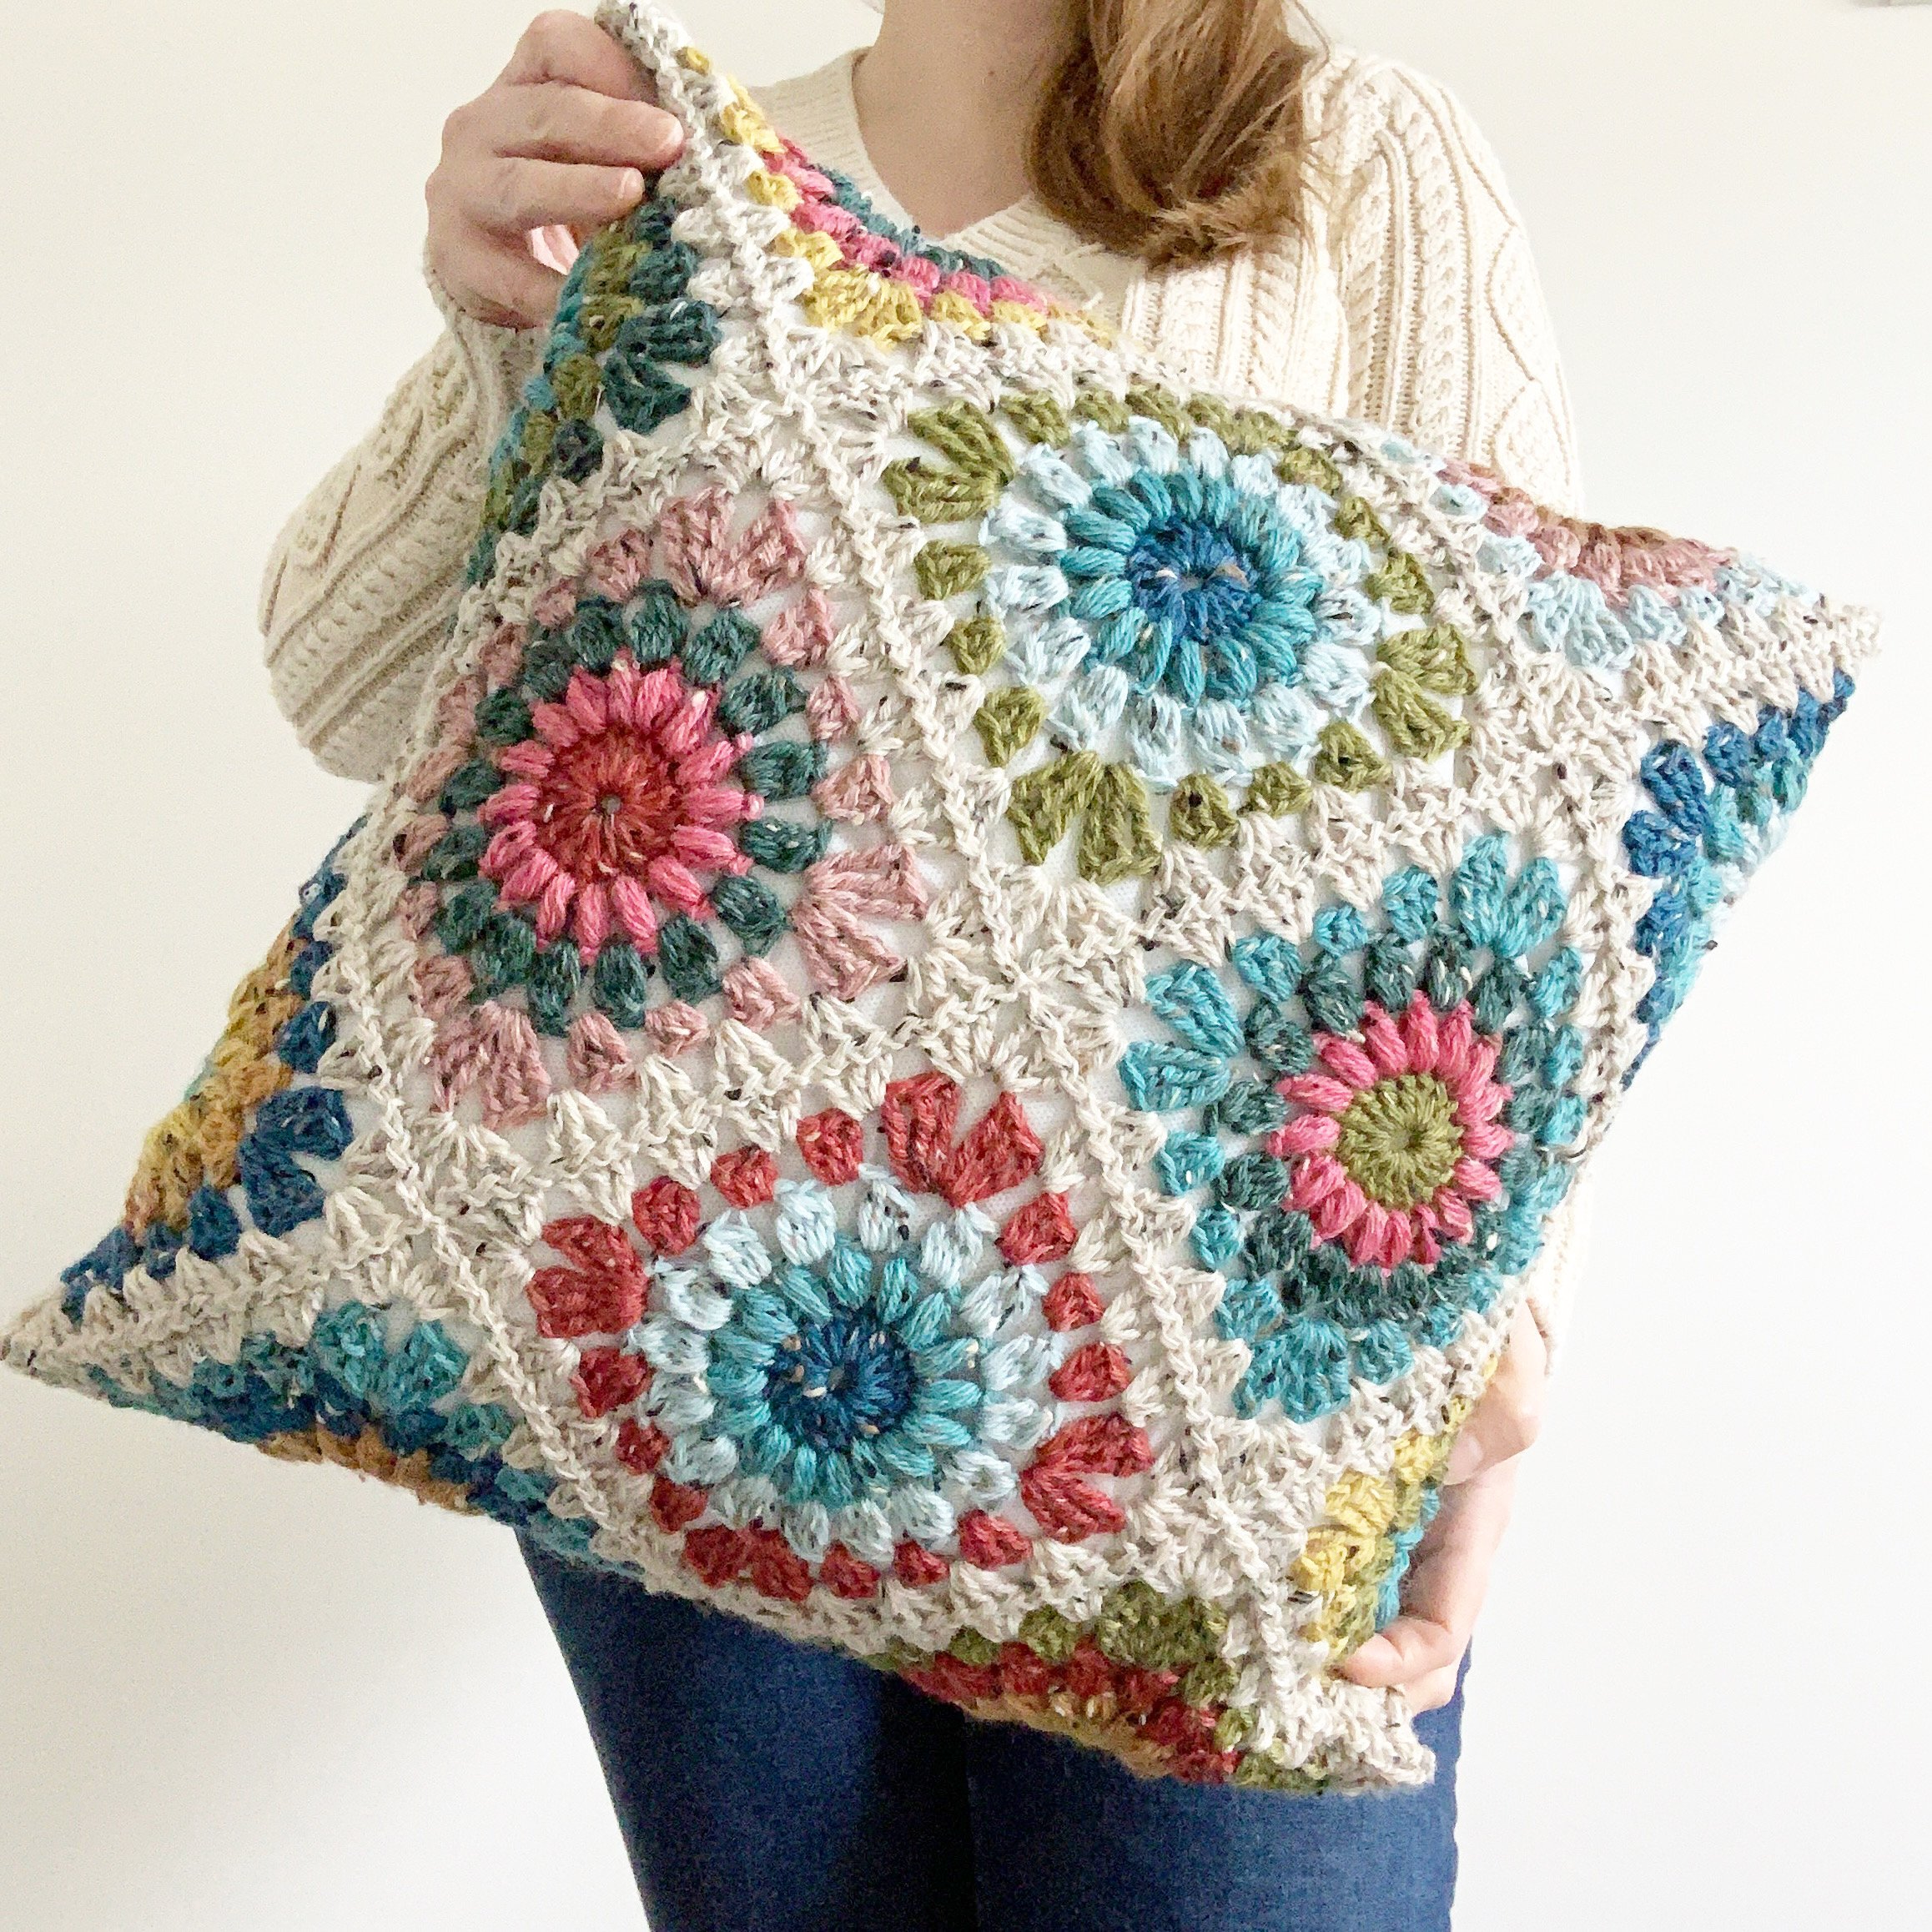
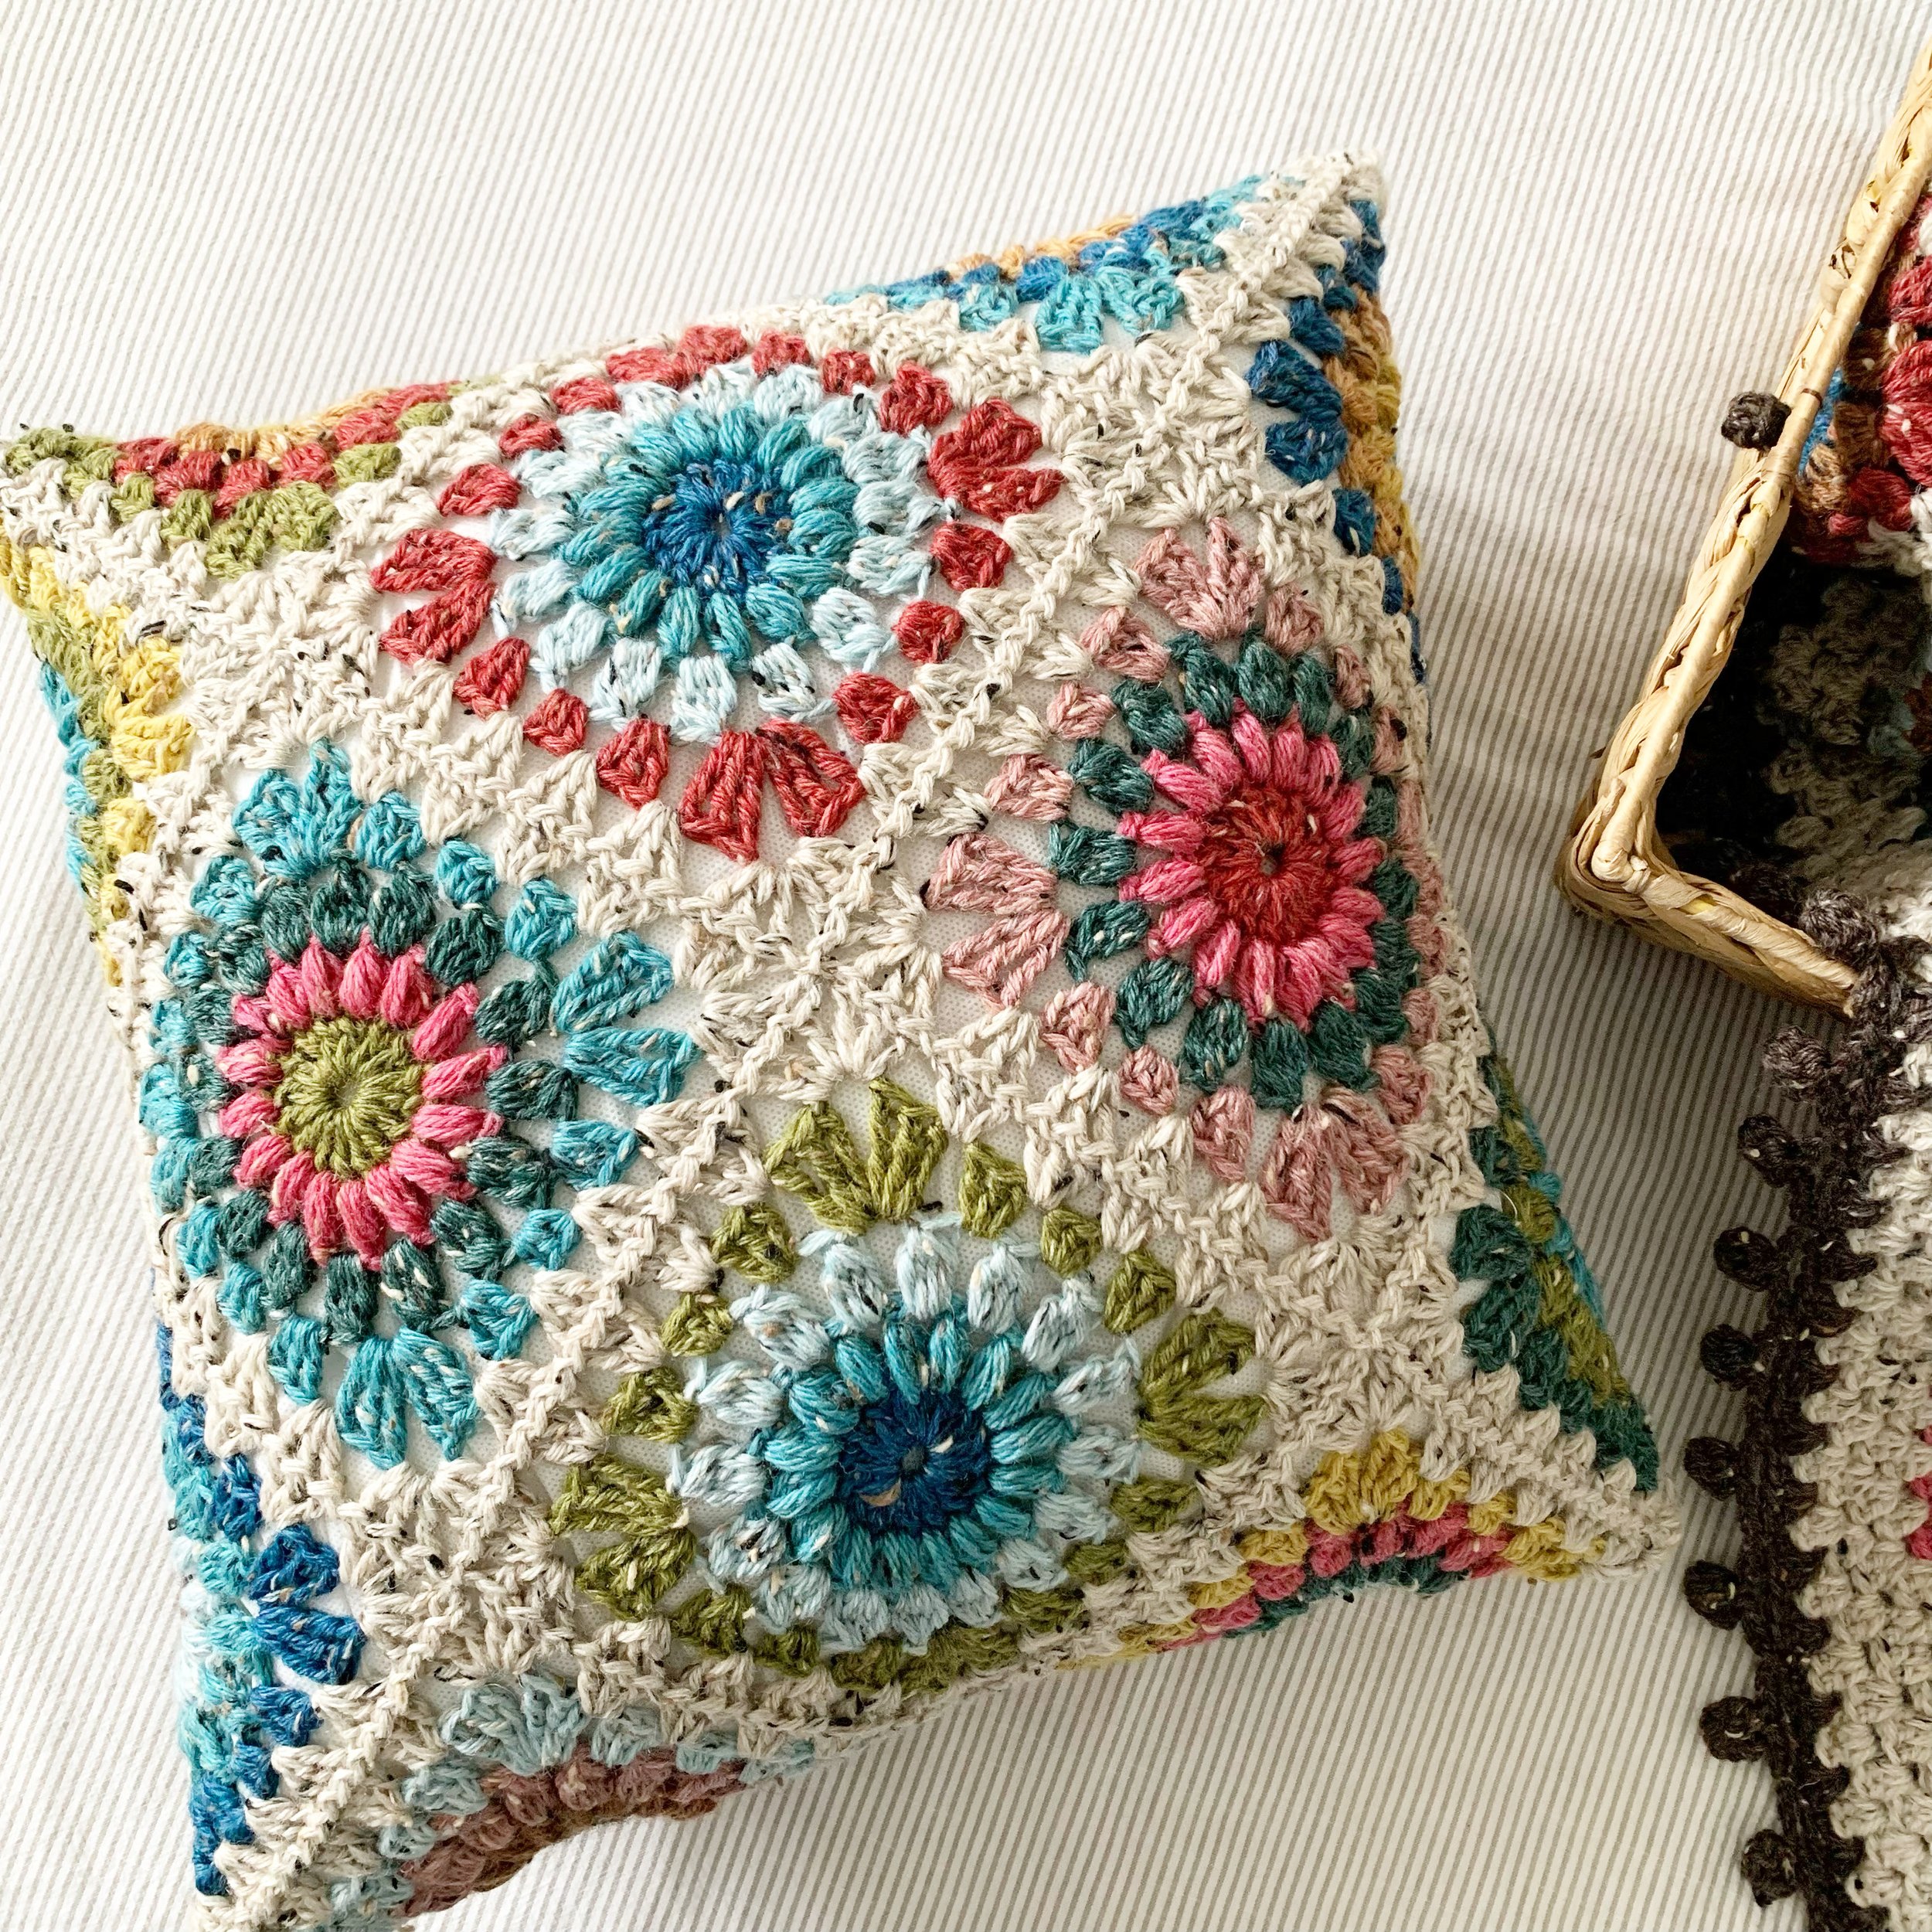
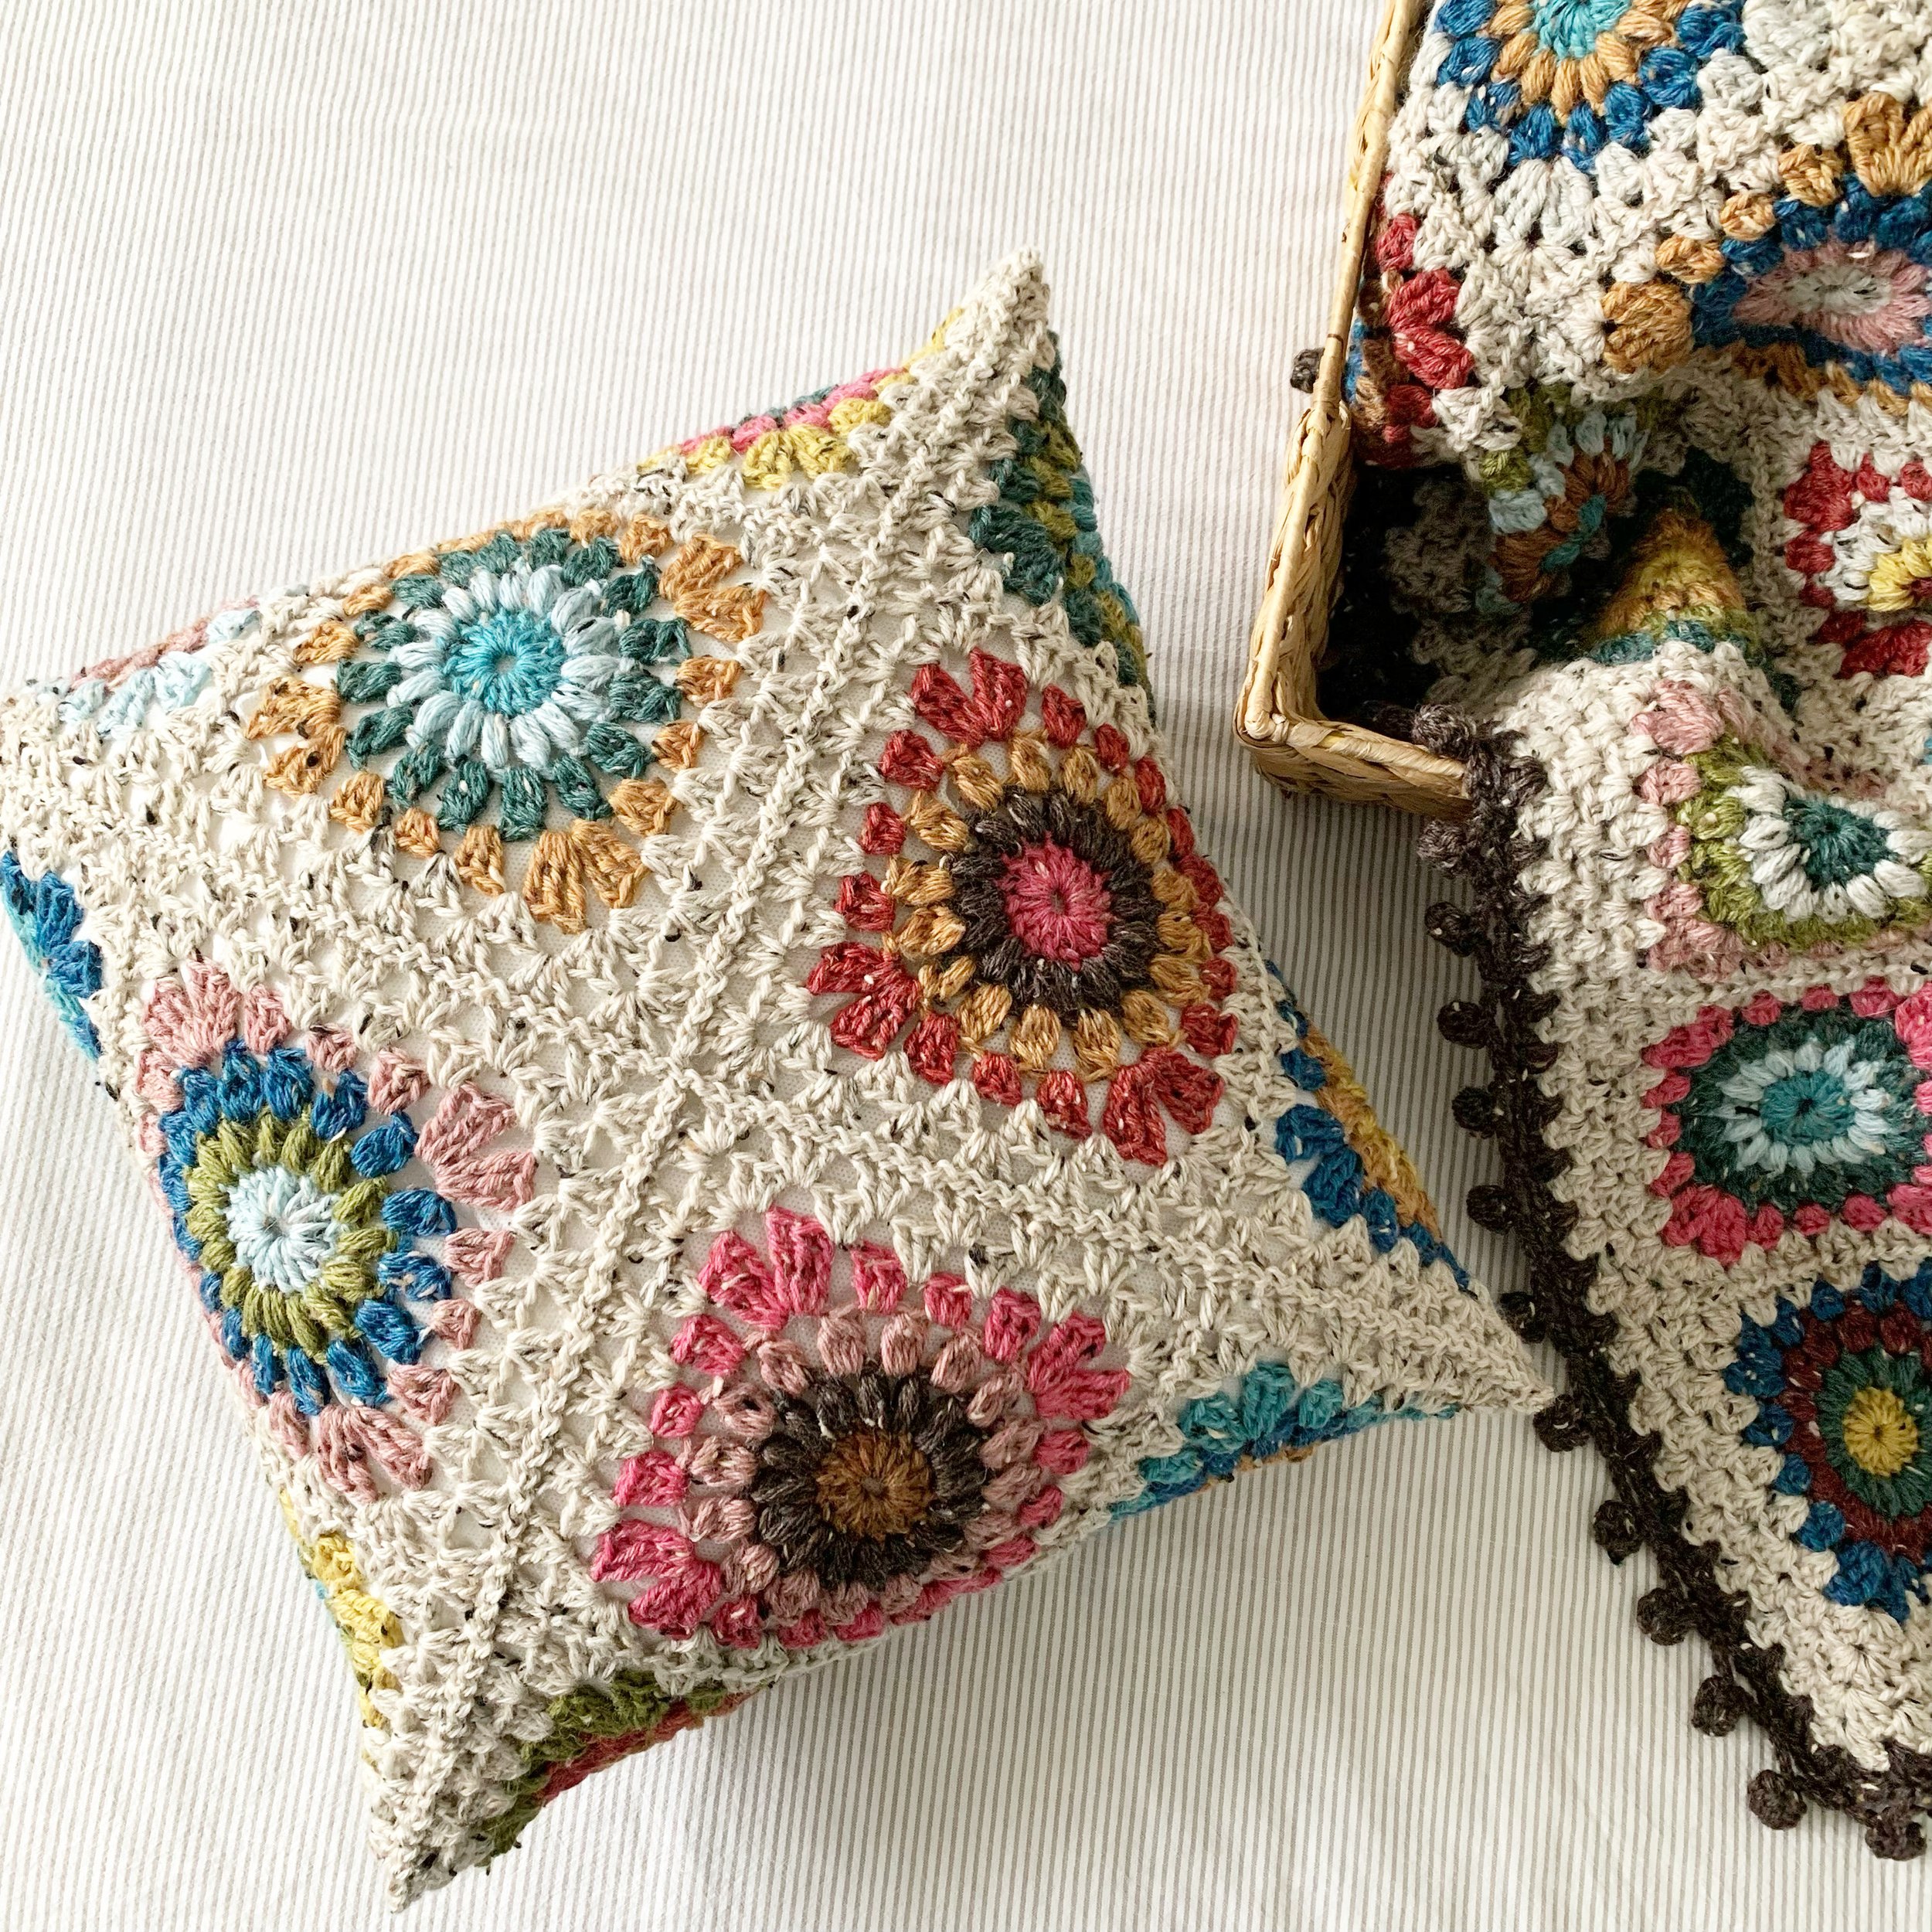
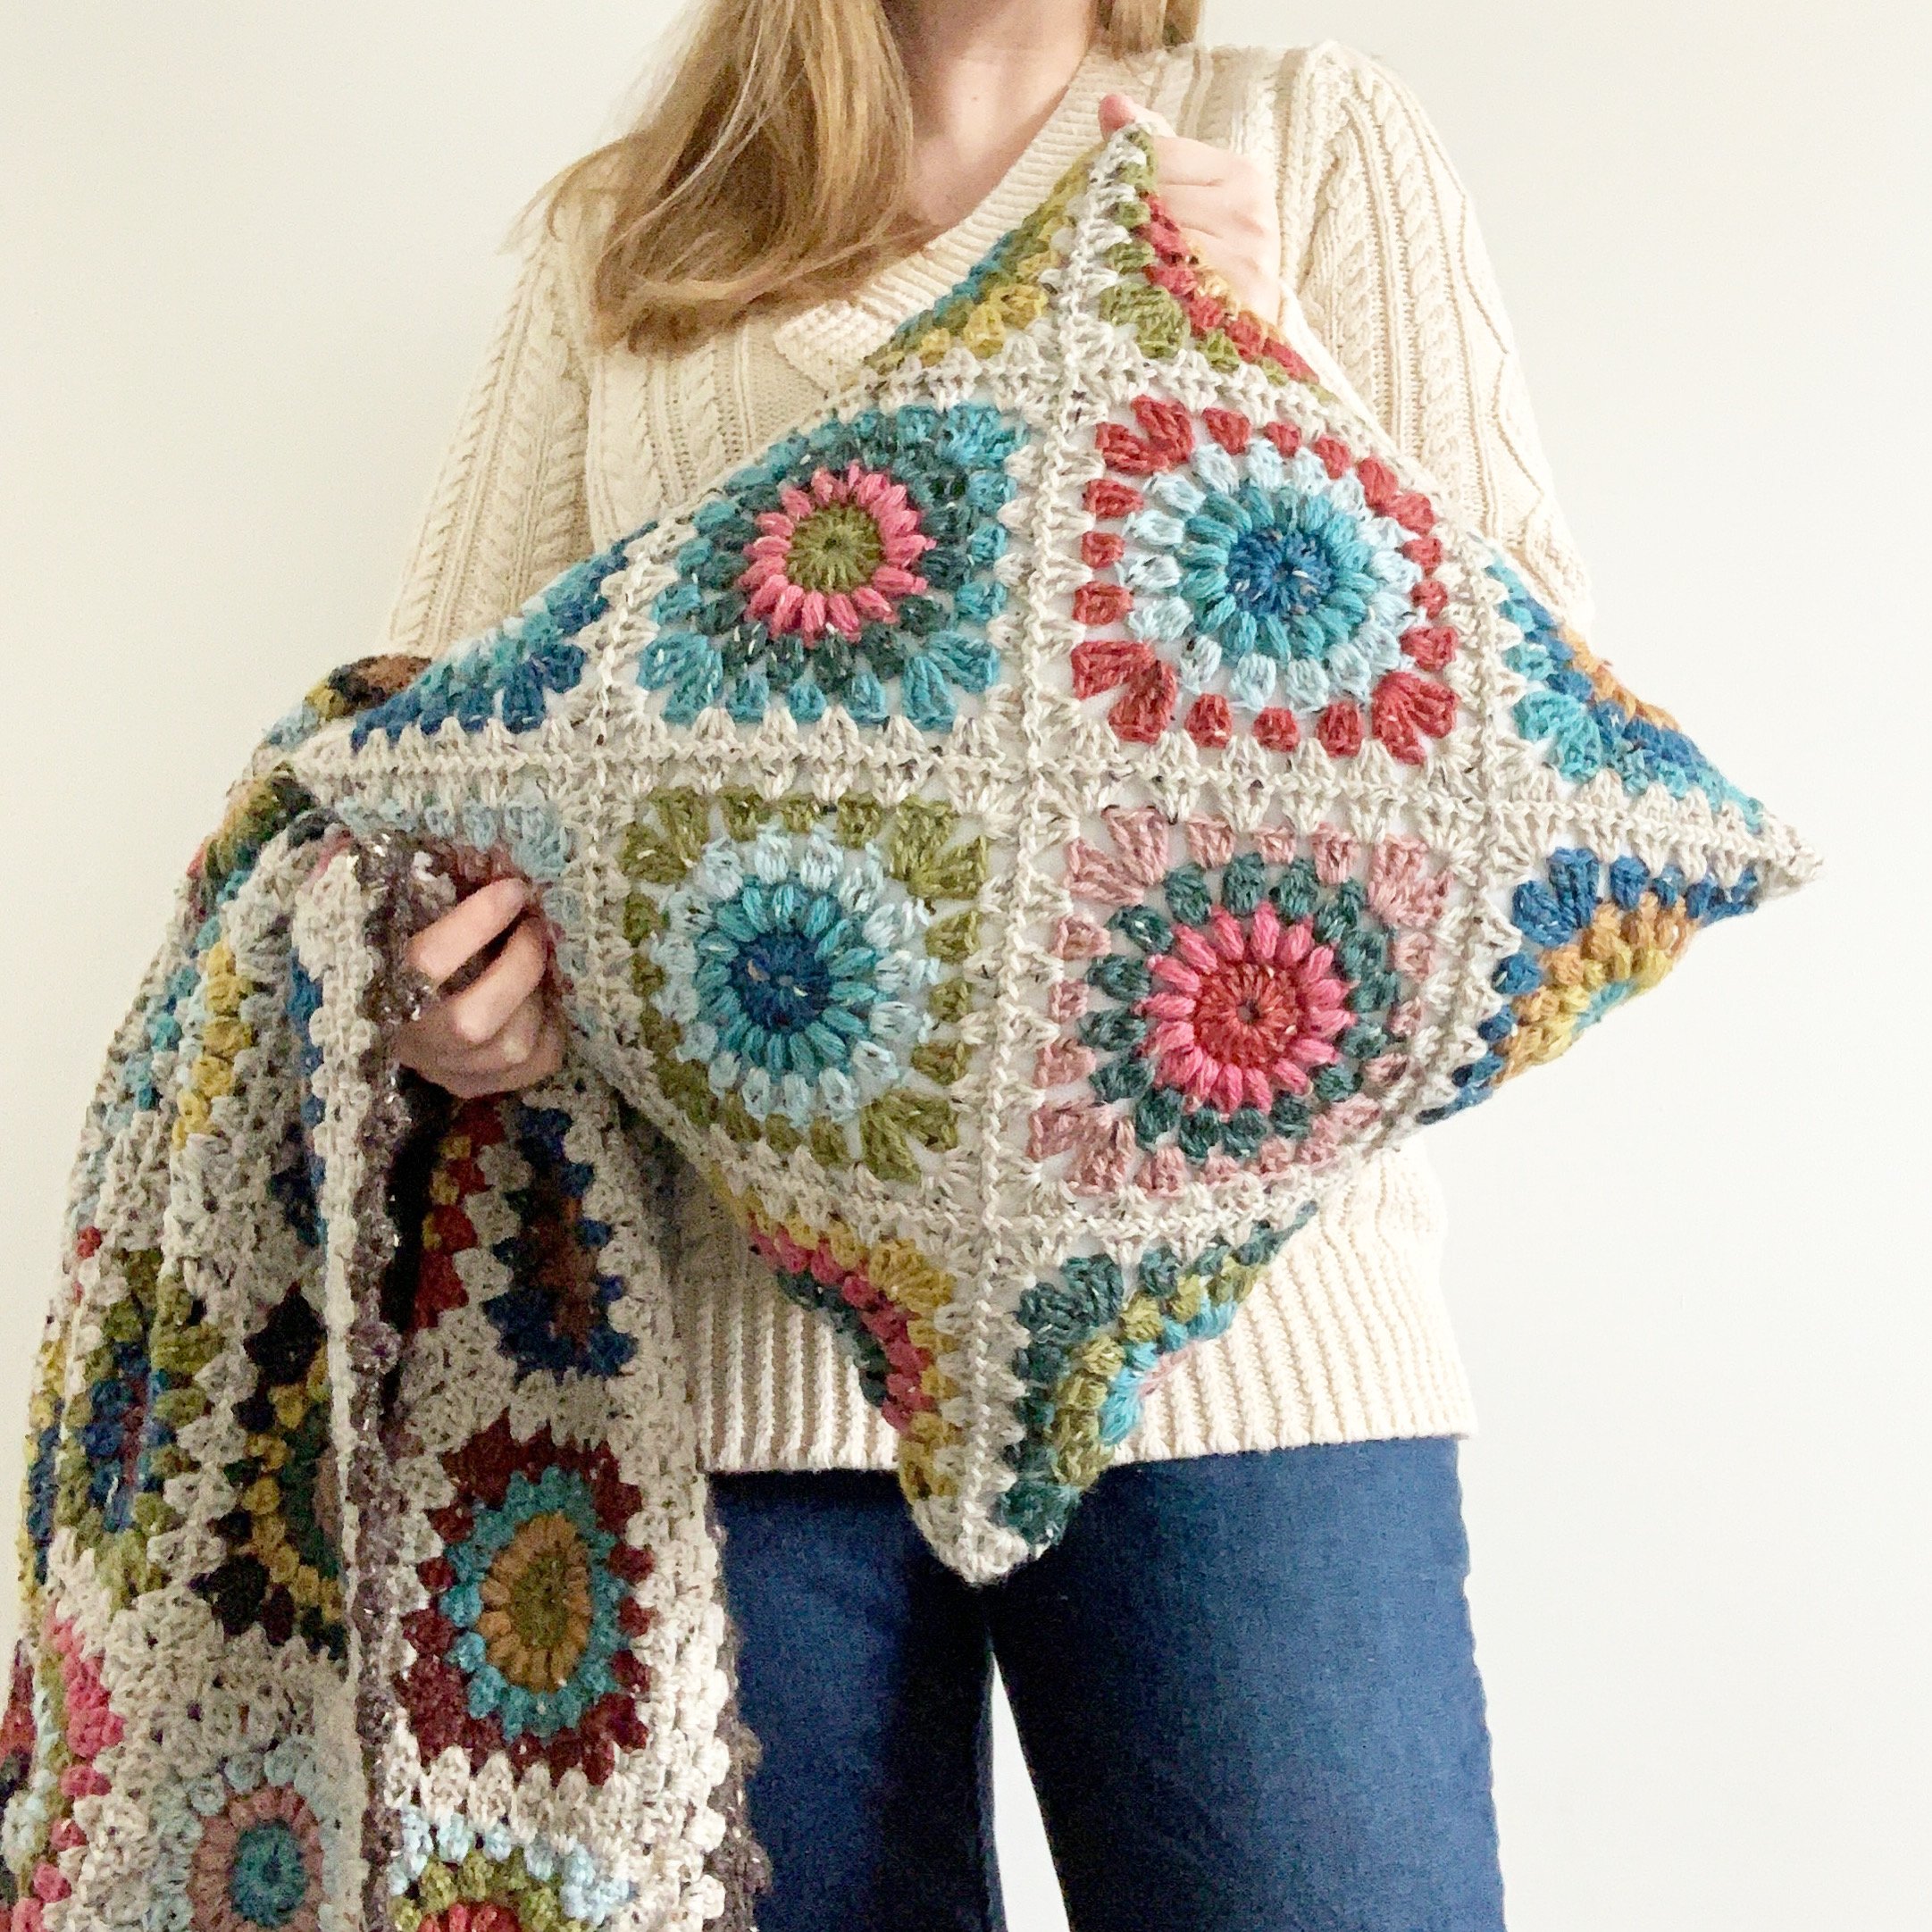
Hygge Burst Granny Square Pillow Pattern


This post contains affiliate links. Affiliate links cost you nothing, but when purchasing through these links you help me earn a small commission. This supports me and my family and my continued efforts to bring you free patterns.
Intro:
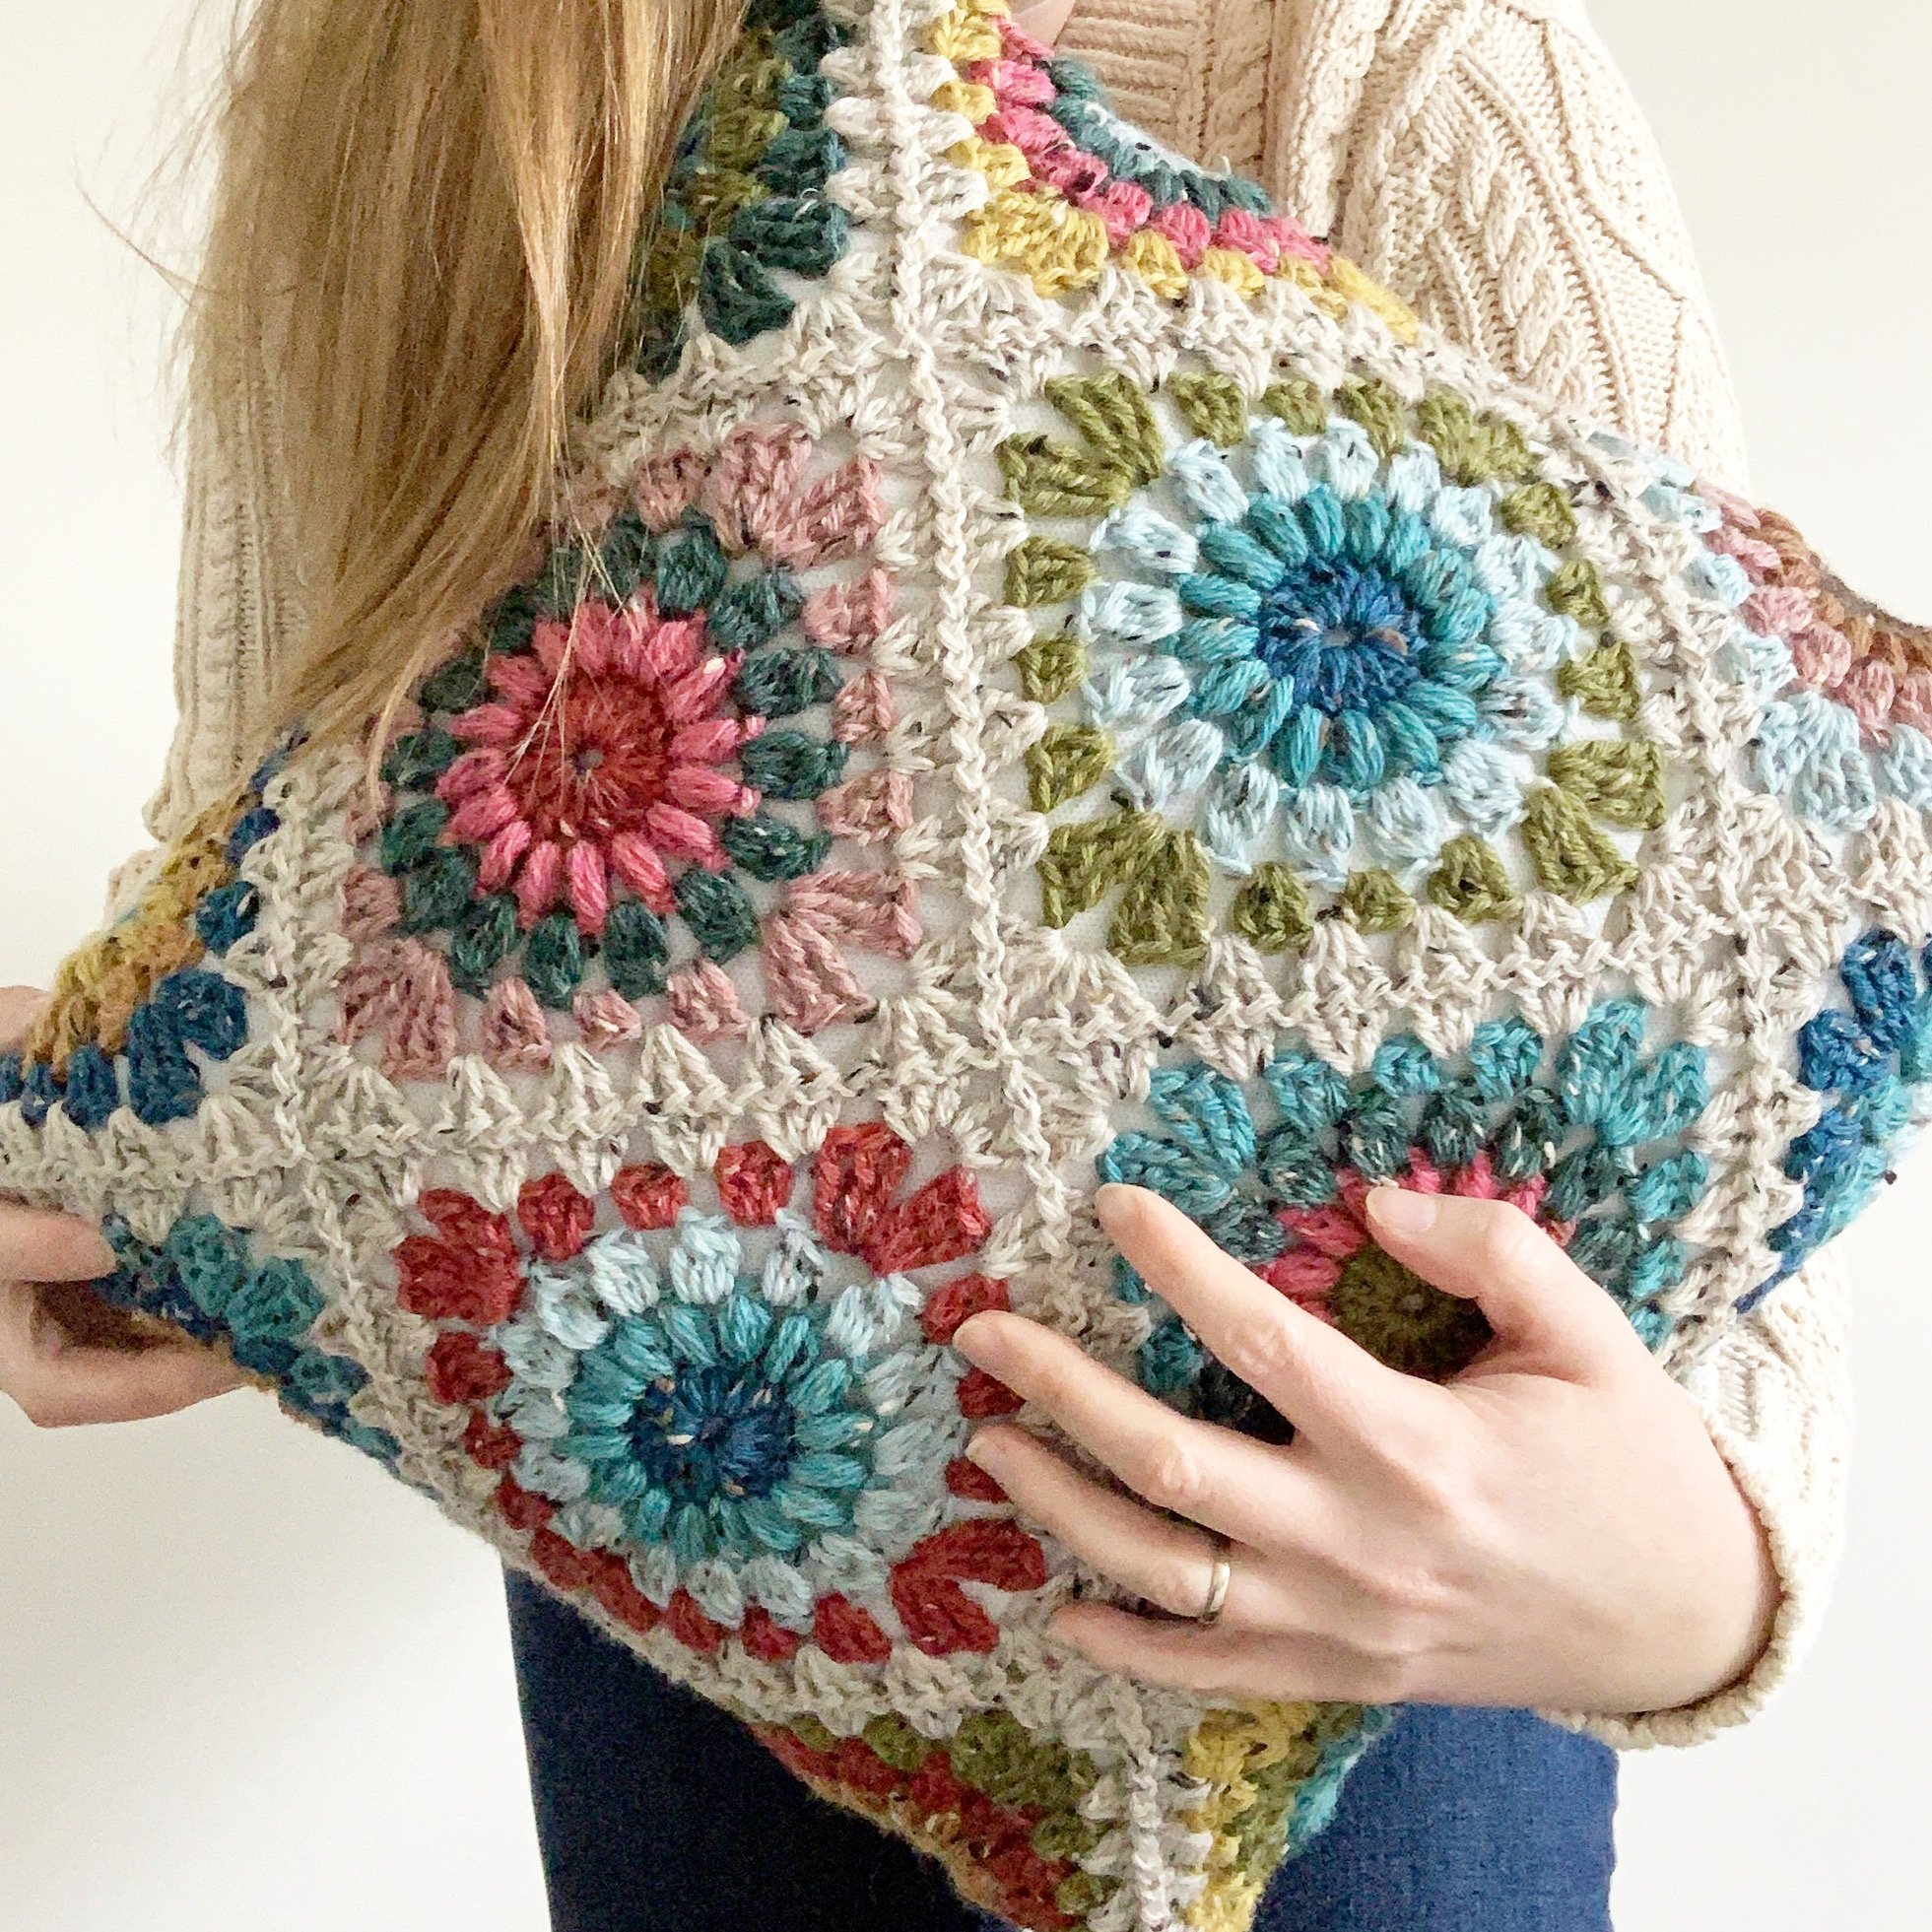
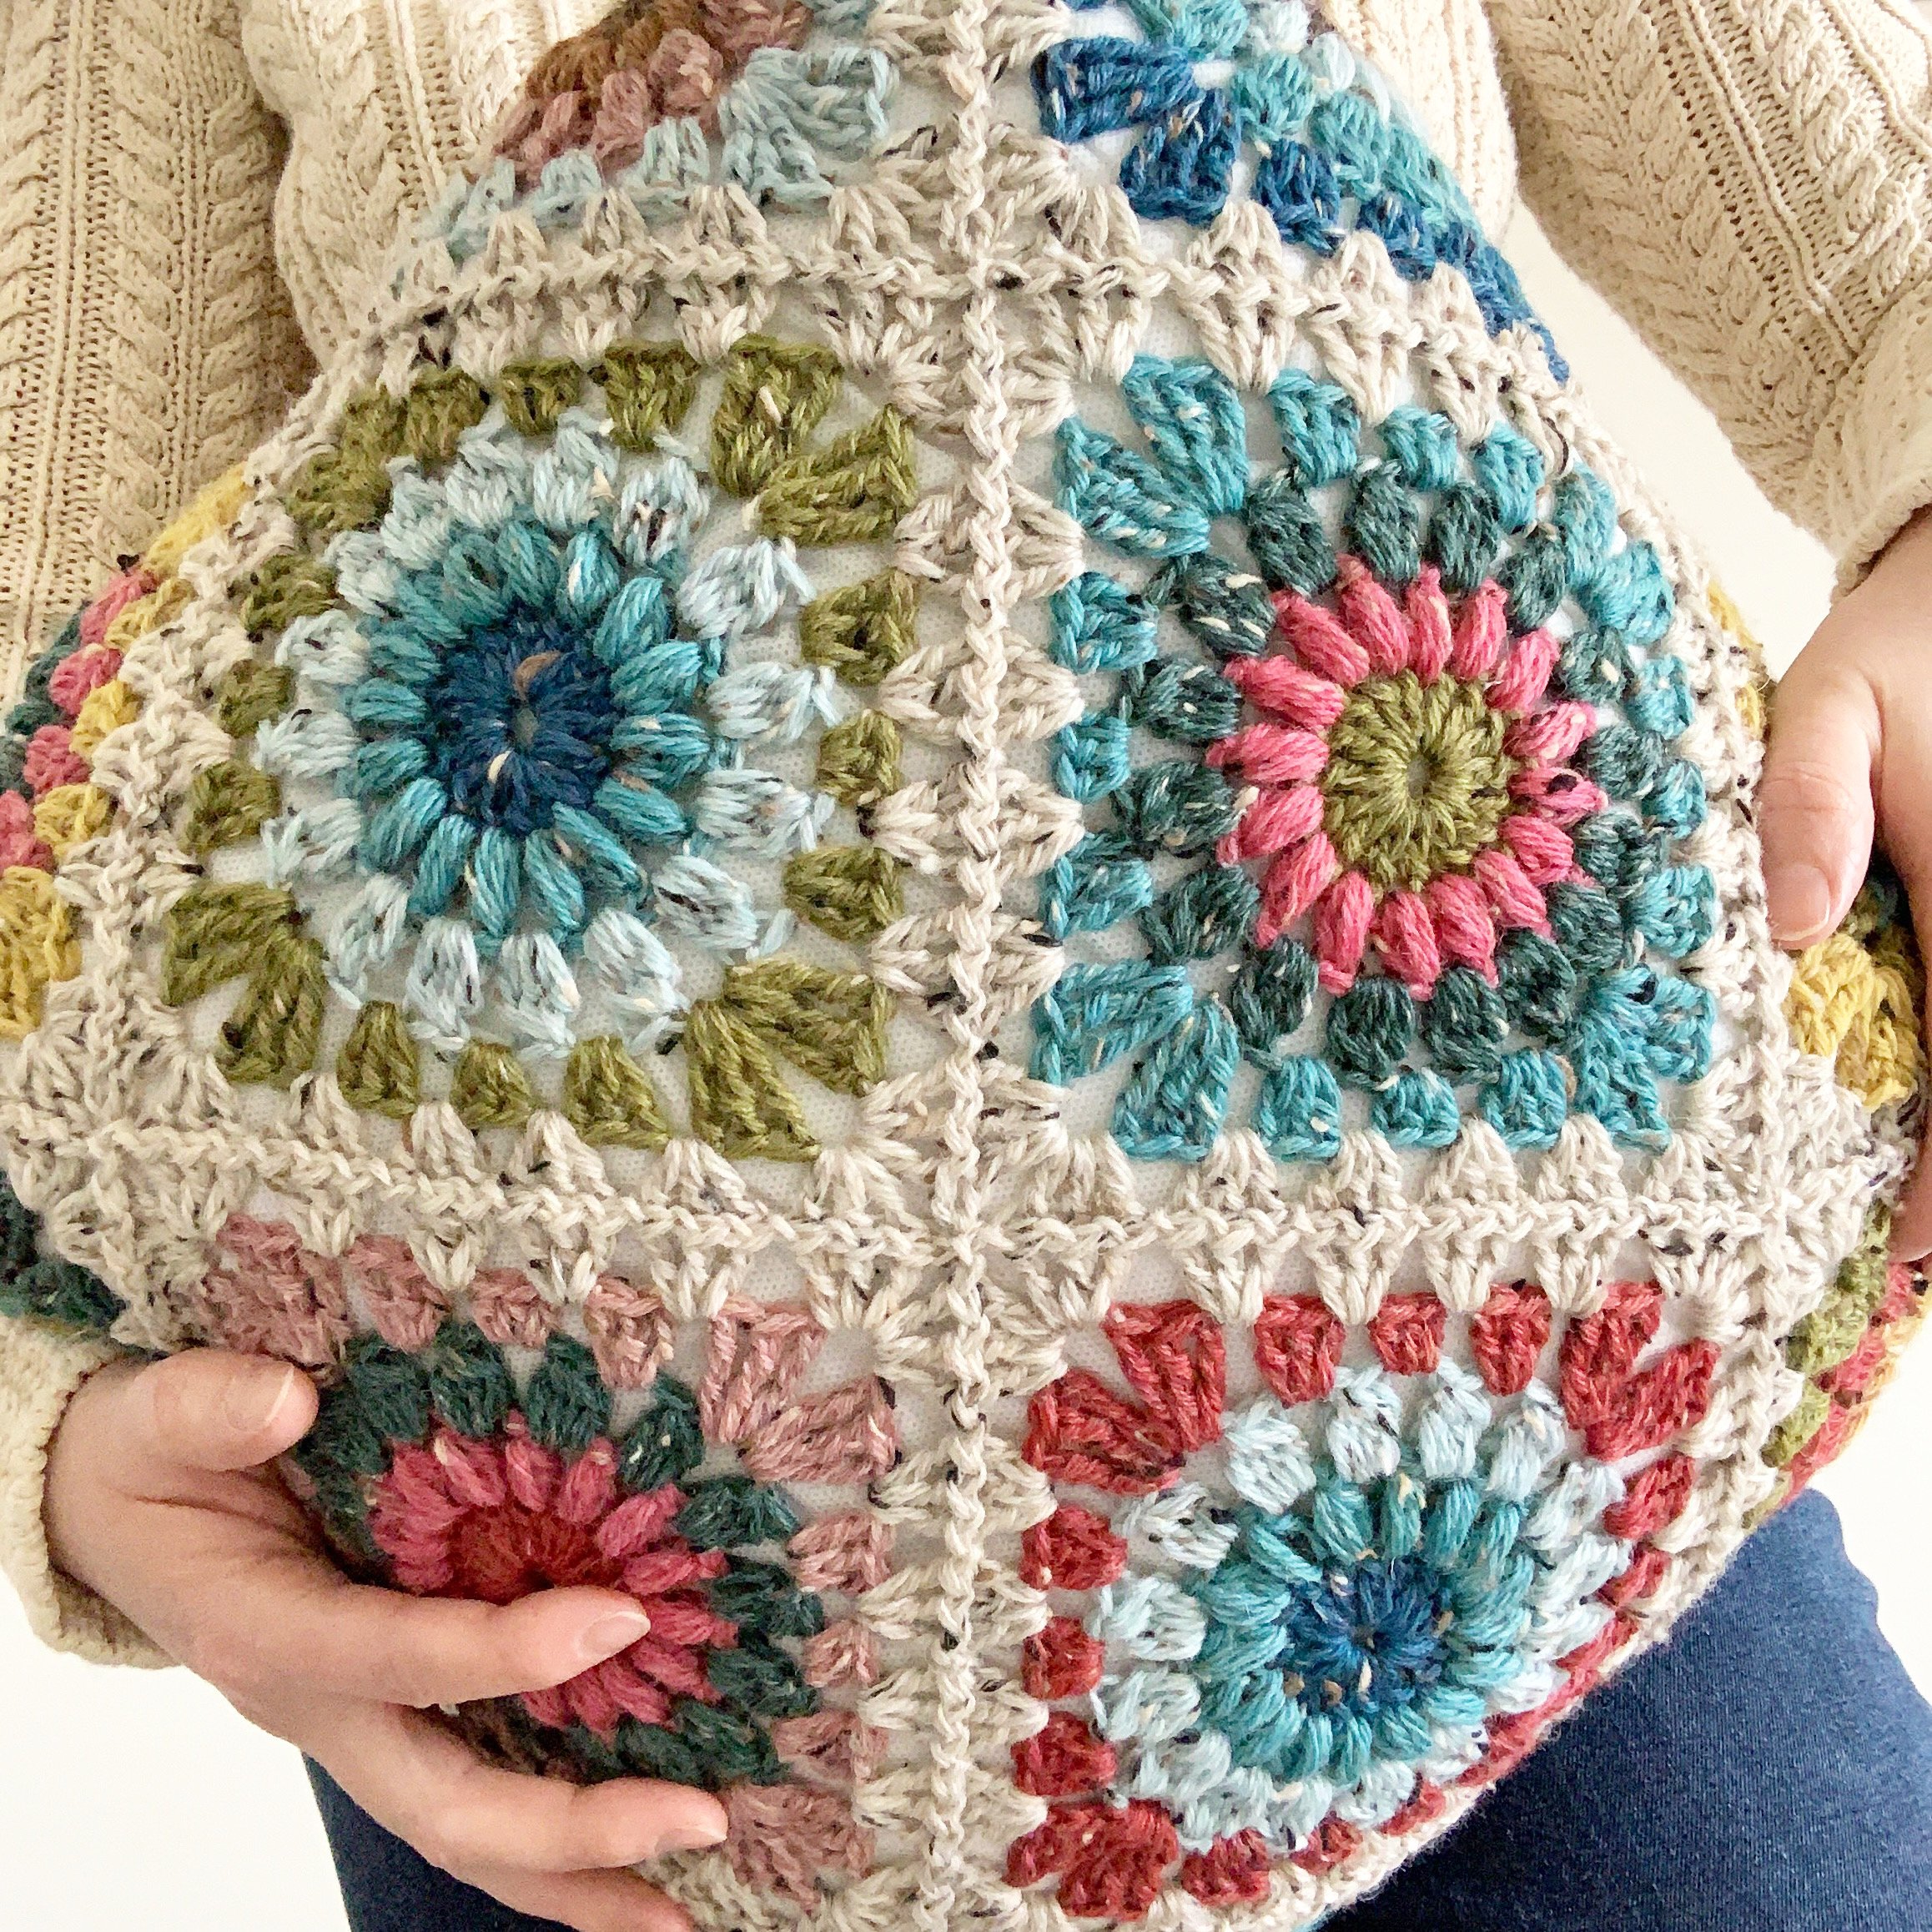
I couldn’t have imagined how much you would all love the Hygge Burst Blanket Pattern. In fact, I’m completely blown away. So here’s to another snuggly pattern perfect for cozy home making. A pillow so full of warmth and tweedy goodness you just can’t resist it.
About the name: Hygge (pronouced “Hue-guh”) is a Scandinavian word meaning everything that is cozy, happy, special, warm and nice. It’s used as a noun, a verb and an adjective! I fell in love with the idea of hygge after reading The Little Book of Hygge: The Danish Way to Live Well by Meik Wiking. For me, this pillow encompasses all the warmth, coziness and happiness that you can get from a pillow. Combined with the Hygge Burst Blanket pattern (found here) you’ll be ready to settle in for a long cozy winter.
Hope you love it just as much as I do :)
M
ps. If you would like a printable PDF of this pattern, you can purchase it on Etsy or Ravelry here:

Materials
US 5.0mm crochet hook
Washable Pillow Form (18x18”)
Needle for weaving in ends
Yarn
WeCrochet Wool of the Andes Tweed (110 yds/50g) **Affiliate link
Picket Fence Heather (185 yds/84g) 2 skeins
Apple Blossom Heather (33 yds/15g) 1 skein
Square Dance Heather (29 yds/13g) 1 skein
Gingham Heather (29 yds/13g) 1 skein
Sarsaparilla Heather (9 yds/4g) 1 skein
Maple Heather (33 yds/15g) 1 skein
Olive Heather (24 yds/11g) 1 skein
Dill Heather (42 yds/19g) 1 skein
Wreath Heather (37 yds/17g) 1 skein
Sea Glass Heather (53 yds/24g) 1 skein
Marine Heather (35 yds/16g) 1 skein
North Pole Heather (42 yds/19g) 1 skein
Farmhouse Heather (18 yds/8g) 1 skein
Yarn Recommendations/Links
WeCrochet Wool of the Andes Tweed Worsted (80% Peruvian Highland Wool, 20% Donegal Tweed)
WeCrochet Wool of the Andes Worsted SW (100% Superwash Wool)
WeCrochet Brava Tweed Worsted (97% Premium Acrylic, 3% Viscose)
WeCrochet Swish Worsted (100% Fine Superwash Merino Wool)
WeCrochet Heatherly Worsted (80% Acrylic, 20% Merino Woo)
WeCrochet Comfy Worsted (75% Pima Cotton / 25% Acrylic)
Hue Loco Worsted (100% SW Merino Wool)
Finished Size
18”x 18” inches

Glossary (using US Crochet Terminology)
st- stitch
sts- stitches
ch- chain
ch sp- chain space
yo- yarn over
sl st- slip stitch
sc- single crochet
hdc- half double crochet
dc- double crochet
cjaygo- continuous join-as-you-go
cl st(s)- cluster stitch(es)
4 dc cl st– 4 double crochet cluster stitch
tr- treble crochet
puff- puff stitch
How to puff stitch (puff): Yo and insert hook into st, yo and pull up a loop (pull up to about the height of a dc). Repeat this 2 more times. There should be 7 loops on your hook. Yo and pull through all 7 loops.
How to 4 dc cl st: Yo and insert hook into sp, yo and pull up a loop, yo and pull through 2. Repeat this 3 more times. There should be 5 loops on your hook. Yo and pull through all 5 loops.
Pattern Notes
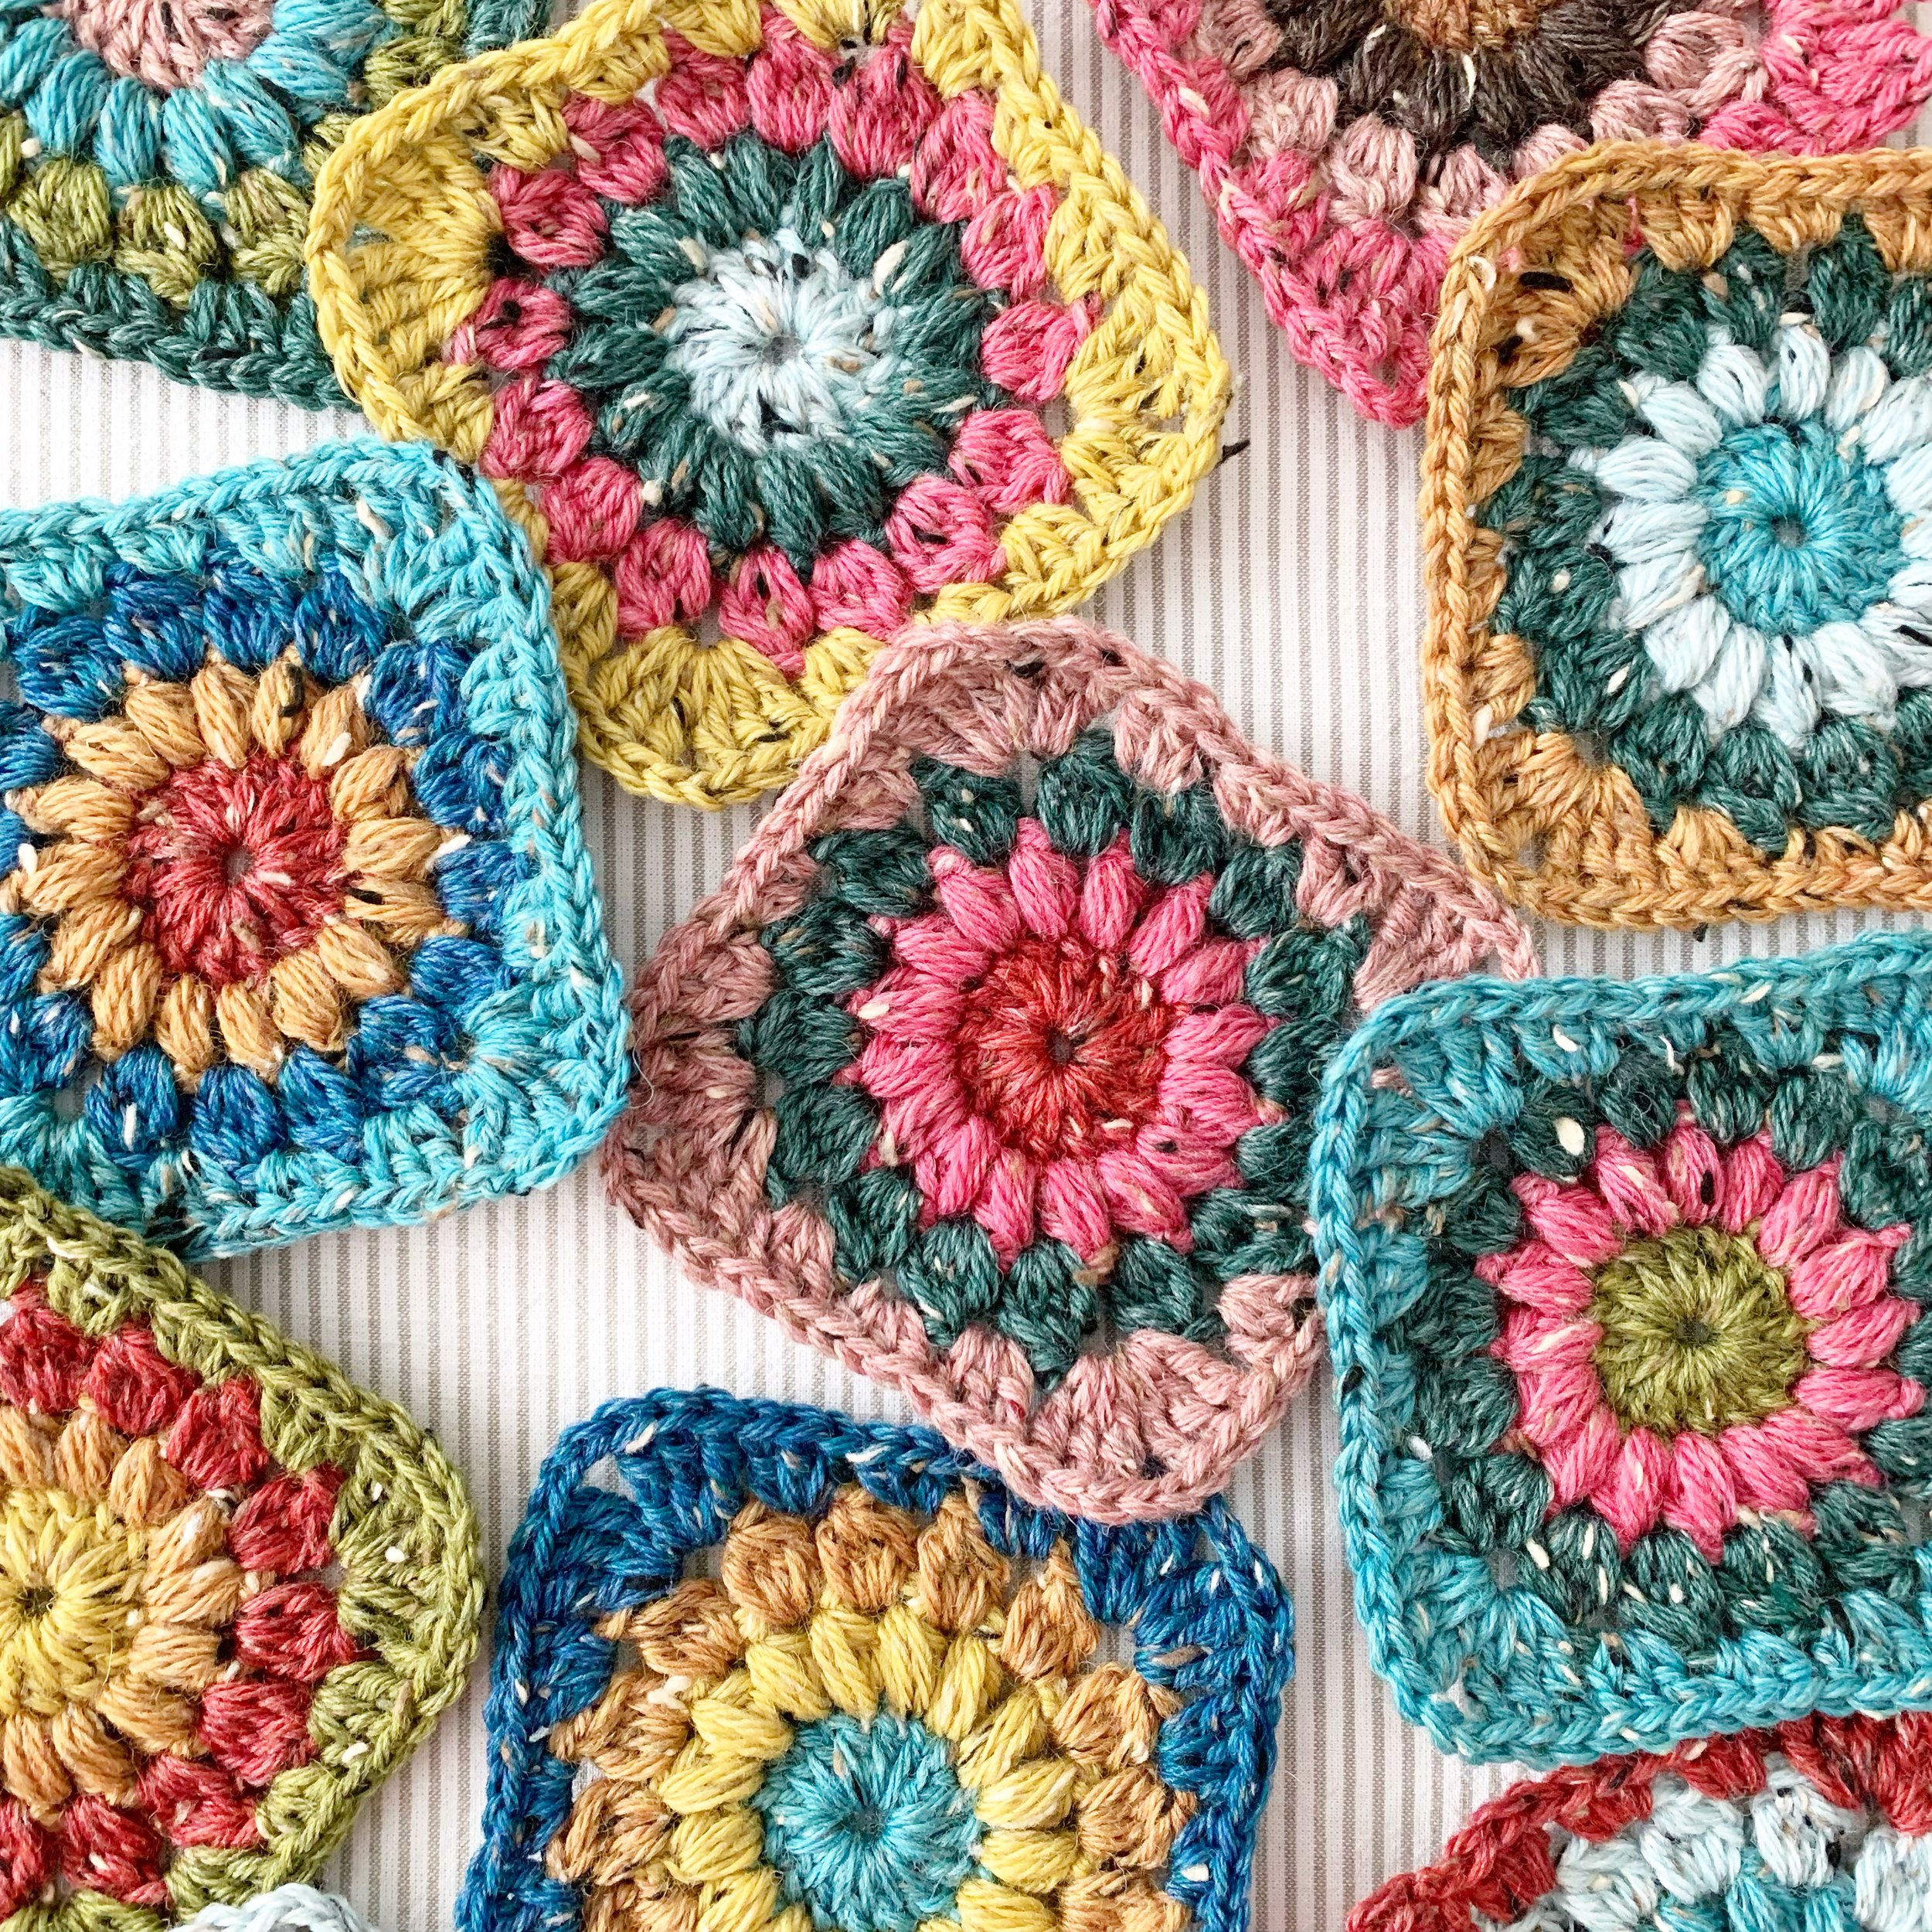
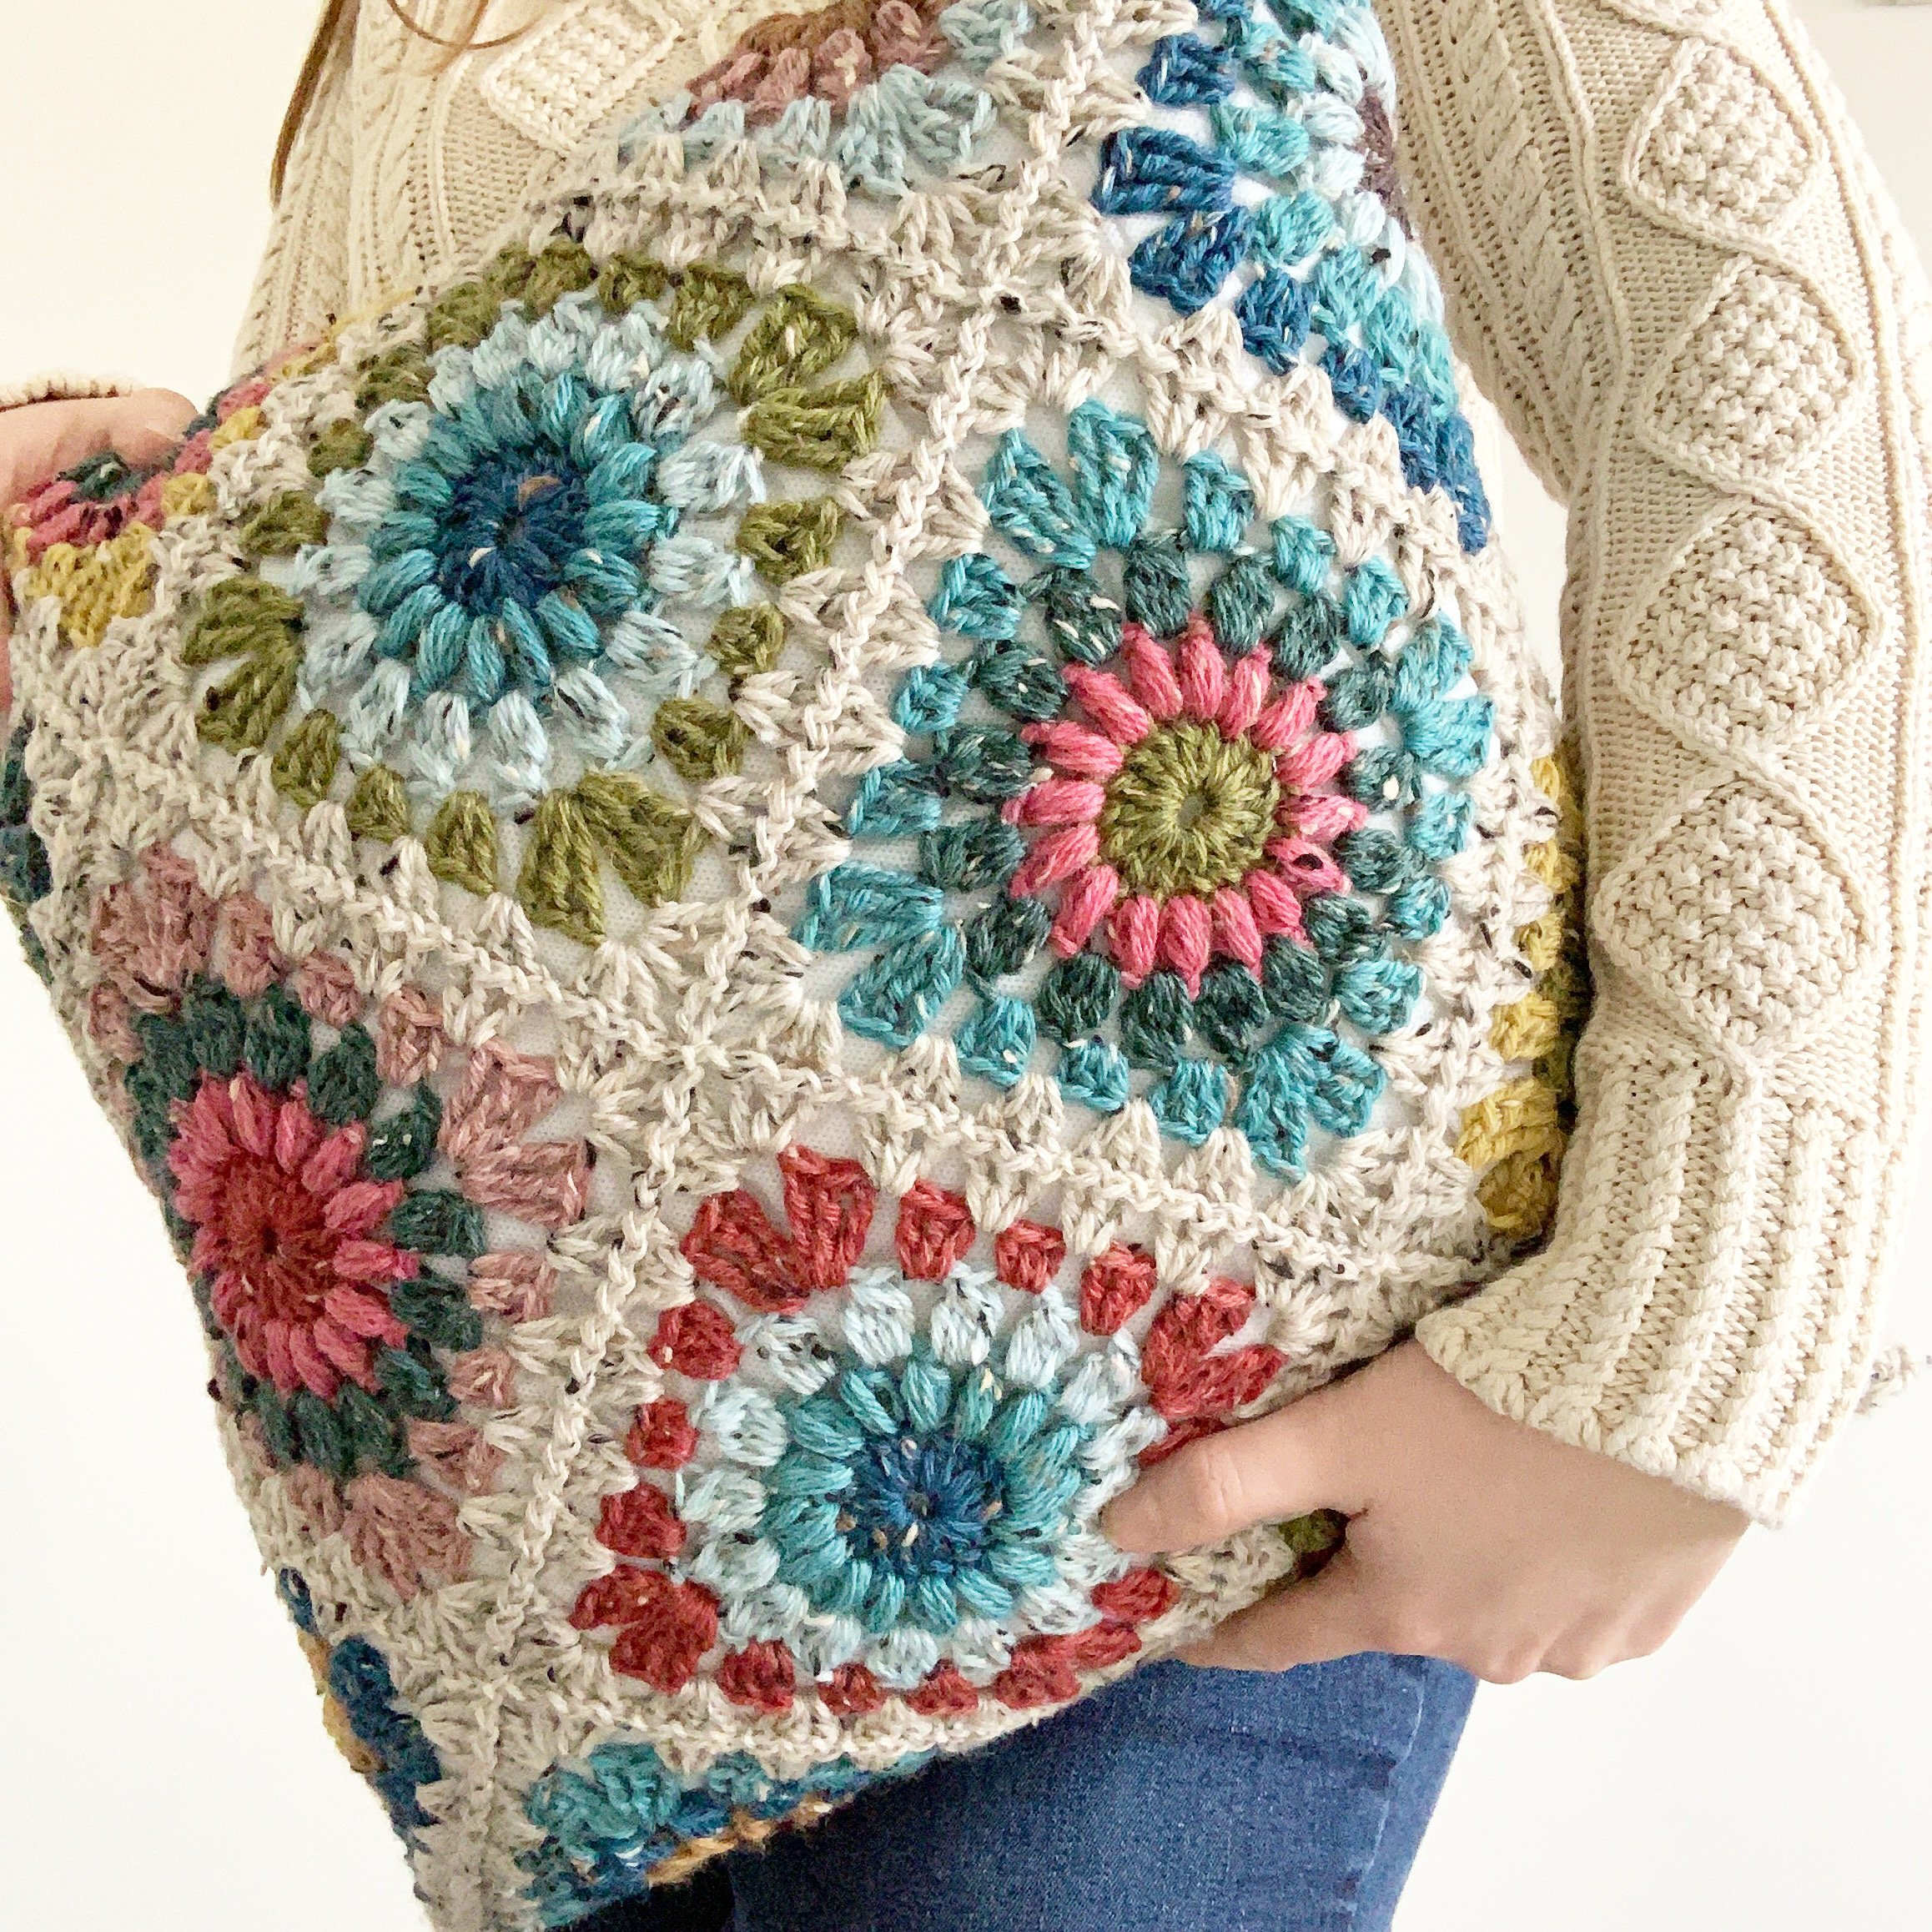
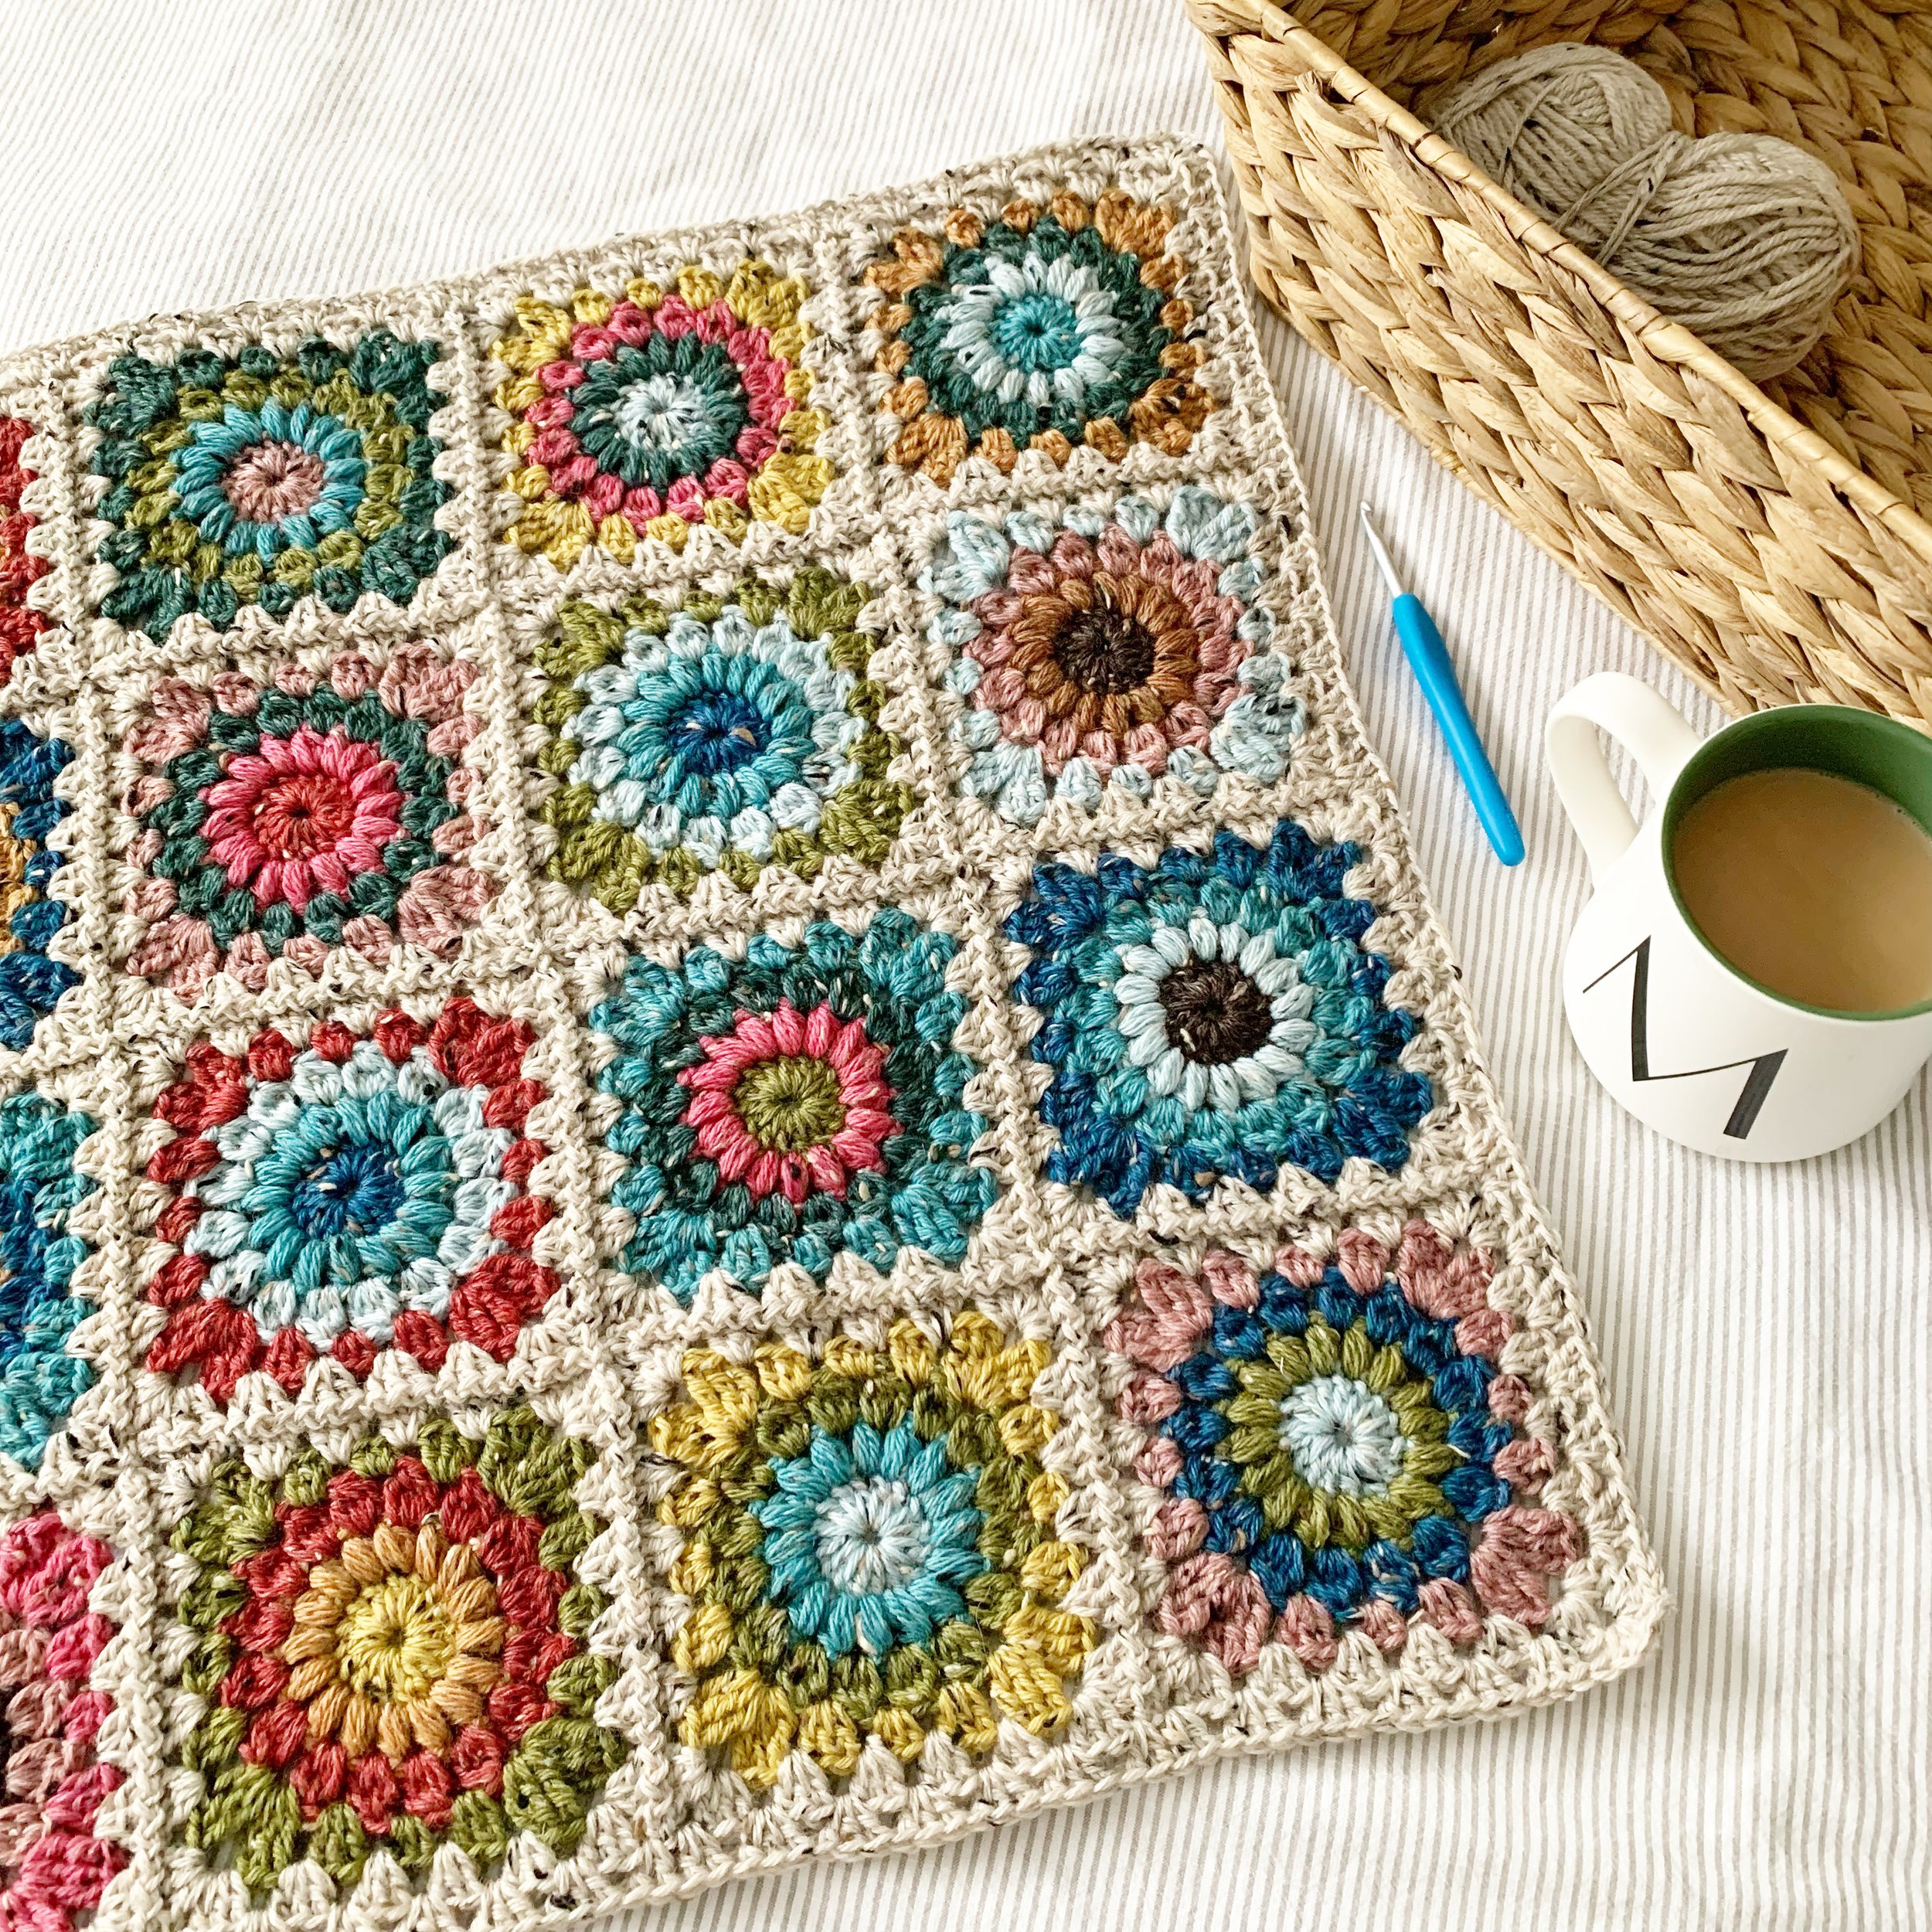
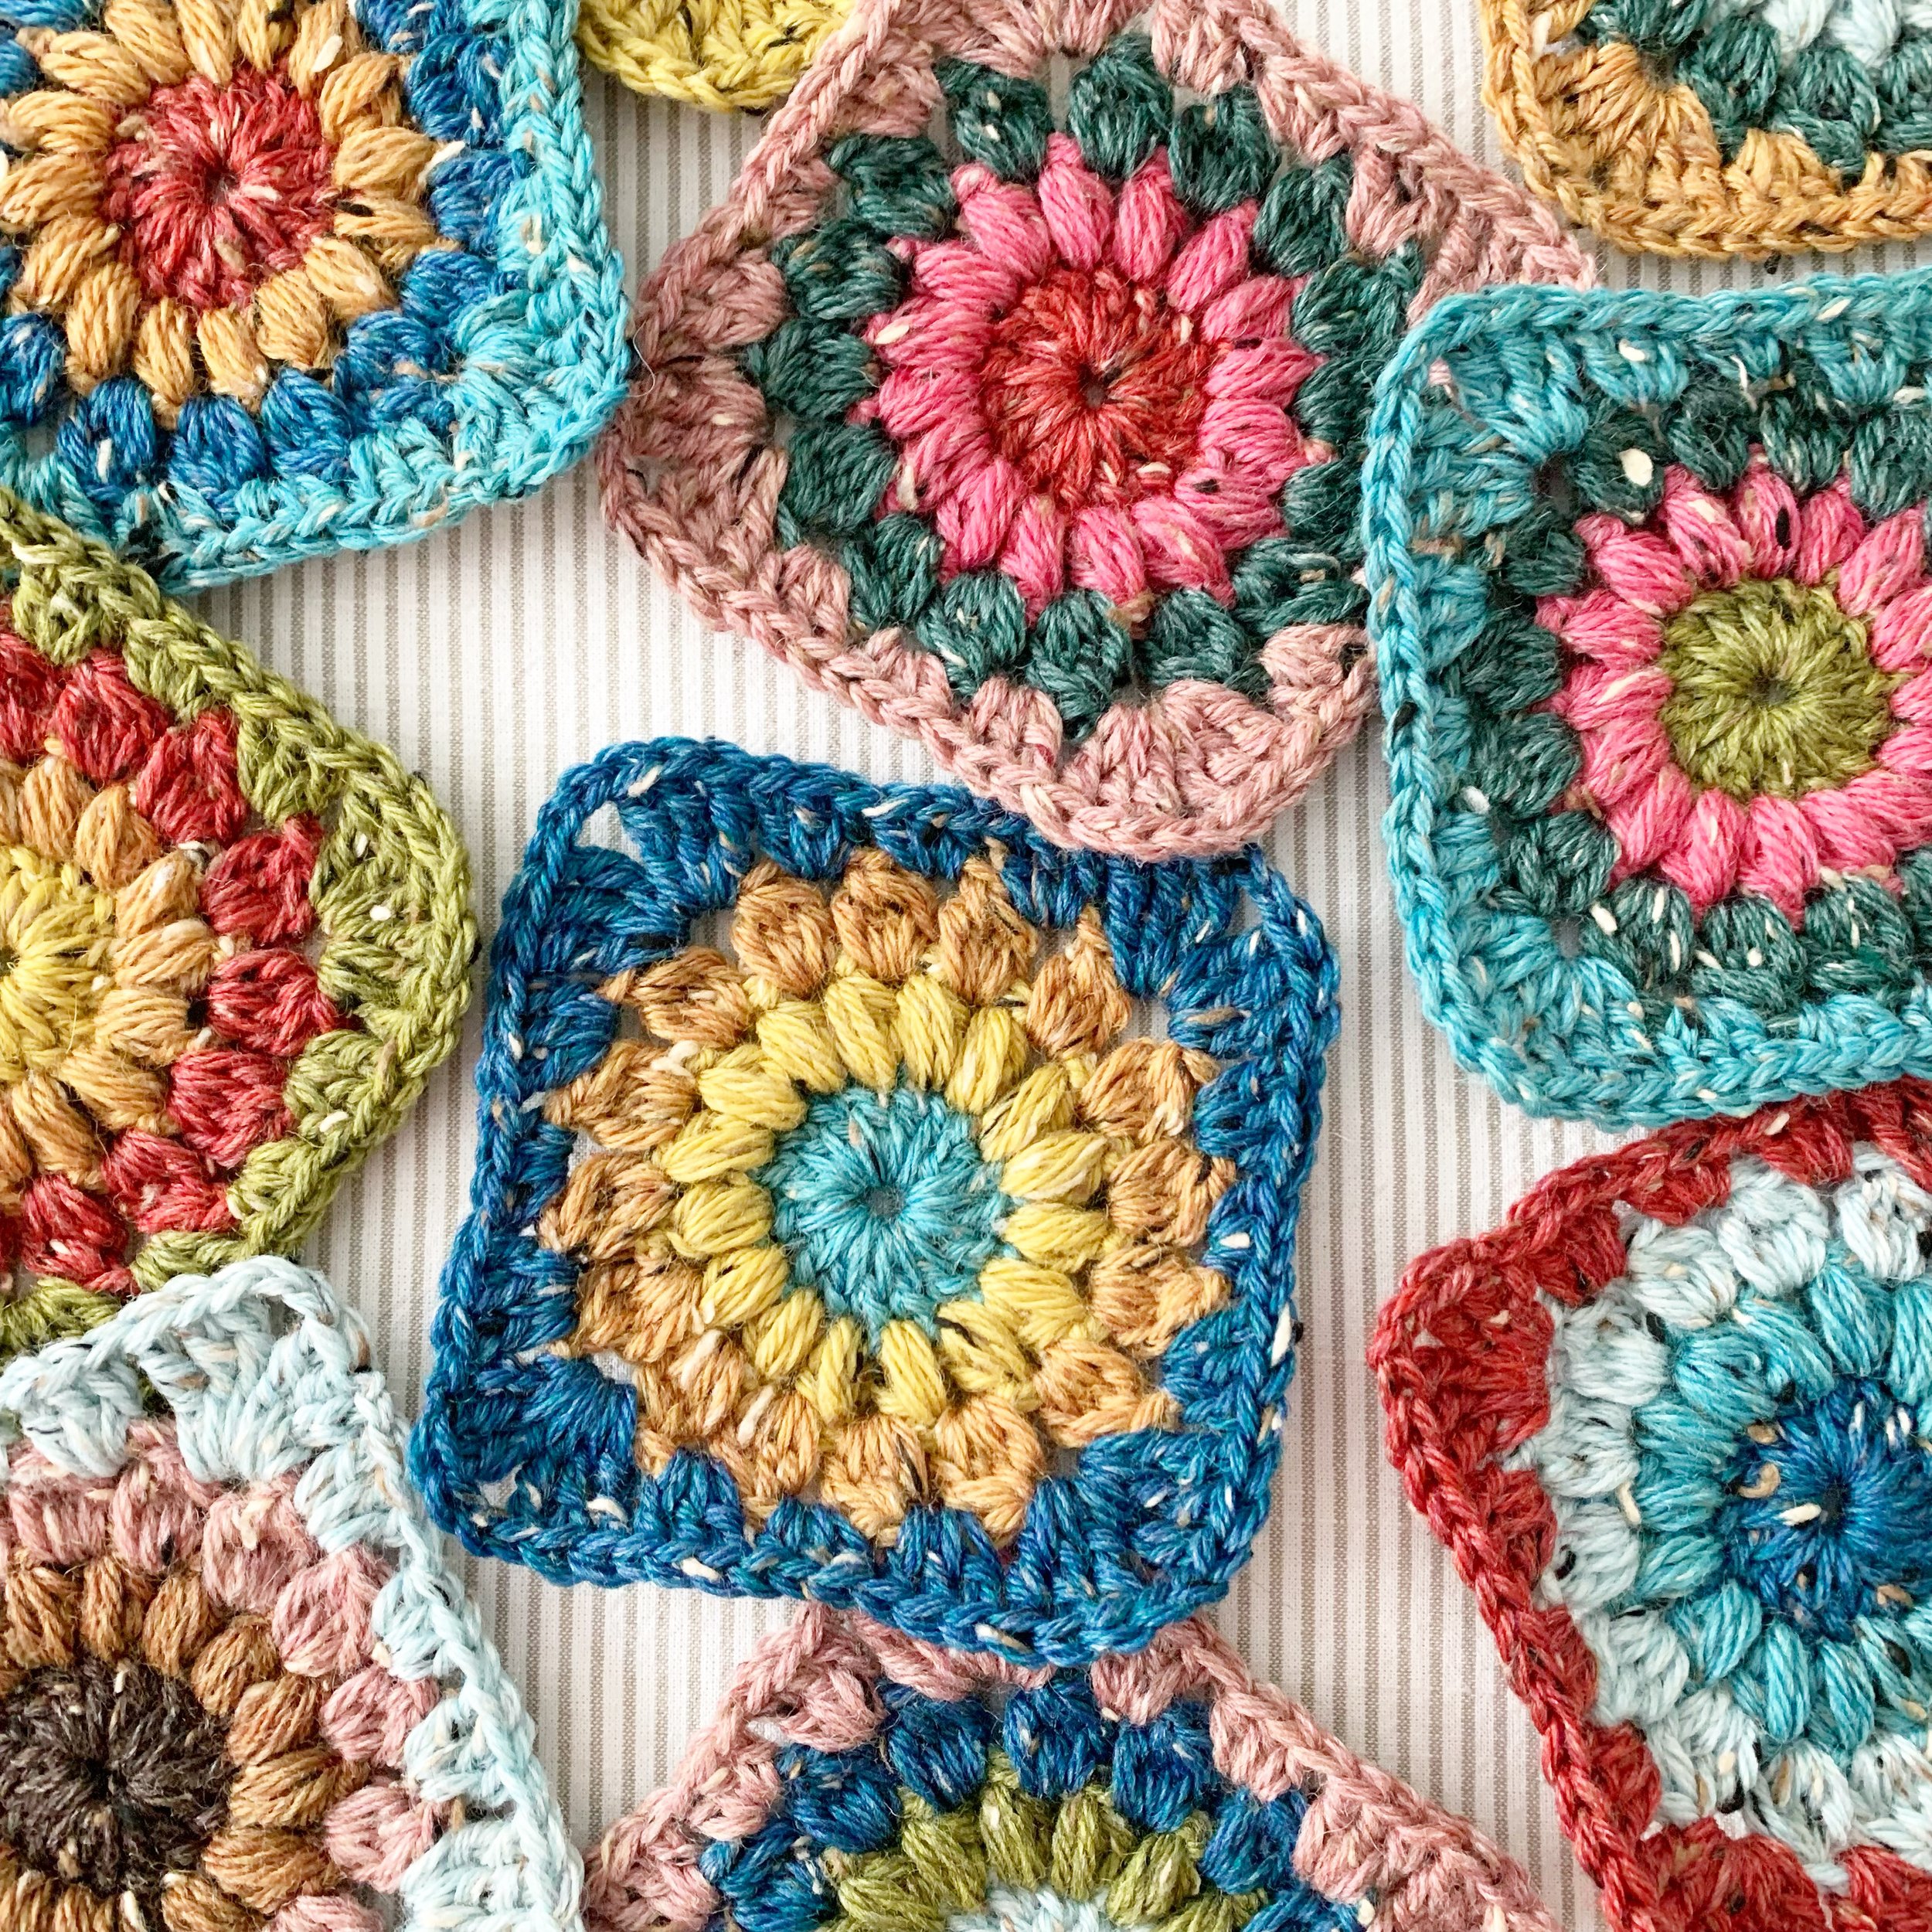
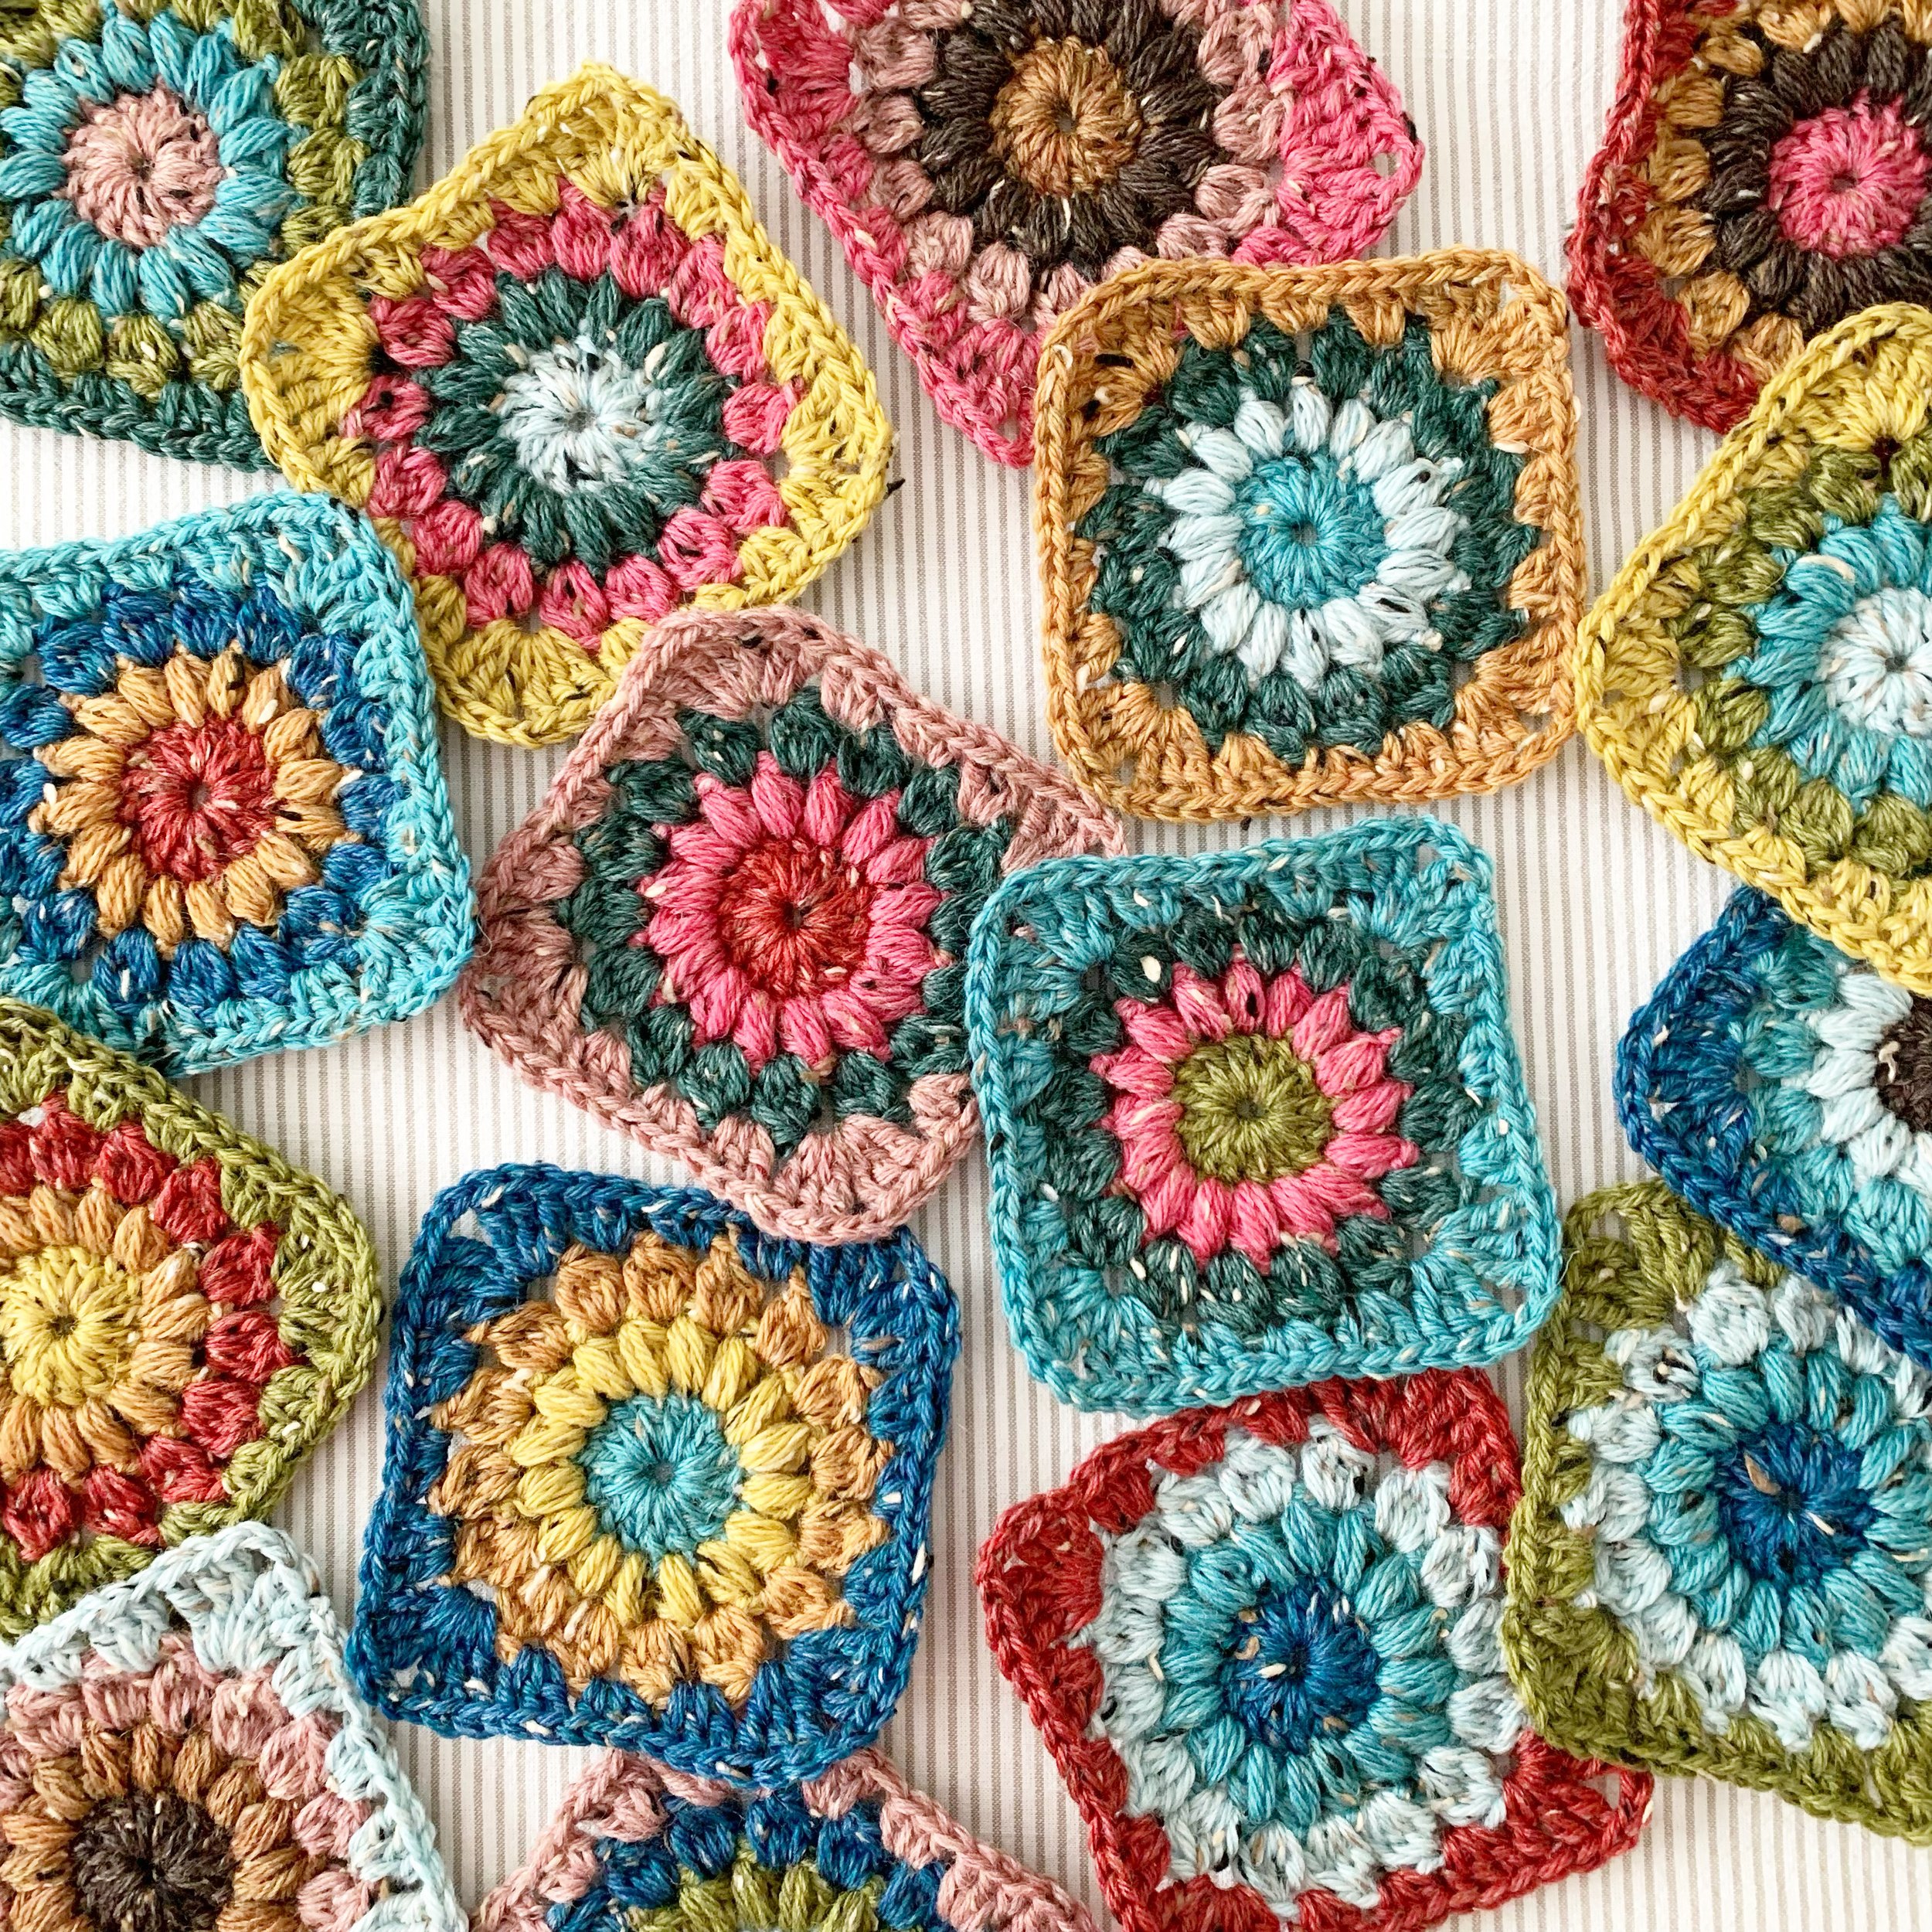
Each sunburst motif consists of 4 rounds and measured approximately 4.75 inches square.
Gauge will affect yarn quantities. If your motifs are larger than 4.75” inches square, you will require more yarn.
If you want to use a larger or smaller hook; please note that your yarn quantities will differ from the pattern.
The pillow panel is very tight-crochet tends to loosen up over time and I like a tight-fitting cover. If it’s too tight for your liking, add another round of granny square stitches on your panel before joining.
If you want to make a smaller pillow- make a 3x3 (total 9 squares) panel for the perfect 14”x14” pillow. Follow the same pattern using a final round of granny stitches around the panel and voila!
Don’t forget to share your makes on Instagram and Facebook! I always love seeing what you’ve all worked up. Tag me on Instagram @nautikrallcrochet or Facebook @nautikrall_crochet

Pattern Graph
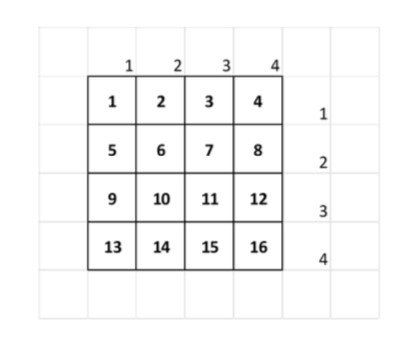
Pillow Panel Dimensions: 4 squares x 4 squares = 16 squares total
*Squares are numbered to coordinate with the colour chart below. Please use this chart for final placement of squares.


Pattern
Sunburst Motif:
Round 1
Using first colour, Ch 5.
Sl st into 5th chain from hook.
Ch 2 (counts as first dc).
Work 15 dc into centre of circle (16 total).
Join with sl st to the top of the first dc (not your chain 2).
Fasten off.
Round 2
Join new colour into top of any st, ch 1.
Puff into same st, ch 1.
Puff and ch 1 into each st around (16 puff sts).
Sl st into the sp between the first two puff sts (NOT into the top of the first puff st).
Fasten off.
Round 3
Join new colour into any ch 1 sp, ch 2.
Into same sp work a 4 dc cl st, ch 2.
Work a 4 dc cl st followed by a ch 2 into each ch 1 sp around (16 cluster sts).
Sl st into the ch 2 sp between the first two clusters (NOT into the top of the cl st).
Fasten off.

Round 4
Join new colour into any ch 2 sp.
Ch 3 (counts as first tr).
Into the same sp work 2 tr, ch 2, 3 tr (completes 1st corner of square).
Work 3 dc into the next ch sp.
Work 3 hdc into the next ch sp.
Work 3 dc into the next ch sp.
Into the next ch sp work 3tr, ch 2, 3 tr (2nd corner).
Work 3 dc into the next ch sp.
Work 3 hdc into the next ch sp.
Work 3 dc into the next ch sp.
Into the next ch sp work 3tr, ch 2, 3 tr (3rd corner).
Work 3 dc into the next ch sp.
Work 3 hdc into the next ch sp.
Work 3 dc into the next ch sp.
Into the next ch sp work 3tr, ch 2, 3 tr (4th corner).
Work 3 dc into the next ch sp.
Work 3 hdc into the next ch sp.
Work 3 dc into the next ch sp.
Sl st to the top of your first tr (not the ch 3).
Fasten off.
**Please see video tutorial below for how to crochet the sunburst motif:
Assembling Pillow Panel (Continuous Join as you go)
Lay out all squares in the arrangement from the colour graph above.
Starting from the top right-hand corner join squares across the rows.
Example: First row will be joined from square number 4 across to square 1. Second row will be joined from number 8 to 5 etc.
Following along with the video tutorial, crocheting squares together until panel is complete.
Once you’re back to the start of the panel in the top right-hand corner.
Sl st into top of next st, sl st into corner, ch 2.
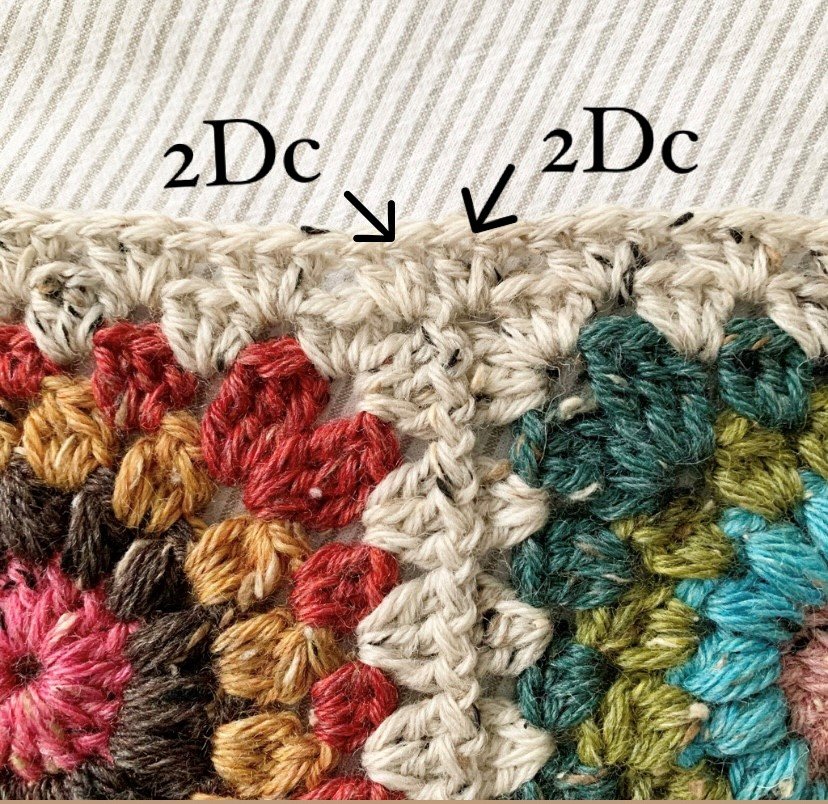
Work 2 dc, ch 2, 3 dc into the corner and work 3 dc granny shells all the way around panel.
Where 2 squares join, work 2 dc in one corner, 2 dc in the next corner (see image below).
In the corners of the panel work 3 dc, ch 2, 3 dc.
Join with a sl st into top of first dc (not the ch 2).
Fasten off, weave in all ends.
**Please see video tutorial below for how to crochet the continuous join as you go (note-this tutorial was for the Hygge Burst Blanket tutorial but the method is the exact same for joining your pillow squares together to form a panel):
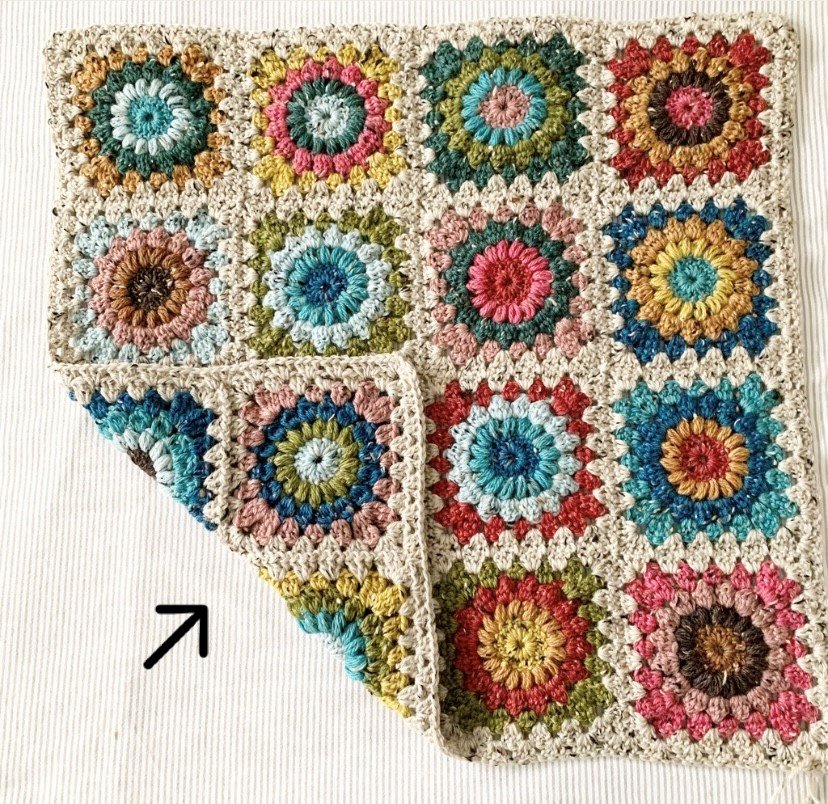
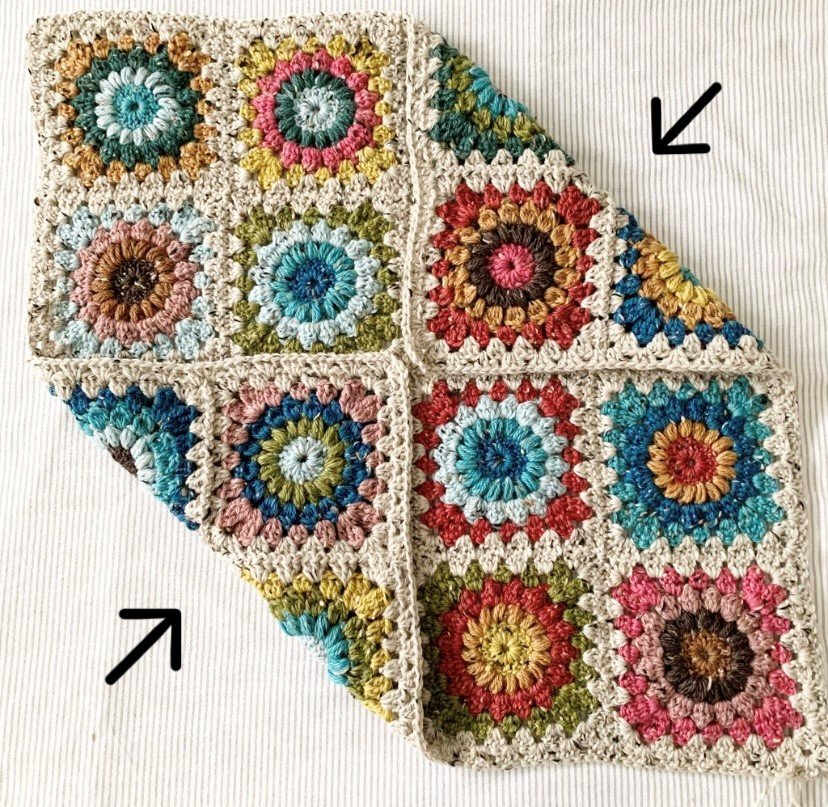
Assembling Finished Pillow Cover
Place pillow cover down with wrong side up.
Fold corners of pillow cover into the centre; seam together using zig zag sl st.
On the final seam, remember to leave enough room to stuff your pillow into the cover before seaming all the way shut.
Fasten off, weave in all ends.


**Please see video tutorial below for how to crochet the zig zag slip stitch and assemble your pillow cover:
~ The End ~
The pattern, the photographs and video tutorials in this document are the property of Nautikrall Crochet. You may sell items you make from this pattern; but may not sell, reproduce, or distribute this pattern, in whole or in part, as your own.
Copyright © 2022 Nautikrall Crochet – All right reserved.
