Autumn Sunflower Pillow Pattern (Free)


This post contains affiliate links. Affiliate links cost you nothing, but when purchasing through these links you help me earn a small commission. This supports me and my family and my continued efforts to bring you free patterns.
Intro:
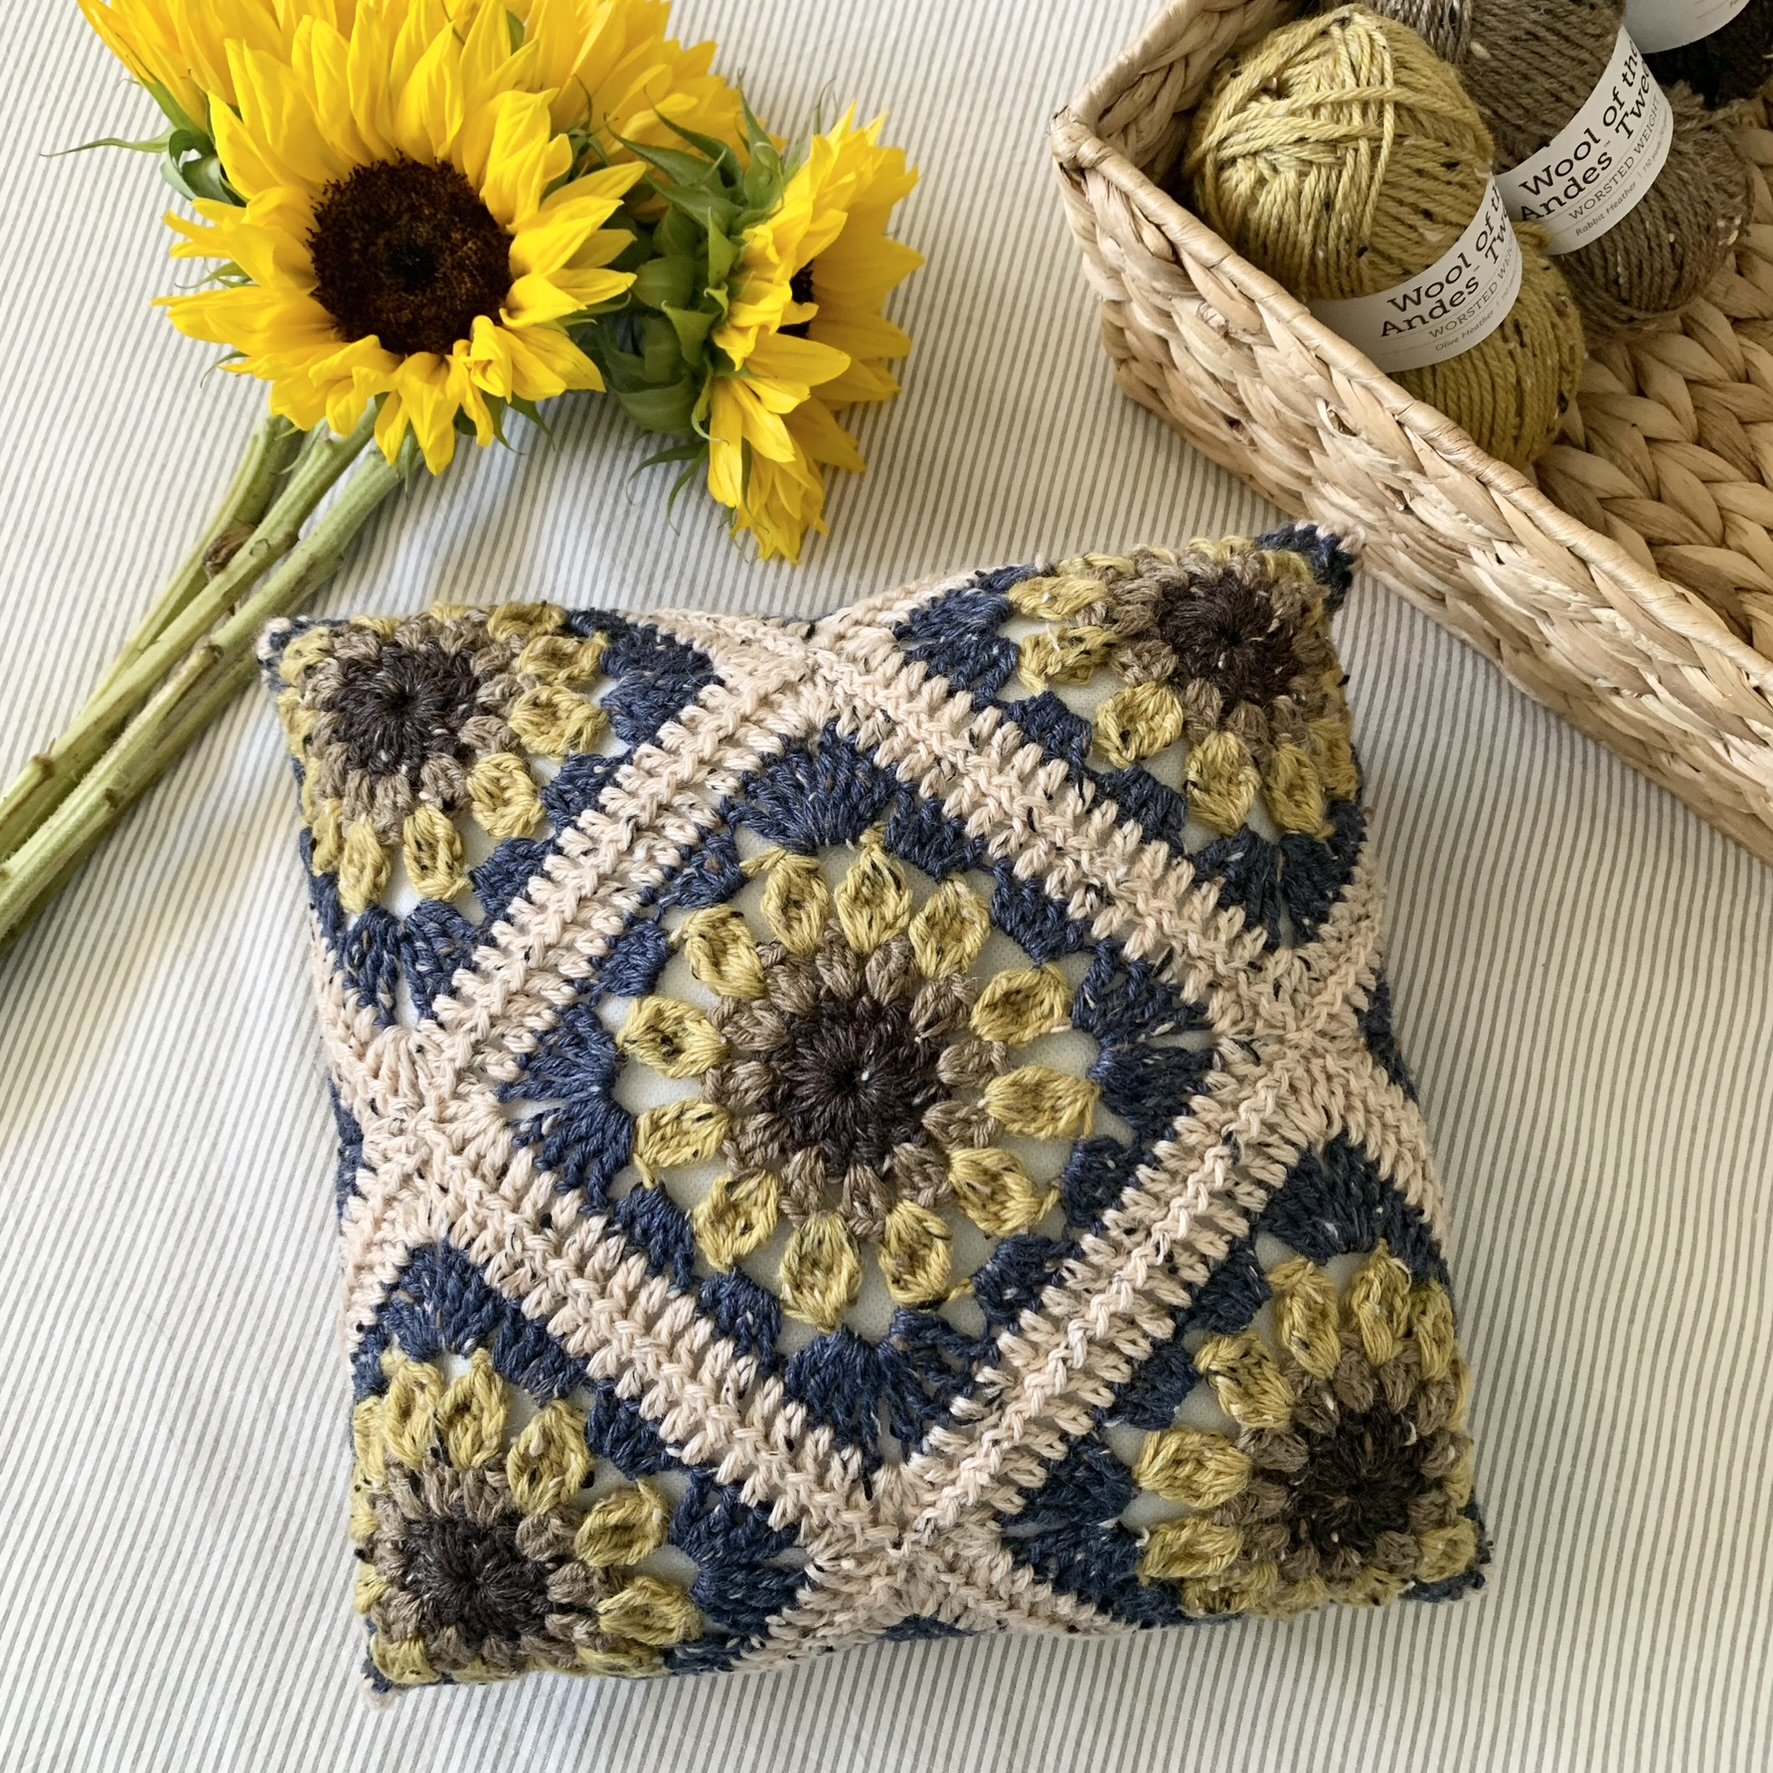
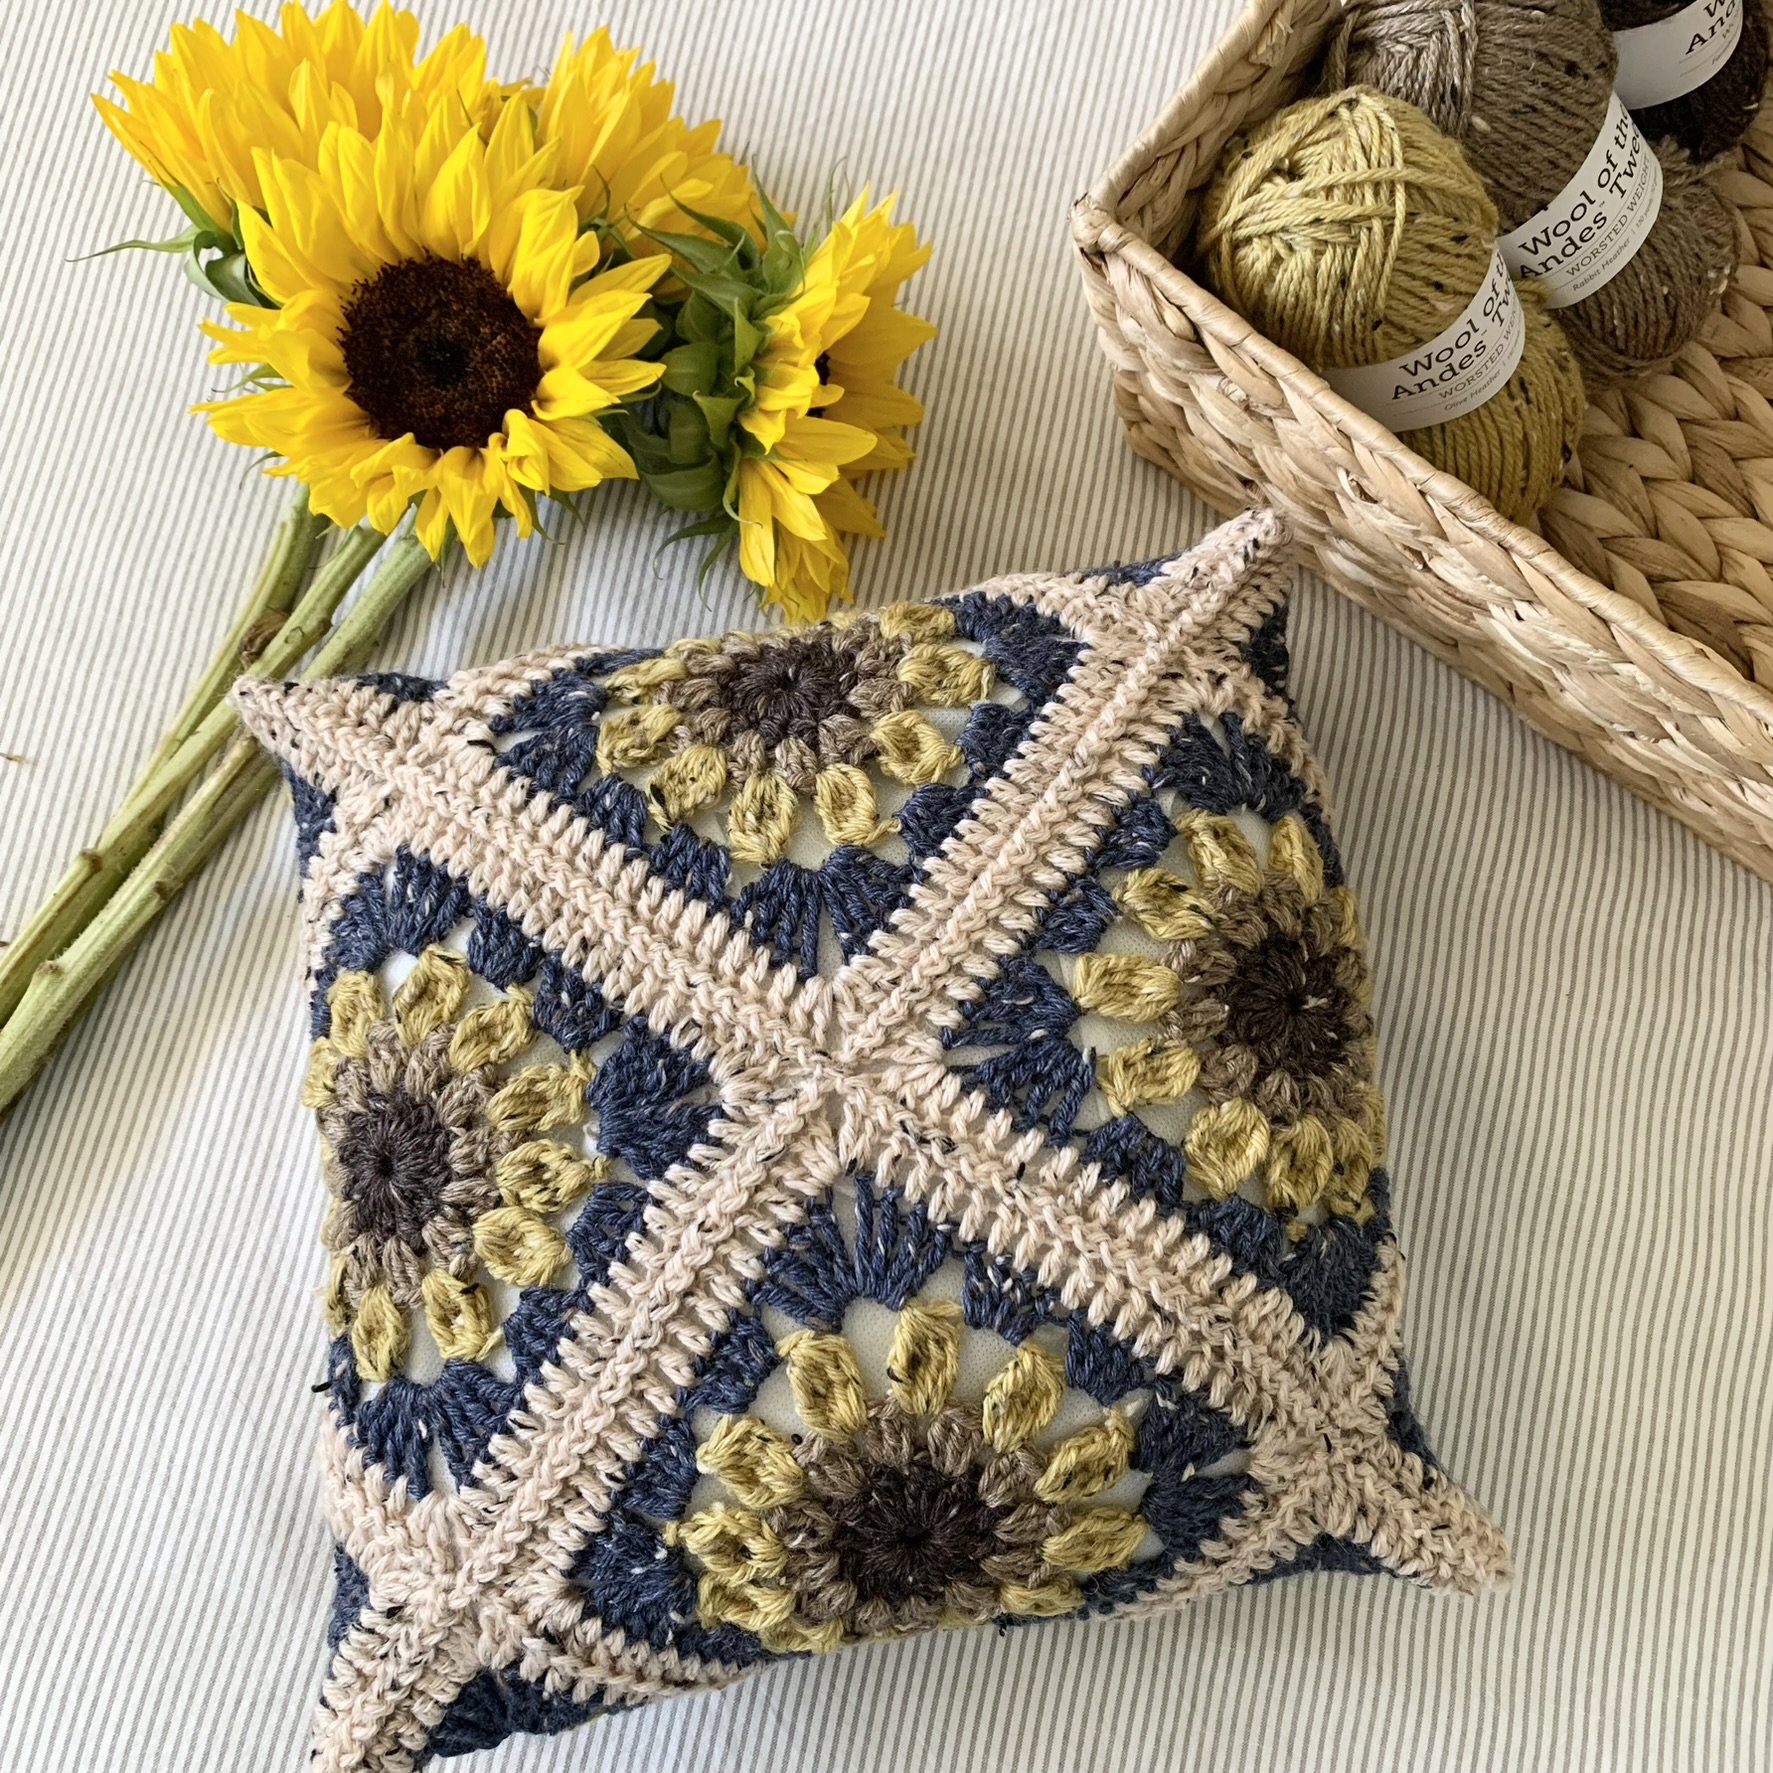
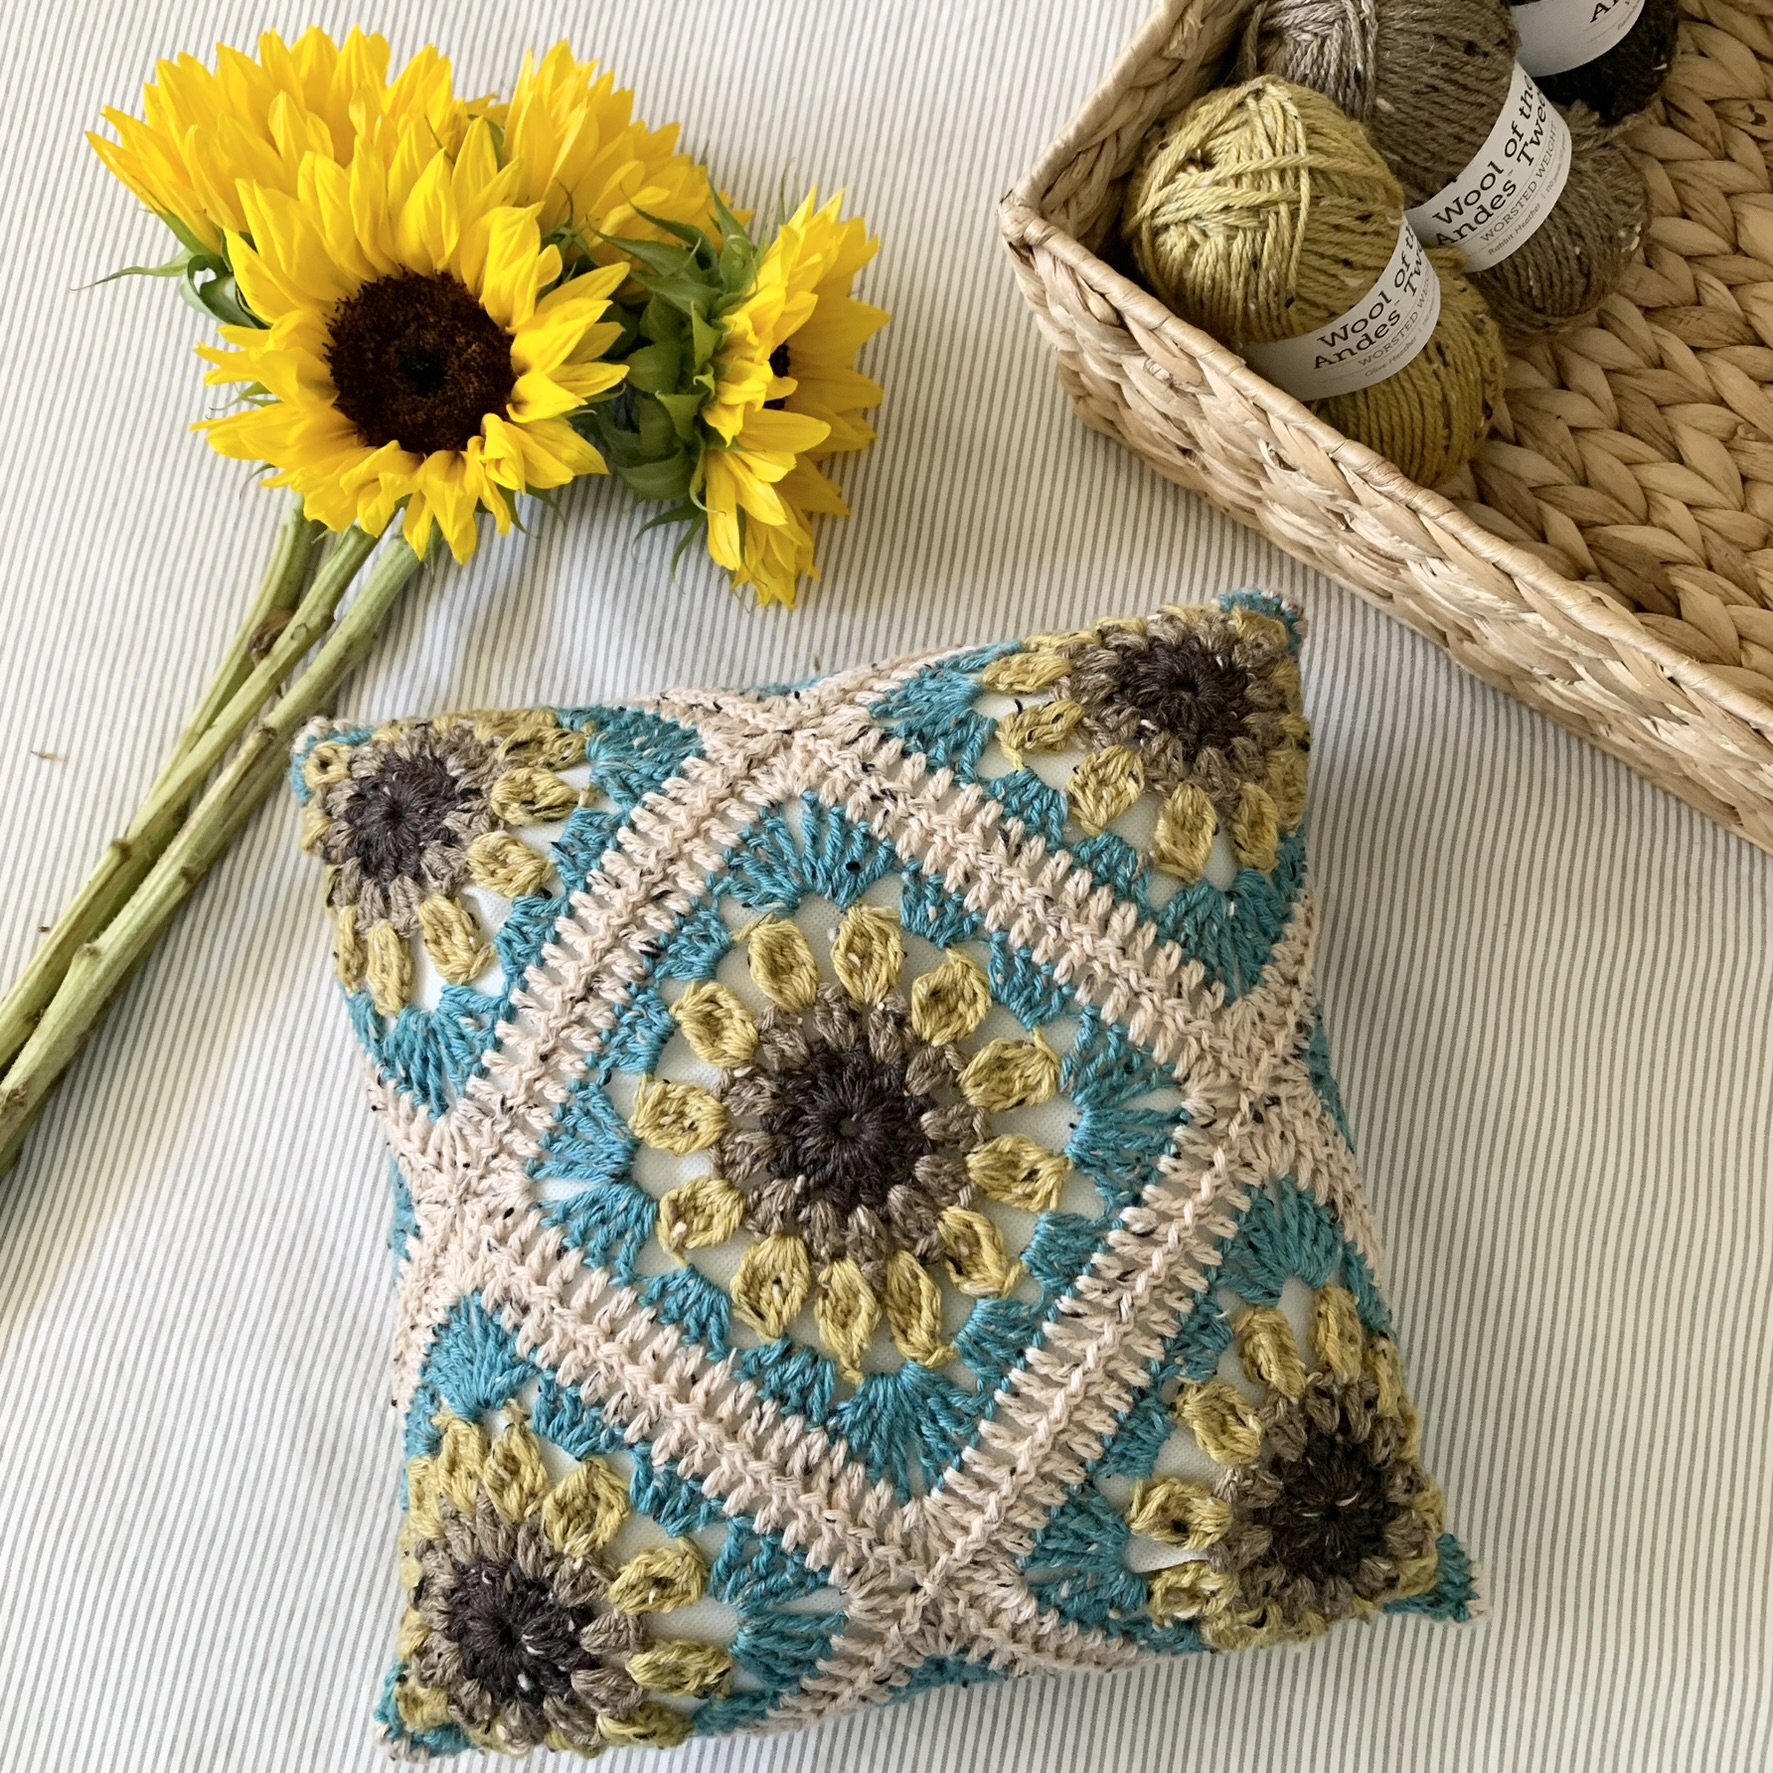
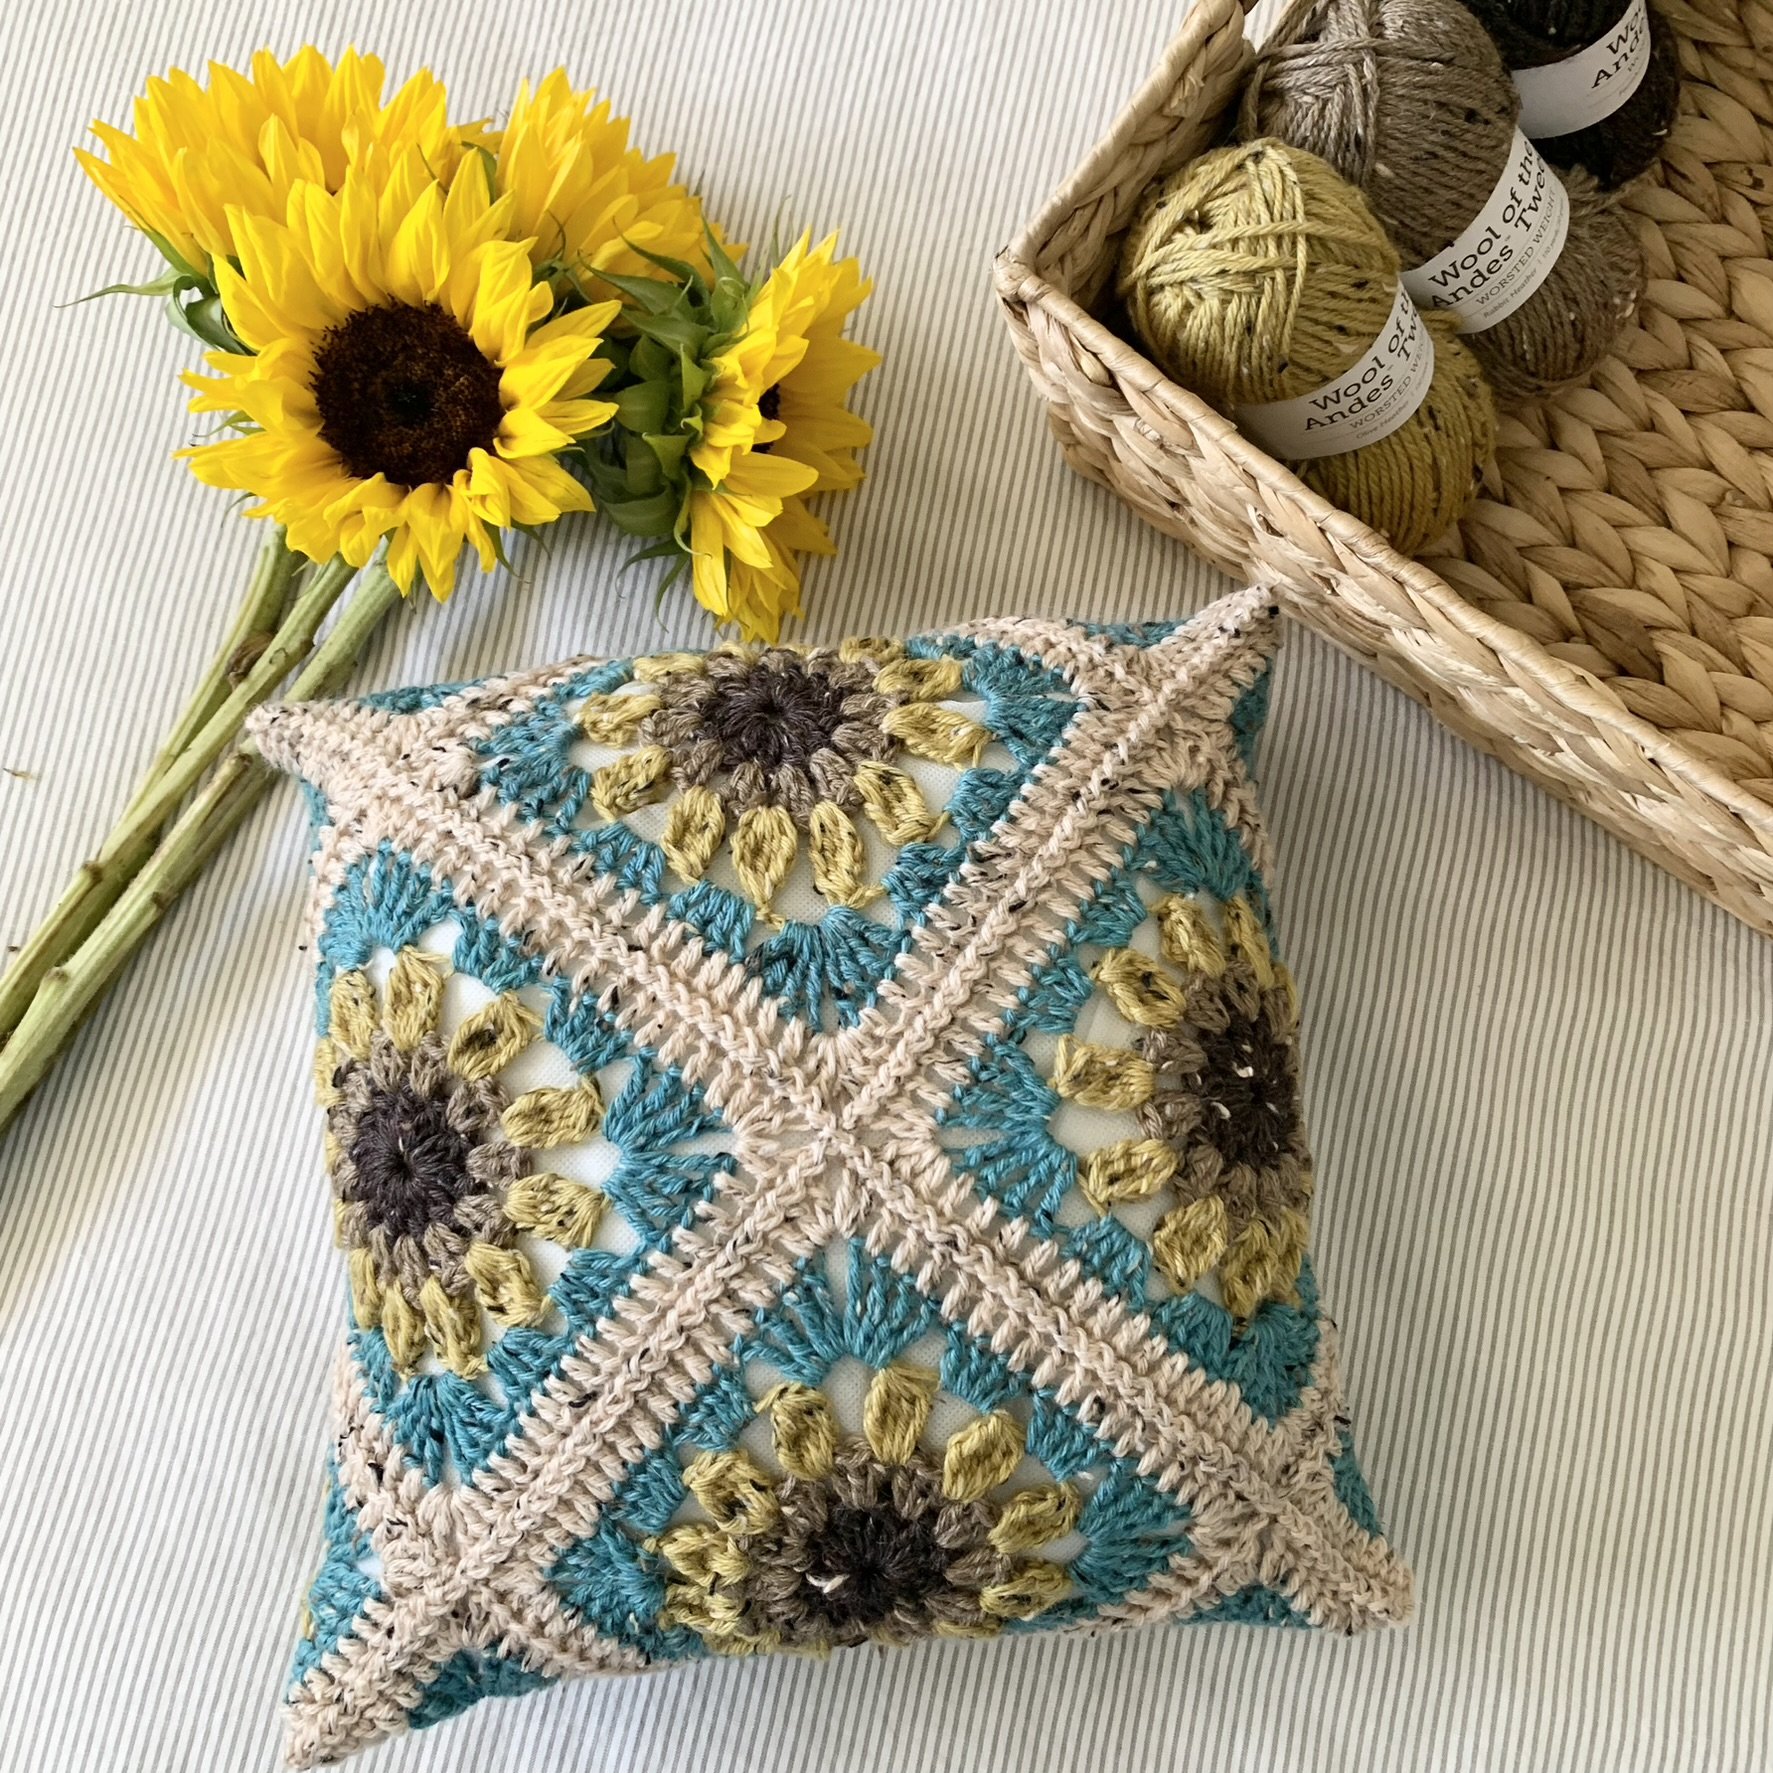
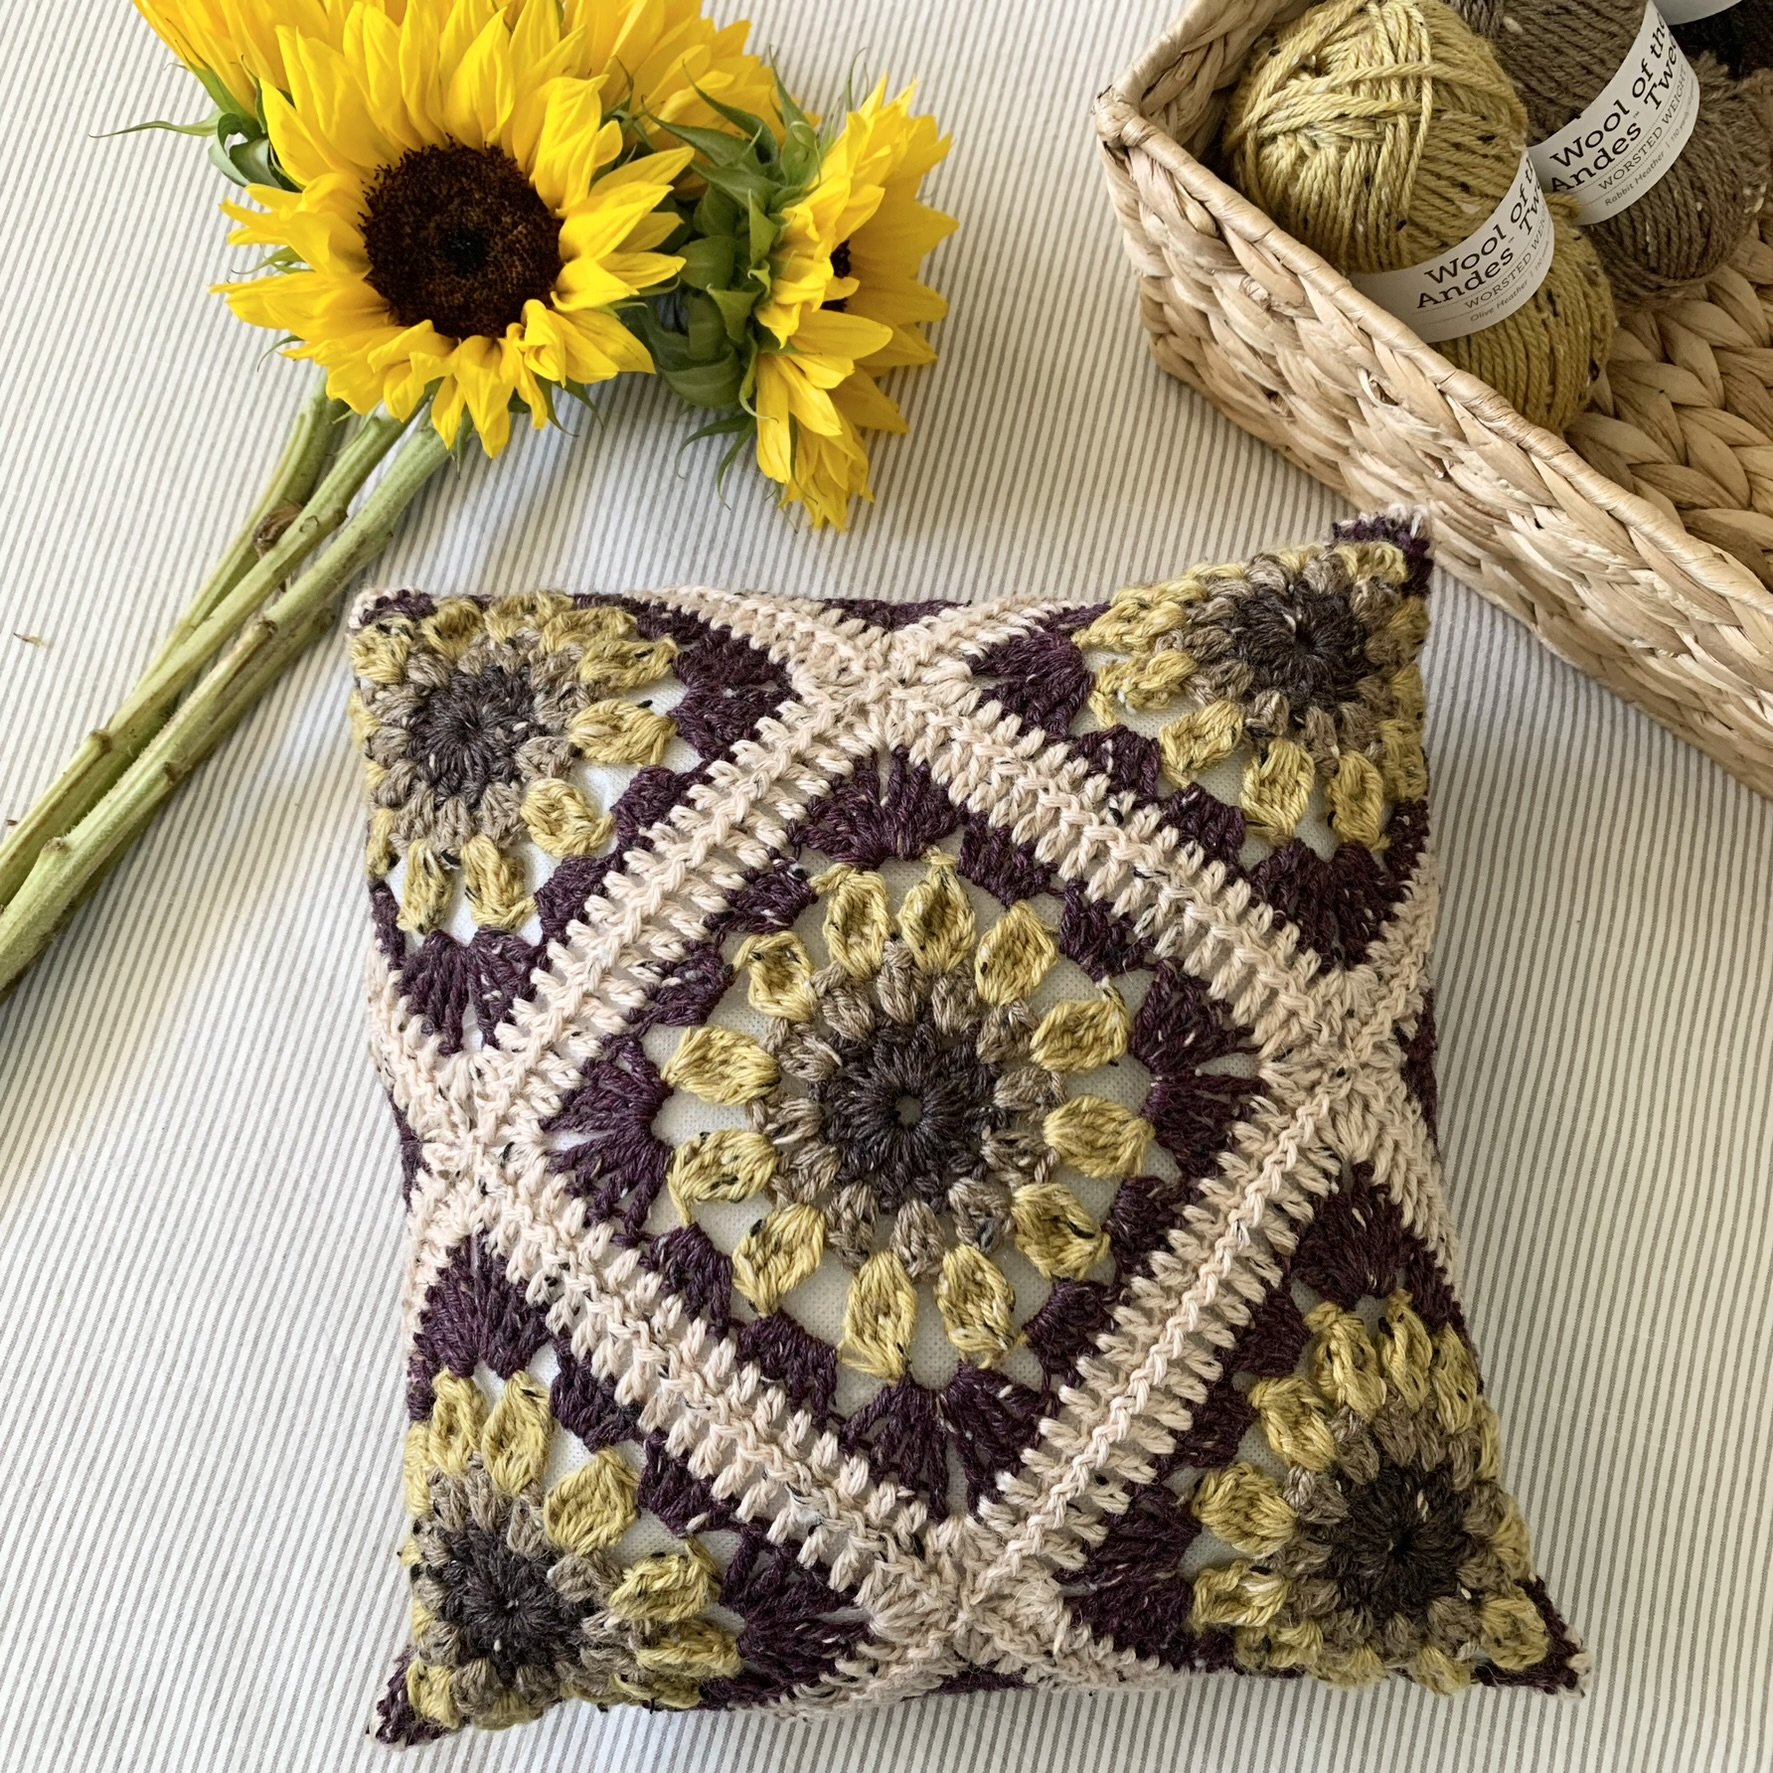
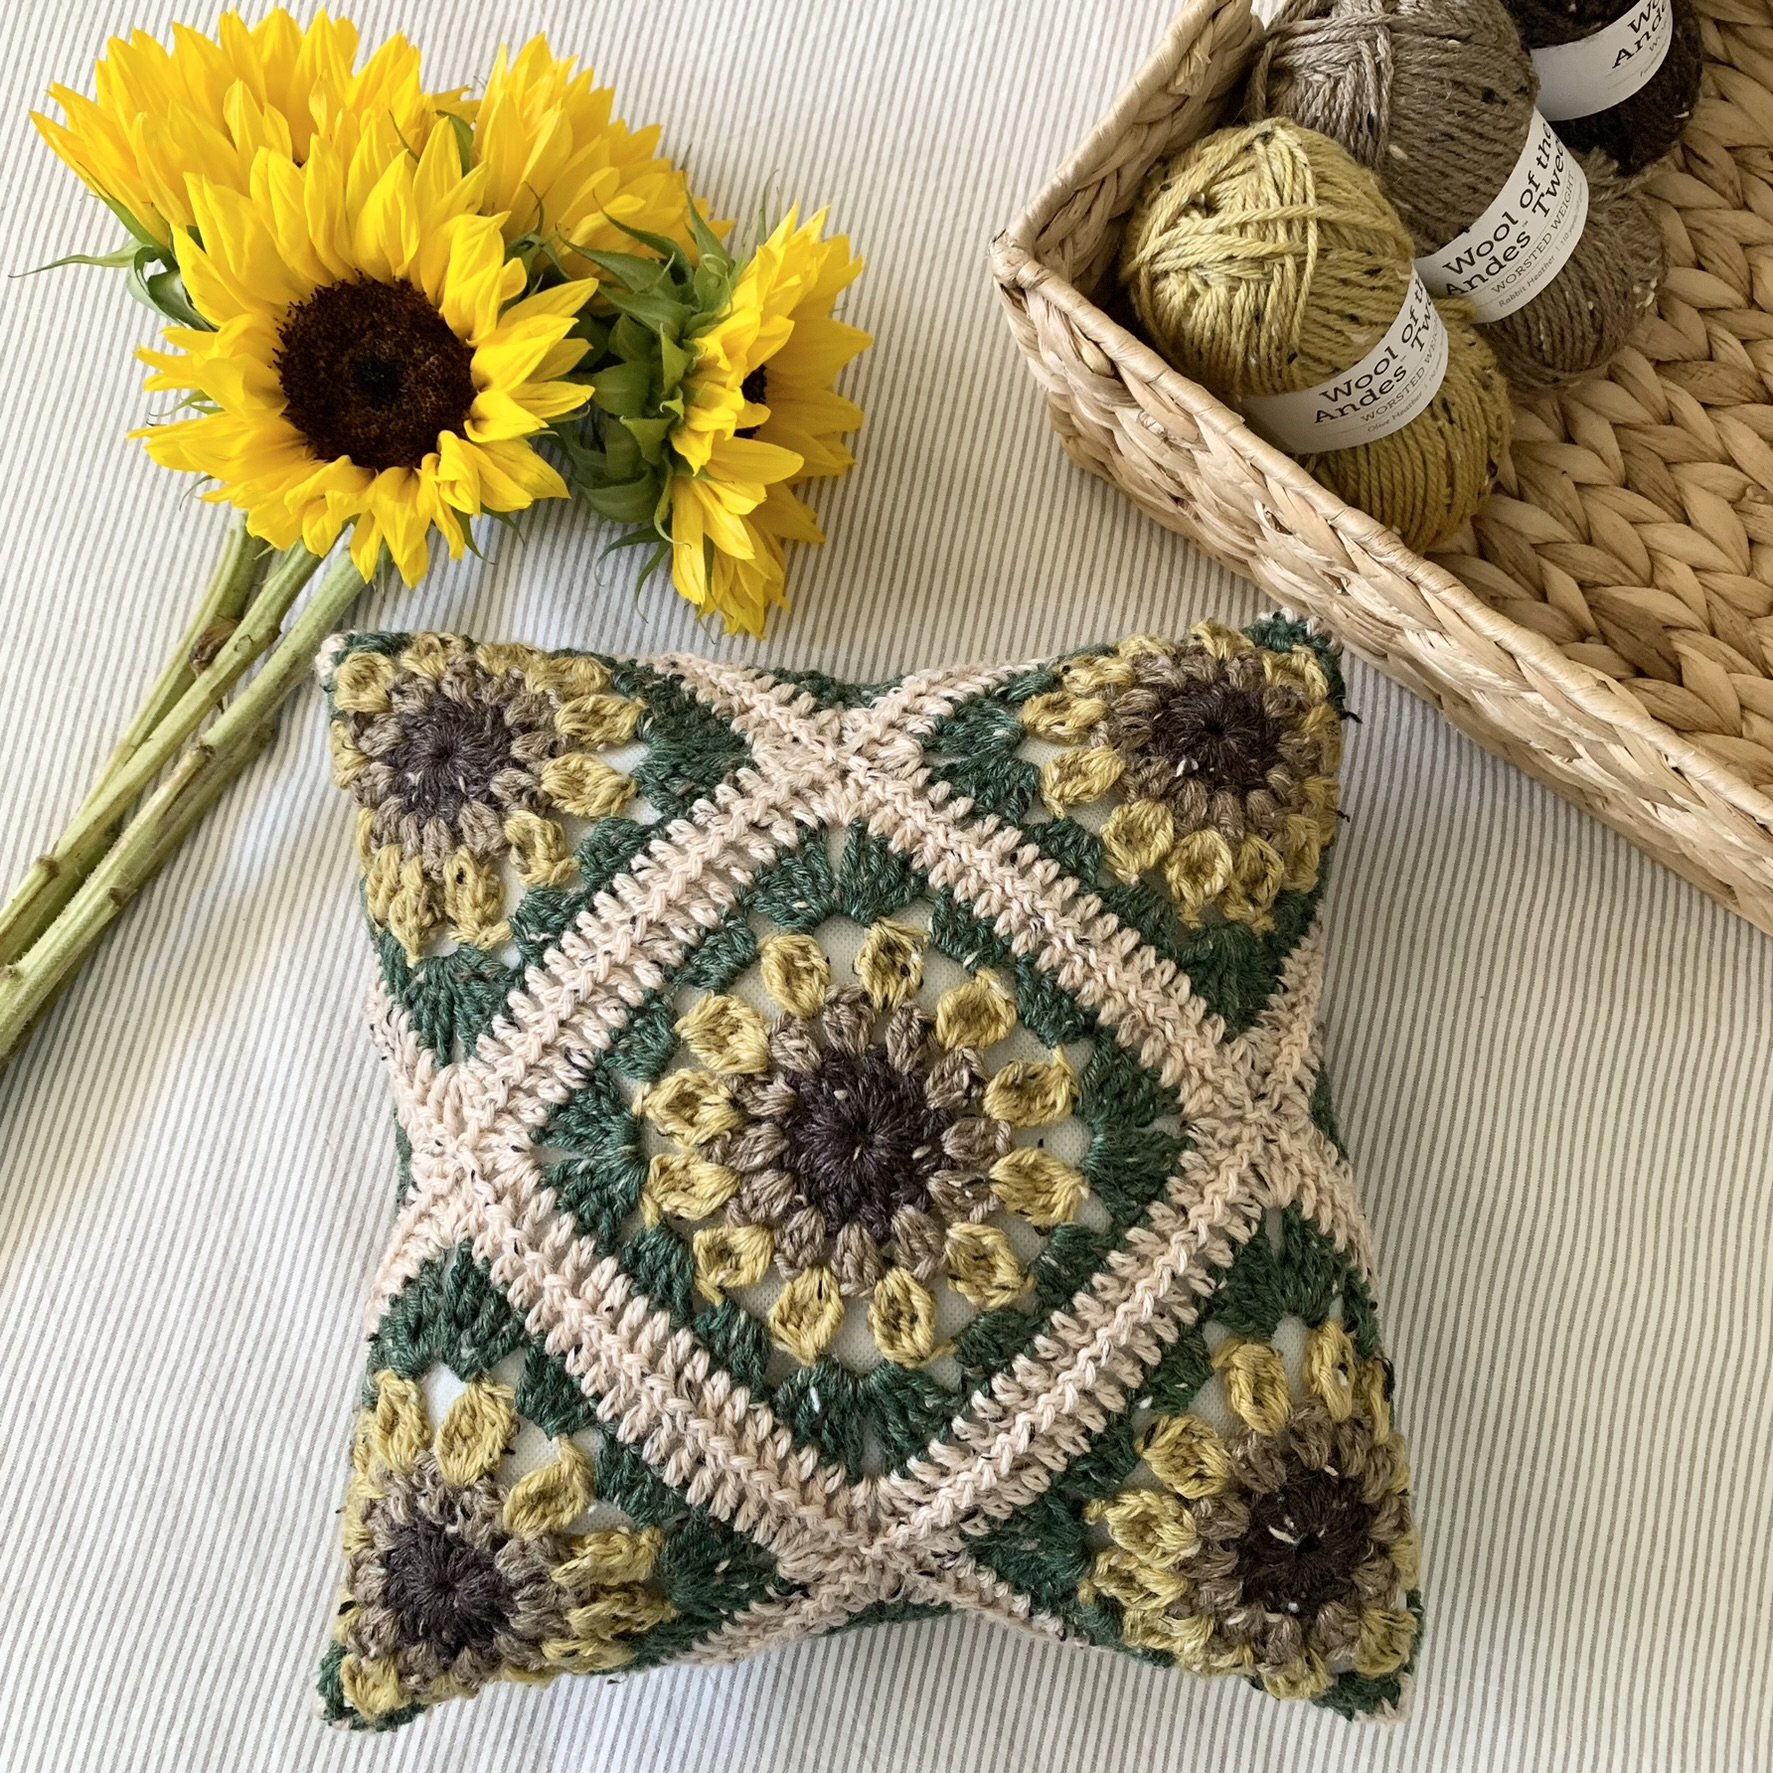
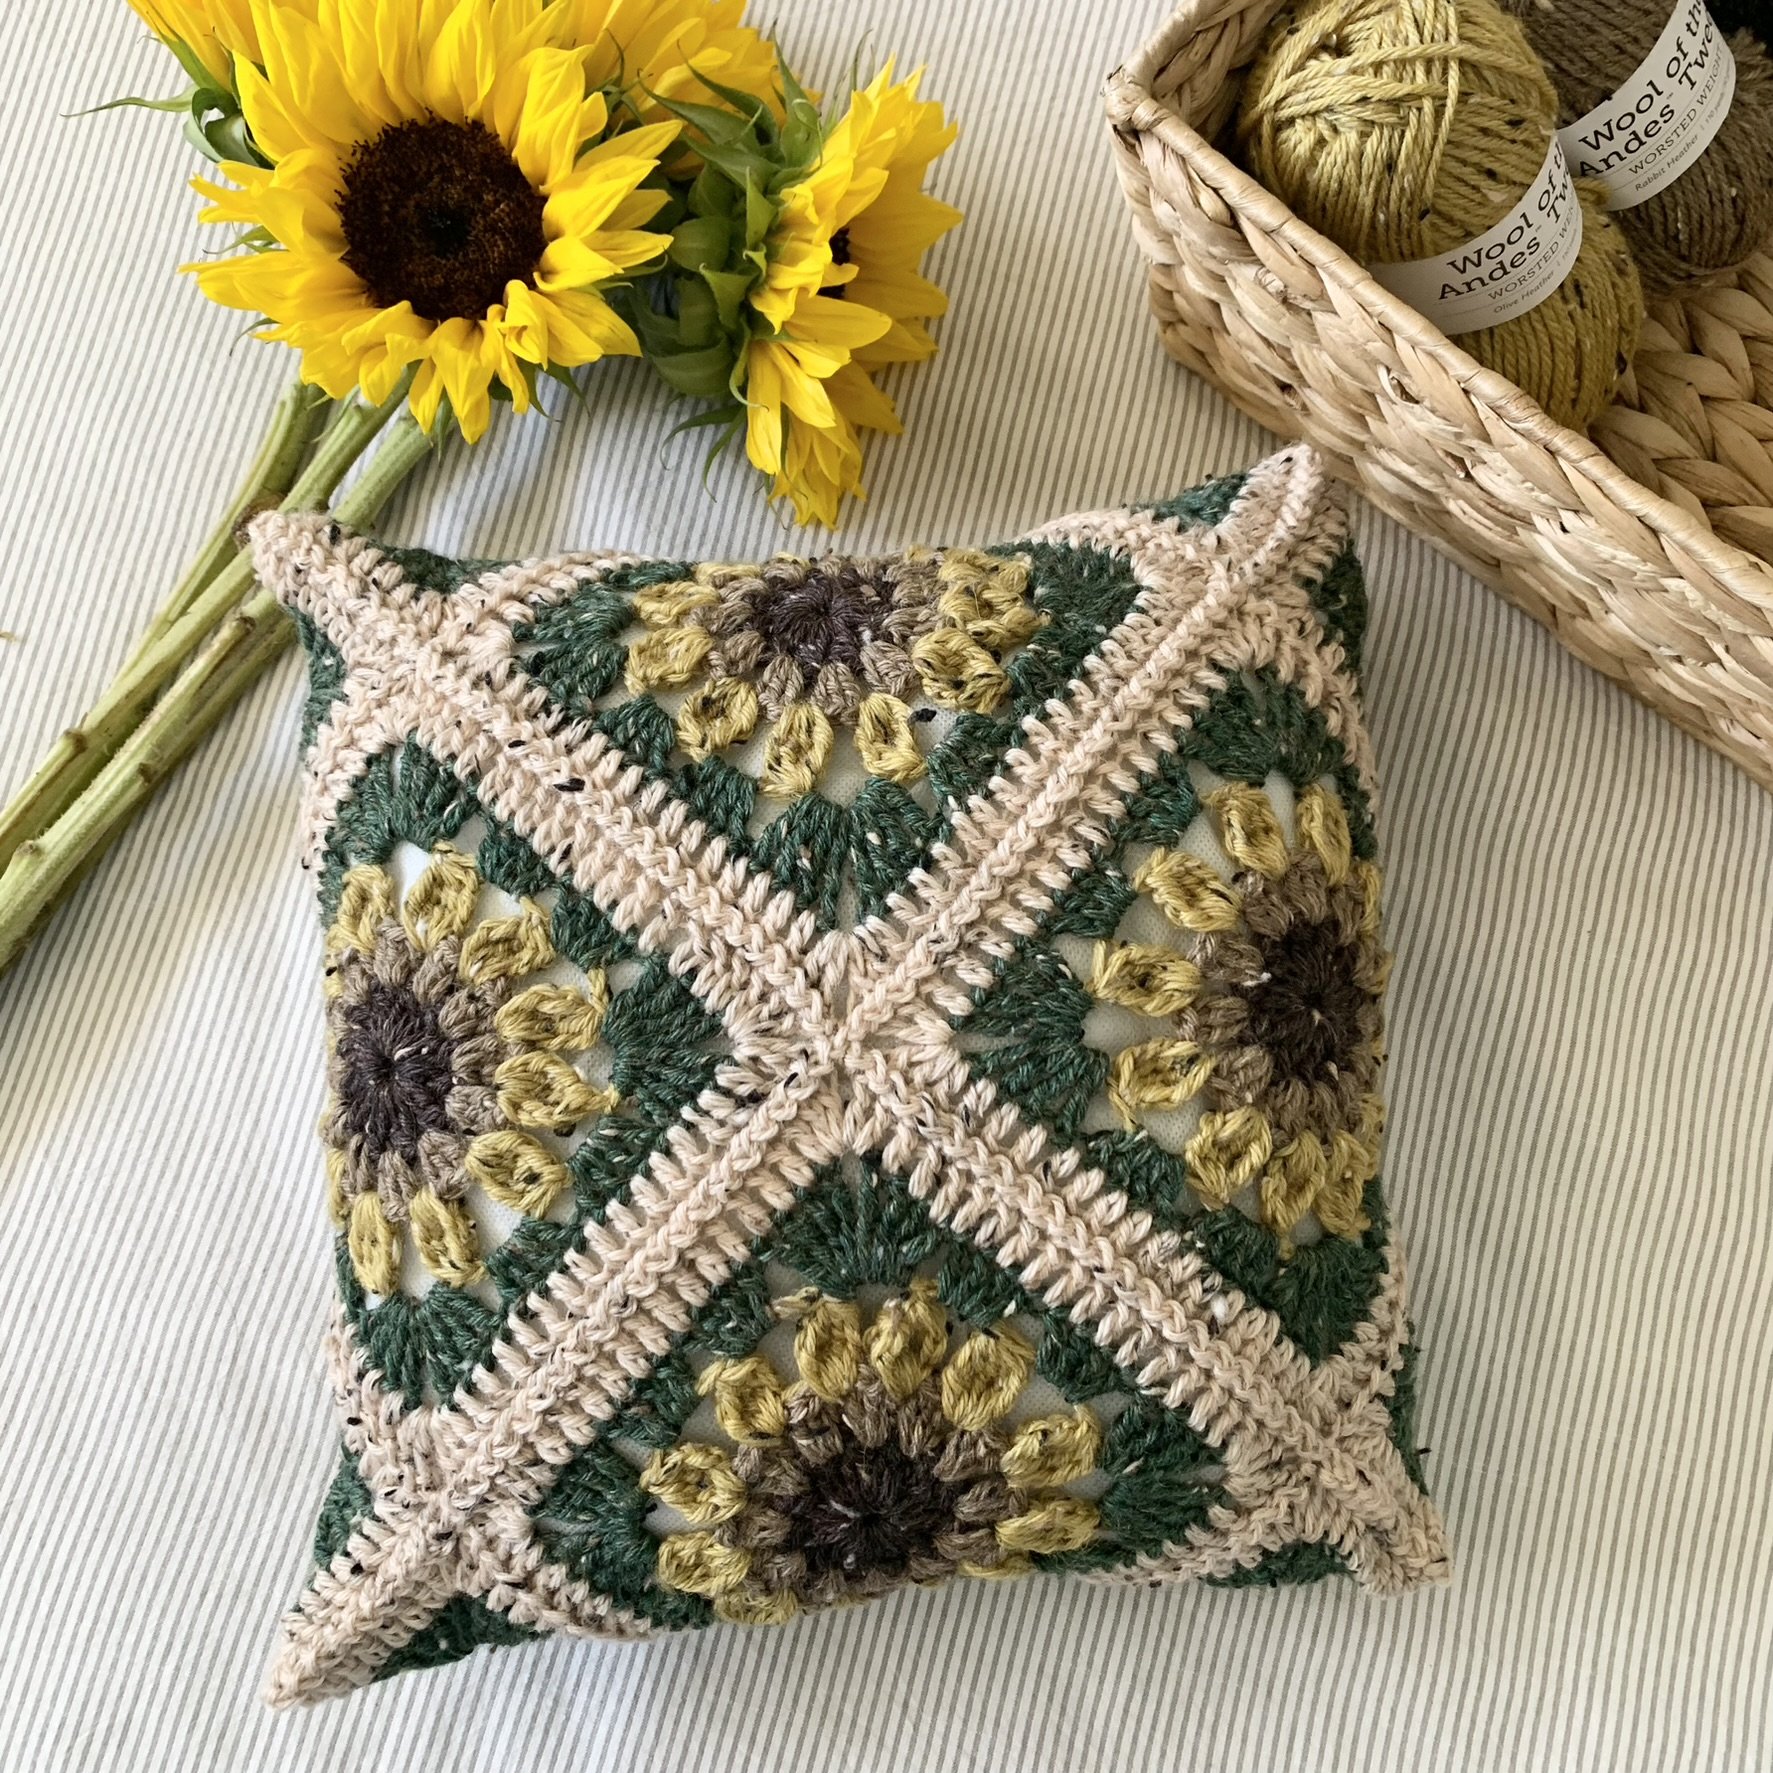
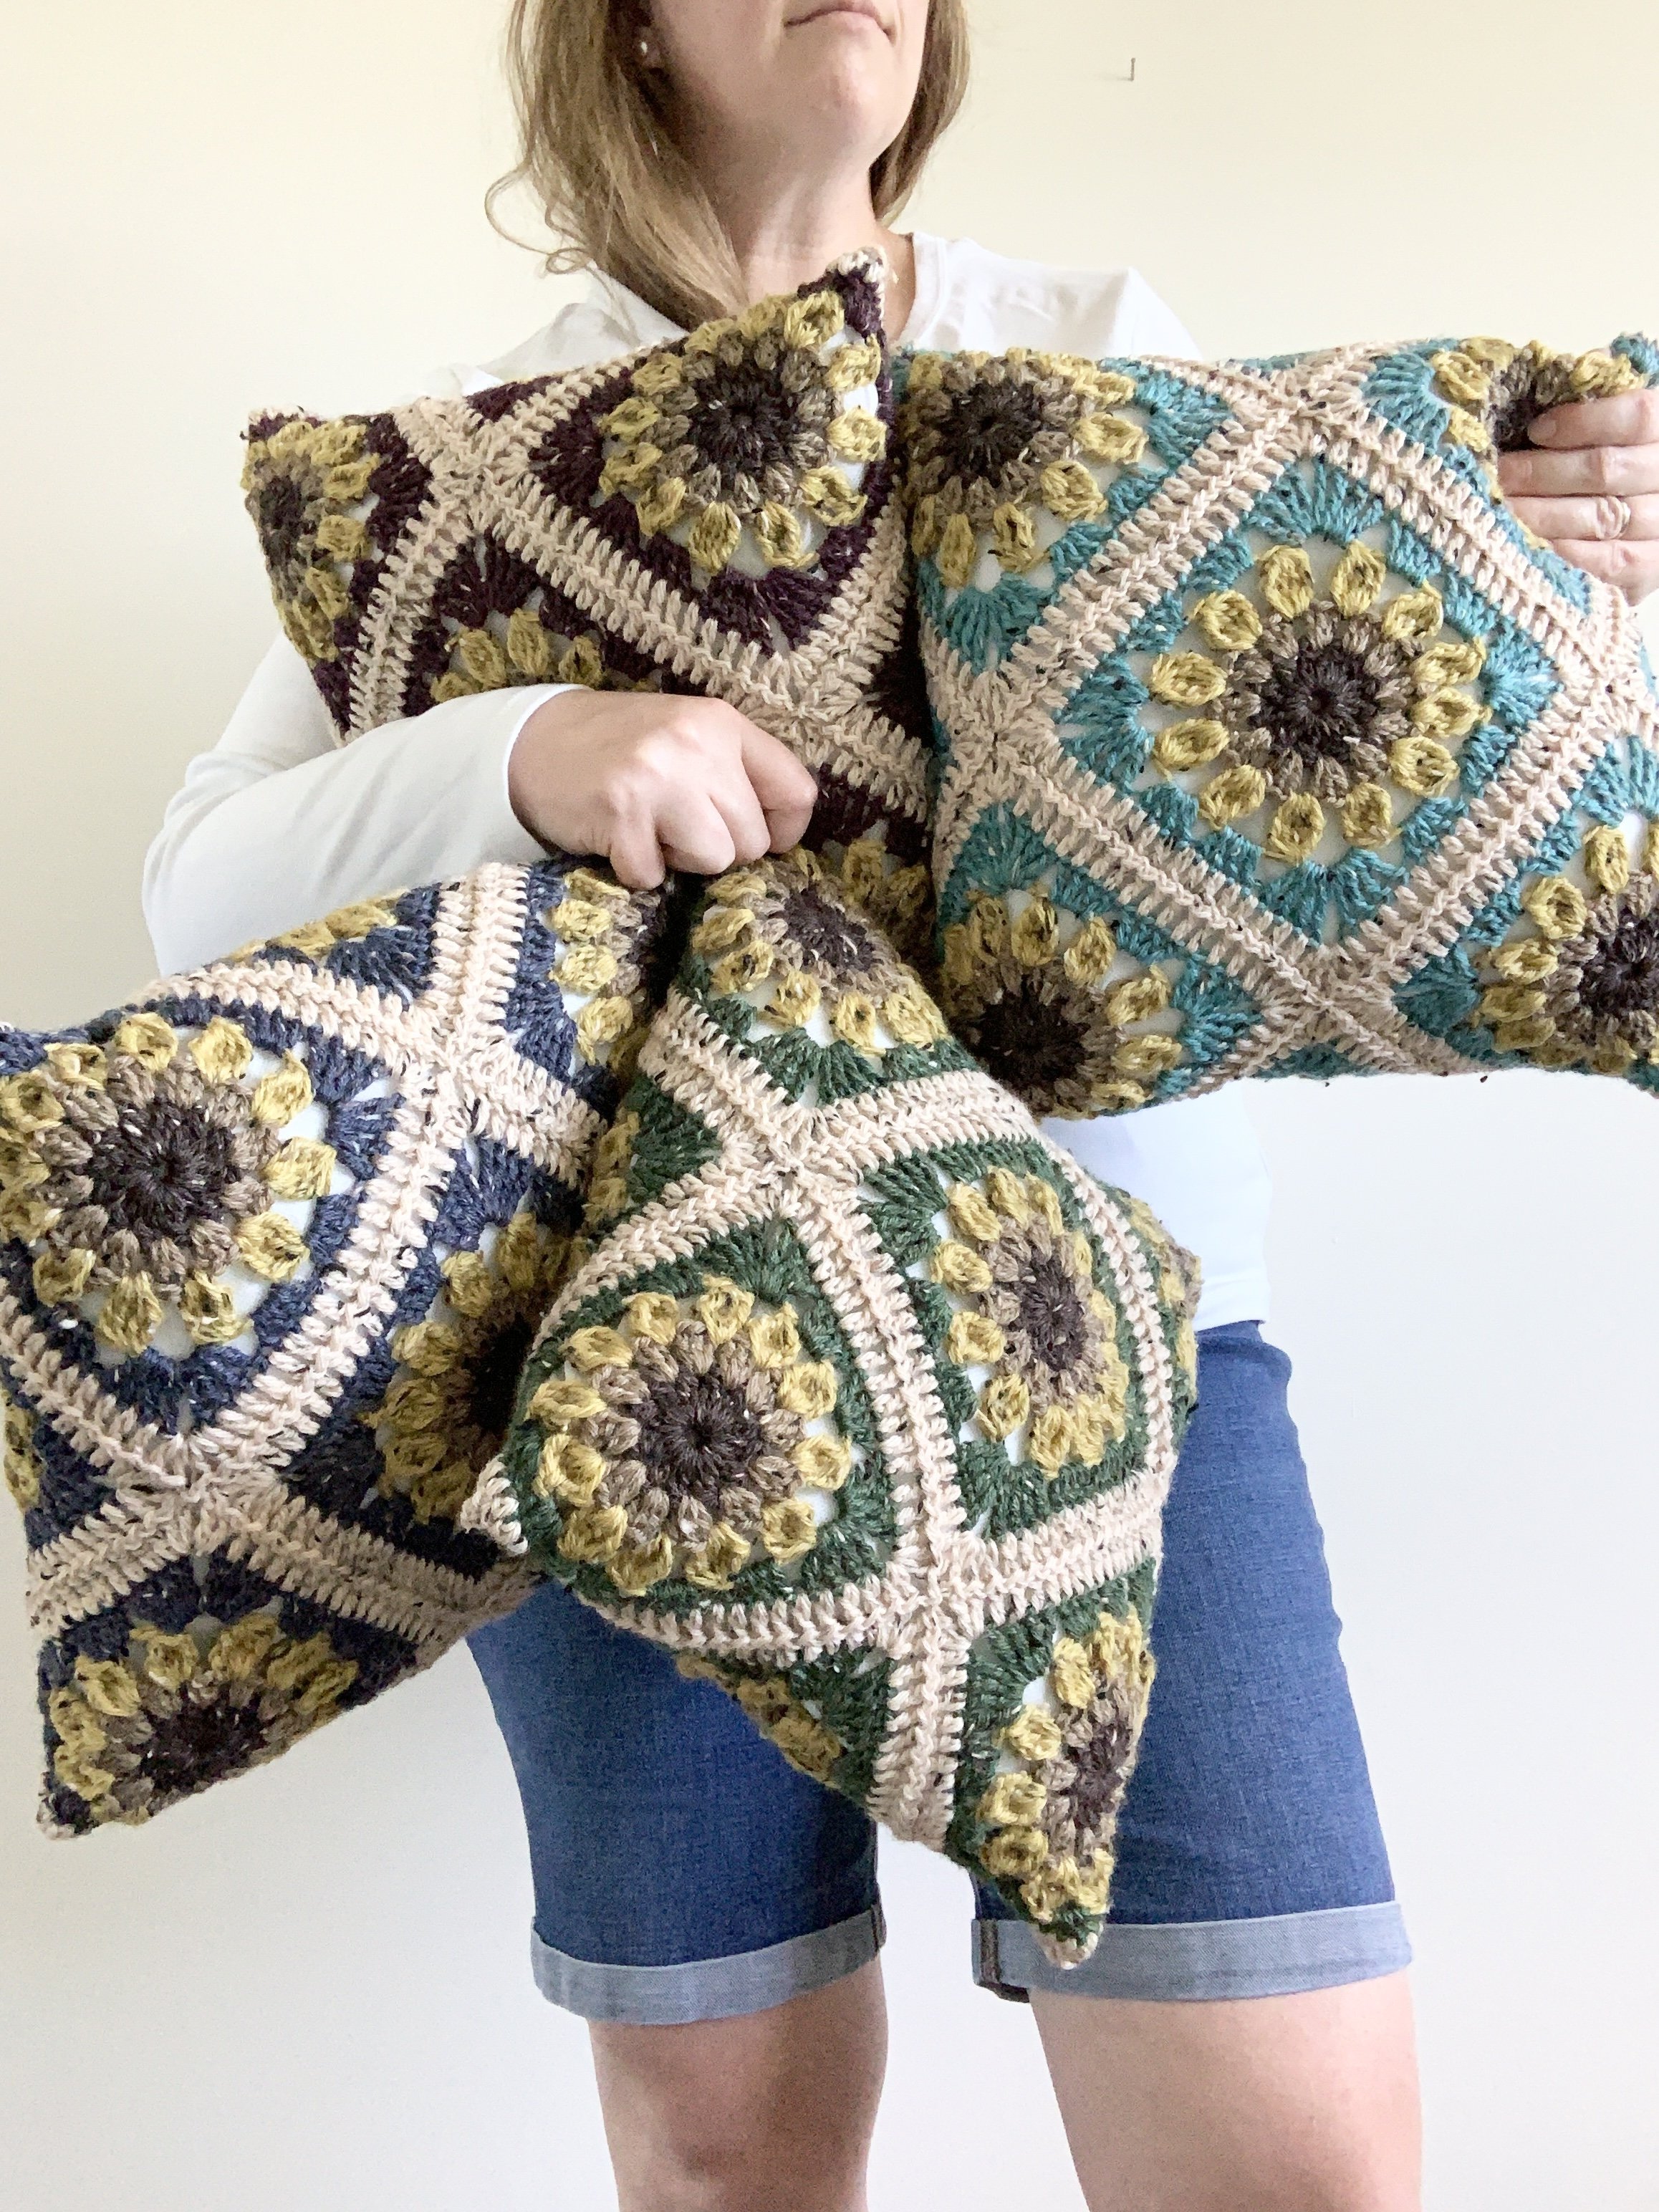
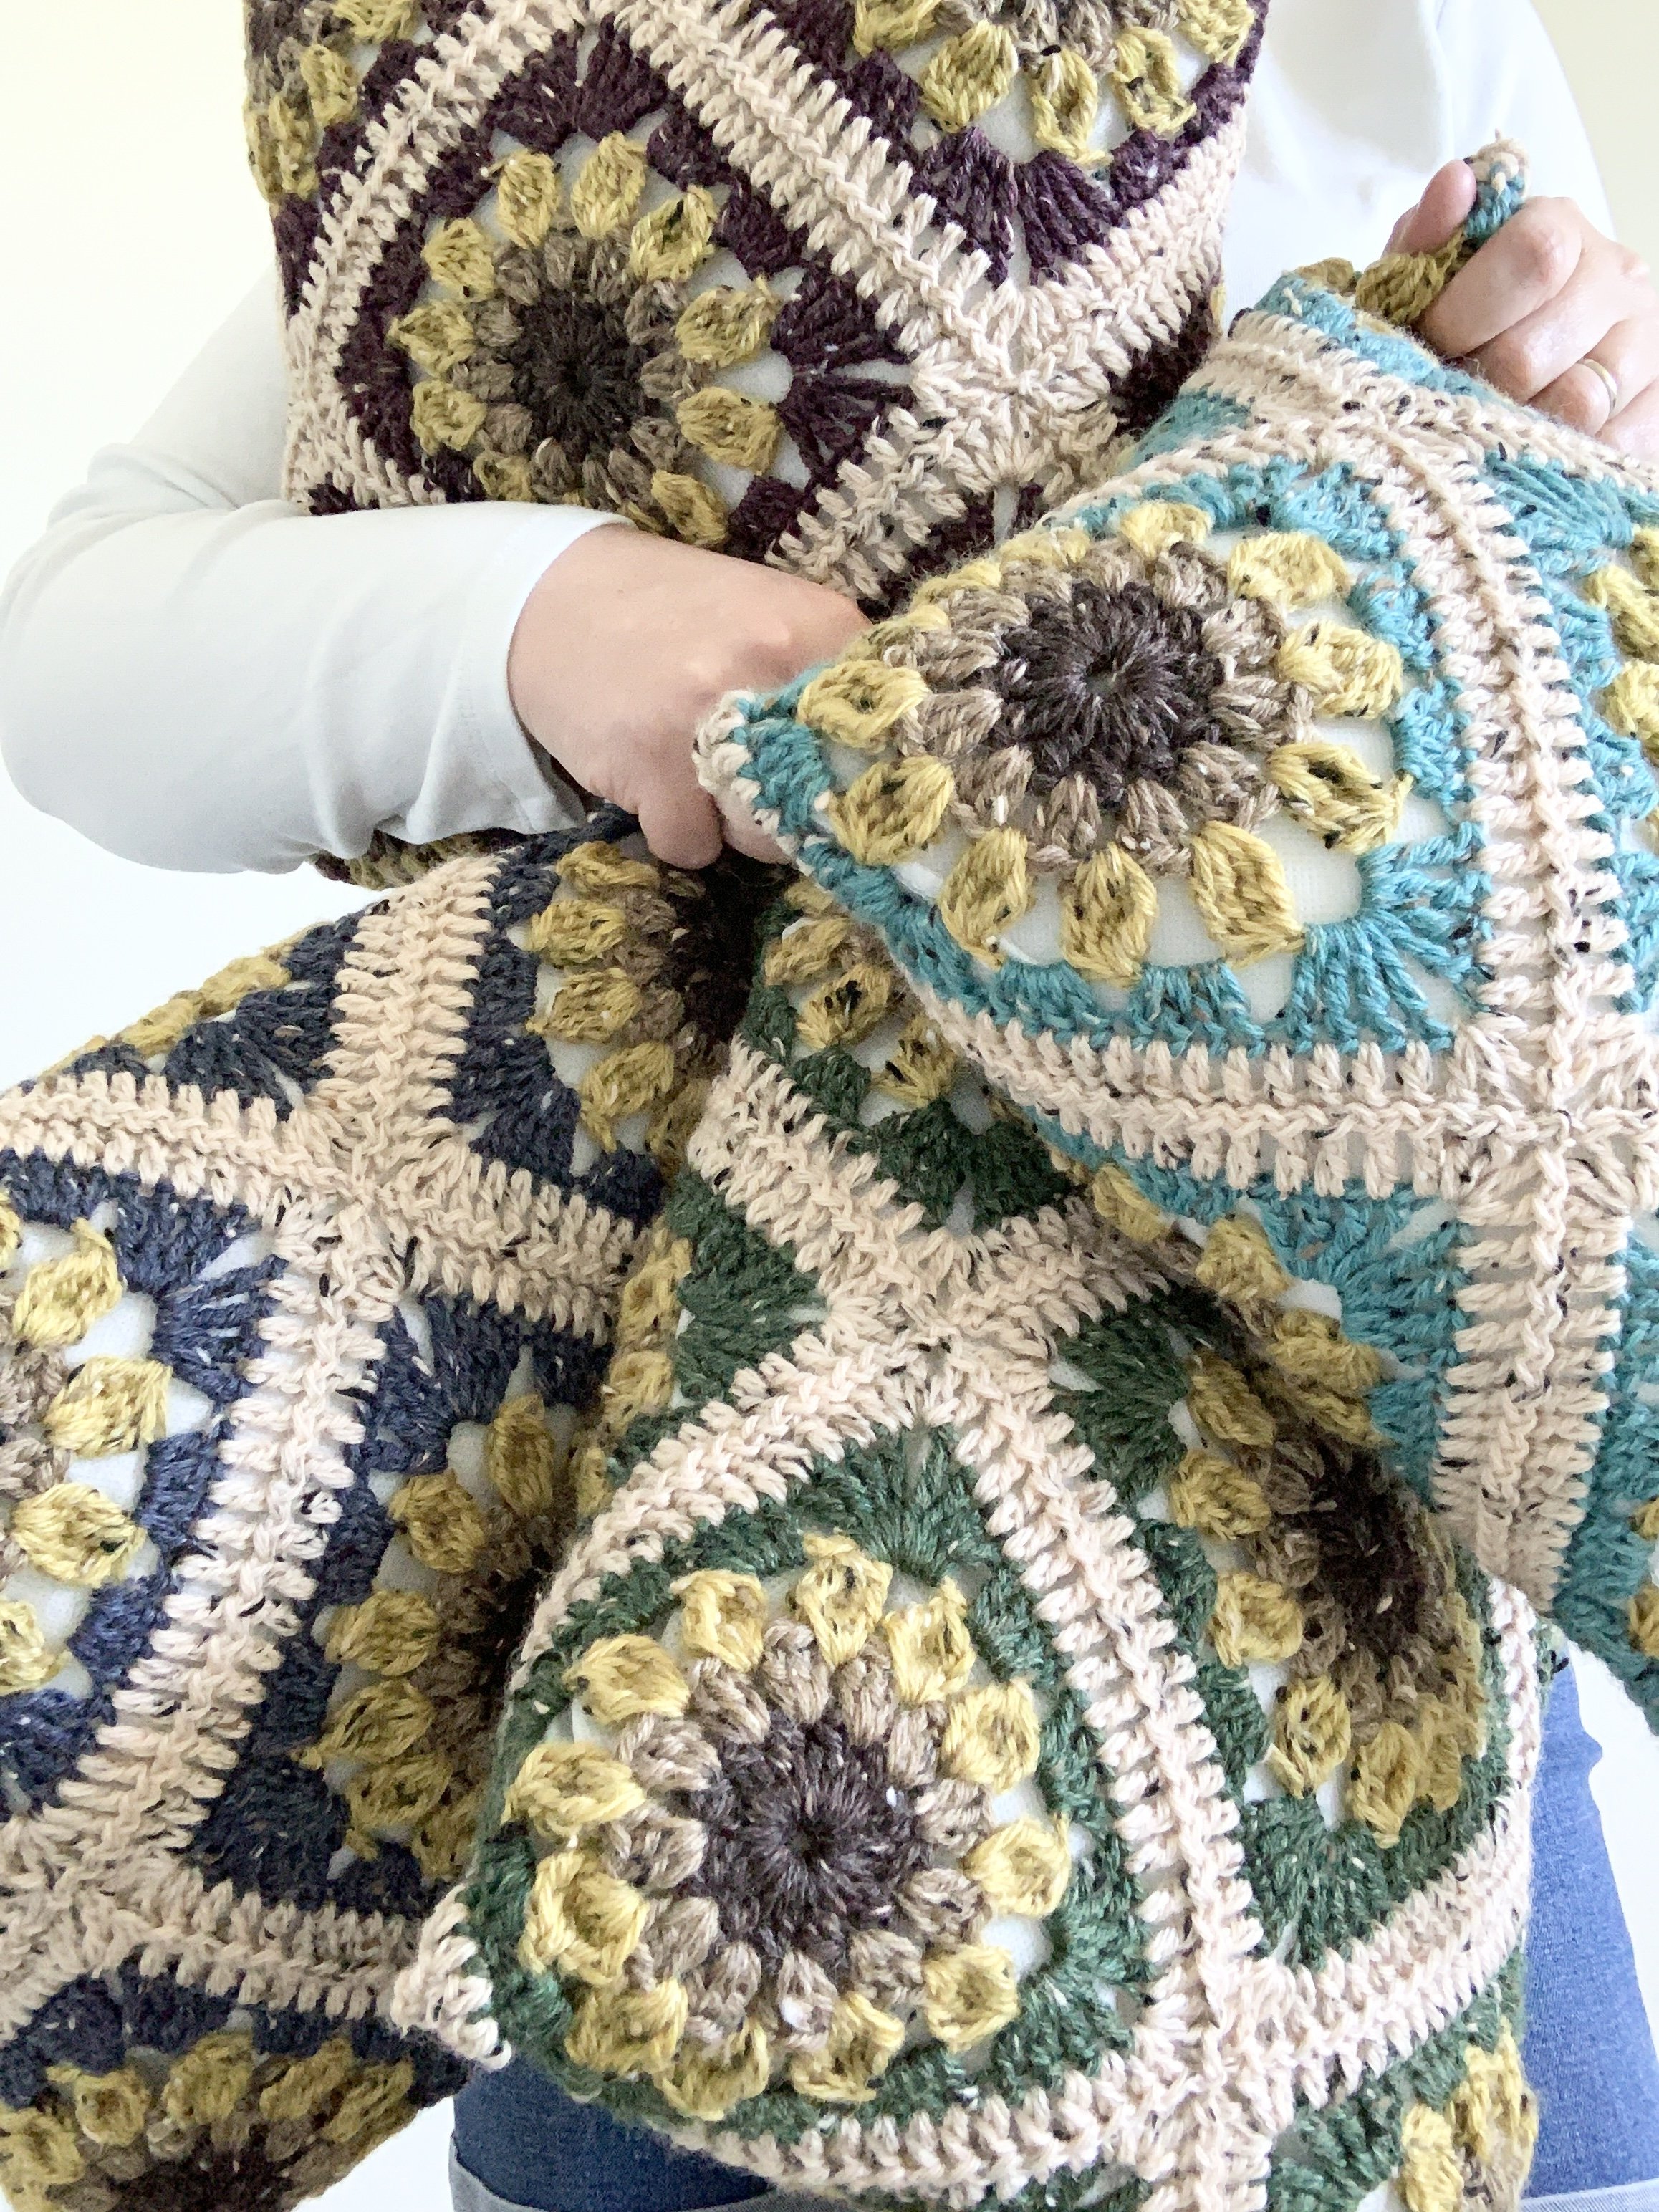
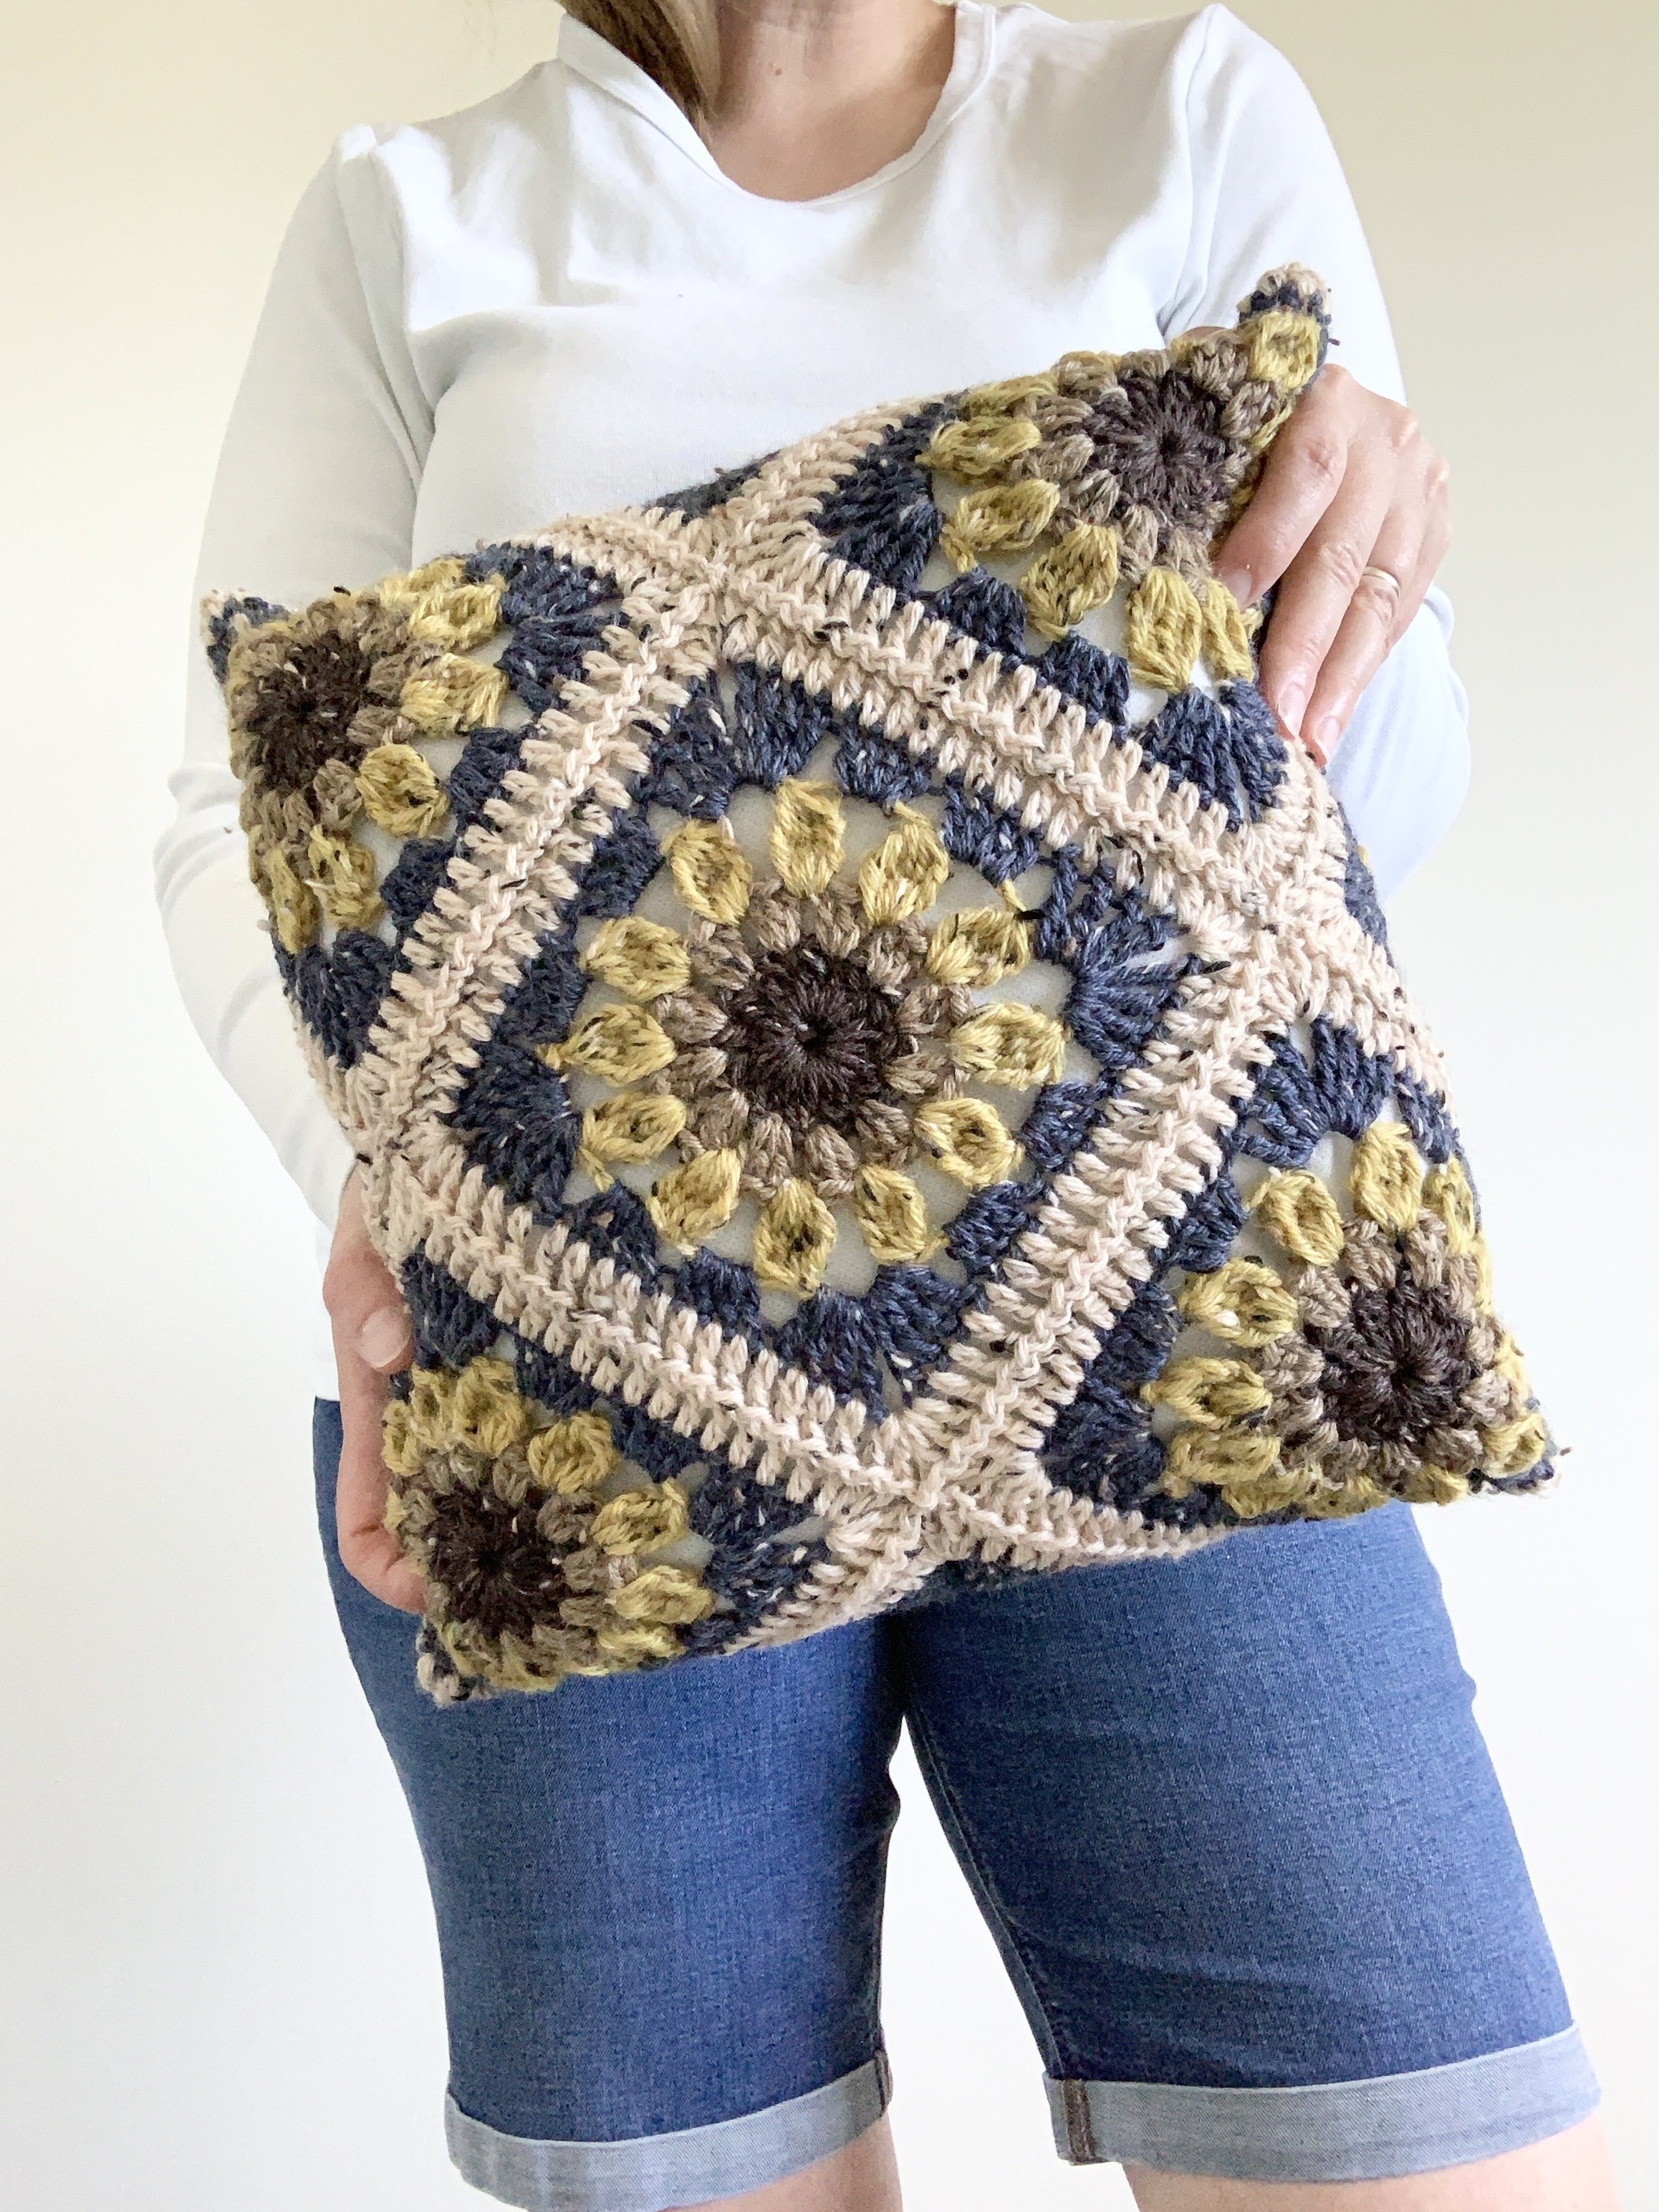
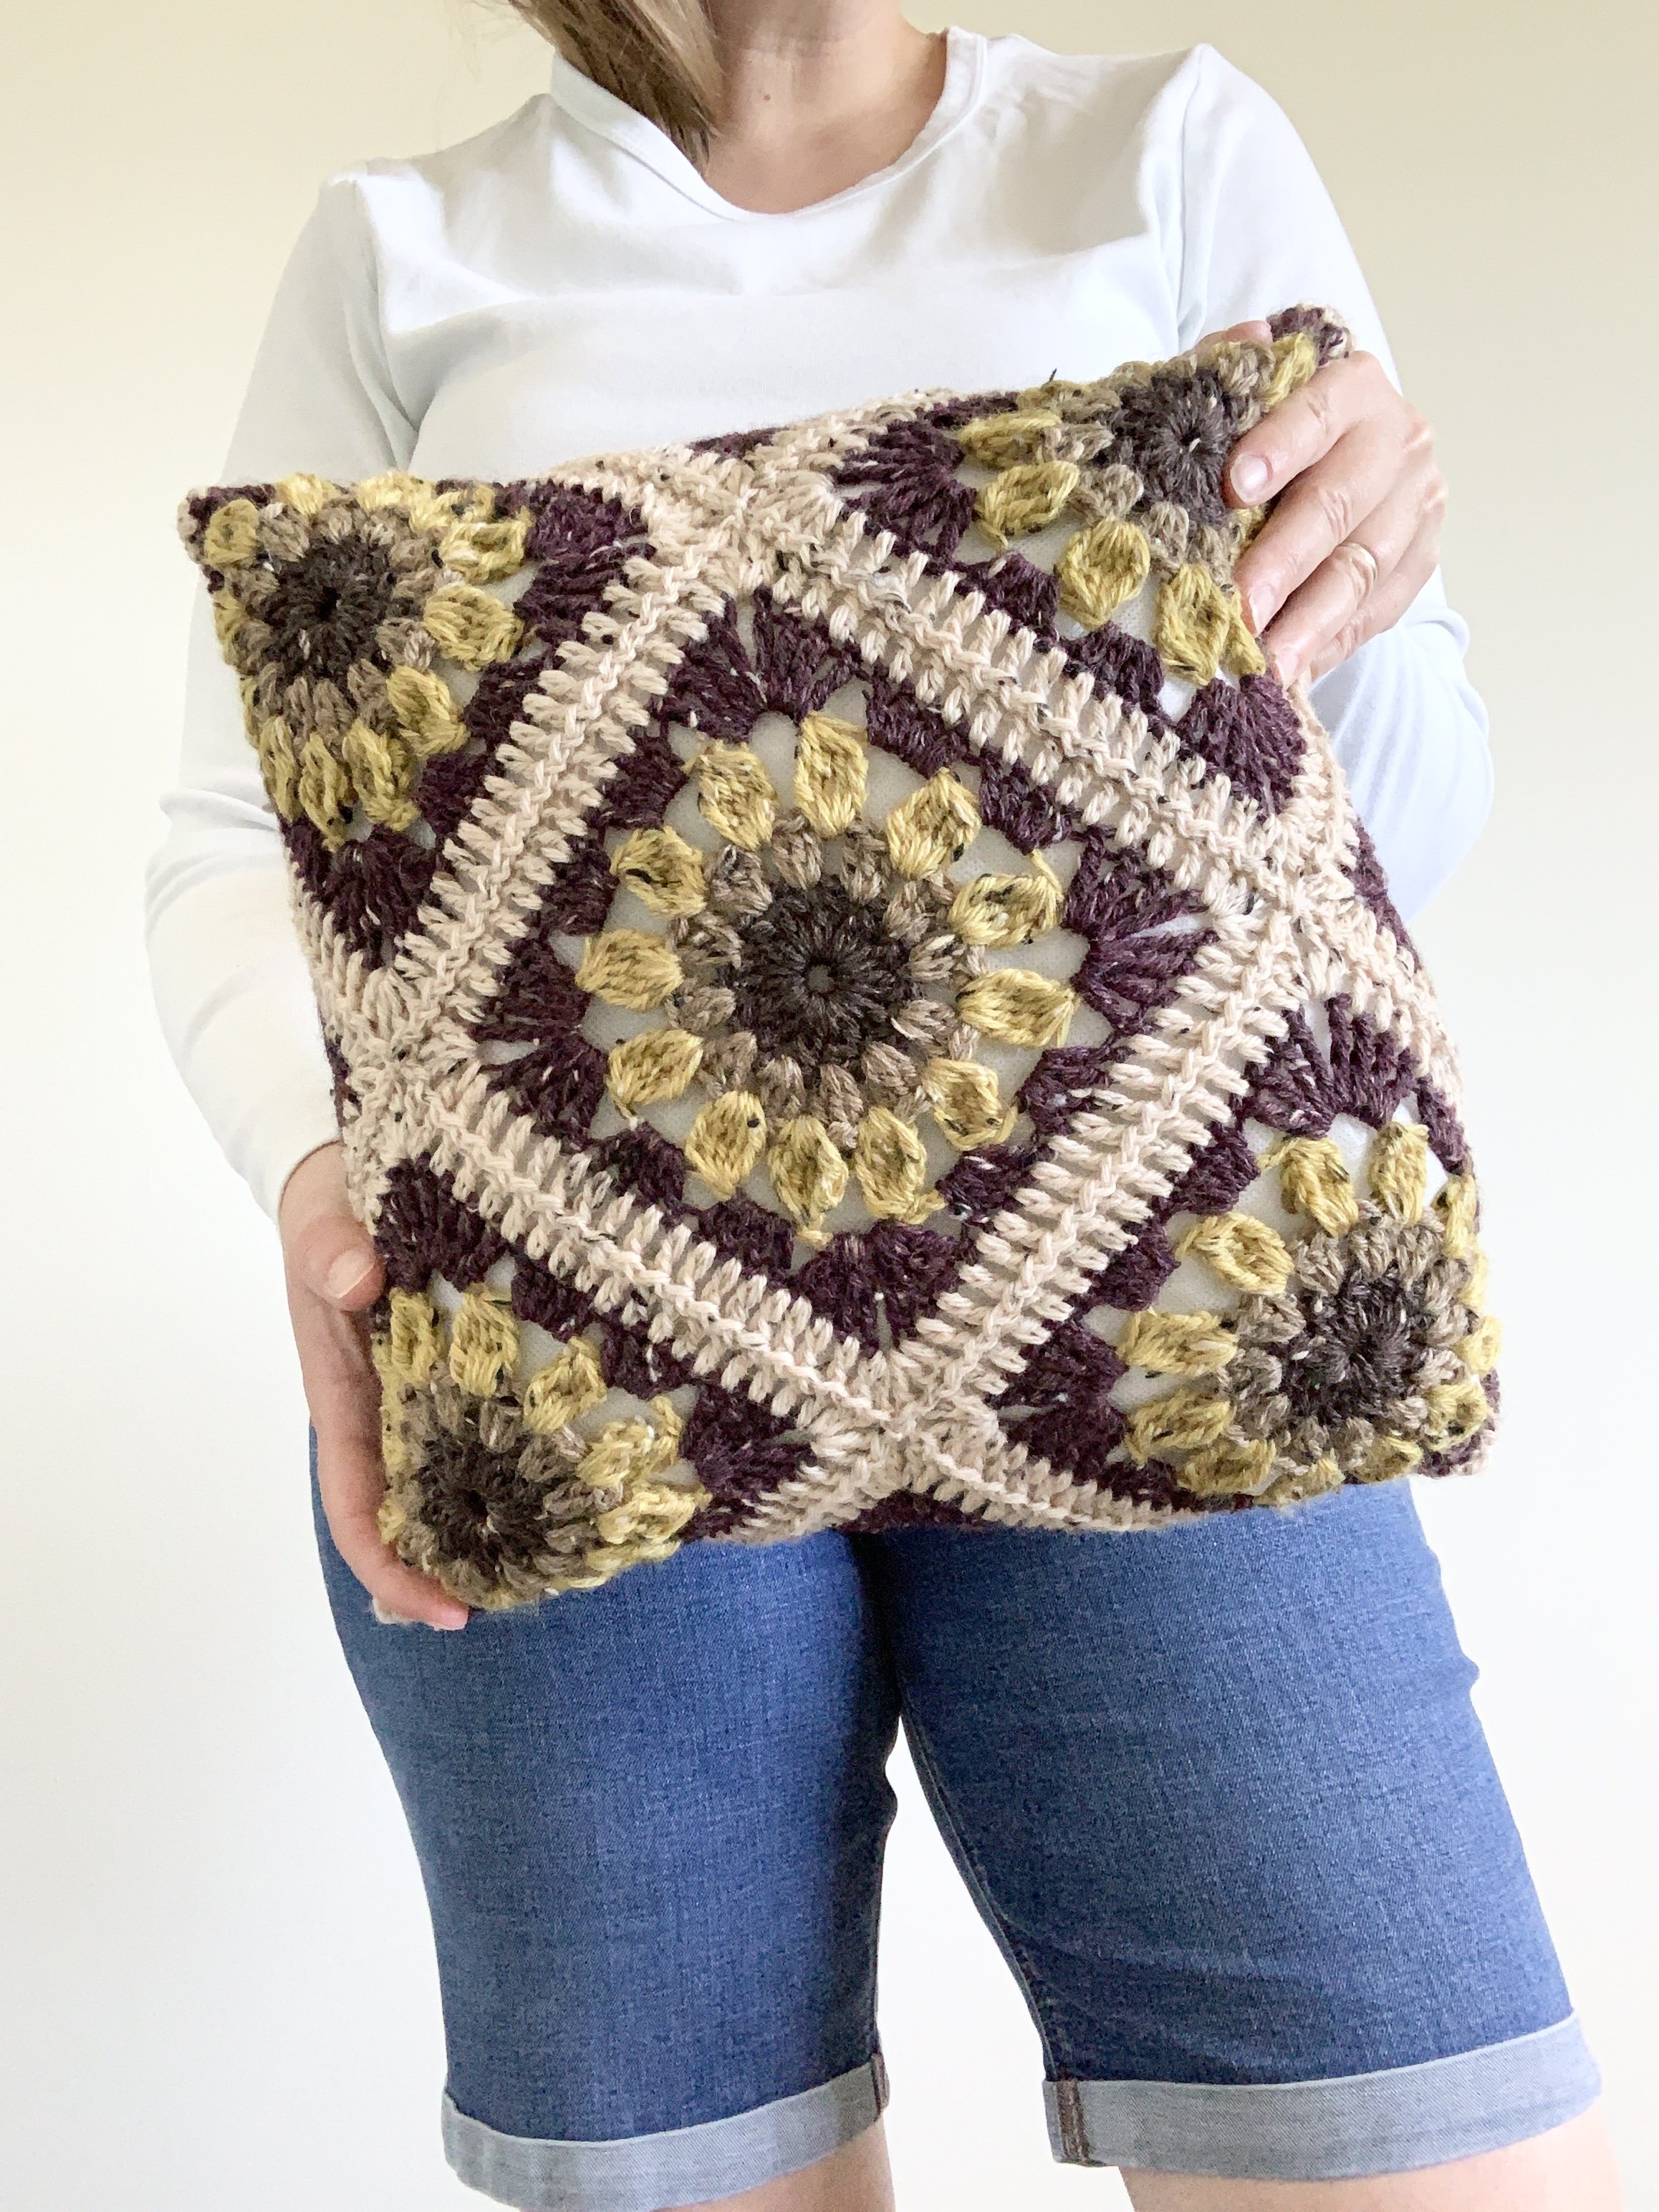
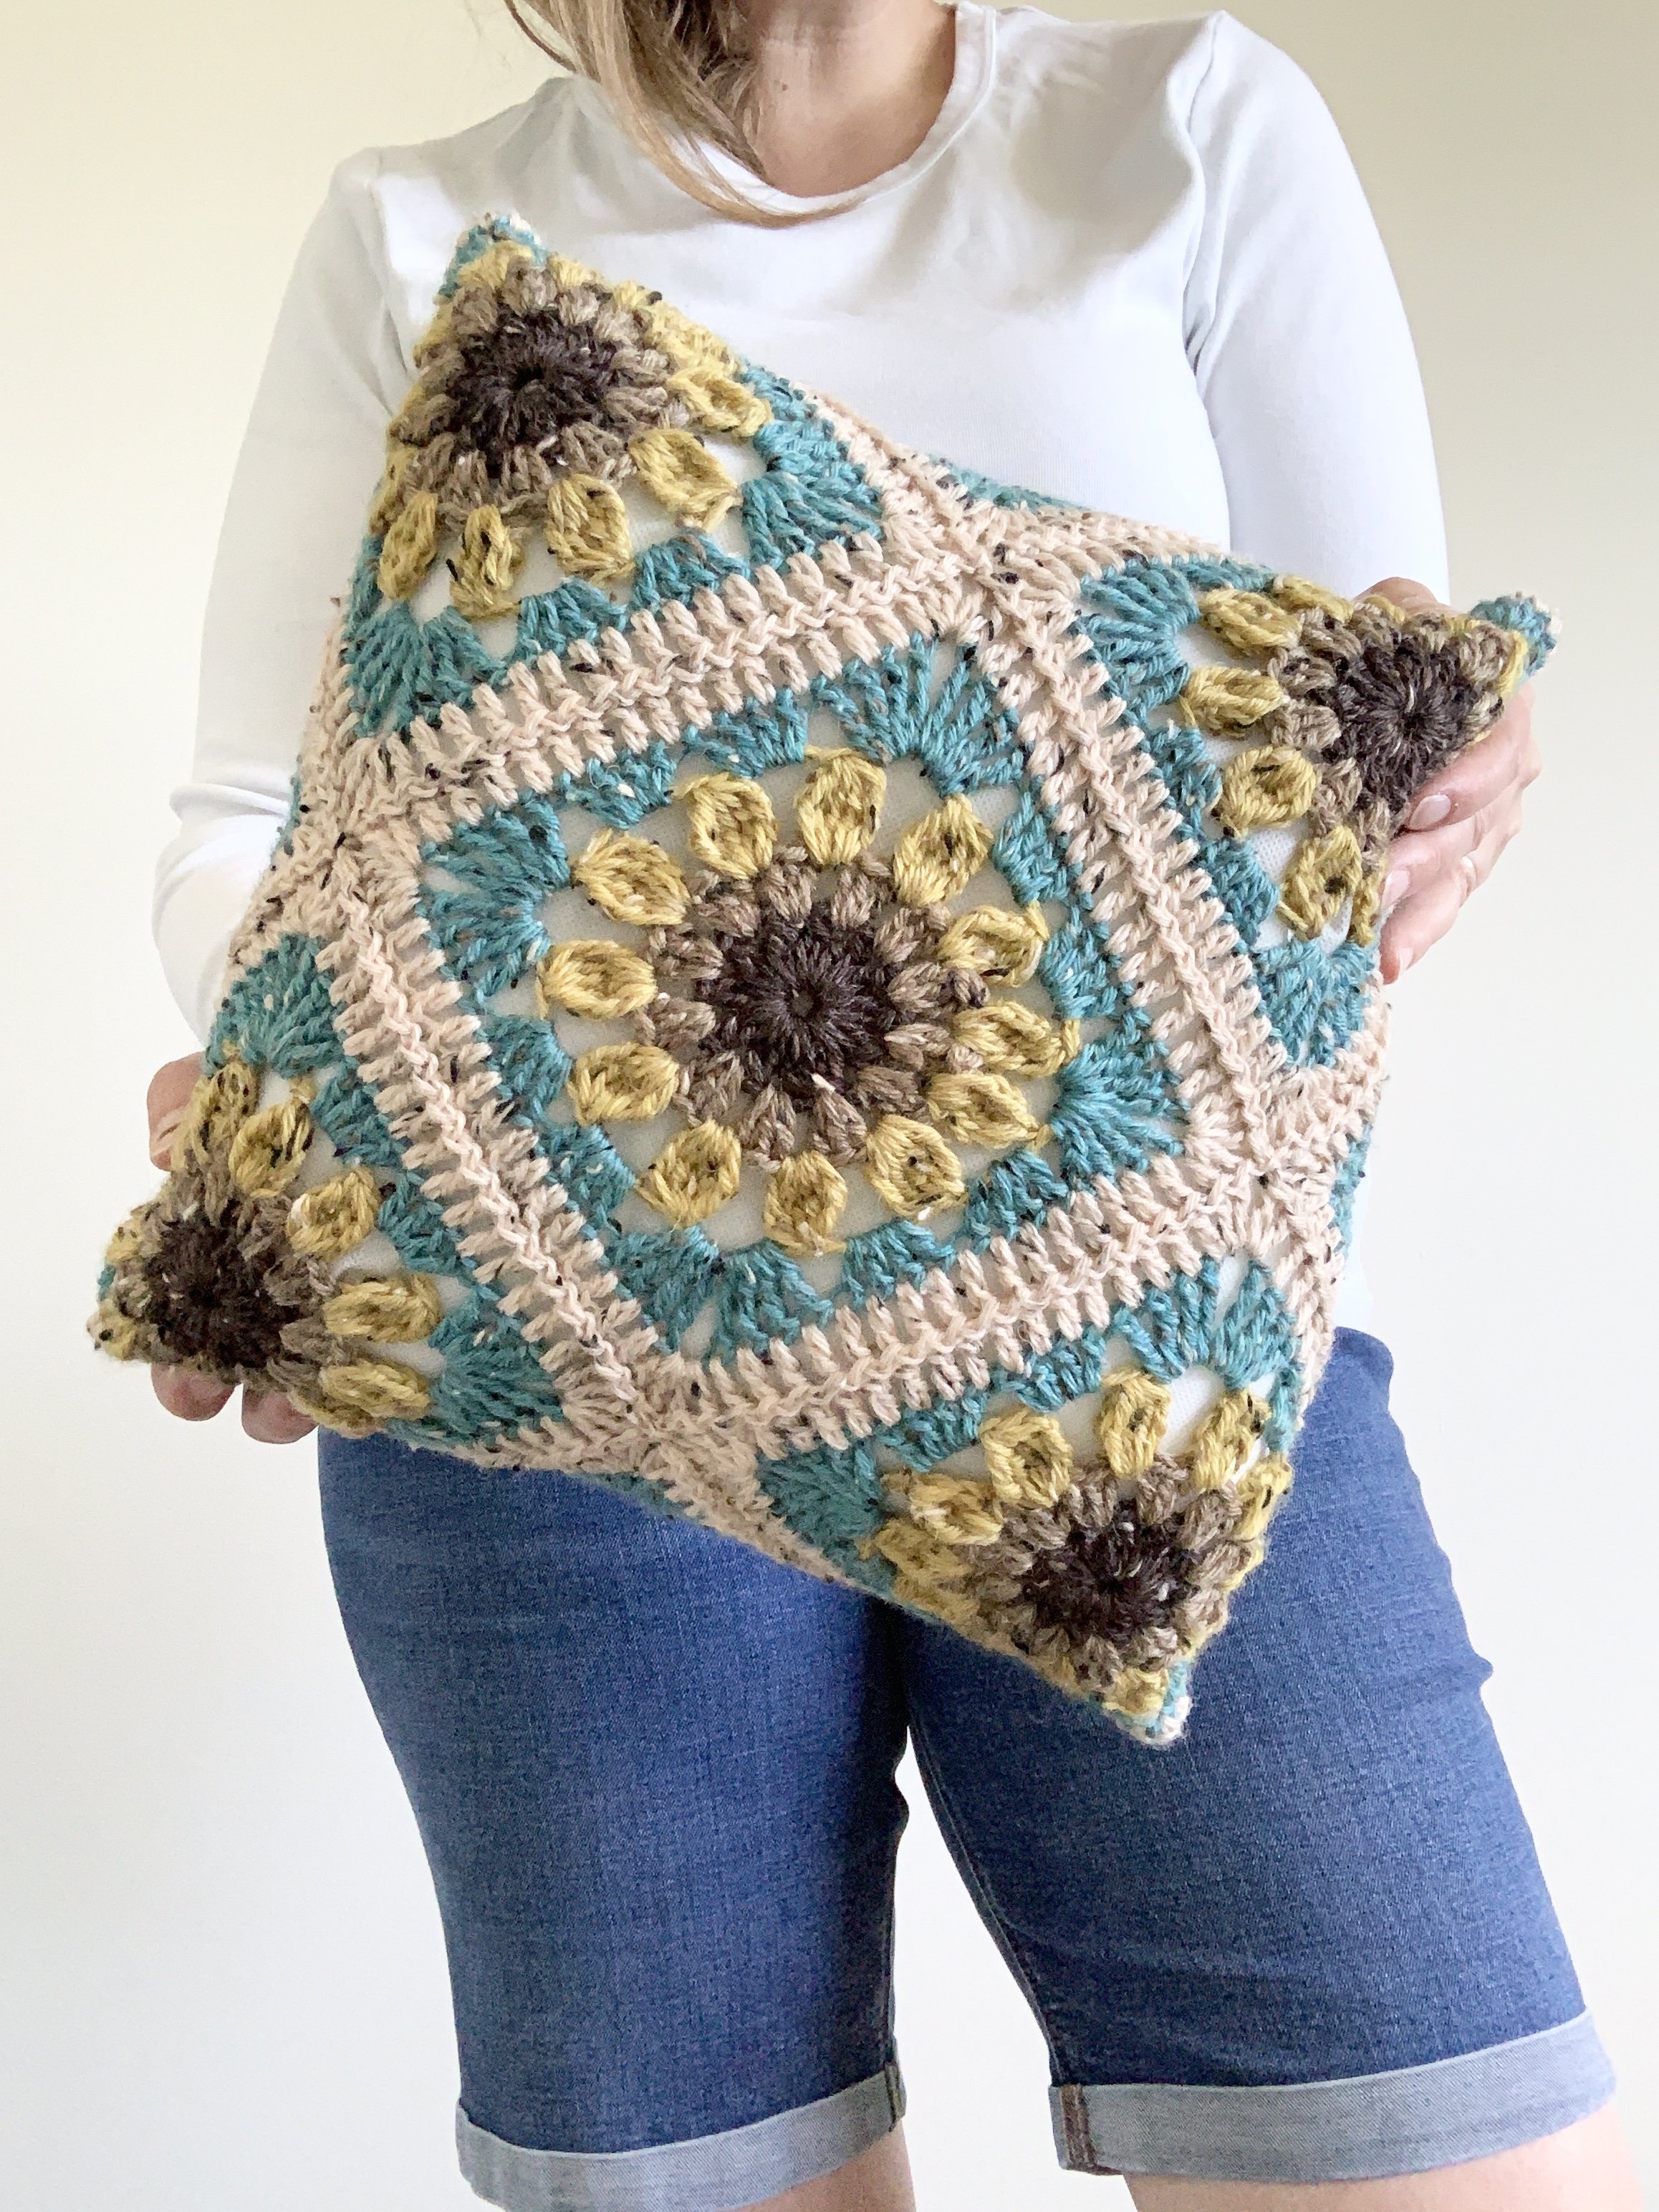
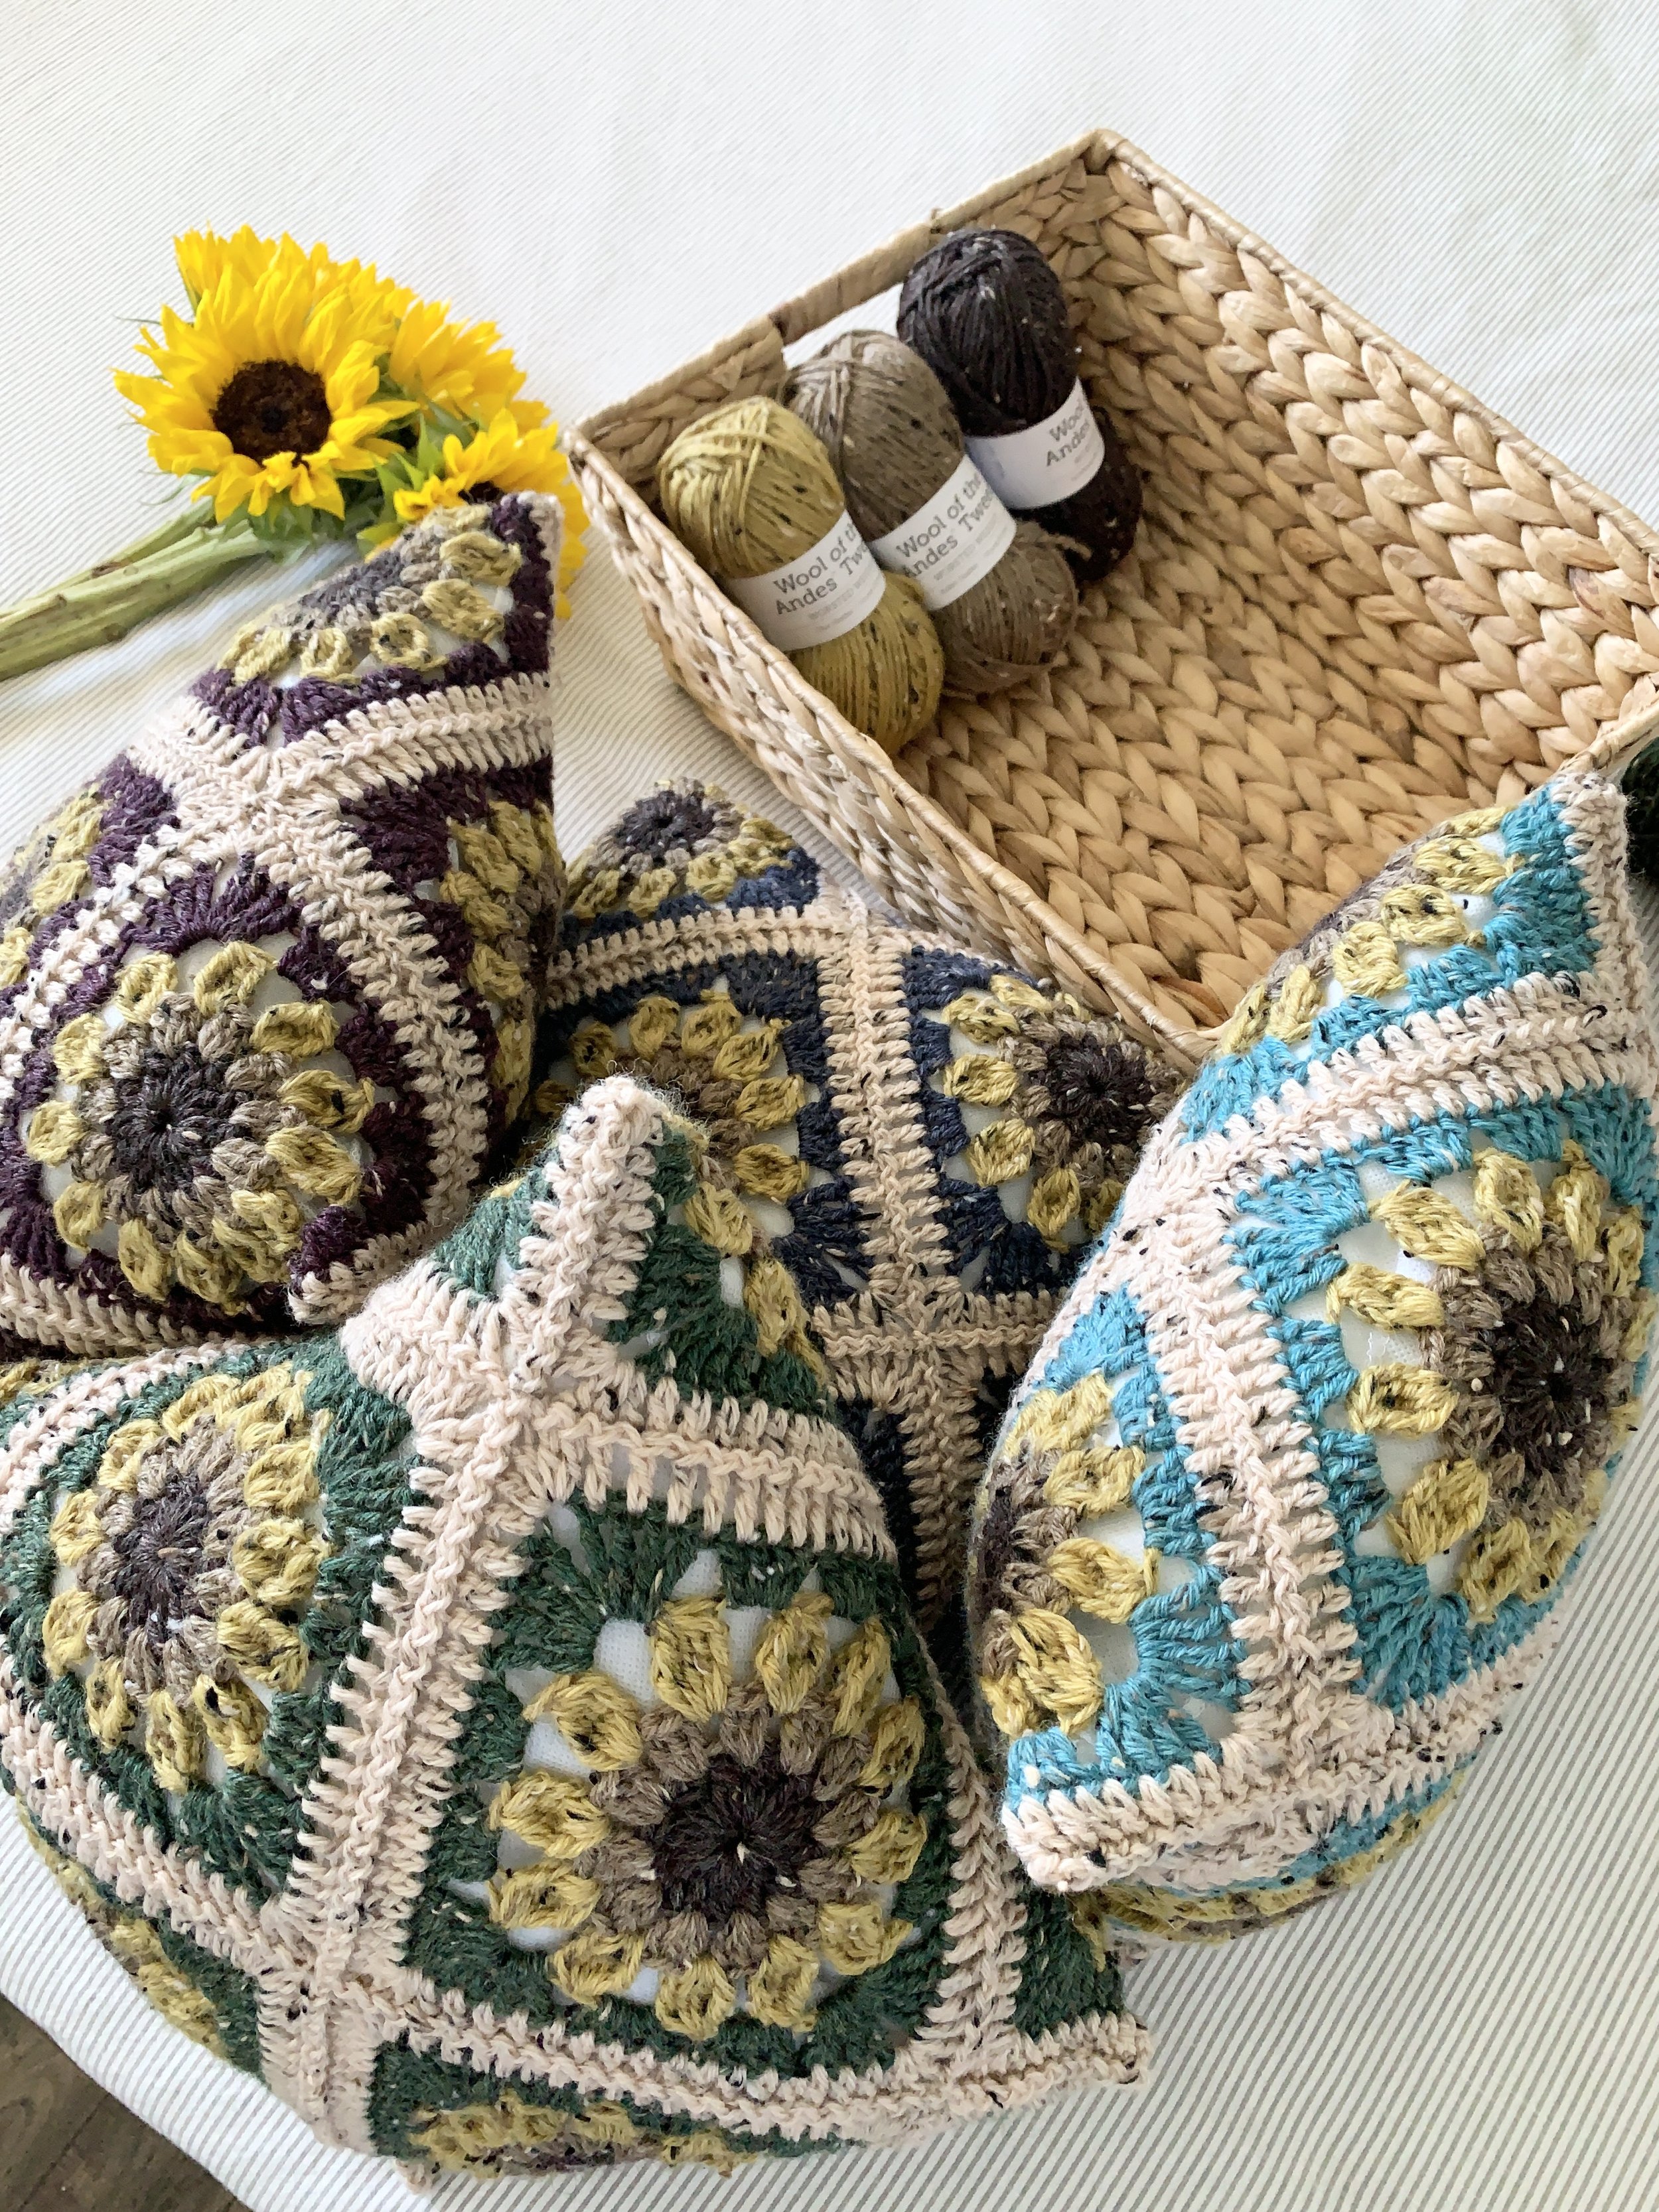
There’s been an obvious shift in pattern sales in my shops lately. As much as I’m still in summer mode—I can see that a lot of you are thinking about the upcoming change in seasons (and Christmas)! I’m not quite there yet, but I do love a good sunflower. Sunflowers scream late summer, early autumn for me and I wanted to make myself a late-summer-inspired pillow in my favourite yarn. Wool of the Andes Tweed from WeCrochet has done it again. It took my ordinary sunflower square and turned it into a stunning, rustic, warm looking pillow that will transition beautifully into Autumn. I couldn’t even stop at one—I had to make a few of the colours before stopping myself :) Hopefully you feel as inspired but these sweet little pillows as I do. Happy crocheting everyone!!
L, M
ps. If you want the ad-free, printable PDF of the pattern you can grab one in my Ravelry or Etsy Pattern Shops:

Notions
US 5.00 mm (size H) crochet hook
Needle for weaving in ends
Scissors
14”x 14” washable pillow form (insert)
Yarn
WeCrochet (Knit Picks) Wool of the Andes Tweed Worsted weight (110yds/50g):
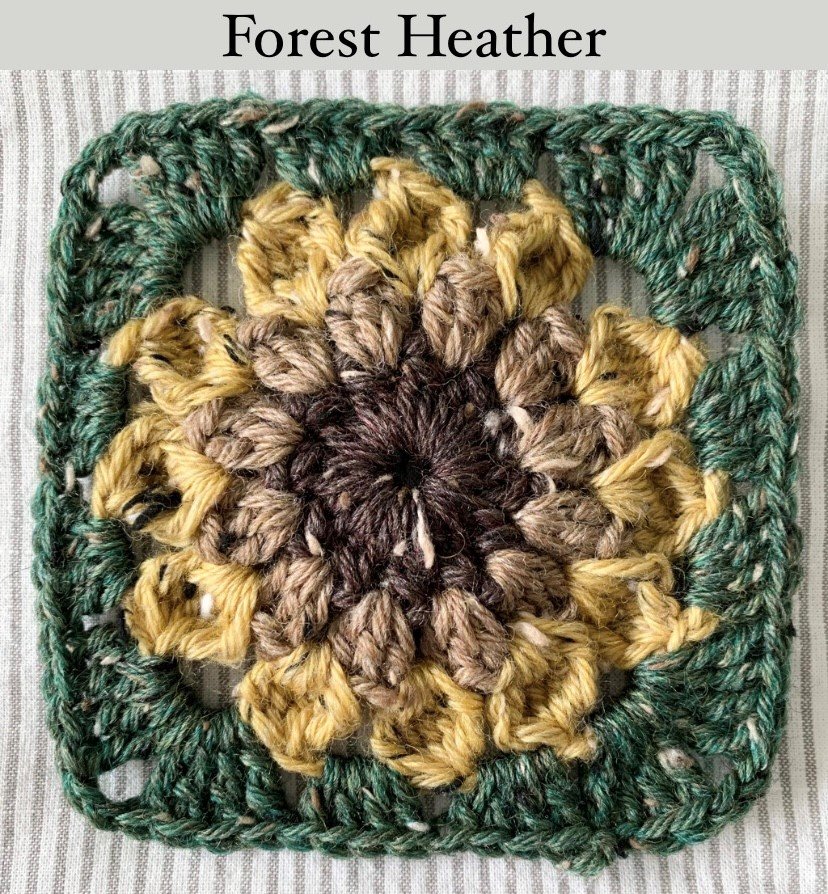
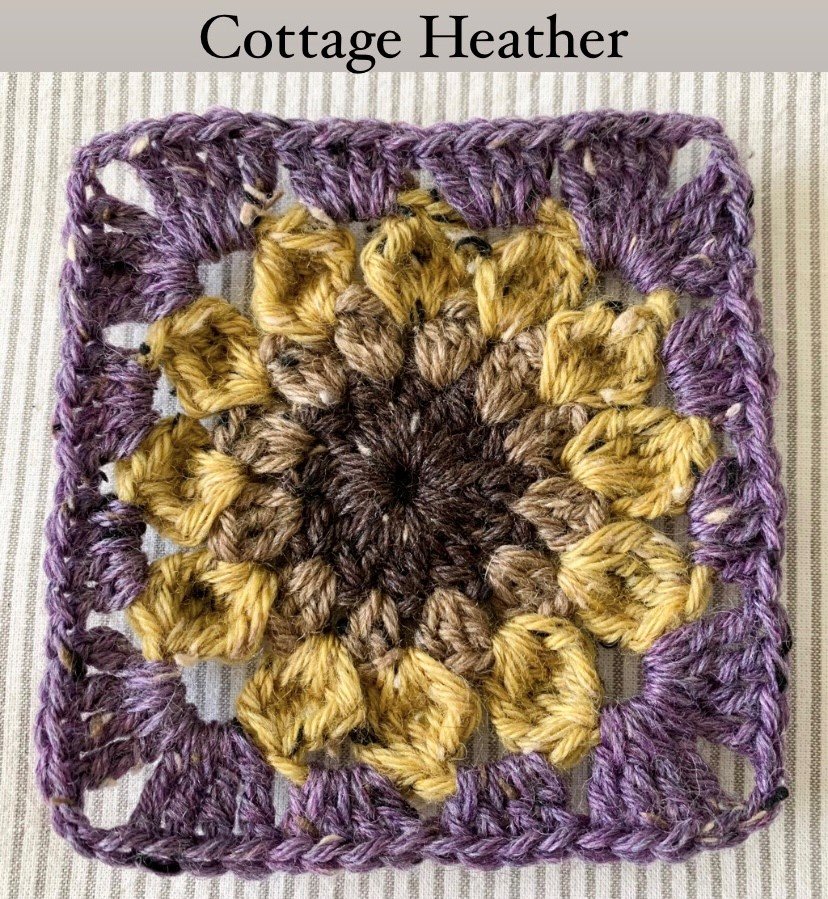
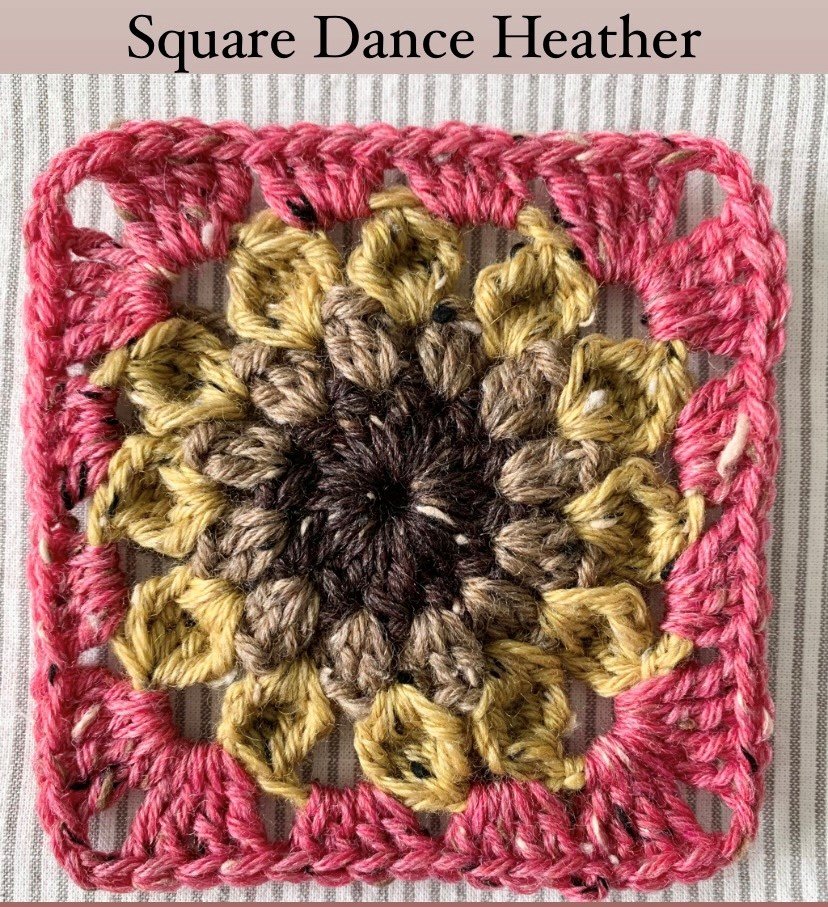
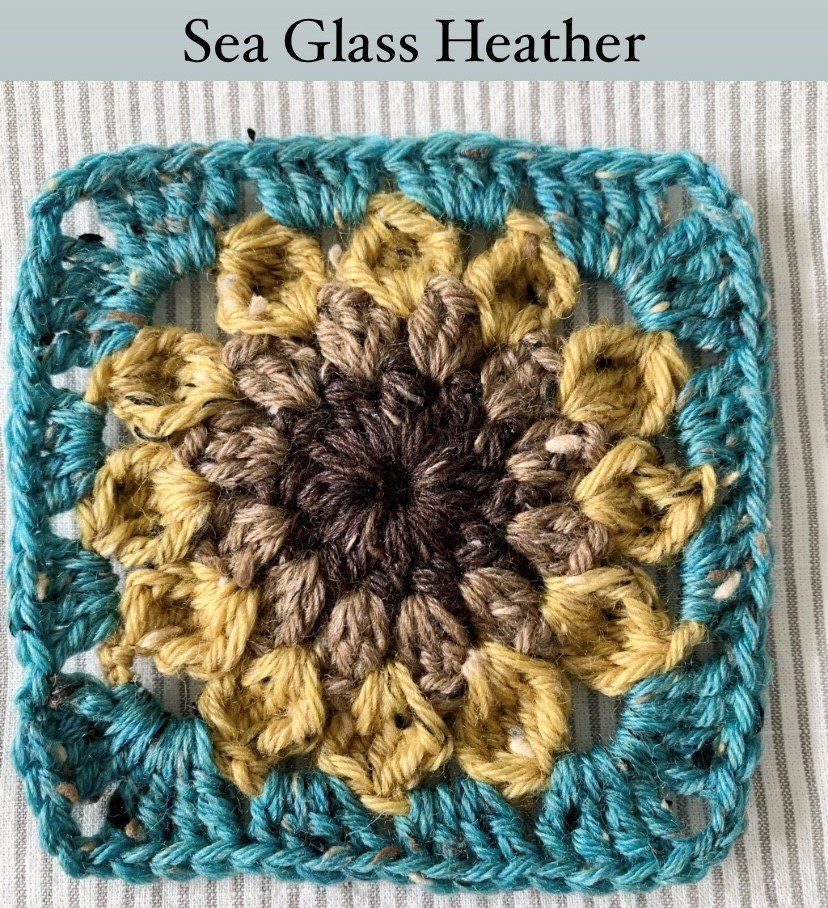
Colour A: Farmhouse Heather (24yds/11g)
Colour B: Rabbit Heather (40yds/18g)
Colour C: Olive Heather (86yds/39g)
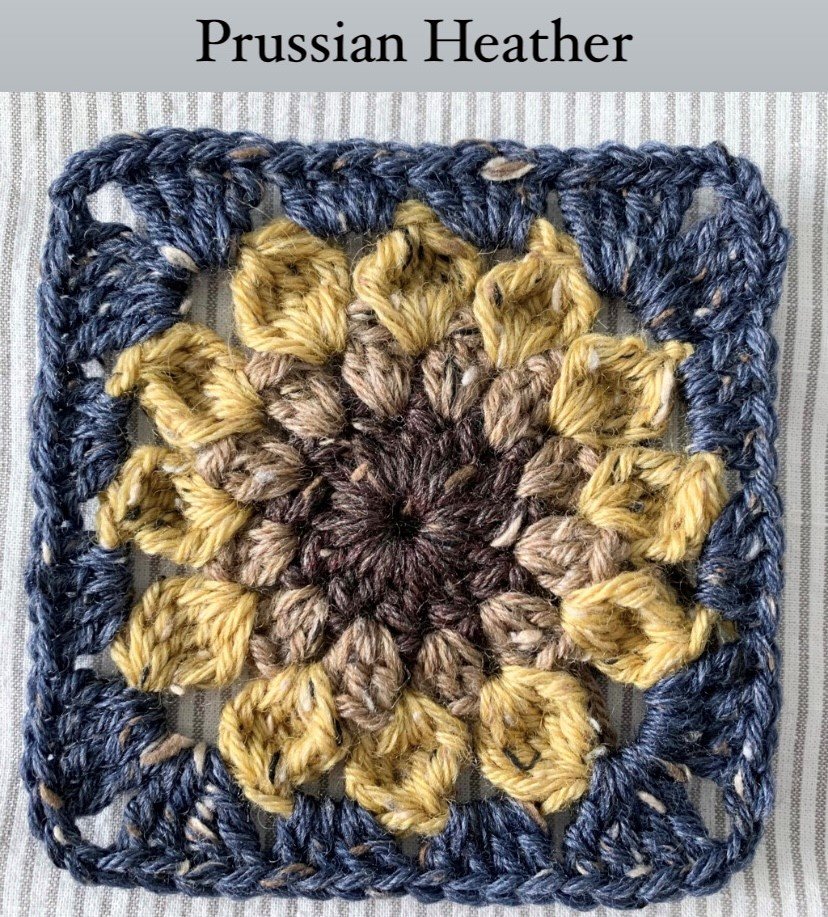
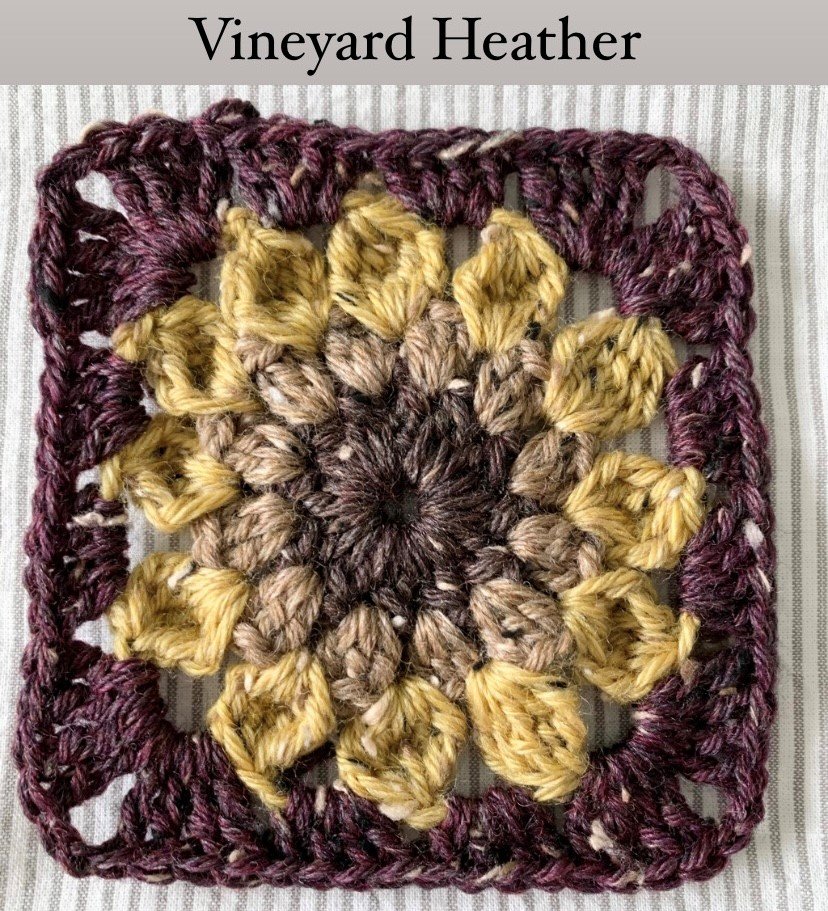
Colour D: Prussian Heather (84yds/38g)
Colour E: Oyster Heather (88yds/40g)
** any worsted weight yarn will work as long as gauge is met. Here are some of my favourite alternatives:
Gauge
4 rnd sunflower square= 4.5” square (unblocked)
Final pillow panel should measure 16” (unblocked)
Finished Size
14”x 14” pillow
Glossary (using US Crochet Terminology)
st(s)- stitch(es)
ch- chain
ch-sp- chain space
sl st- slip stitch
YO- yarn over
SC- single crochet
DC- double crochet
tr- treble crochet
cl st(s)- cluster stitch(es)
2 DC cl – 2 double crochet cluster stitch
4 tr cl- 4 treble cluster stitch
5 tr cl- 5 treble cluster stitch
CJAYG- continuous join as you go
DC shell- group of DC stitches

How to Crochet the 2 DC cluster stitch (2 DC cl): YO, insert hook into center of circle, YO and pull up a loop, YO and pull through 2 loops on hook, YO and insert hook into center of circle, YO and pull up a loop, YO and pull through 2 loops on hook, YO and pull through 3 loops on hook, ch 1.
How to 4 tr cluster stitch (4 tr cl): YO twice and insert hook into sp, YO and pull up a loop, YO and pull through 2, YO pull through 2. Repeat 3 more times. There should be 5 loops on the hook. YO and pull through all 5 loops.
How to 5 tr cluster stitch (5 tr cl): YO twice and insert hook into sp, YO and pull up a loop, YO and pull through 2, YO pull through 2. Repeat 4 more times. There should be 6 loops on the hook. YO and pull through all 6 loops.
Pattern Notes
Gauge is important! If squares are larger than 4.5” inches, you will require more yarn.
Please adjust hook size to meet gauge of pattern.
Final pillow panel should measure approximately 16”x 16”.
Ch 2 counts as DC throughout pattern.
Ch 3 counts as tr throughout pattern.
The pillow panel is very tight; crochet tends to loosen up over time and I like a tight-fitting cover. If it’s too tight for your liking, add another round of DC stitches on your final 3x3 panel before joining.
In some cases, the video tutorials have been used for other patterns. Please follow the yarn recommendations, hook size and stitch counts in the written pattern- the videos are only meant as visual guides.
Please see section “Colour Legend” where I included my favourite substitutions for Colour D.
Don’t forget to share your makes on Instagram and Facebook! I always love seeing what you have all worked up. Tag me on Instagram @nautikrallcrochet or Facebook @nautikrall_crochet, or use the hashtag: #autumnsunflowerpillow

Schematic

Pillow Panel Dimensions: 3 squares x 3 squares = 9 squares total
Colour Legend:

Pattern Starburst Sunflower Granny Square:
Make 9 Sunflower squares.
Round 1
With Colour A, ch 5.
Sl st into 5th ch from hook to create centre ring.
Ch 2, work 1 DC into centre ring, ch 1 (counts as first cl st).
Work eleven 2 DC cl sts into the centre of the circle (12 cl sts).
Join with sl st to the ch-1 sp (between the first and second cl sts at beginning of rnd).
Fasten off.

Round 2
Join Colour B into any ch-1 sp, ch 2.
Work 2 DC into same sp.
Work 3 DC into every ch-1 sp (36 DC sts).
Join rnd with sl st into the top of the first DC (not the ch 2).
Fasten off.
Rnd 3
Join Colour C in between any two DC shells, ch 3.
Into same sp work a [4 tr cl, ch 3].
Work [5 tr cl, ch 3] into each sp between DC shells around (12 tr cl sts).
Sl st into the ch-3 sp (not the top of the cl st).
Fasten off.
Rnd 4
Join Colour D into any ch-3 sp, ch 3.
[3 tr, ch 2, 4 tr] into same sp (1st corner).
*4 DC into next ch-3 sp, twice.
[4 tr, ch 2, 4 tr] into next ch-3 sp.*
Repeat from * to * 2 more times.
4 DC into next ch-3 sp, twice.
Join rnd with sl st into top of first tr (not the ch 3).
Fasten off.
***Please see the YouTube video tutorial below on how to make these starburst sunflower squares:

Assembling Pillow Panel (CJAYG):
Starting in the top right-hand corner, join squares across the rows by following along with the video tutorial below using the solid, tight CJAYG method to make a panel.
Example: First row will be joined from square number 3 across to square 1. Second row will be joined from square 6 to 4 etc.
Fasten off, weave in all ends.
**Please see video tutorial below for how to CJAYG sunflowers to create pillow panel/cover:

Assembling Finished Pillow Cover:
Final pillow panel should measure 16”
Place pillow cover down with wrong side up.
Fold corners of pillow cover into the centre; seam together using zig zag sl st.
On the final seam, remember to leave enough room to stuff your pillow into the cover before seaming all the way shut.
Fasten off, weave in all ends.
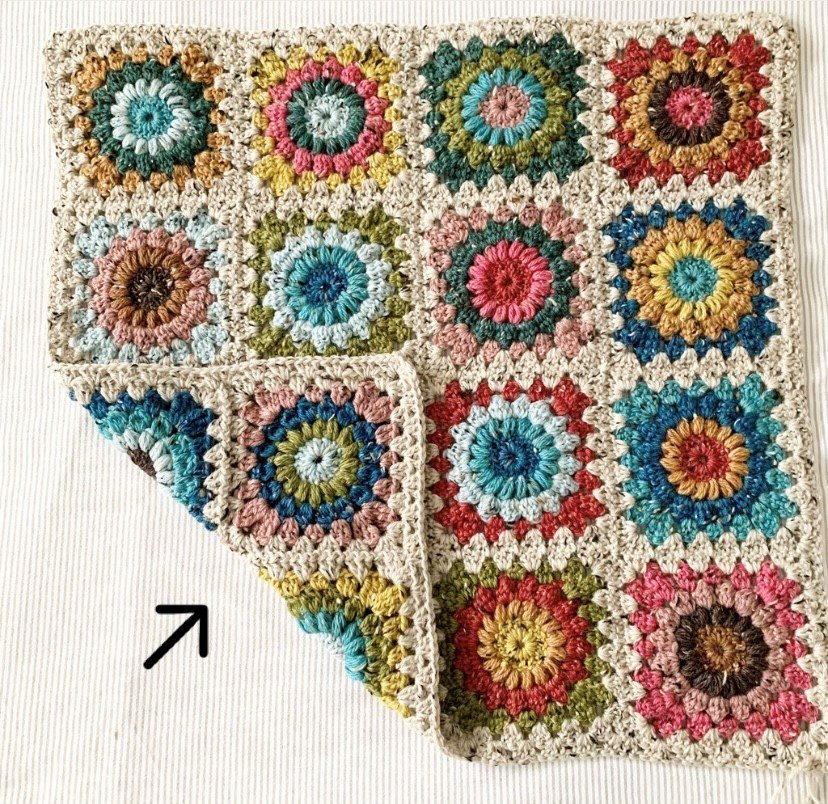
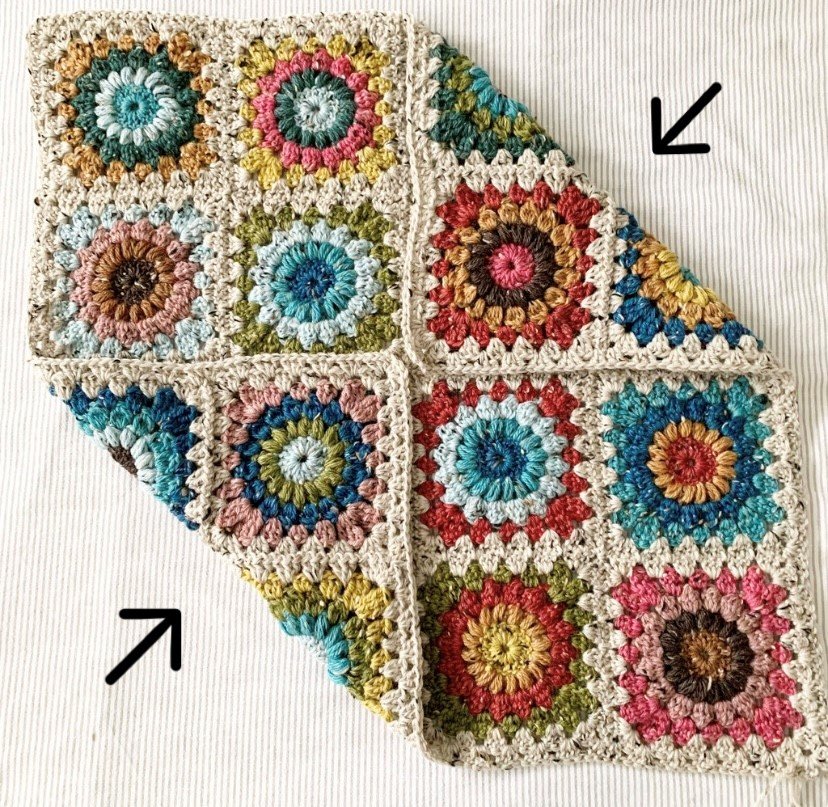
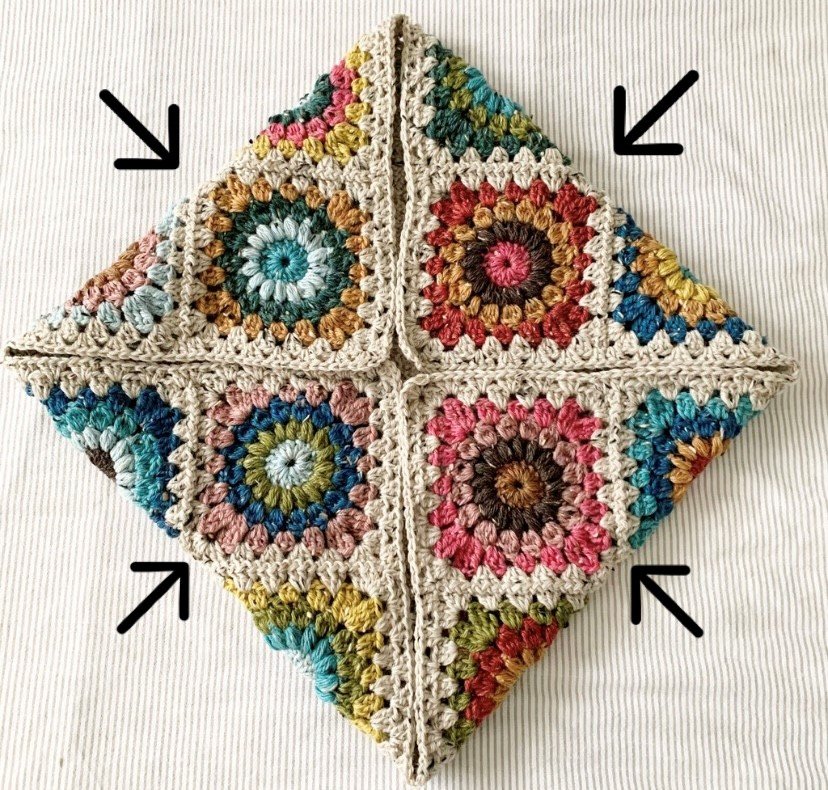
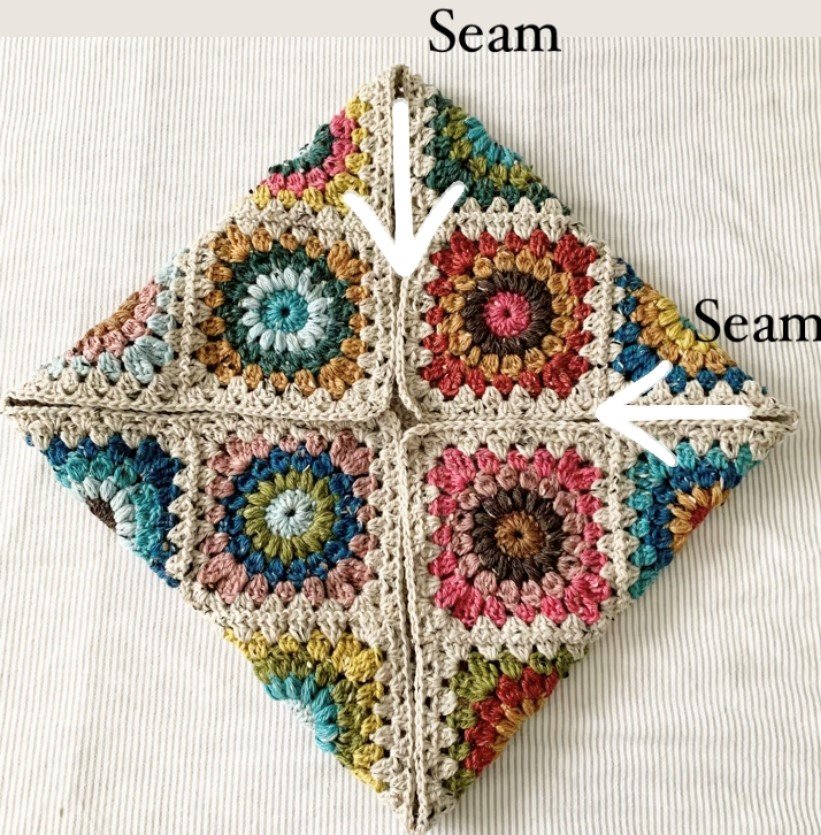
*please note: pictures were used from the Hygge Burst Pillow Pattern—yours will be sunflowers and only a 3x3 panel!
**Please see the video tutorial for how to seam/assemble pillow panel:
~The End~
The pattern, the photographs and video tutorials in this document are the property of Nautikrall Crochet. You may sell items you make from this pattern; but may not sell, reproduce, or distribute this pattern, in whole or in part, as your own.
Copyright © 2023 Nautikrall Crochet – All rights reserved.