
Aurelia Pillow Pattern x Limoncello Collection by Hue Loco

This post contains affiliate links. Affiliate links cost you nothing, but when purchasing through these links you help me earn a small commission. This supports me and my family and my continued efforts to bring you free patterns.
Intro:
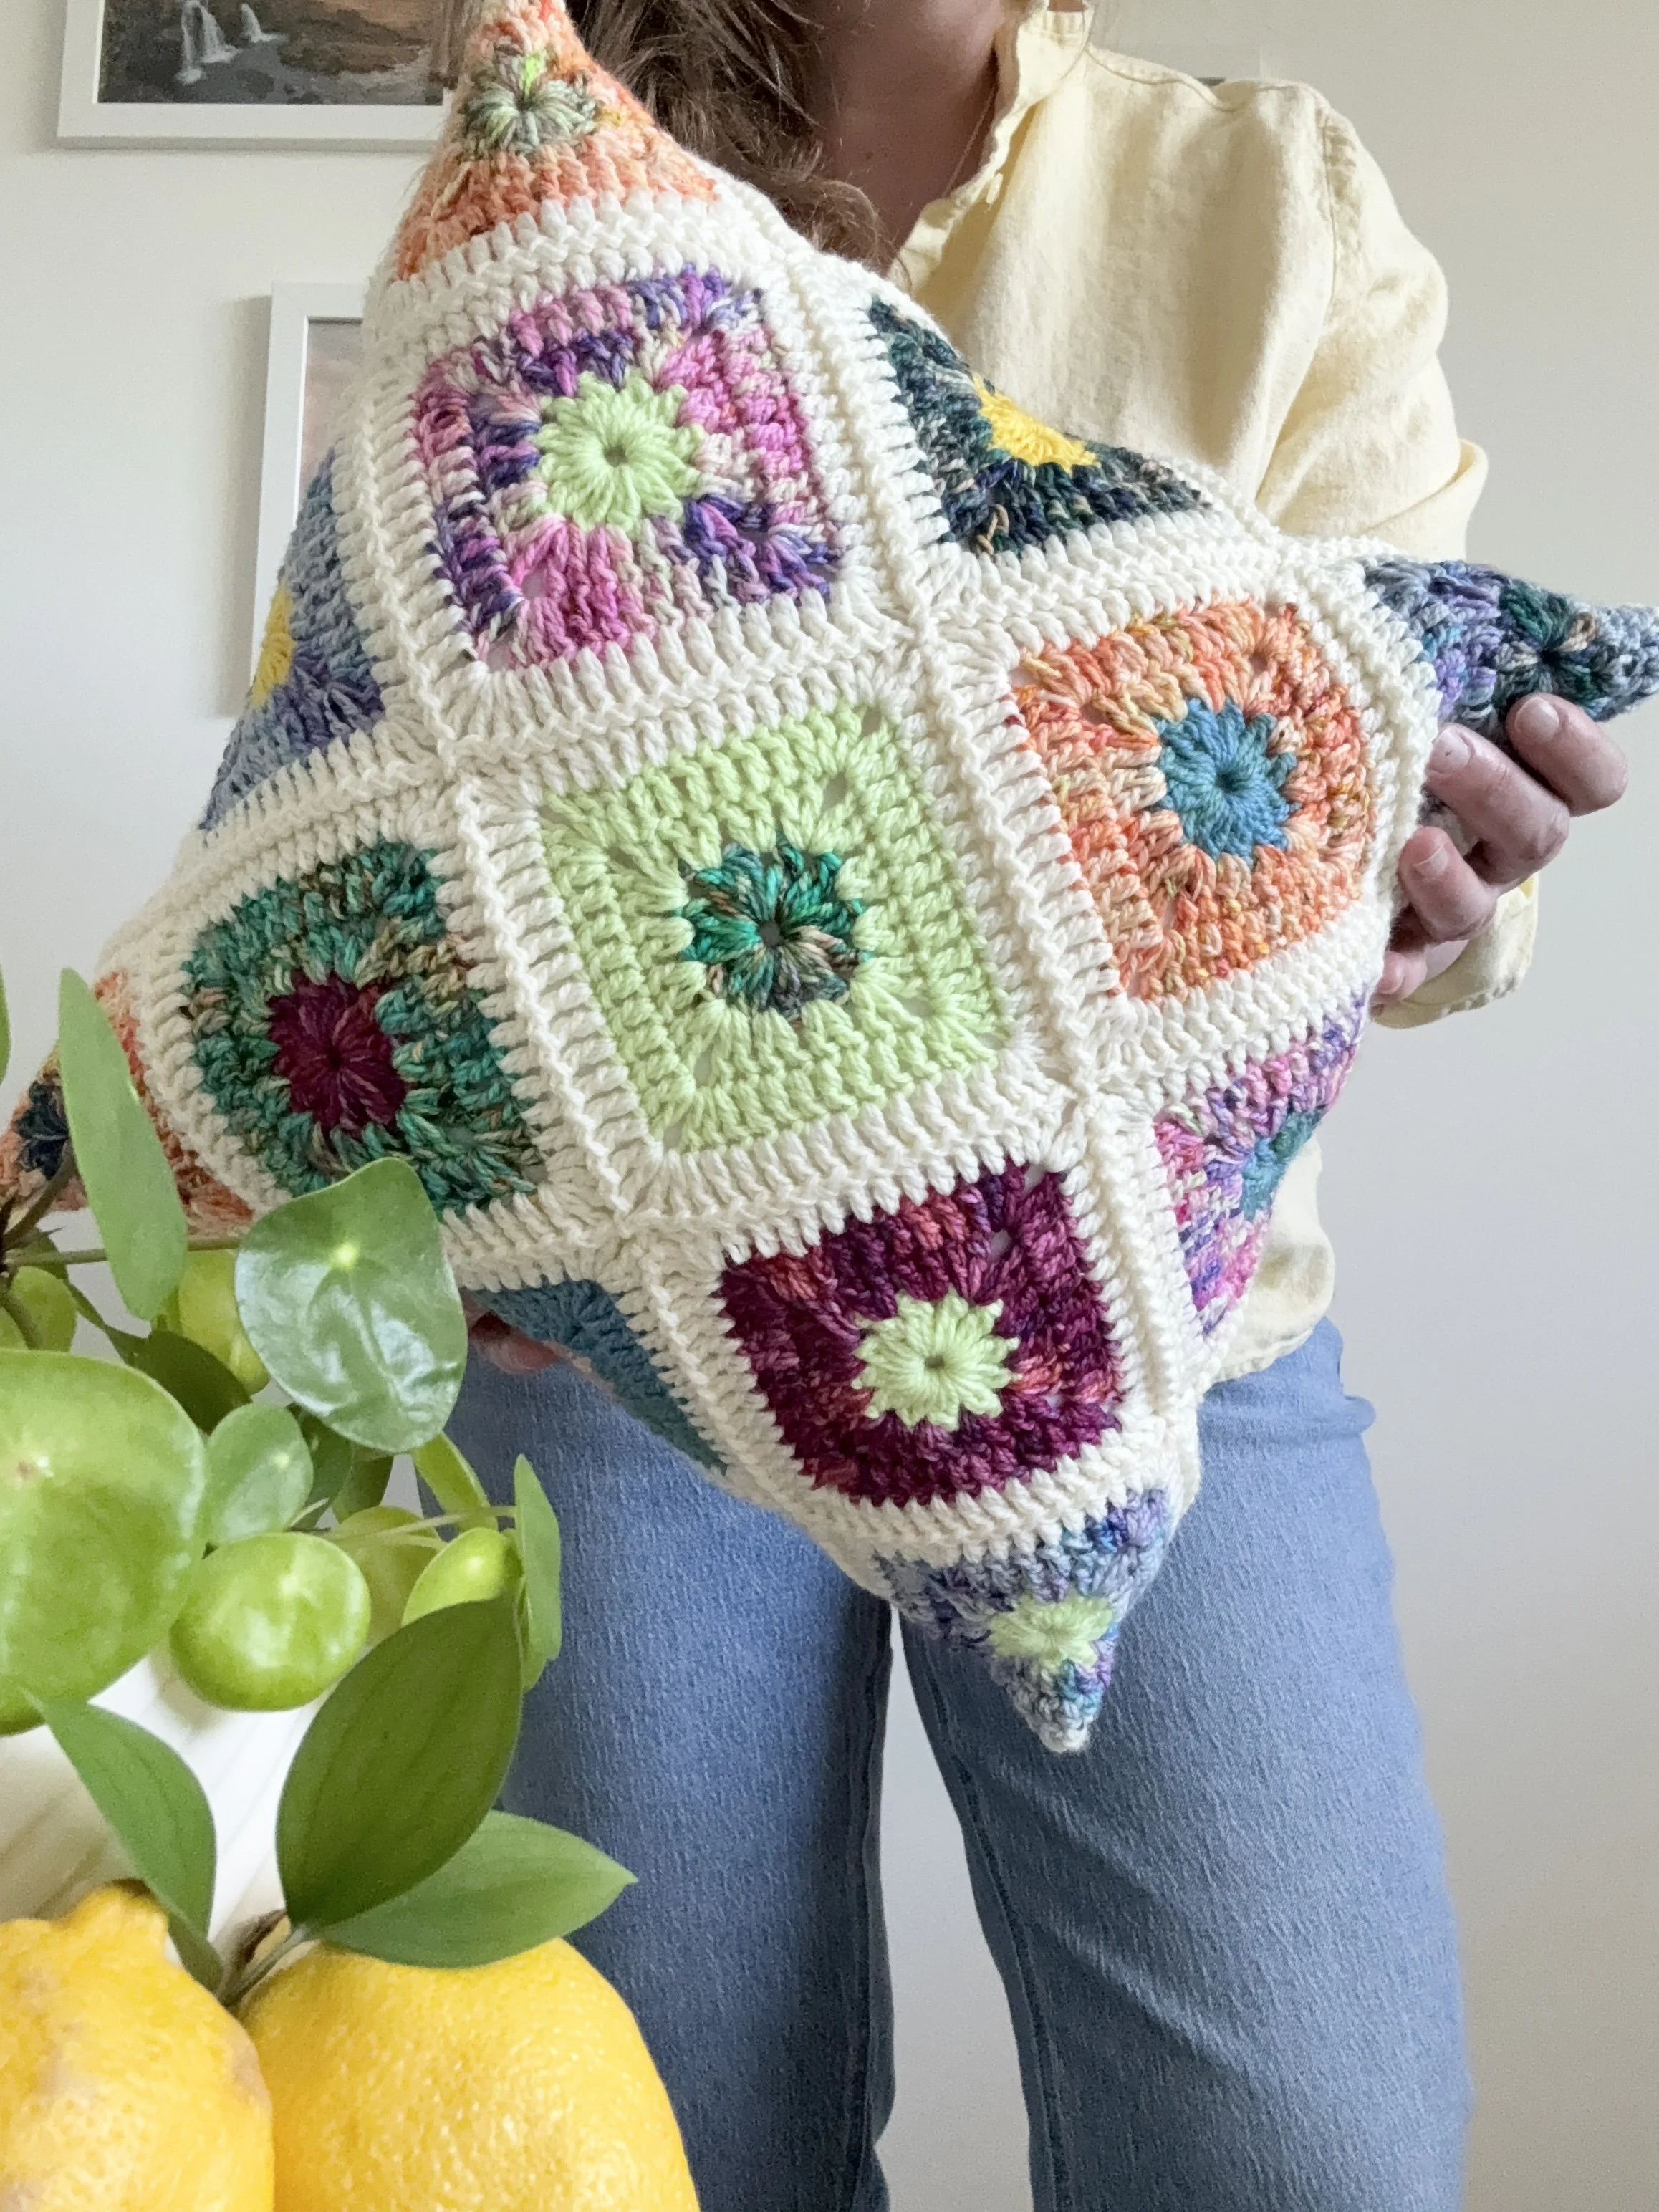
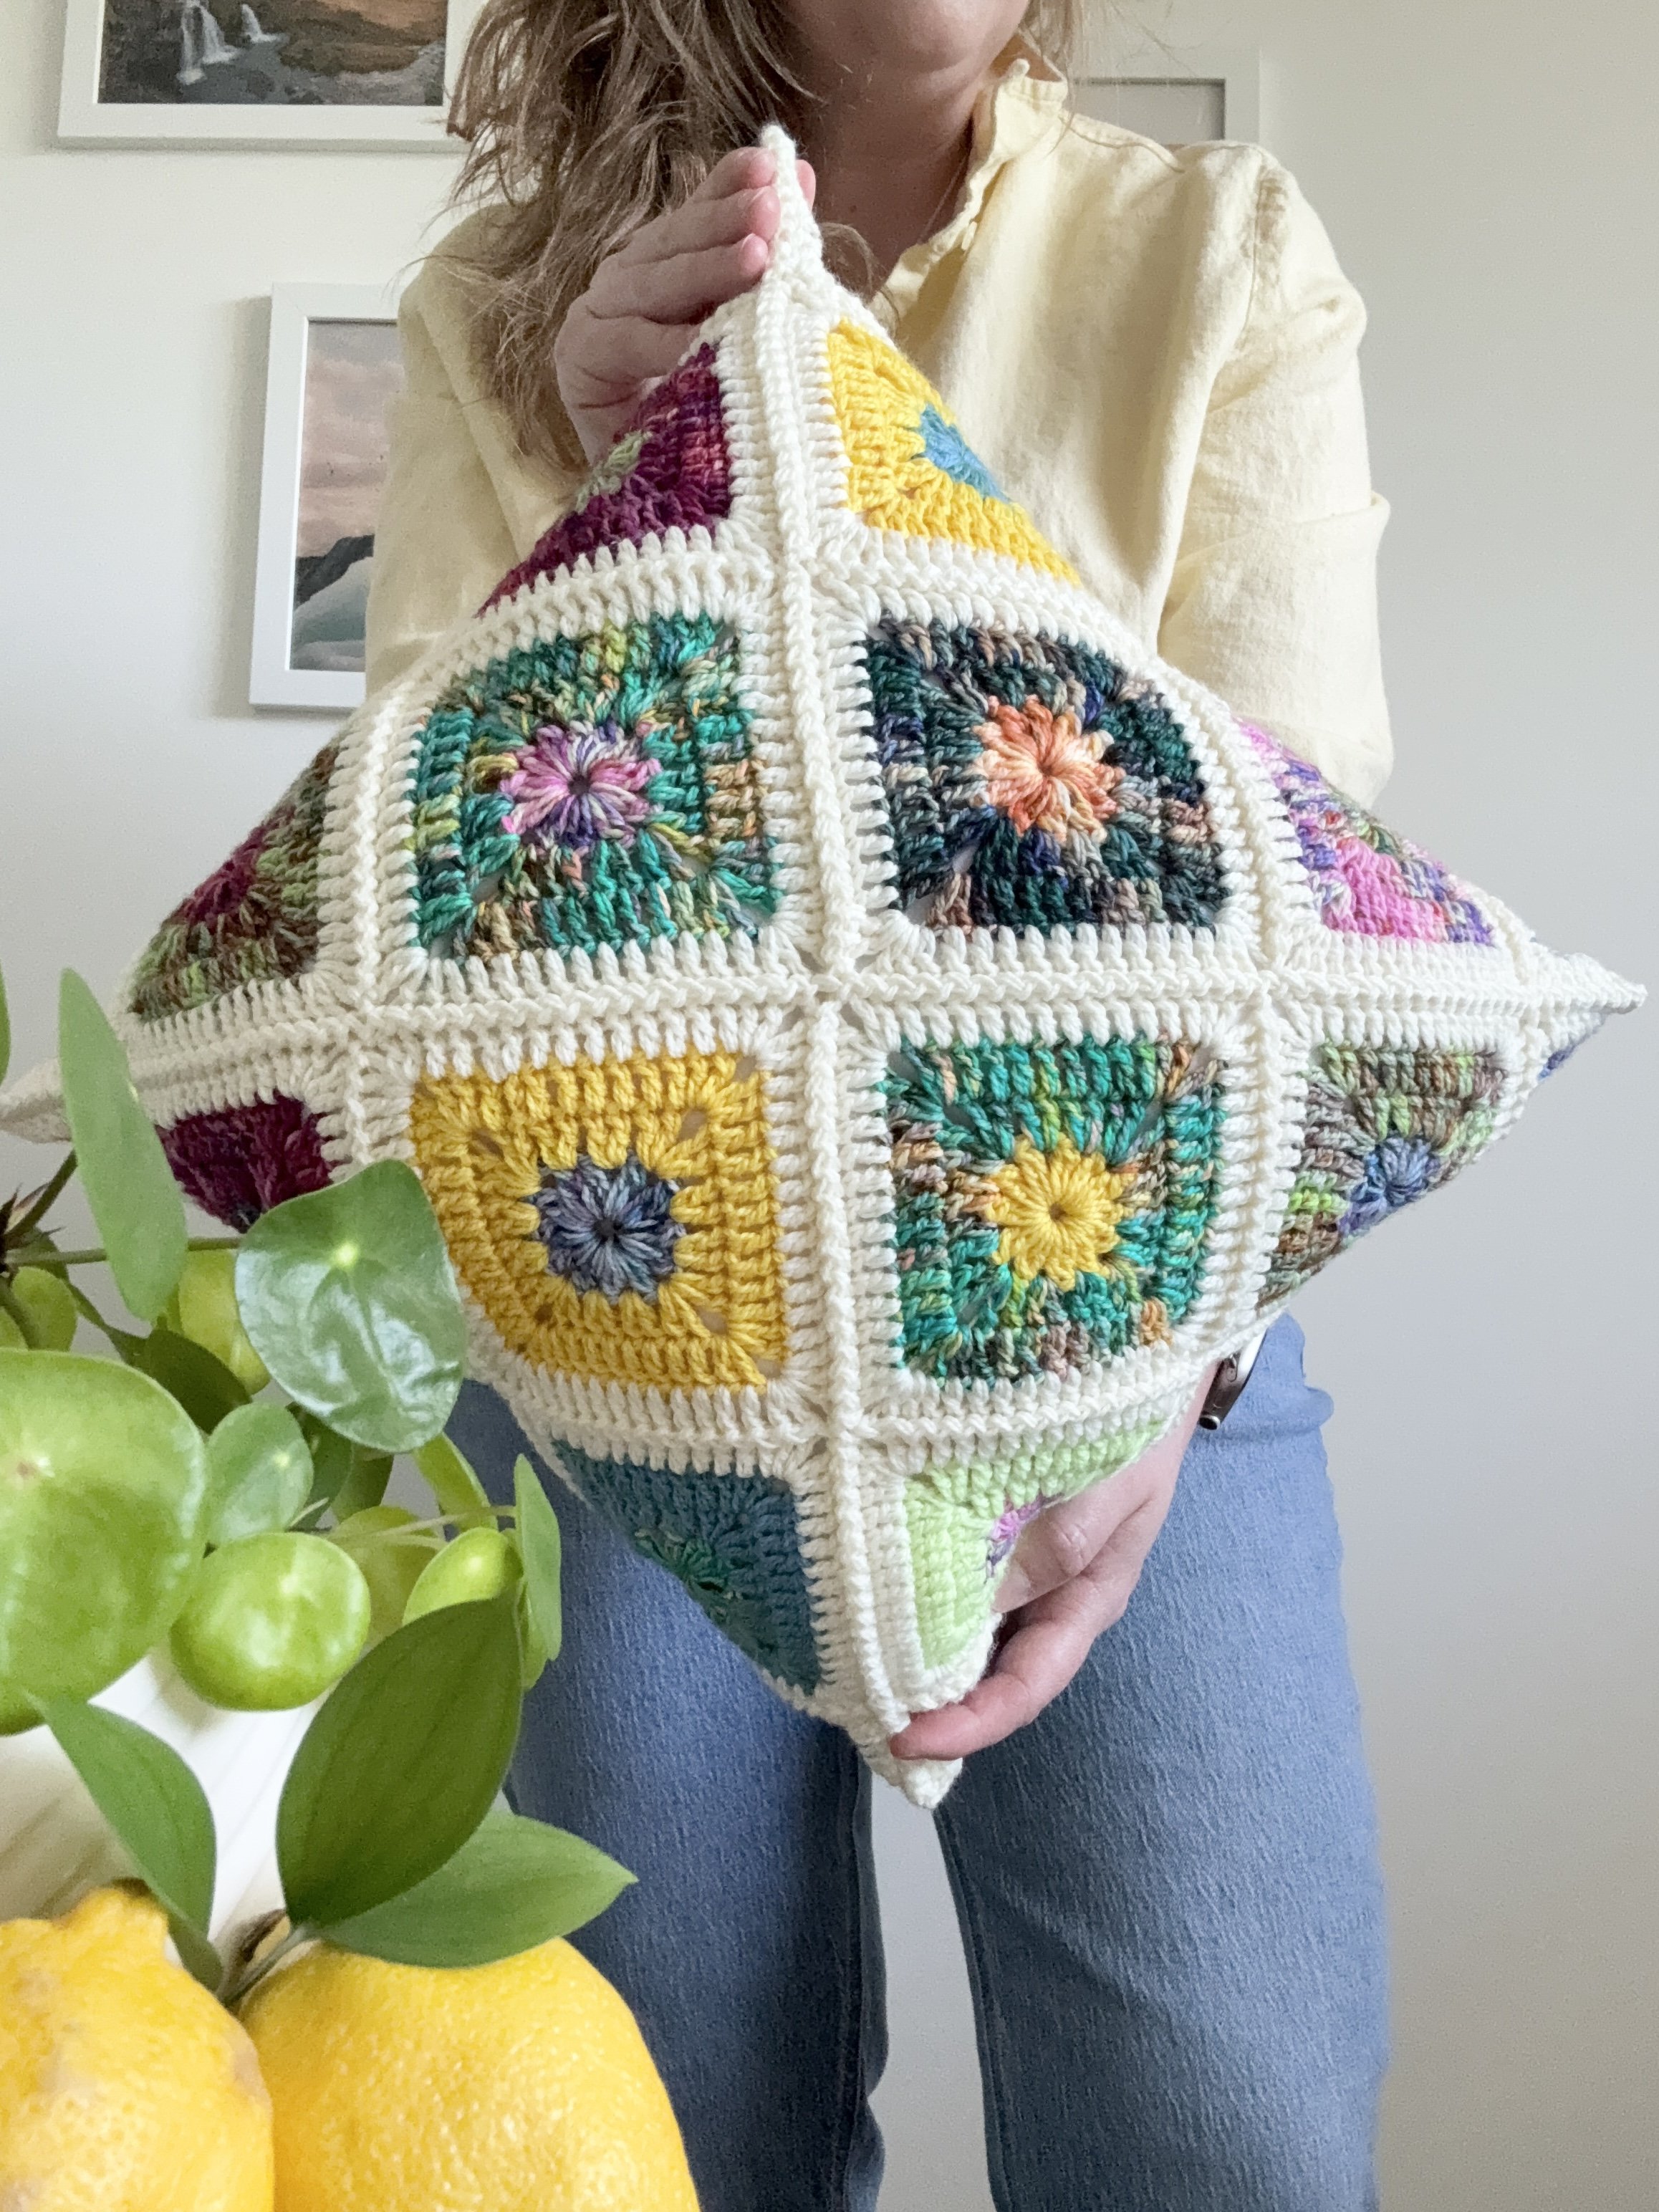
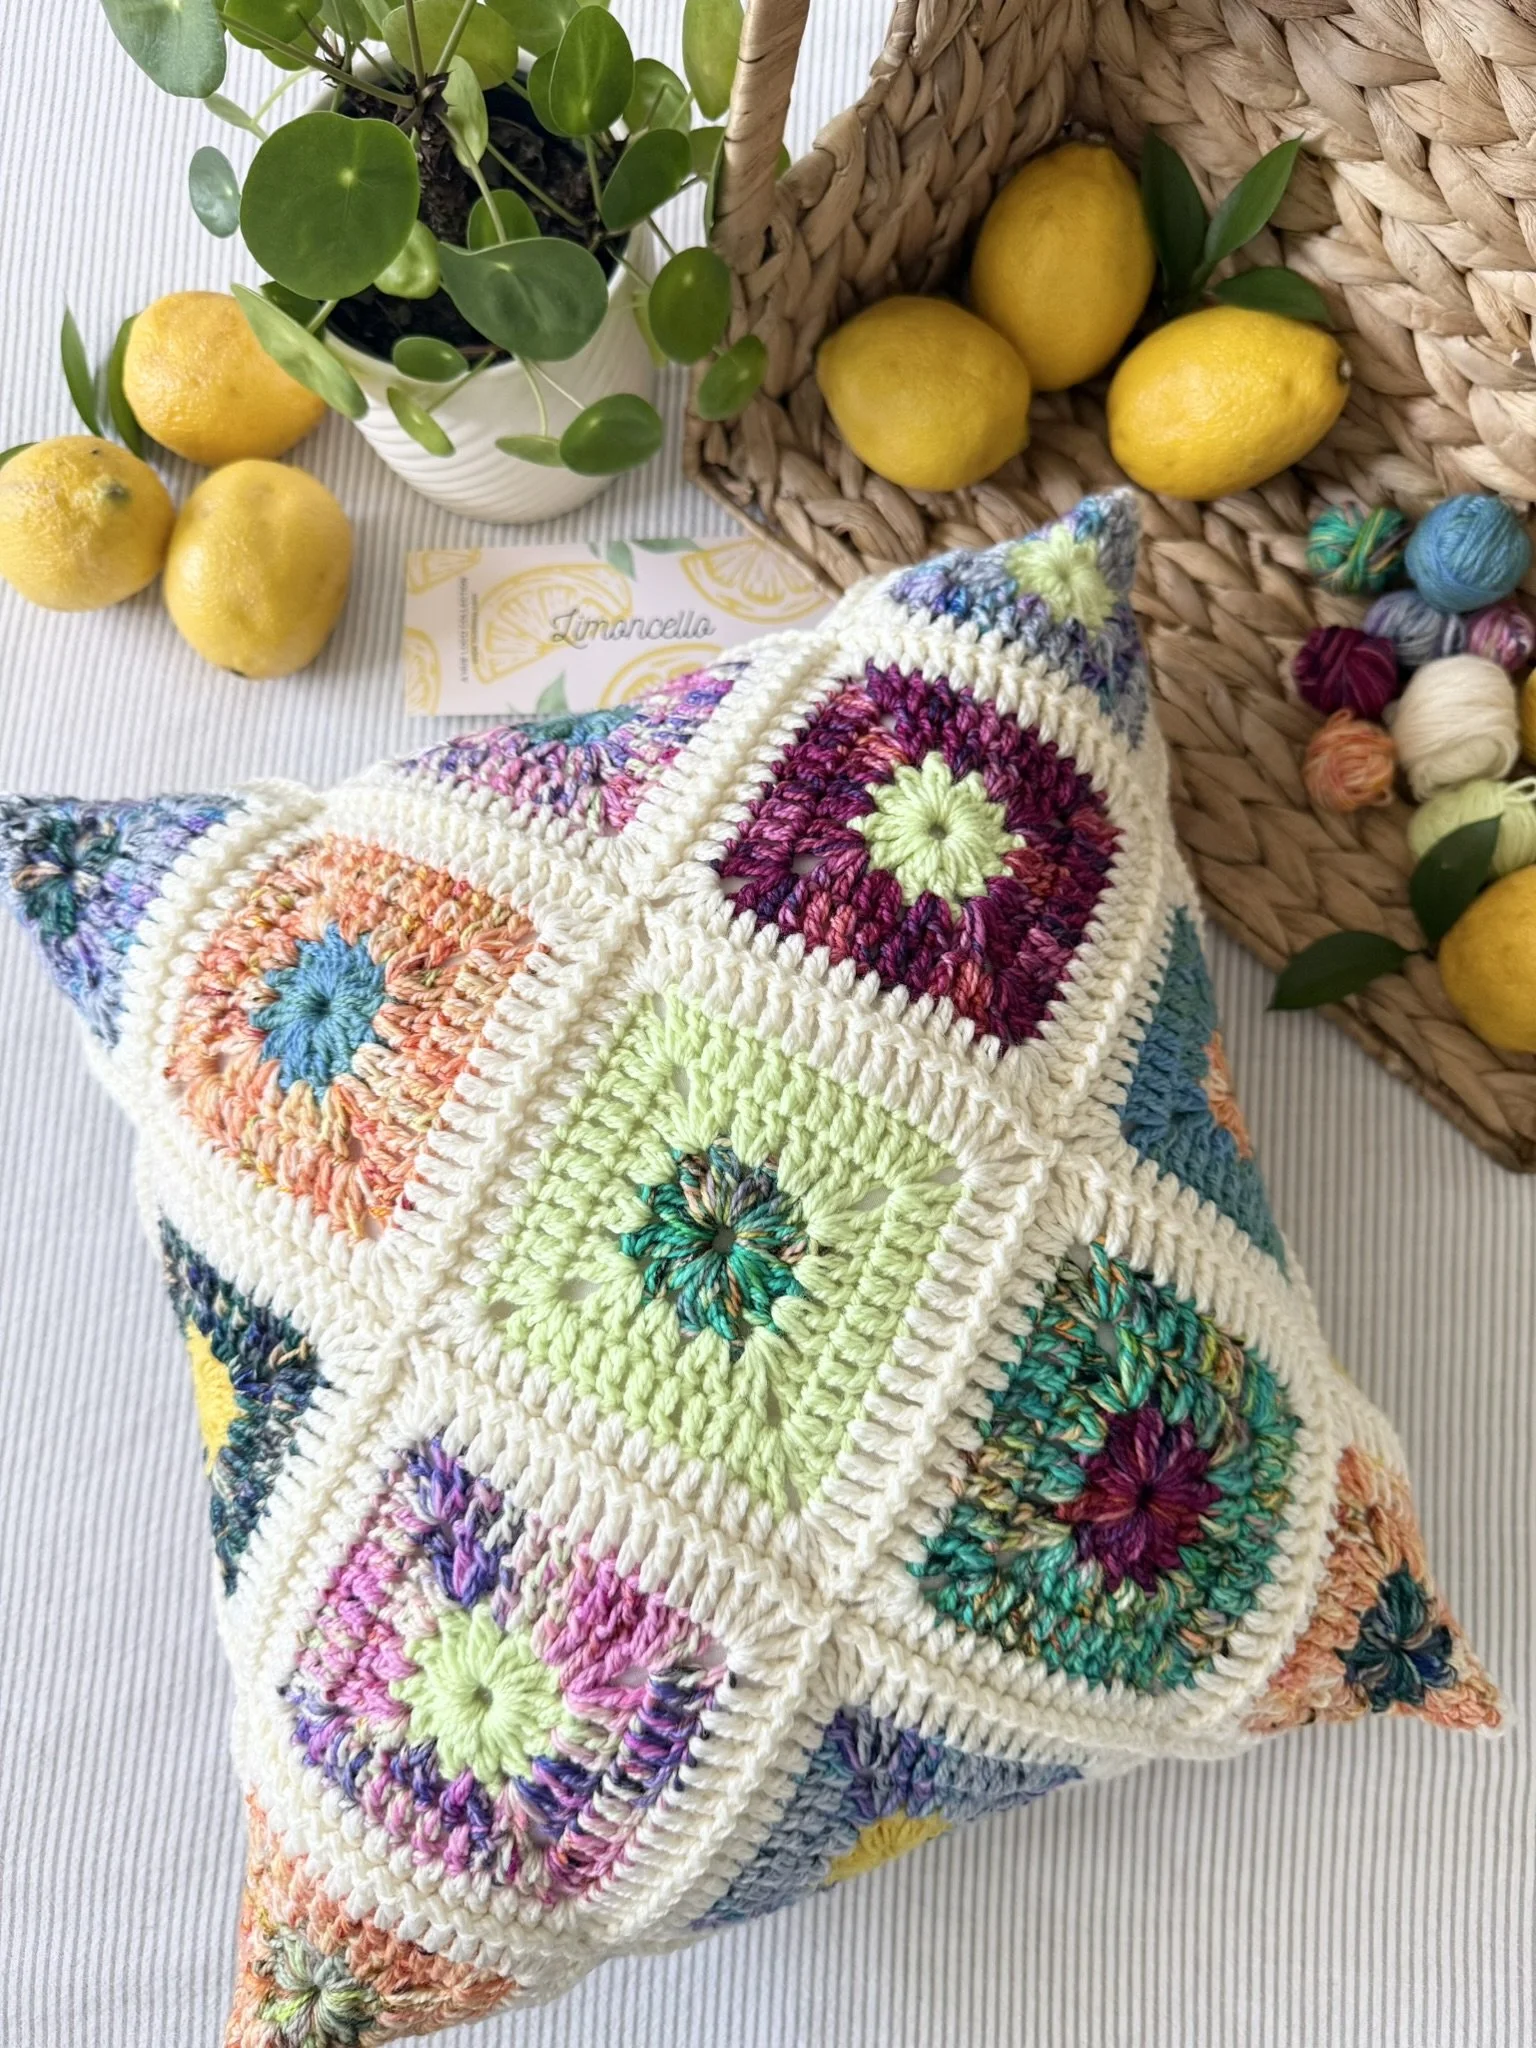
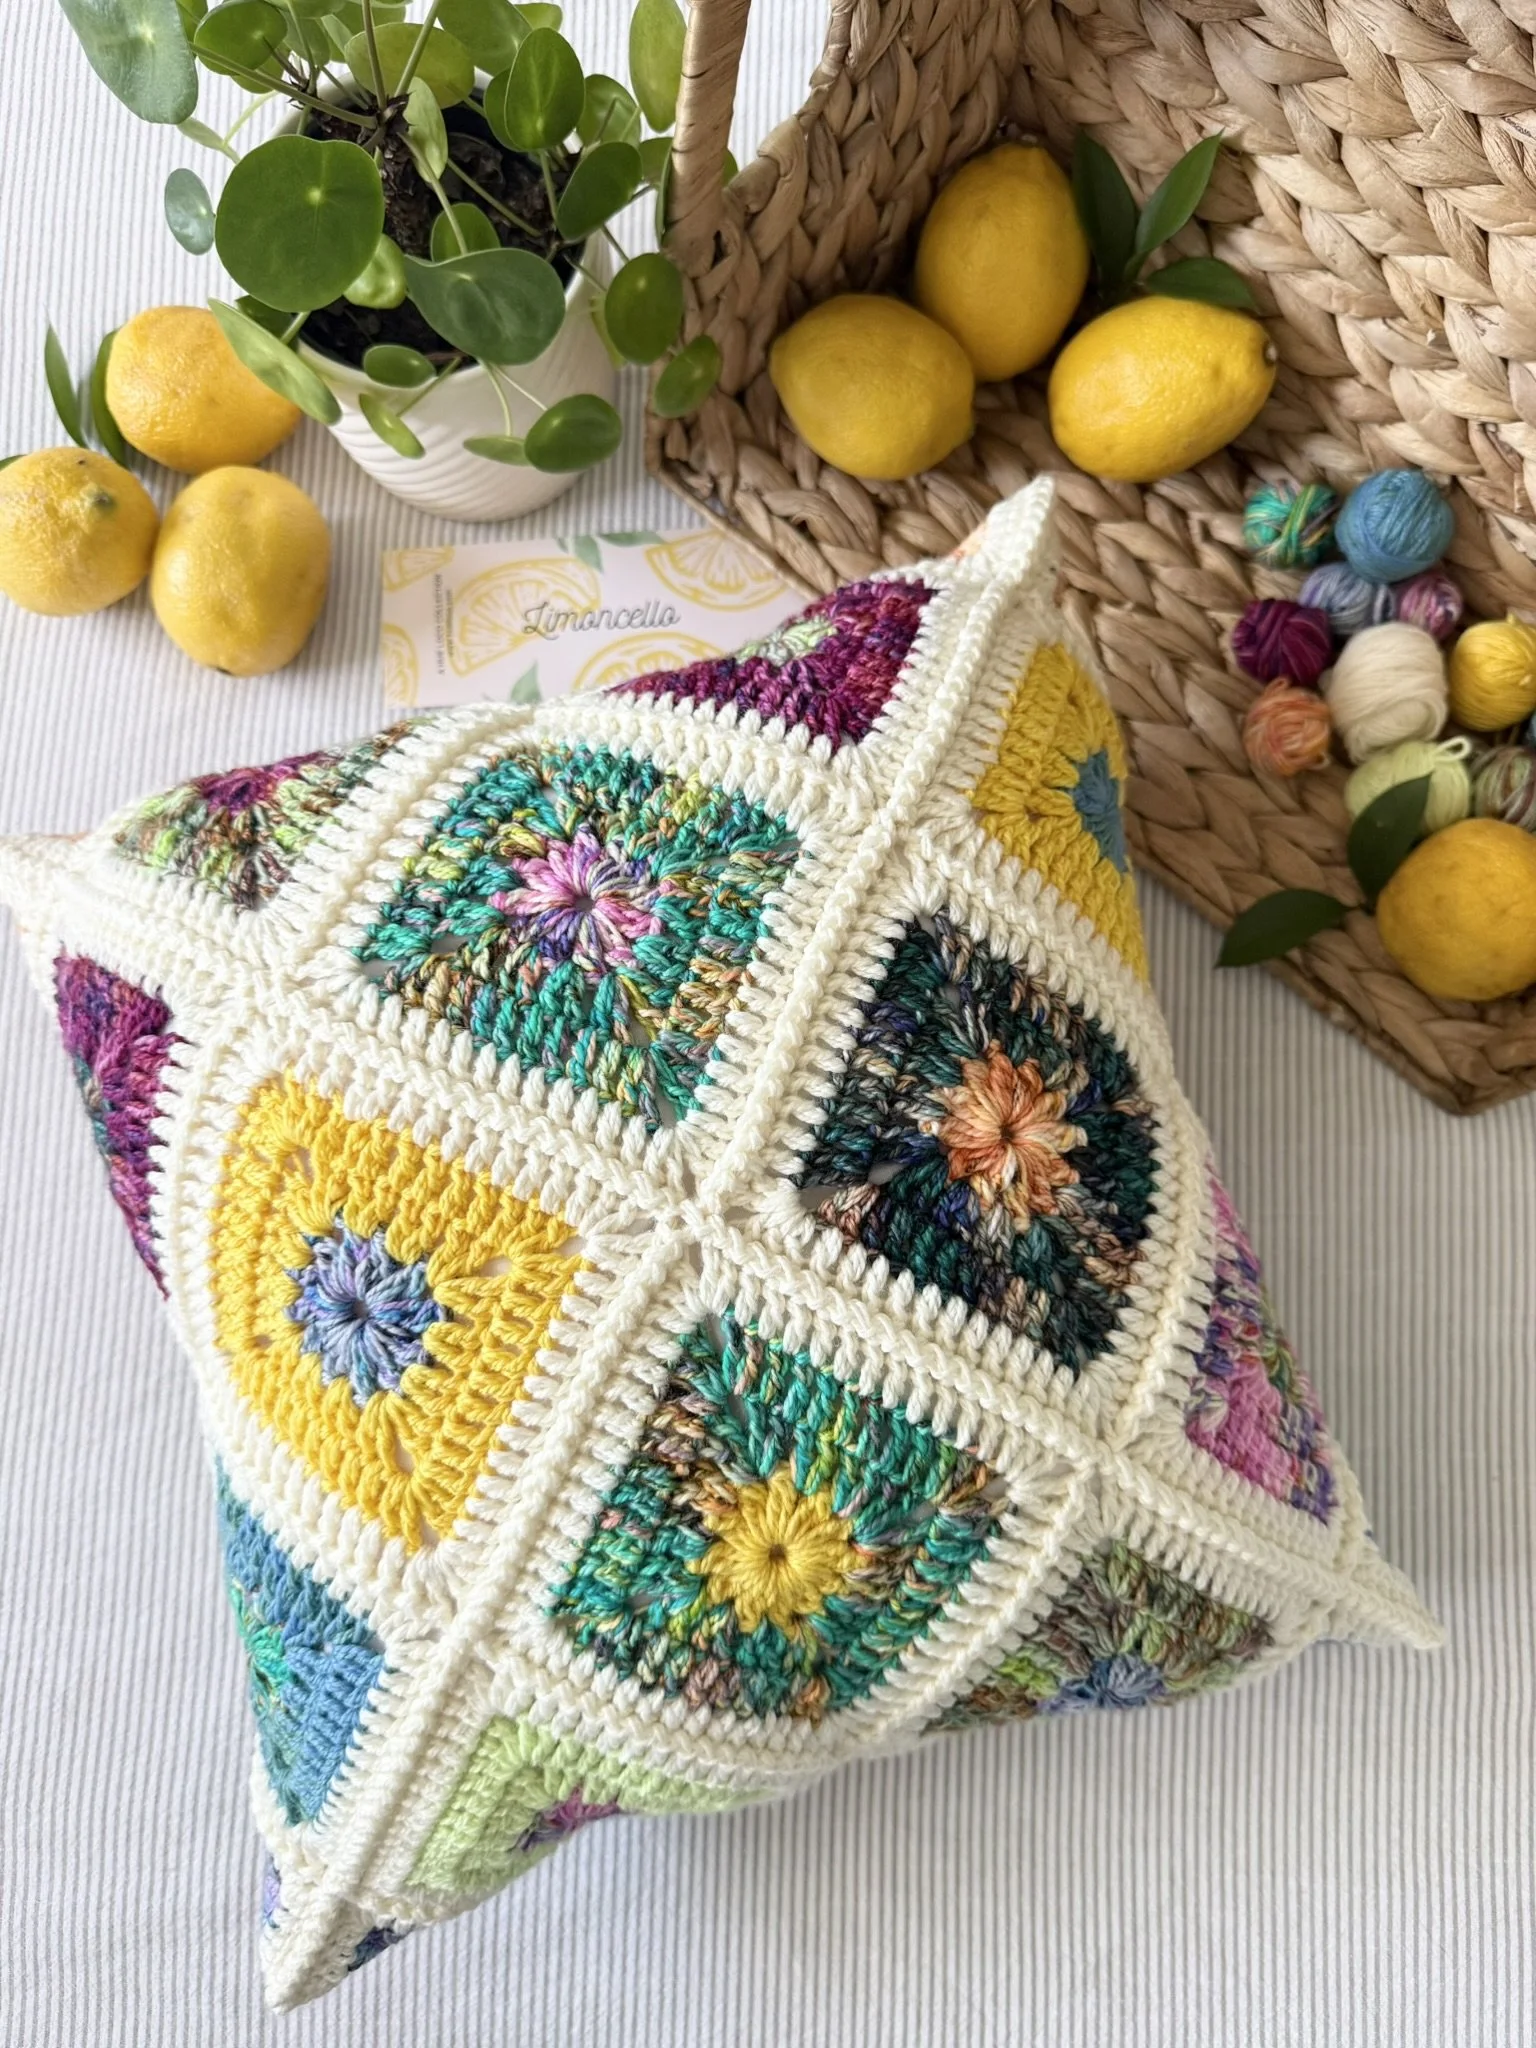
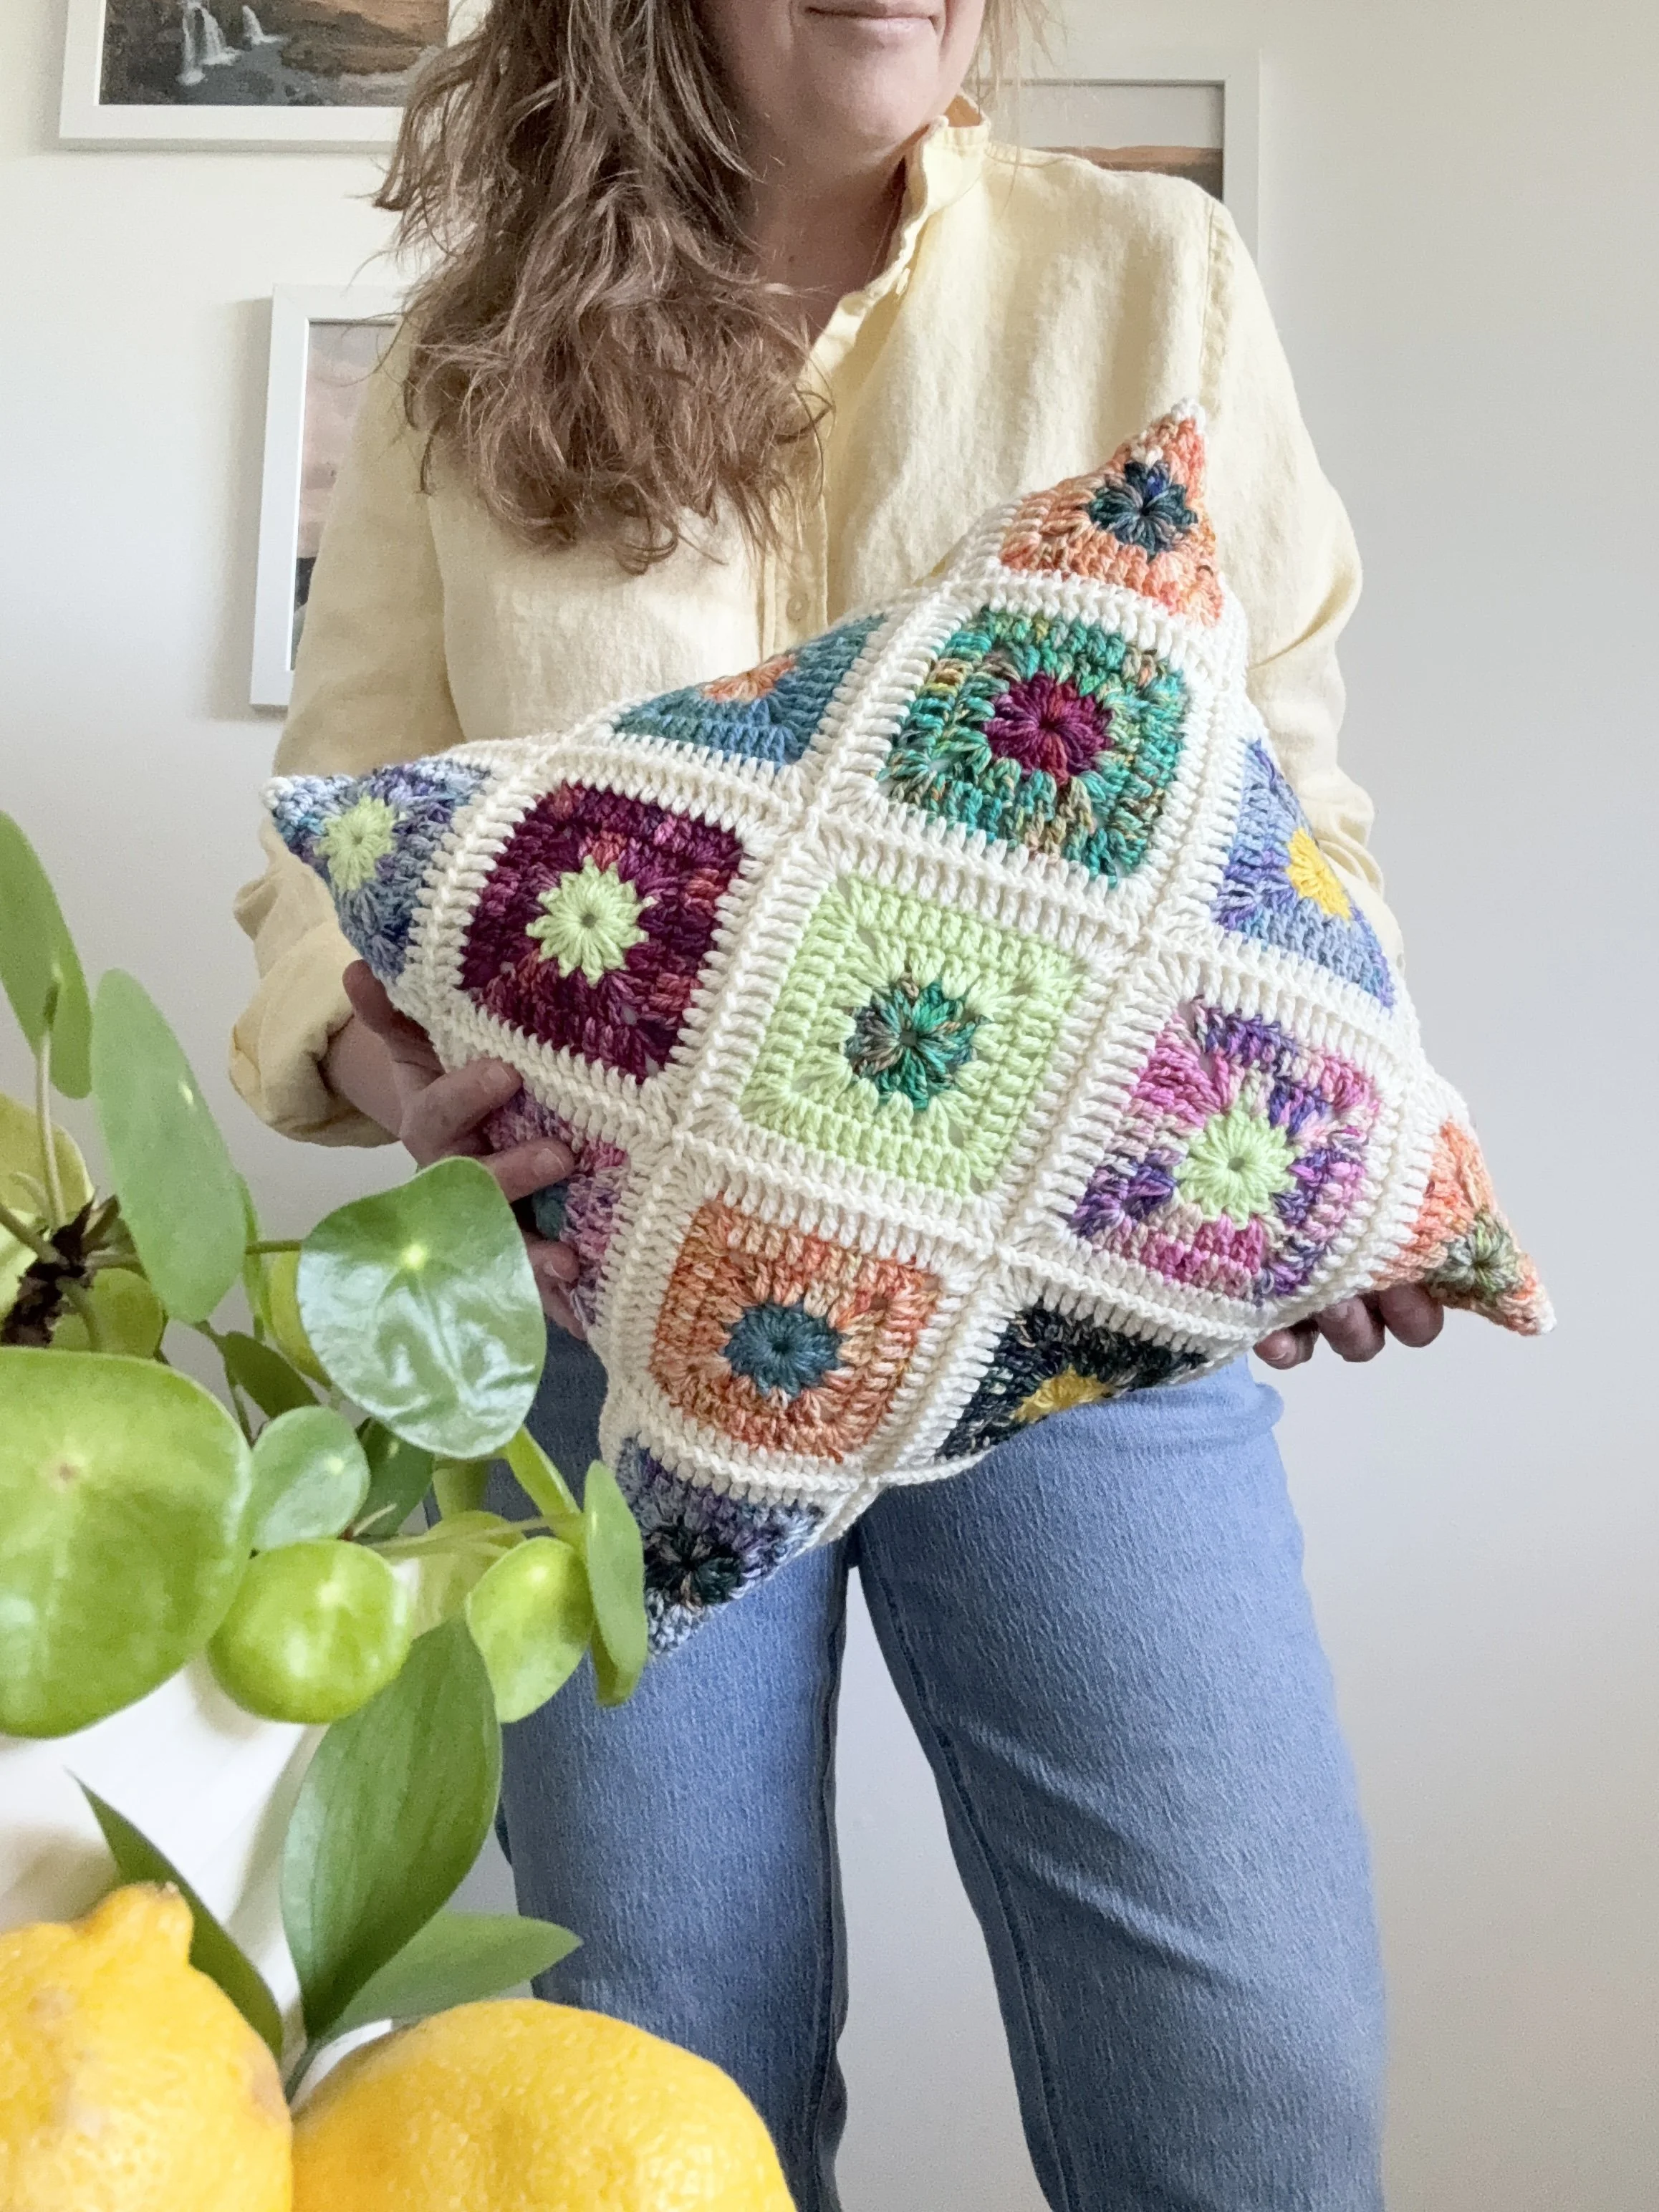
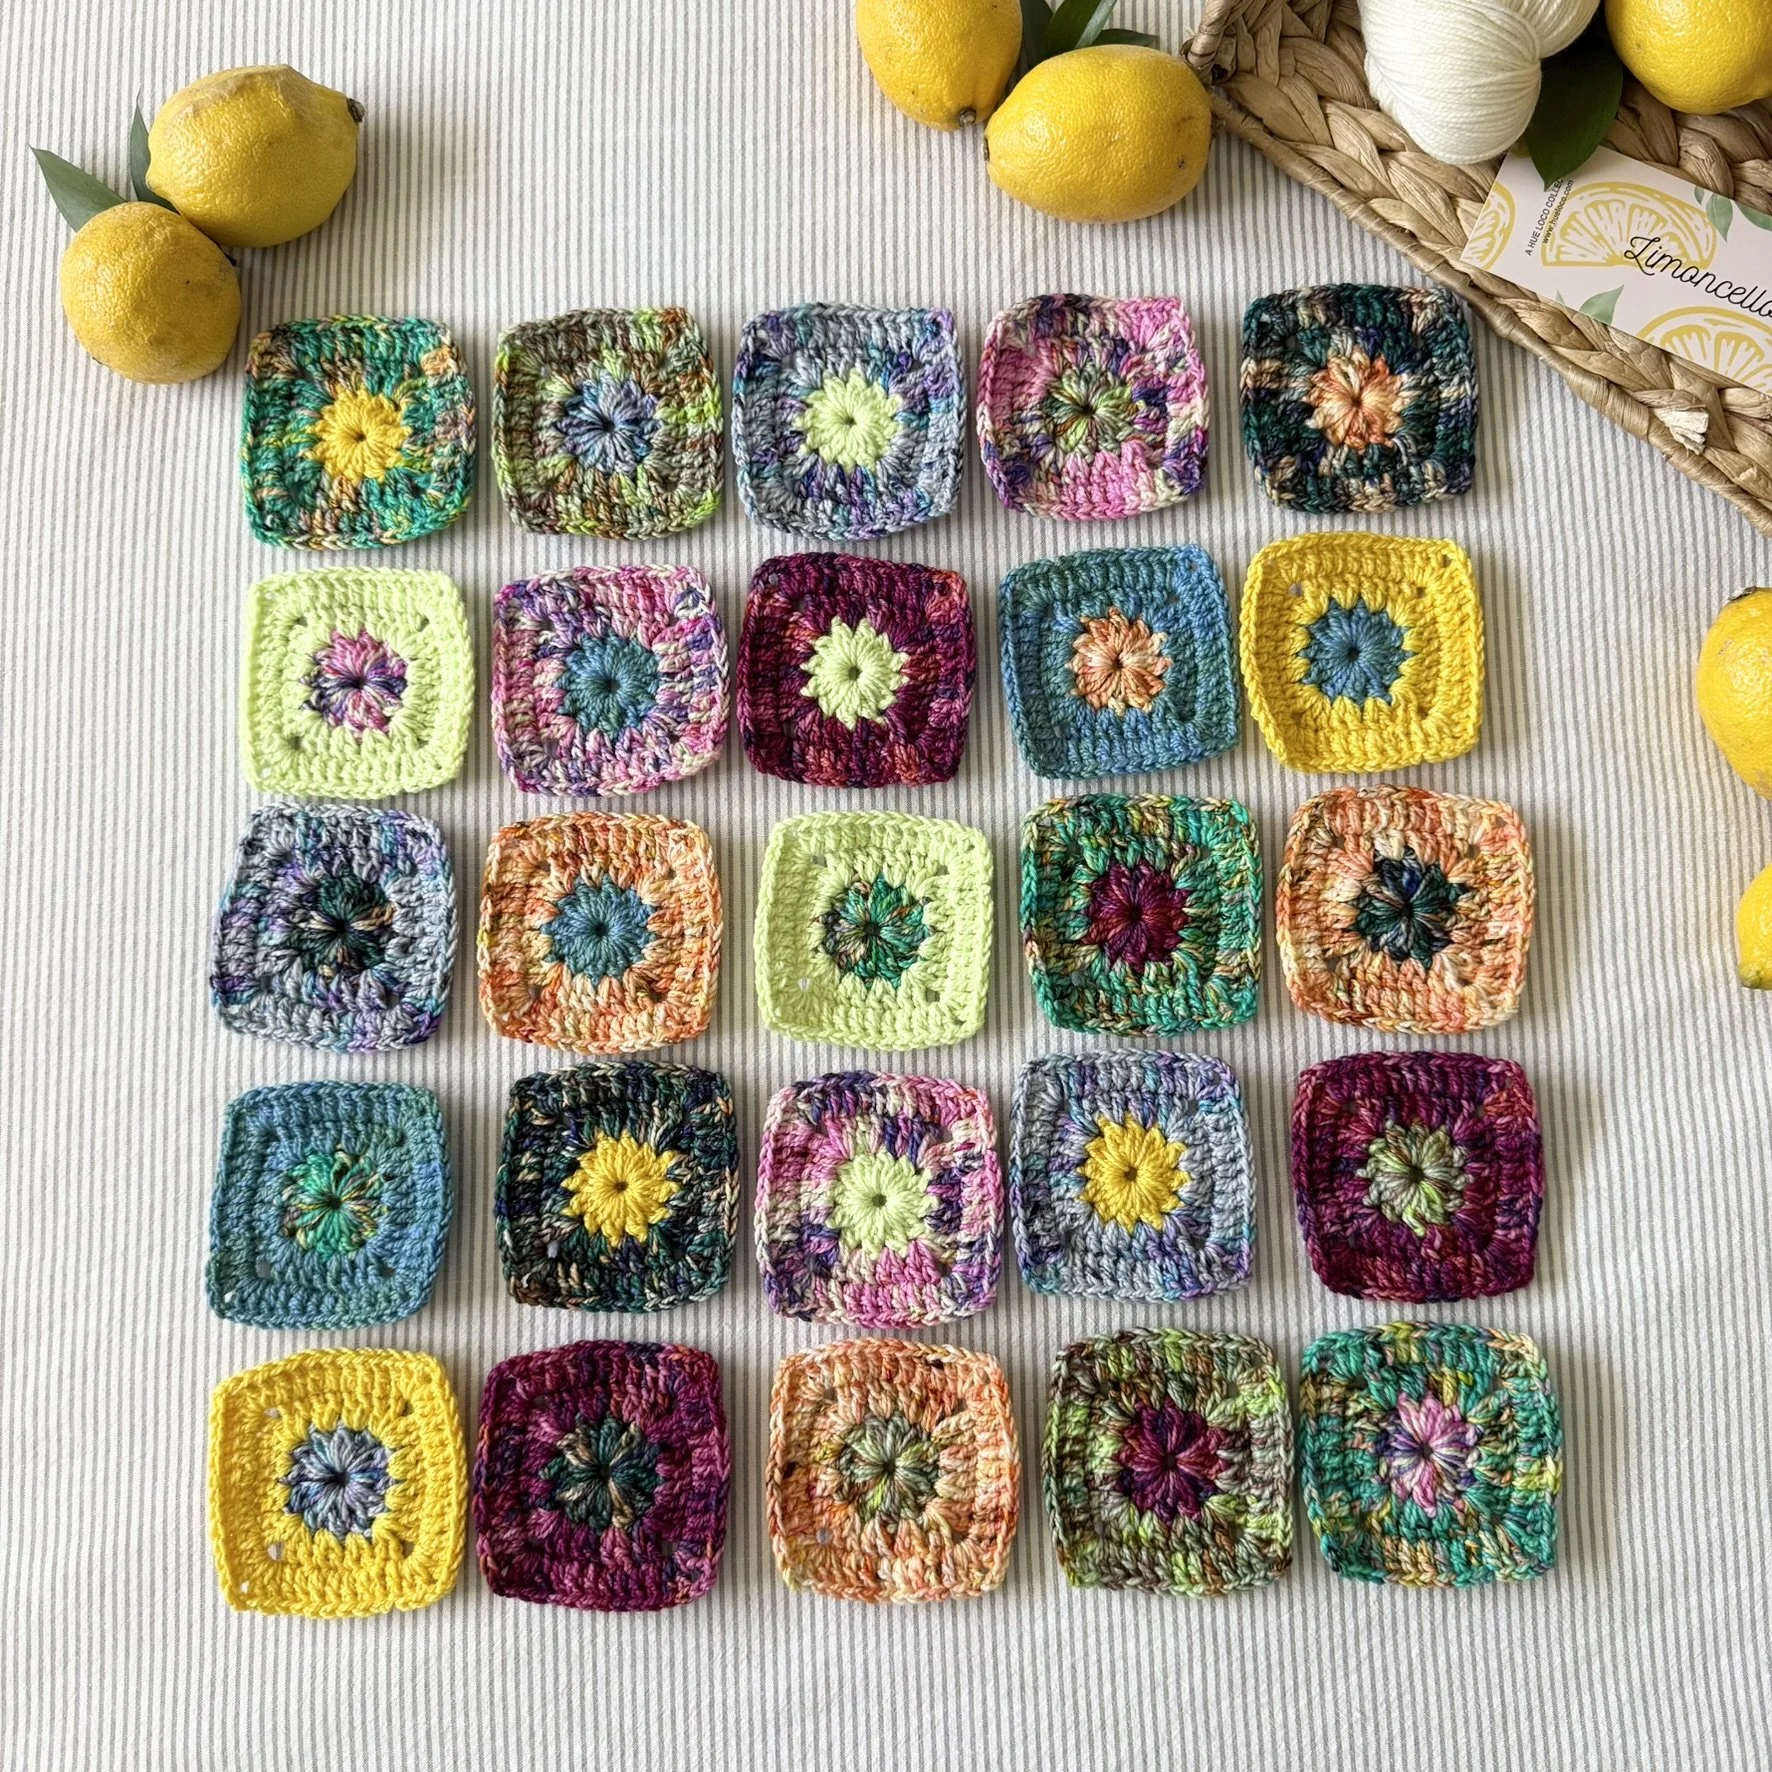
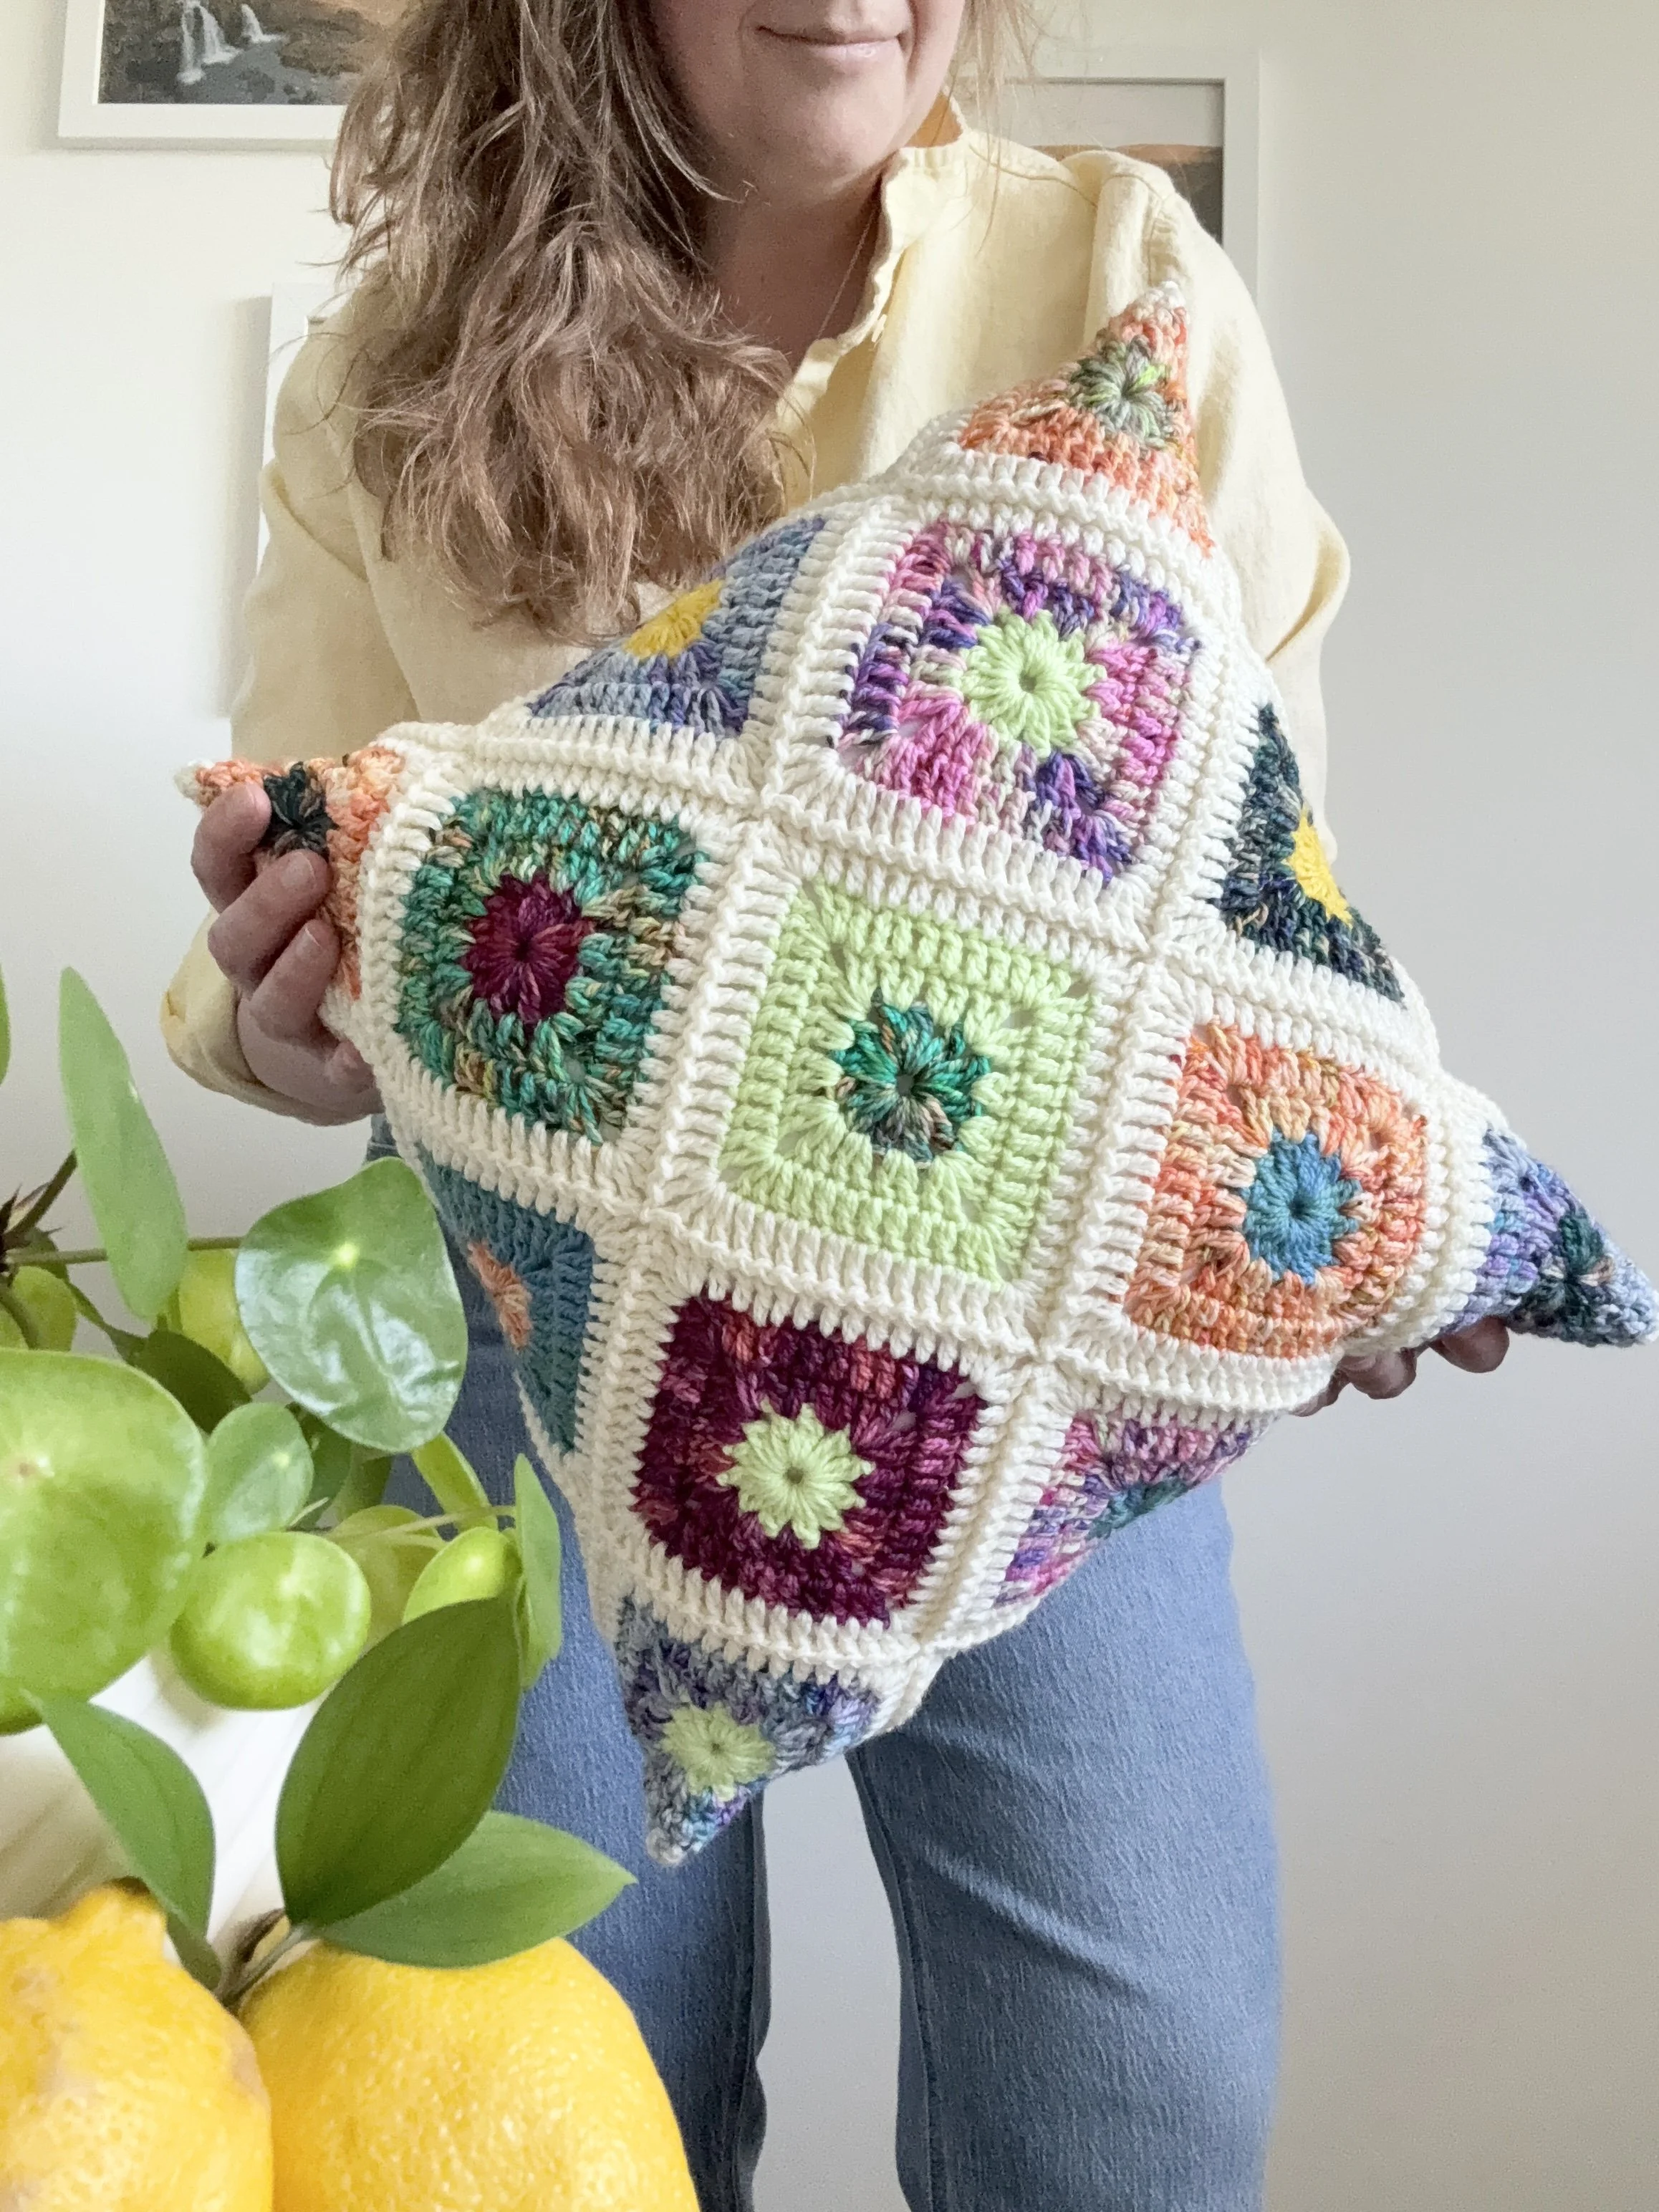
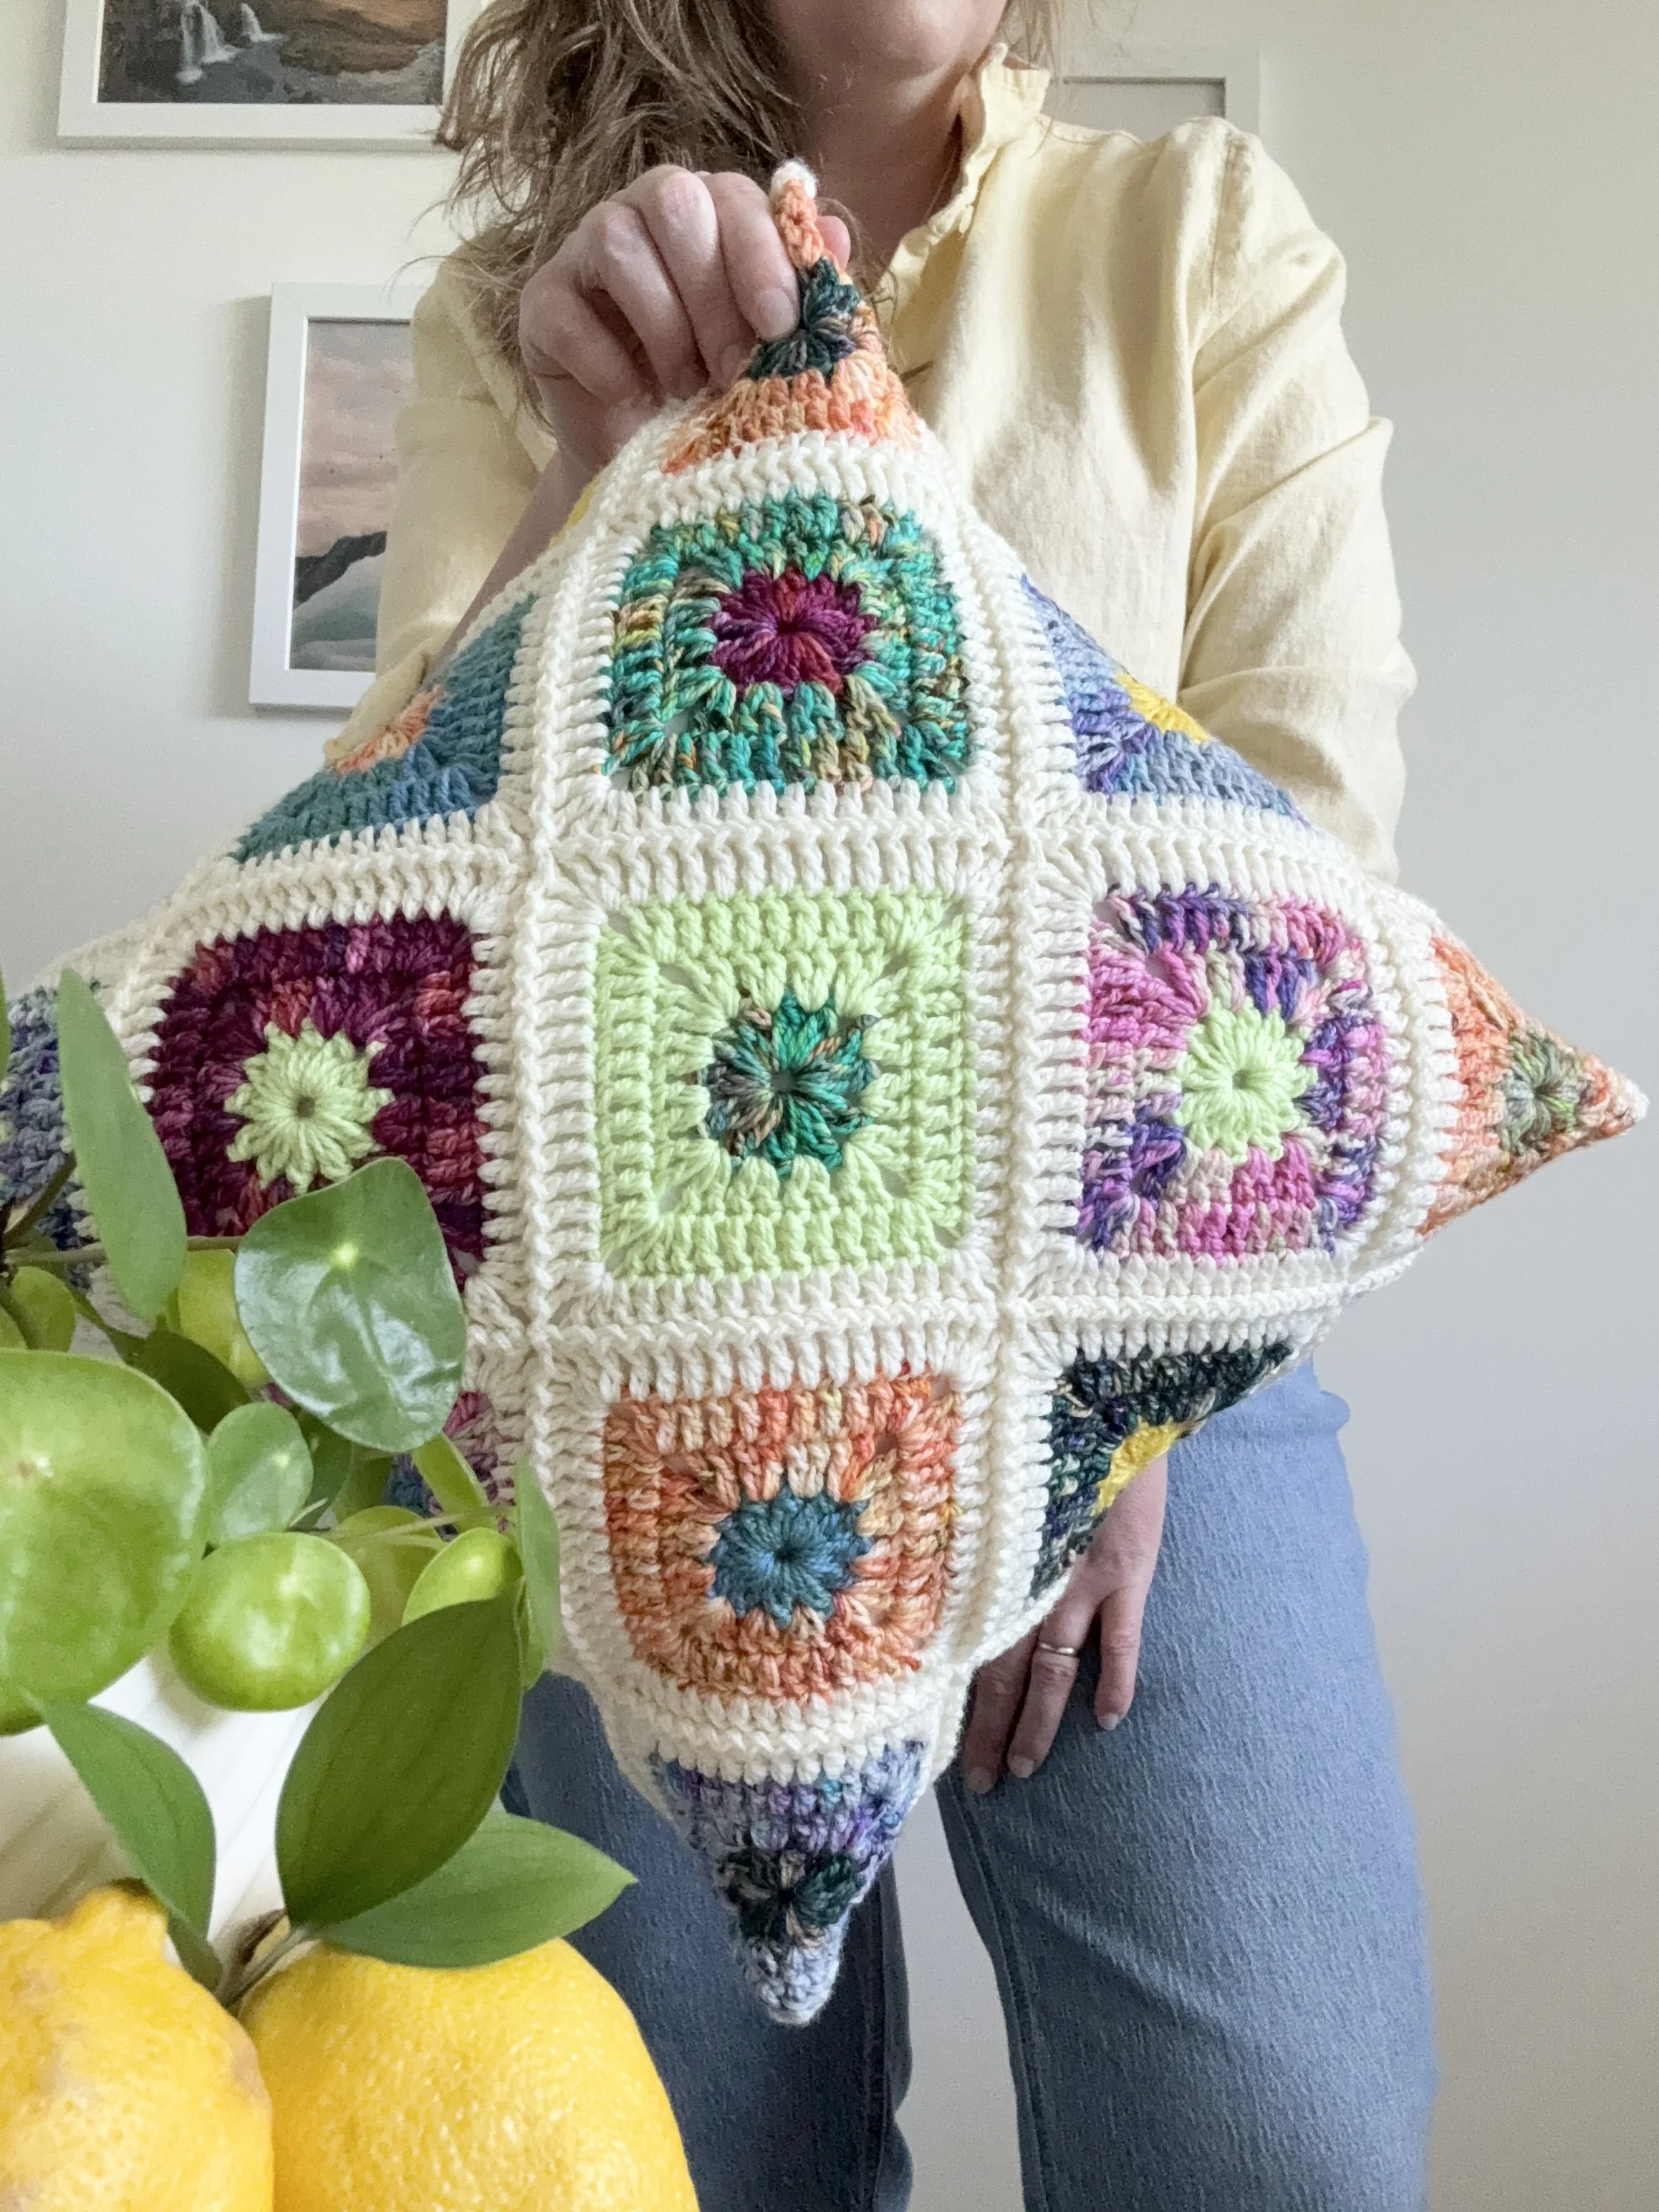
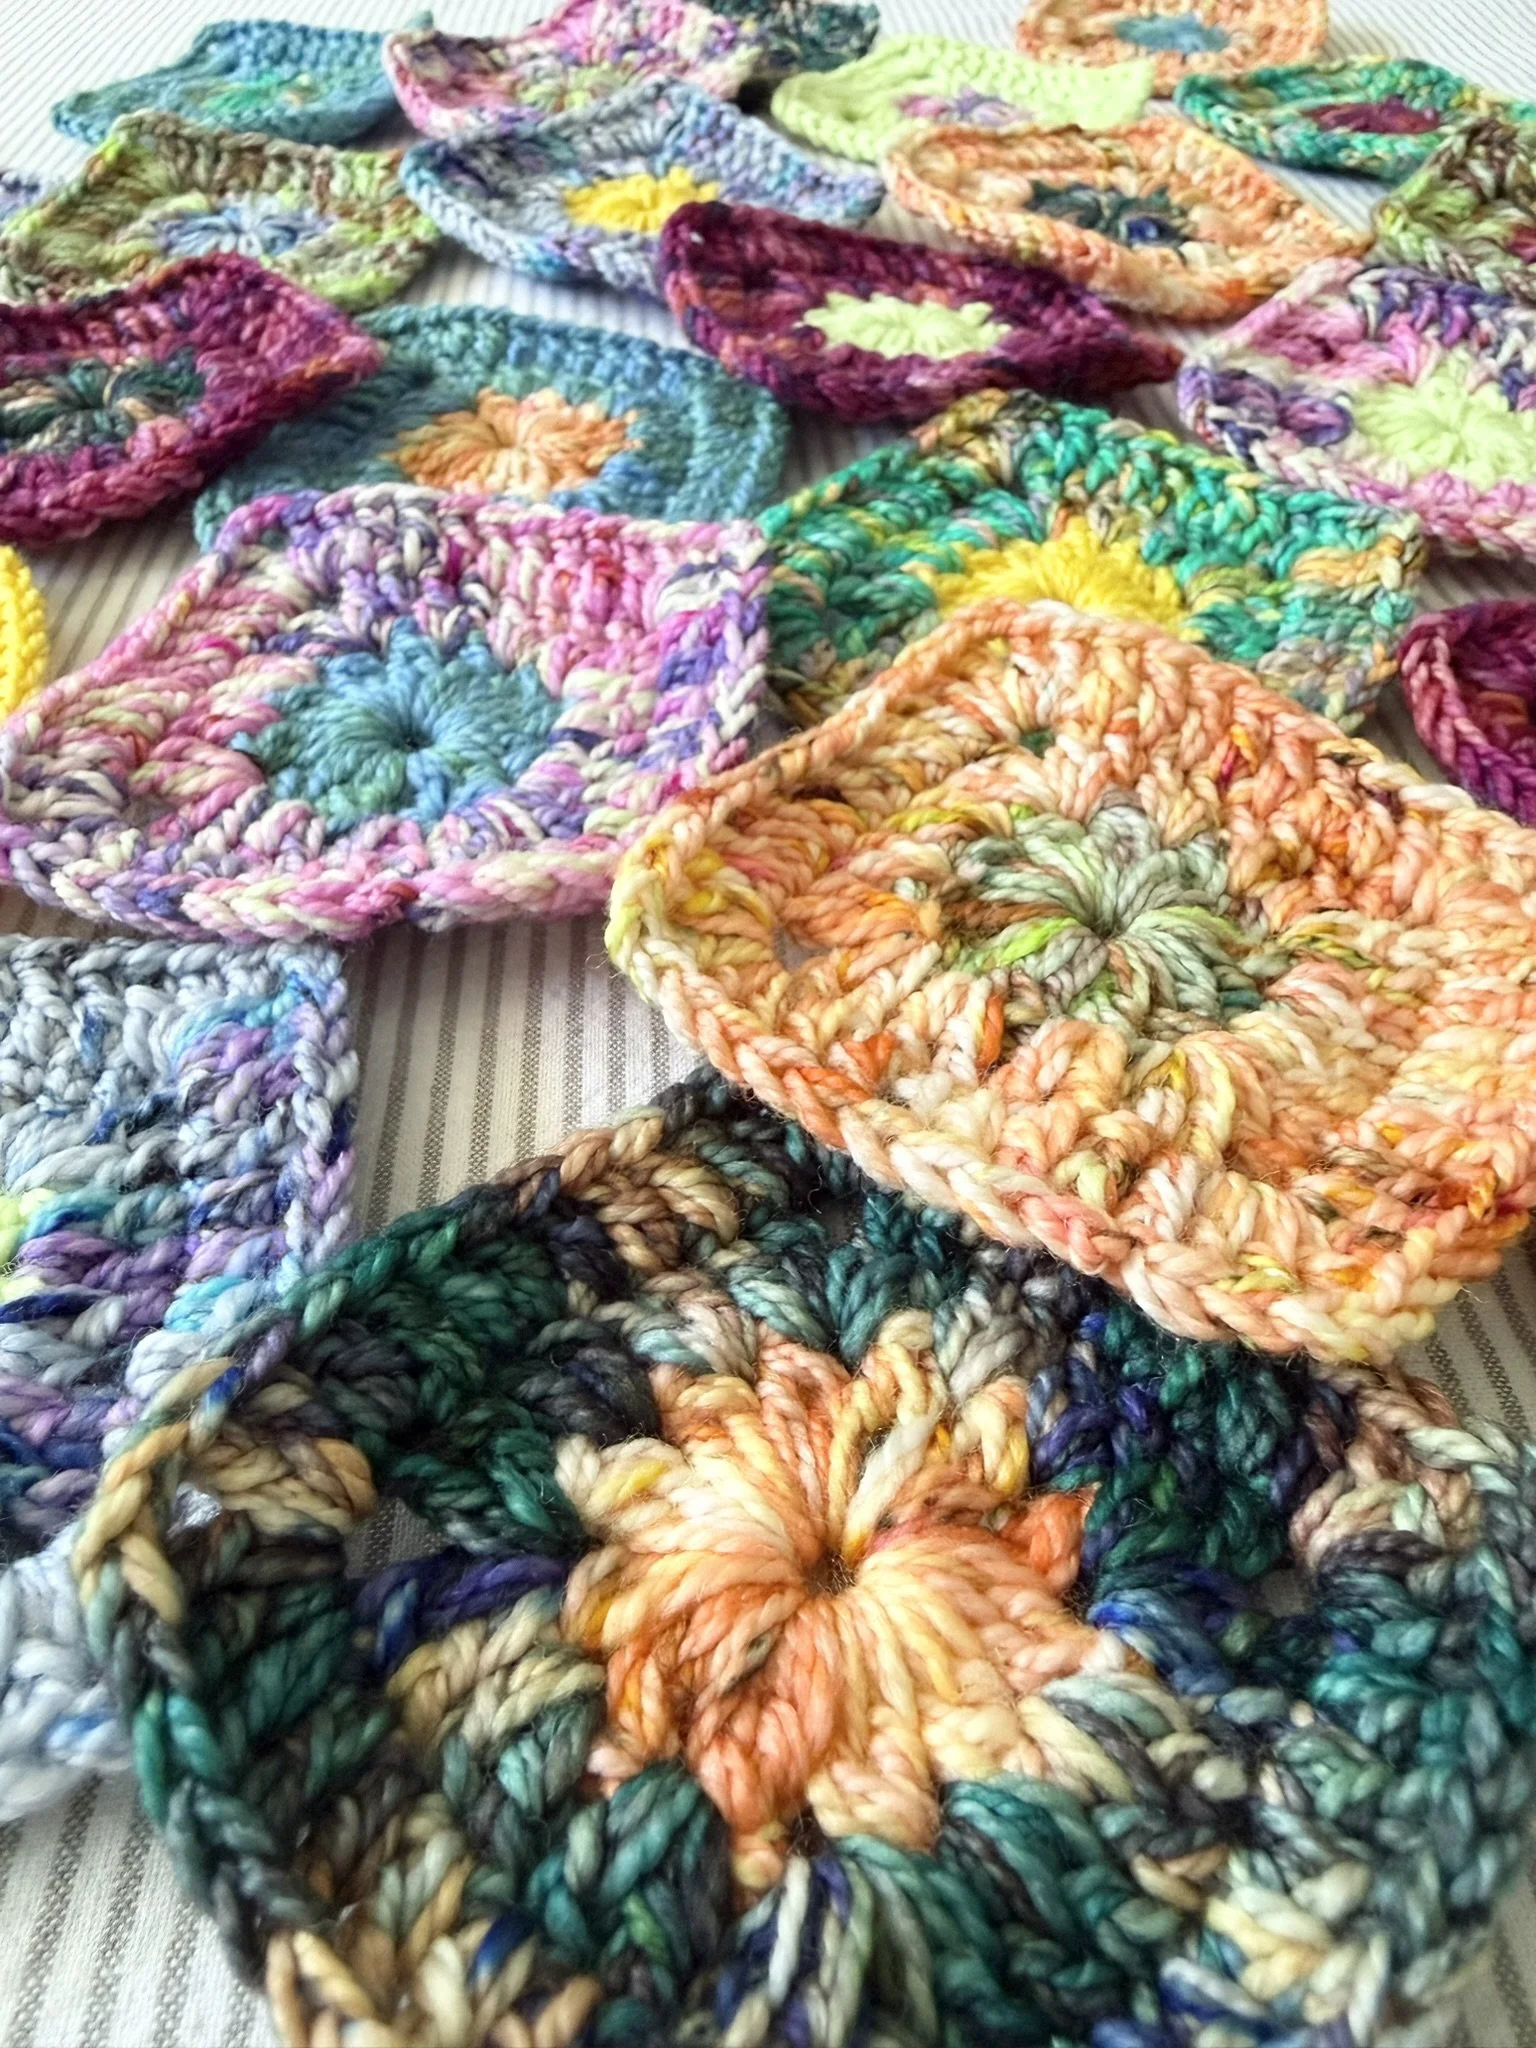
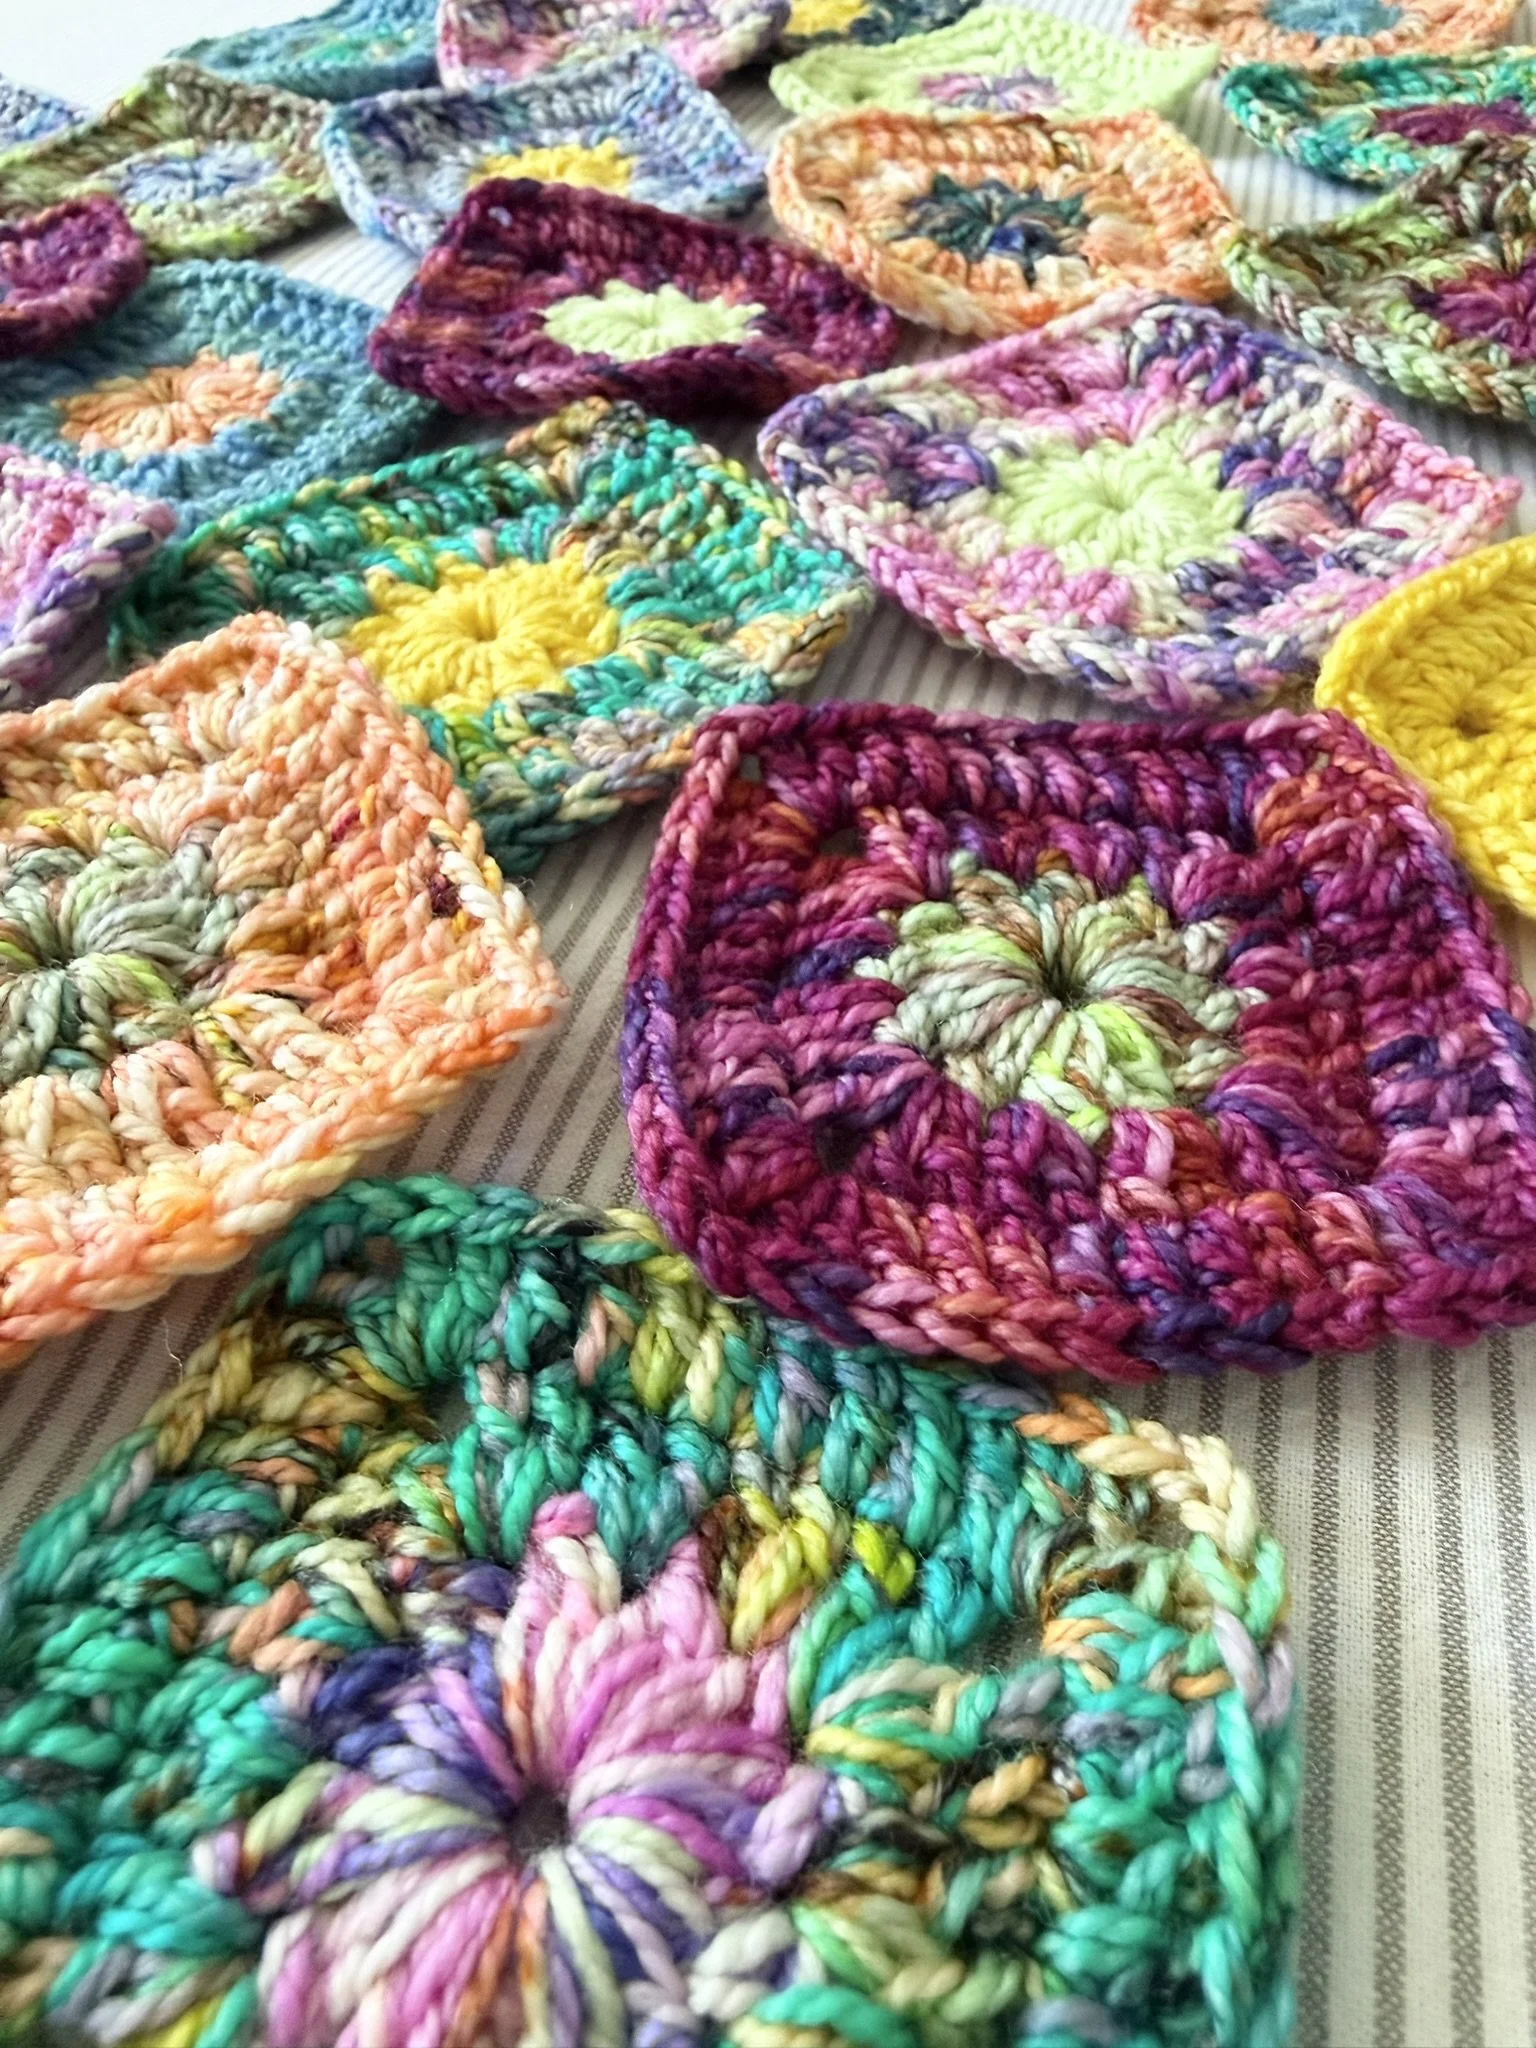
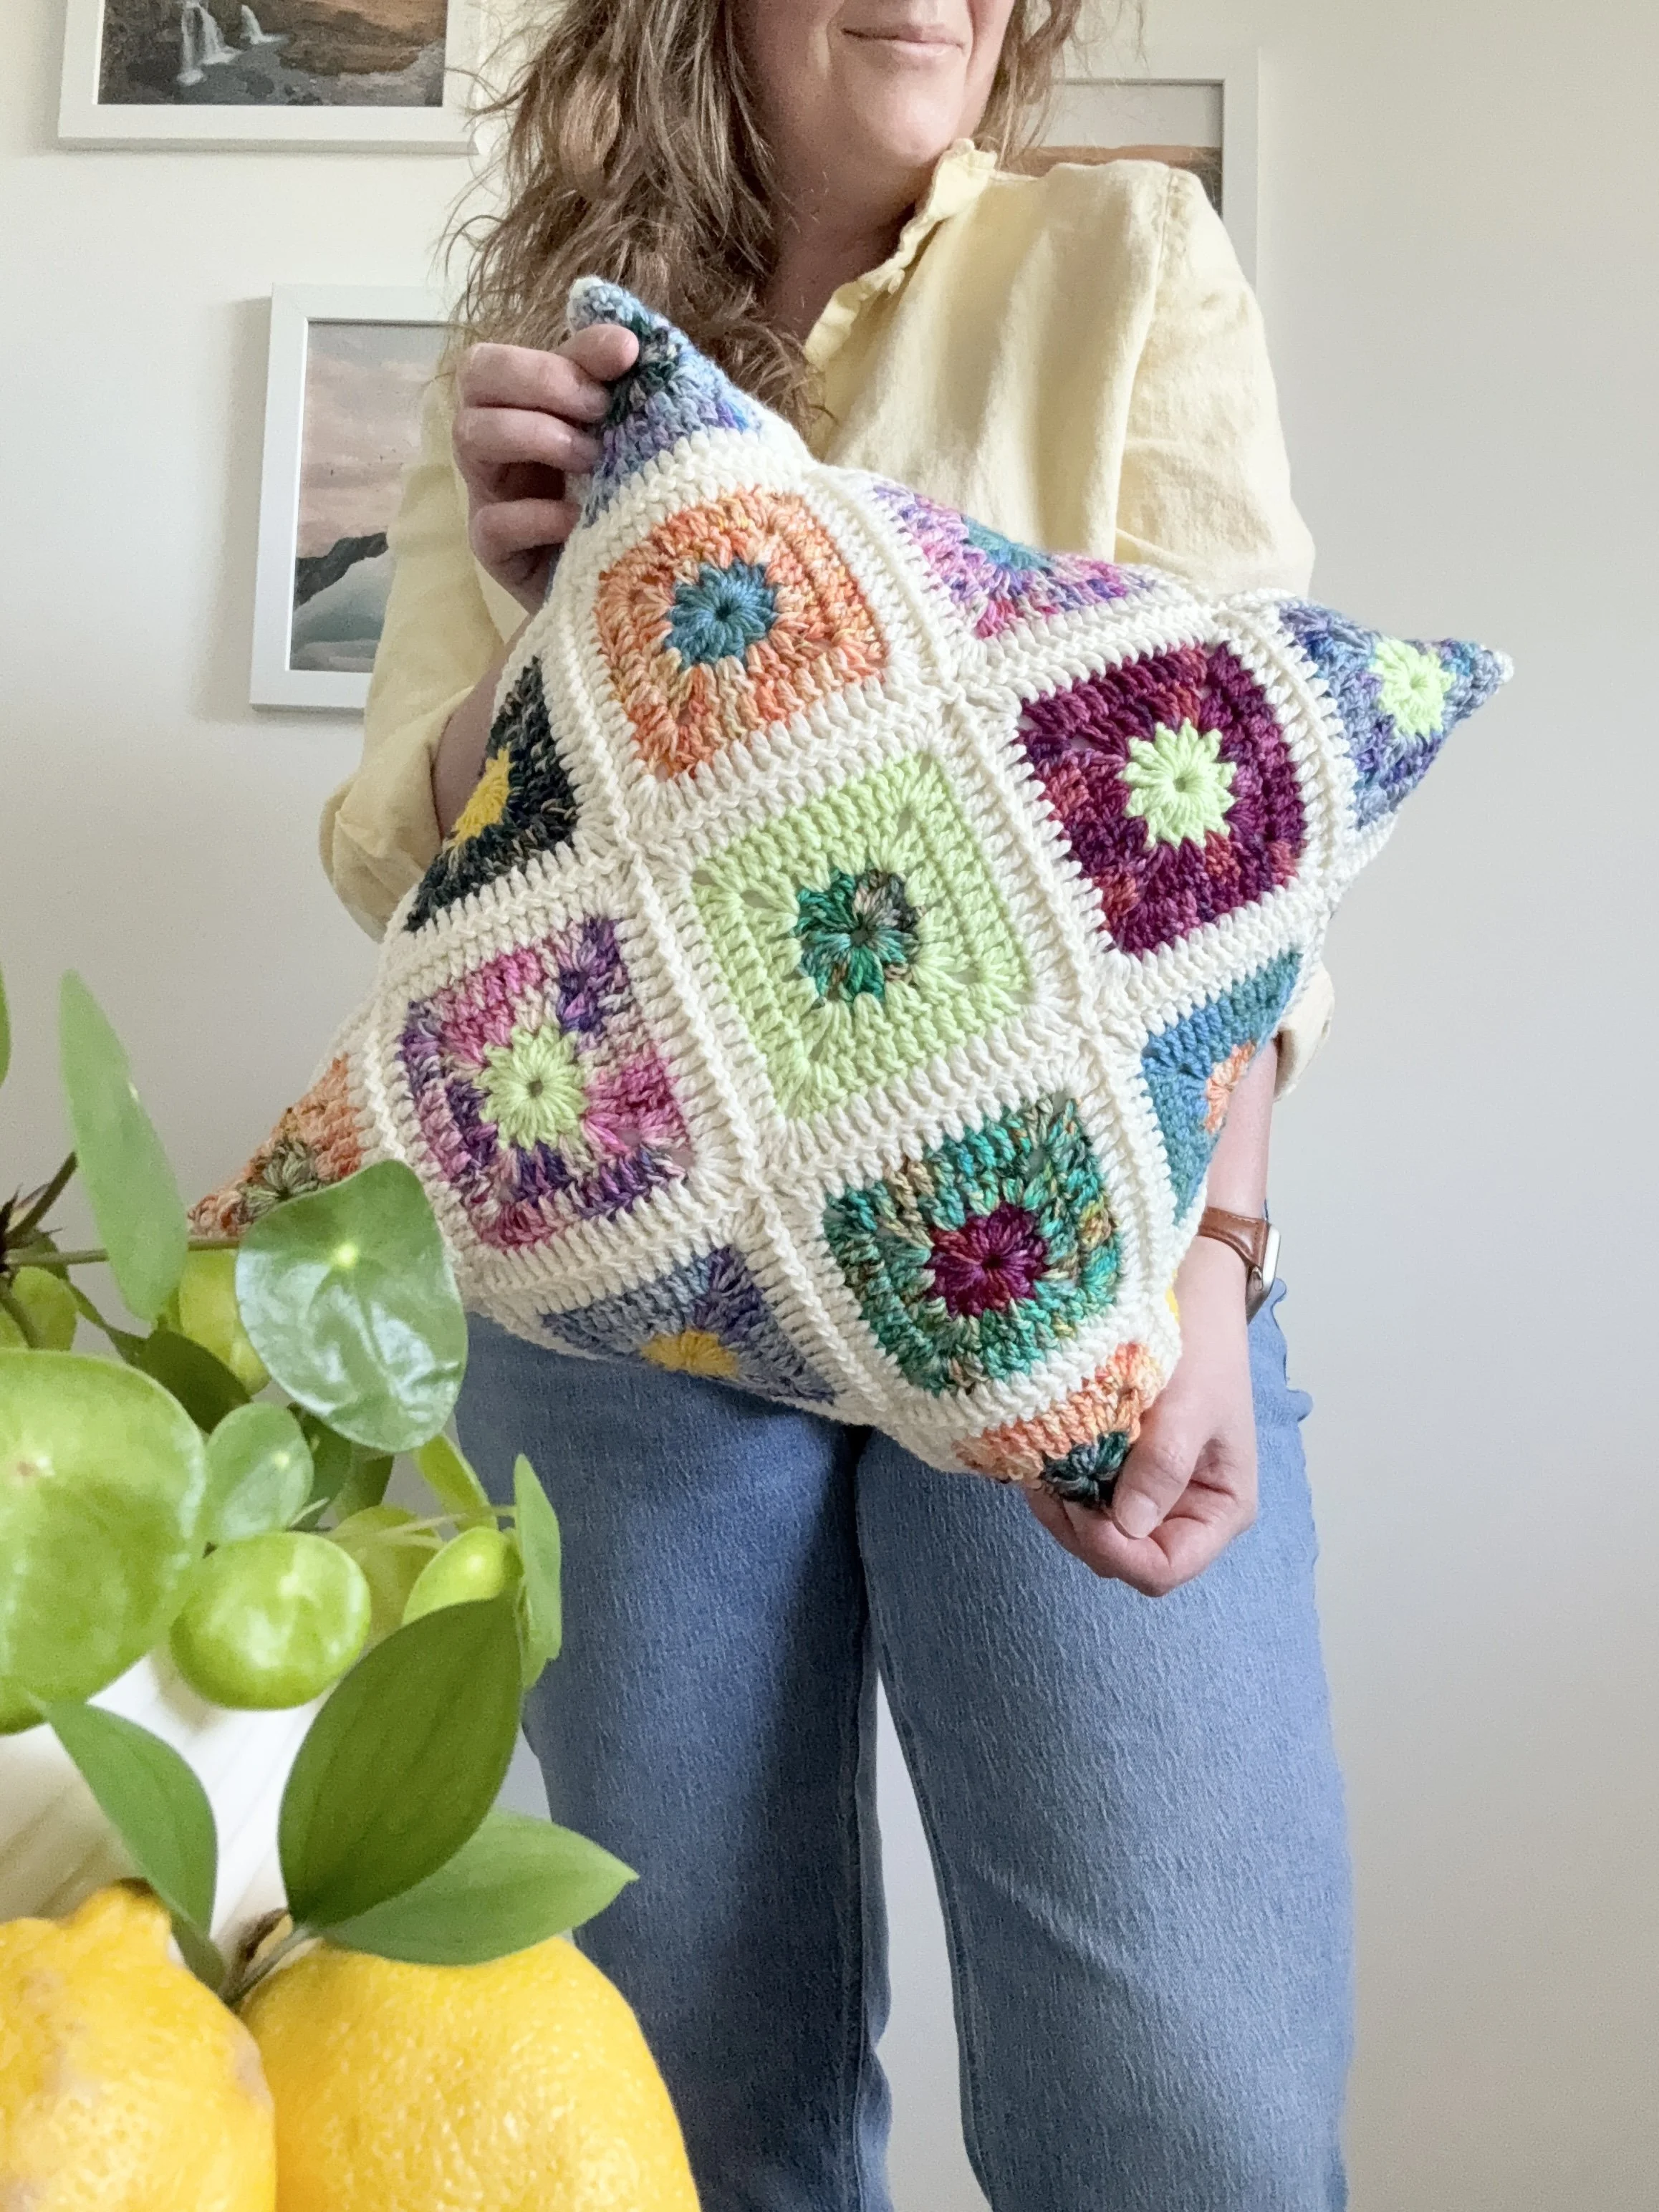
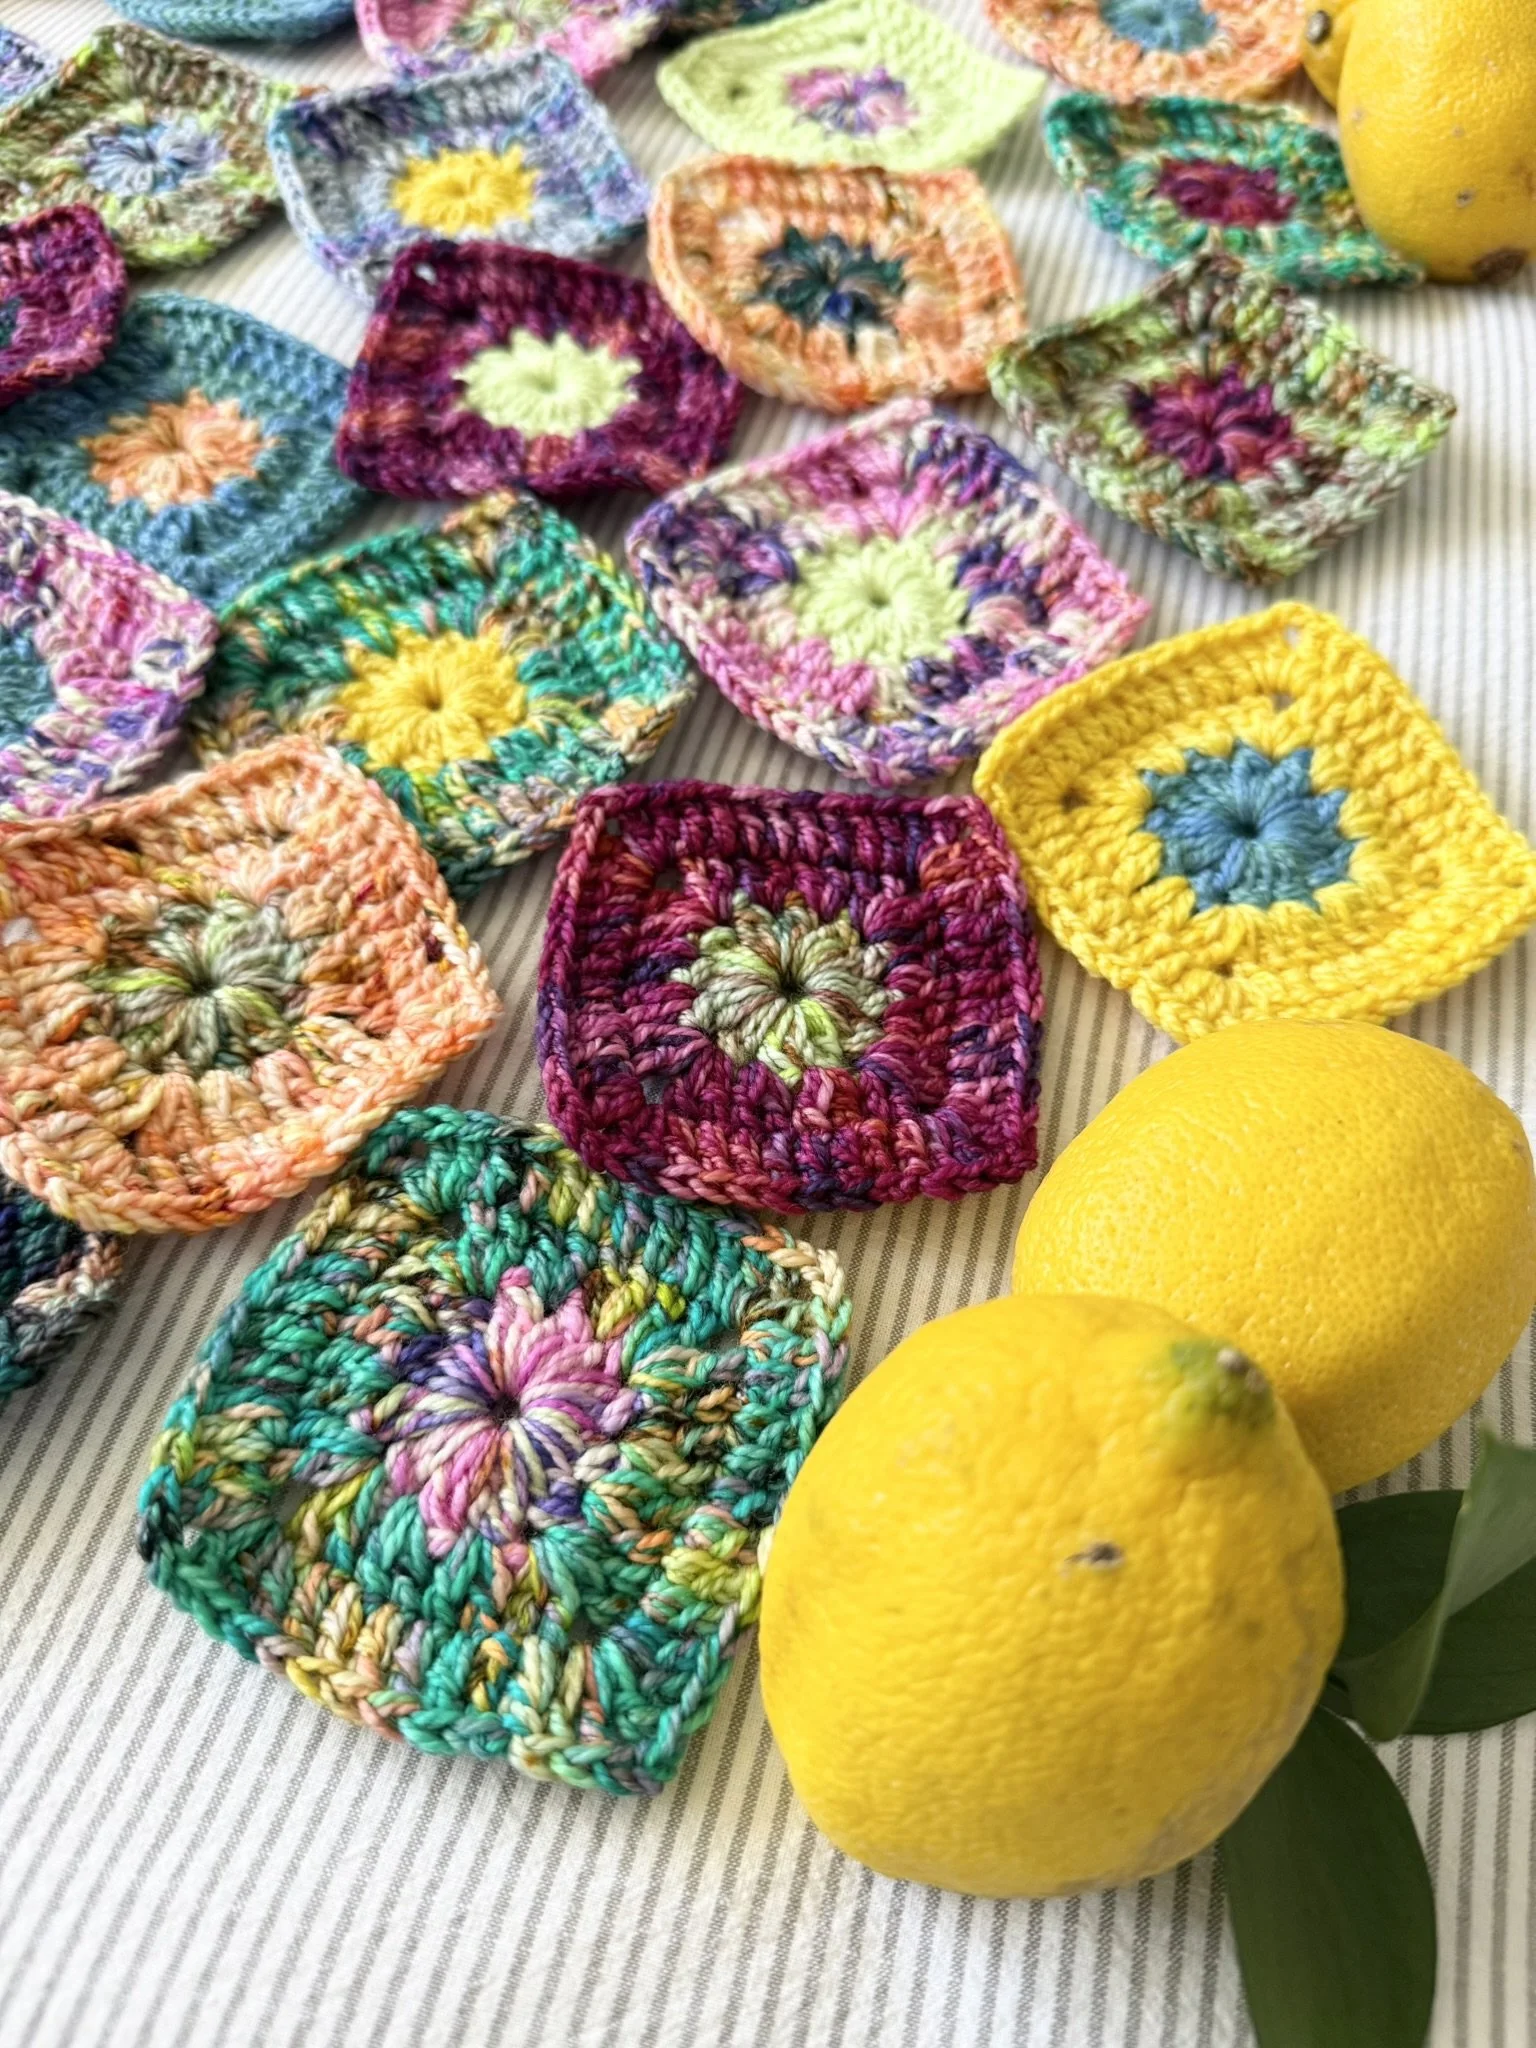
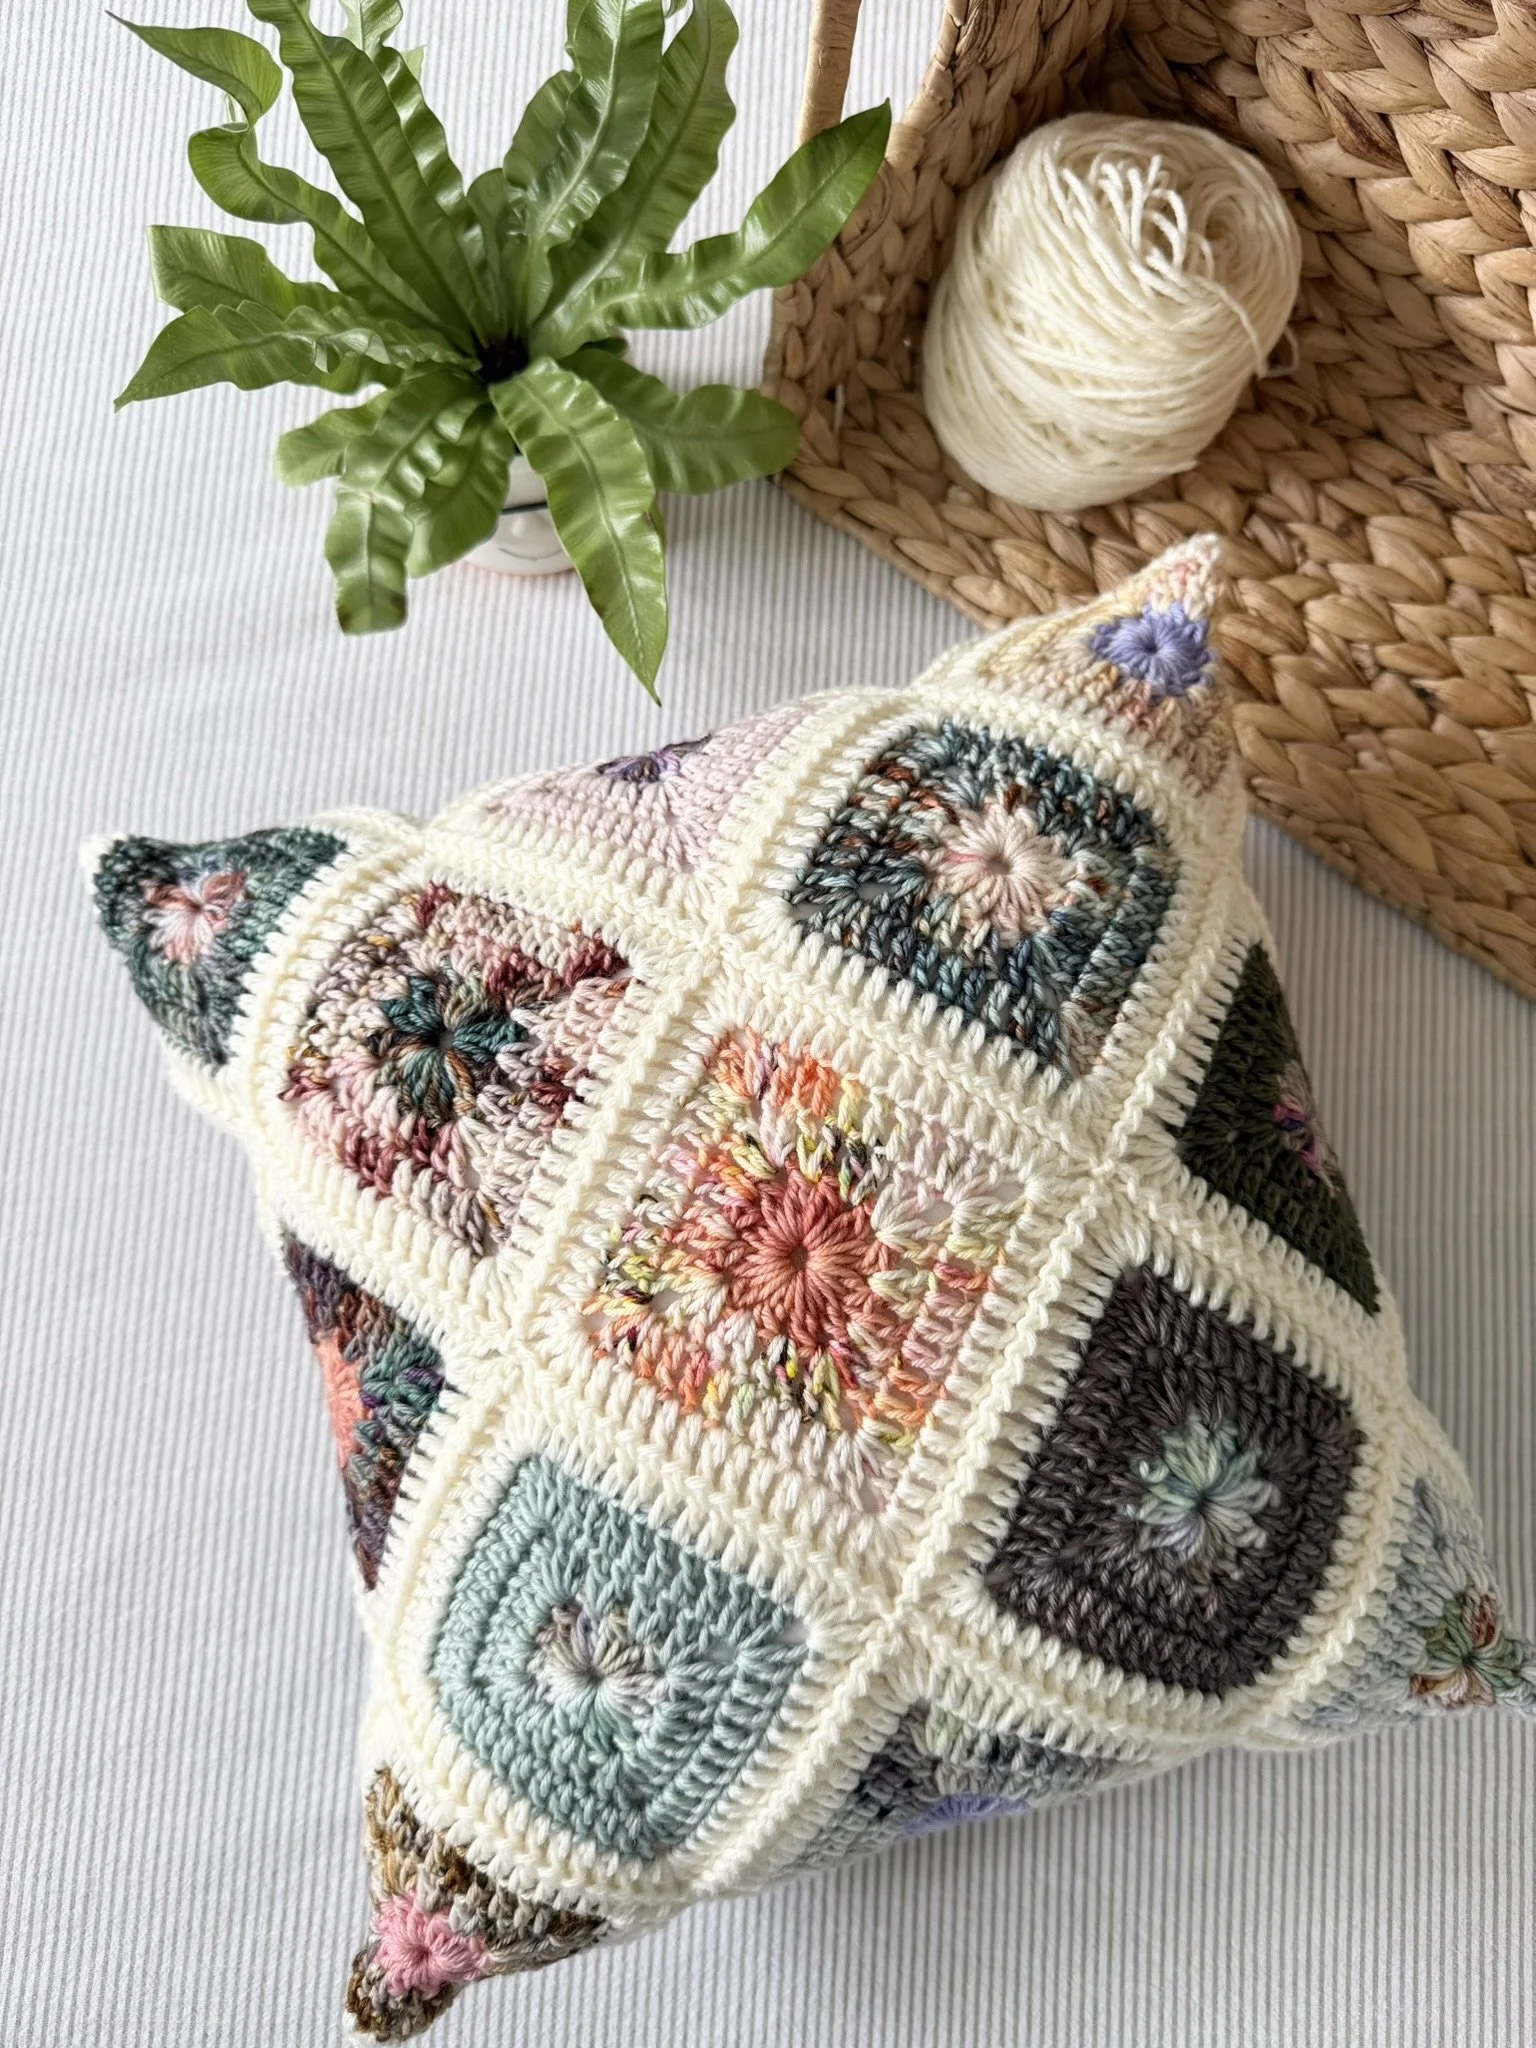
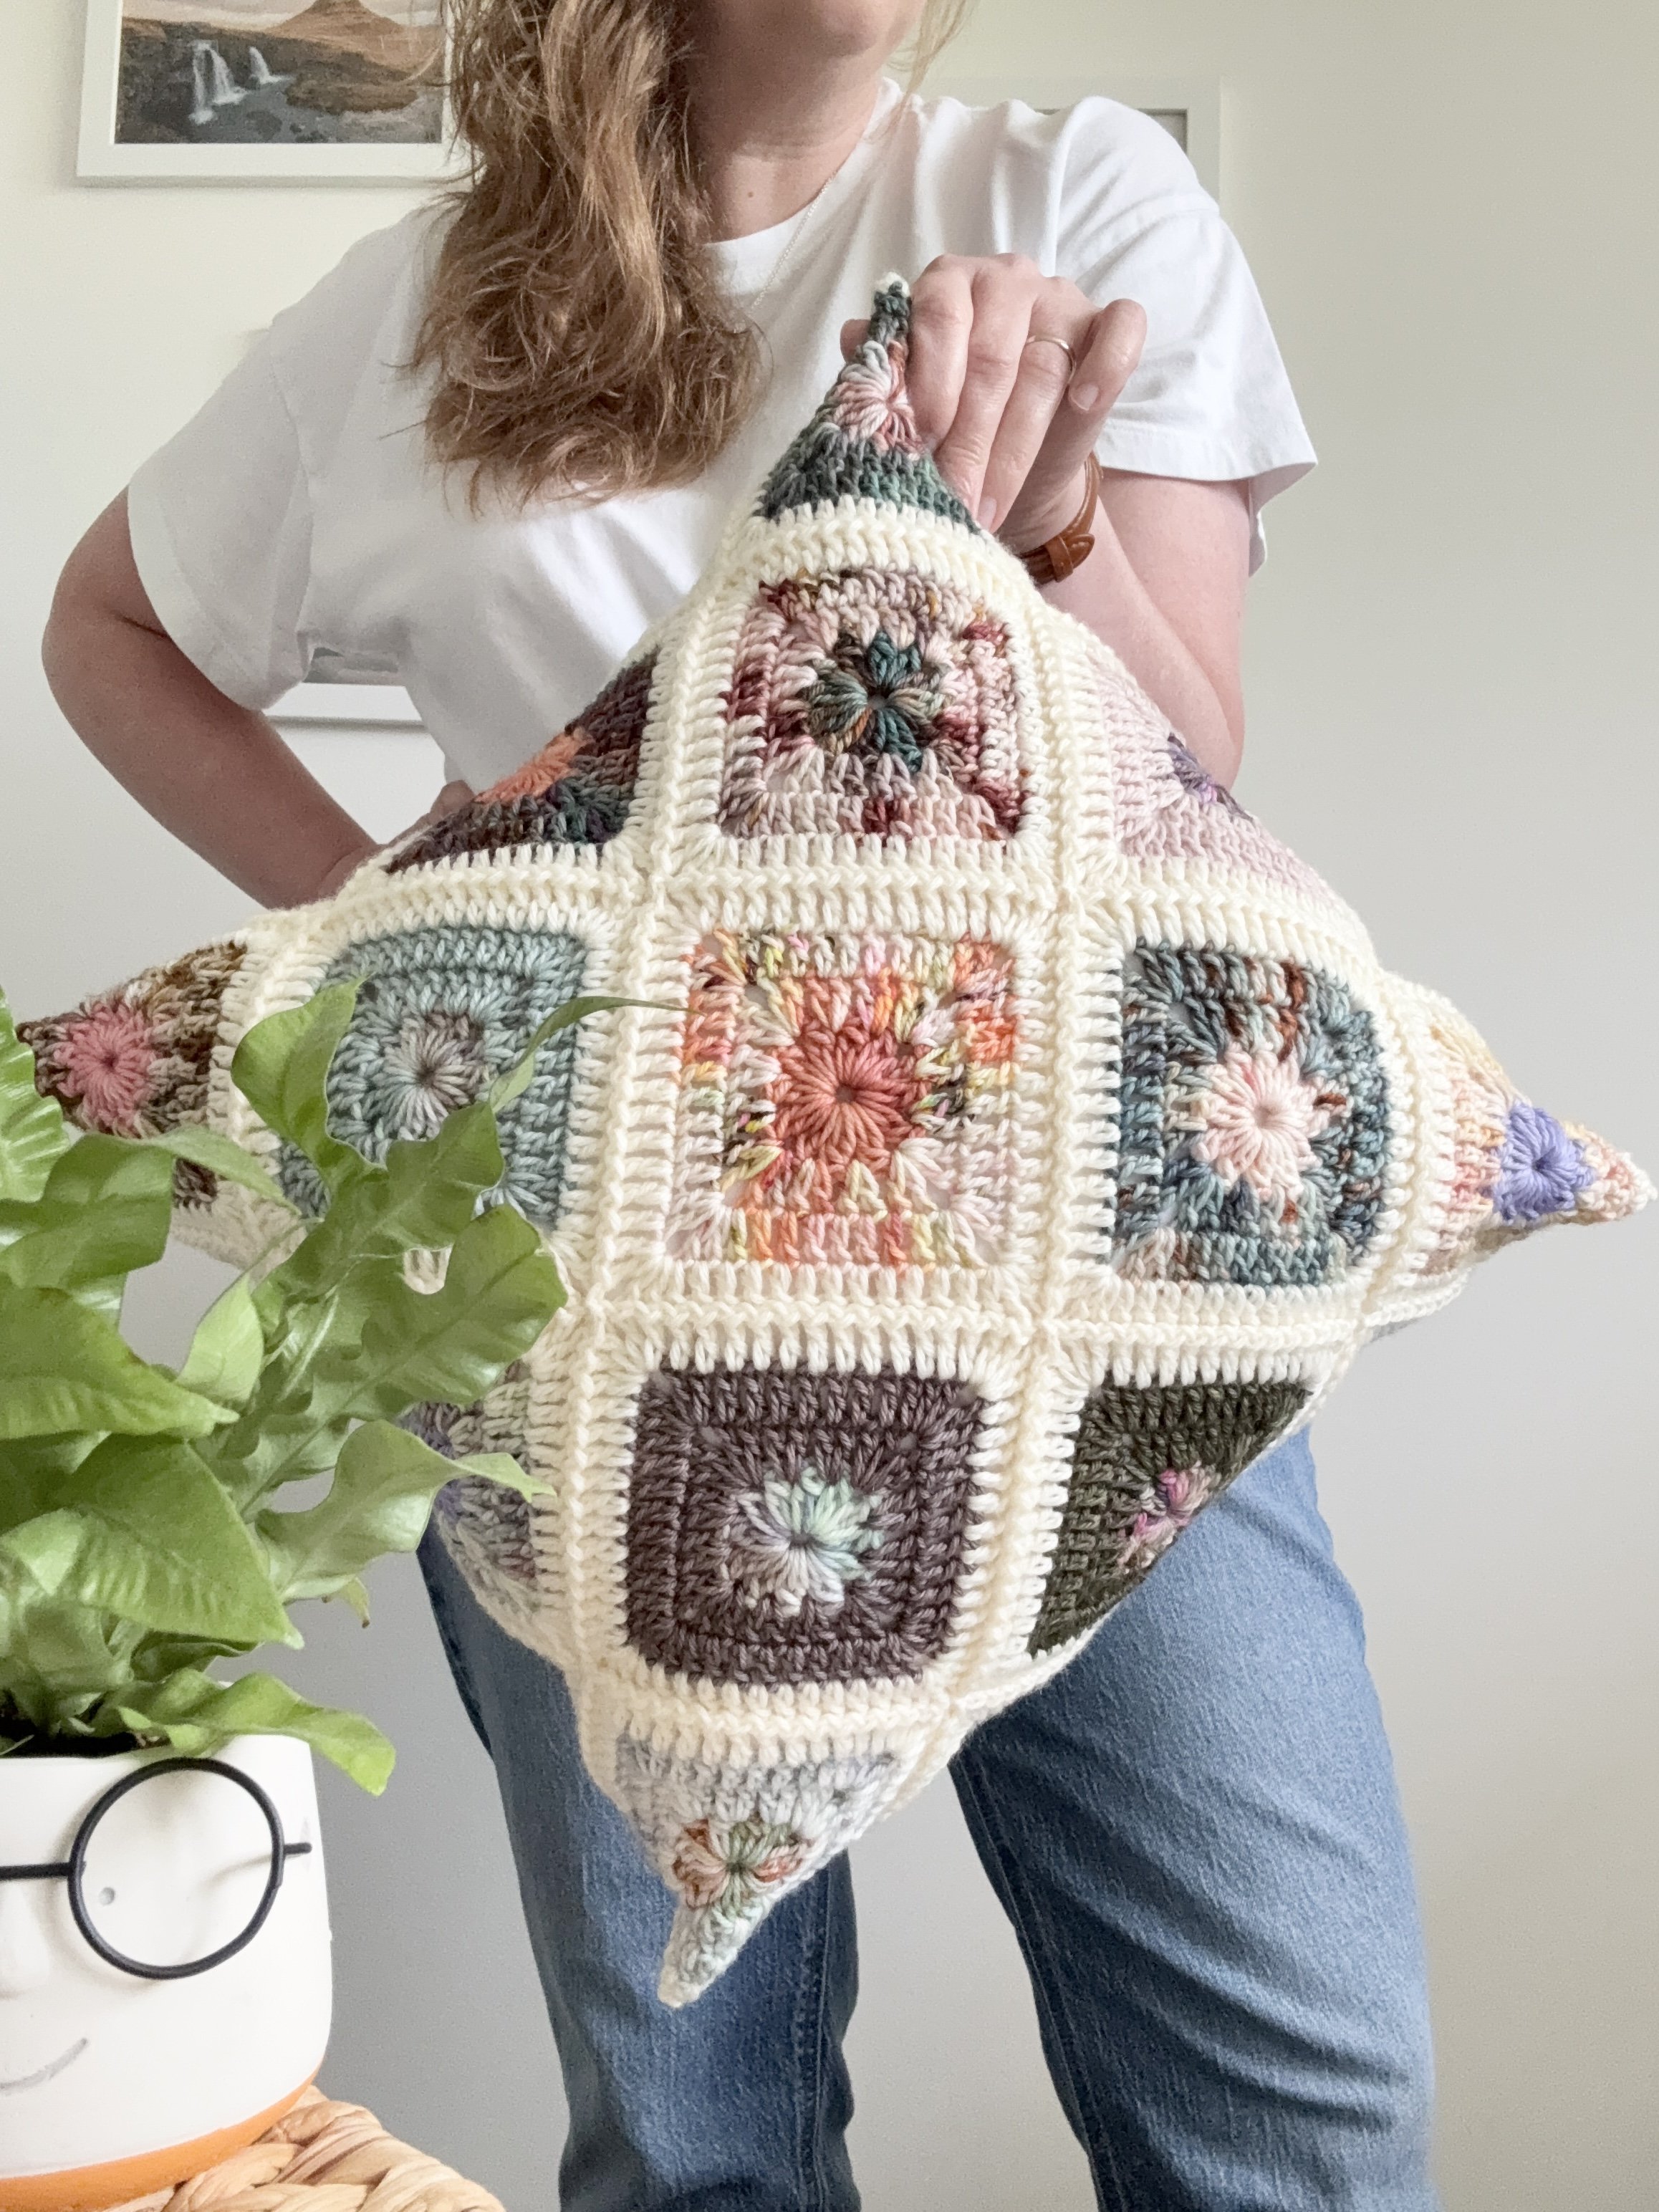
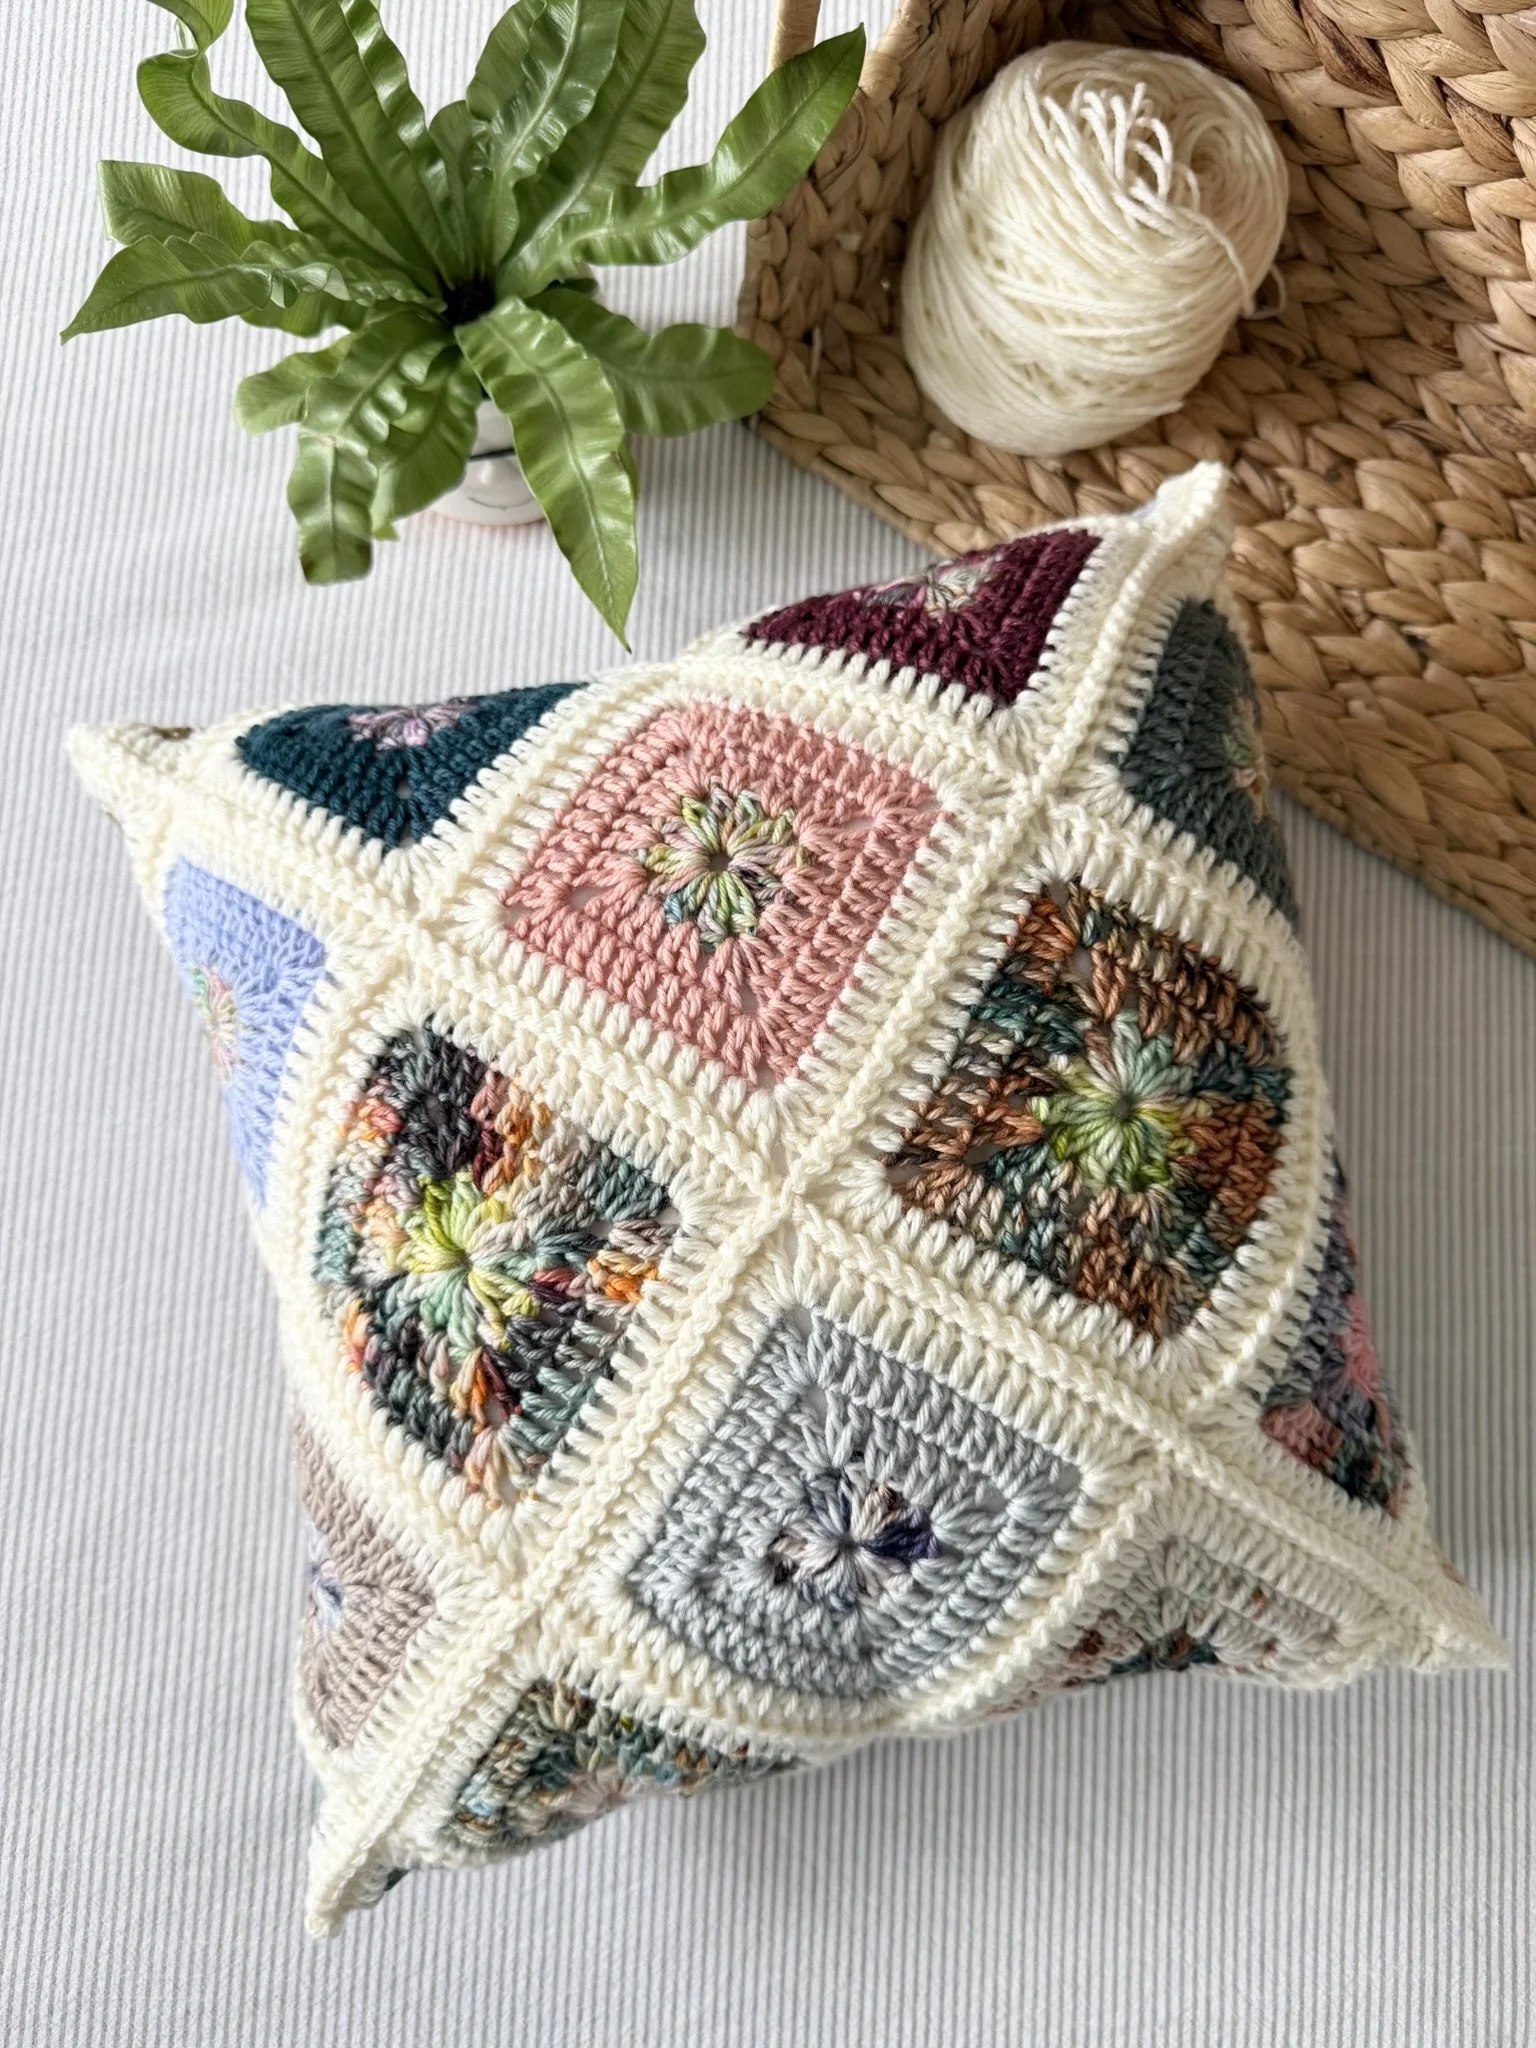
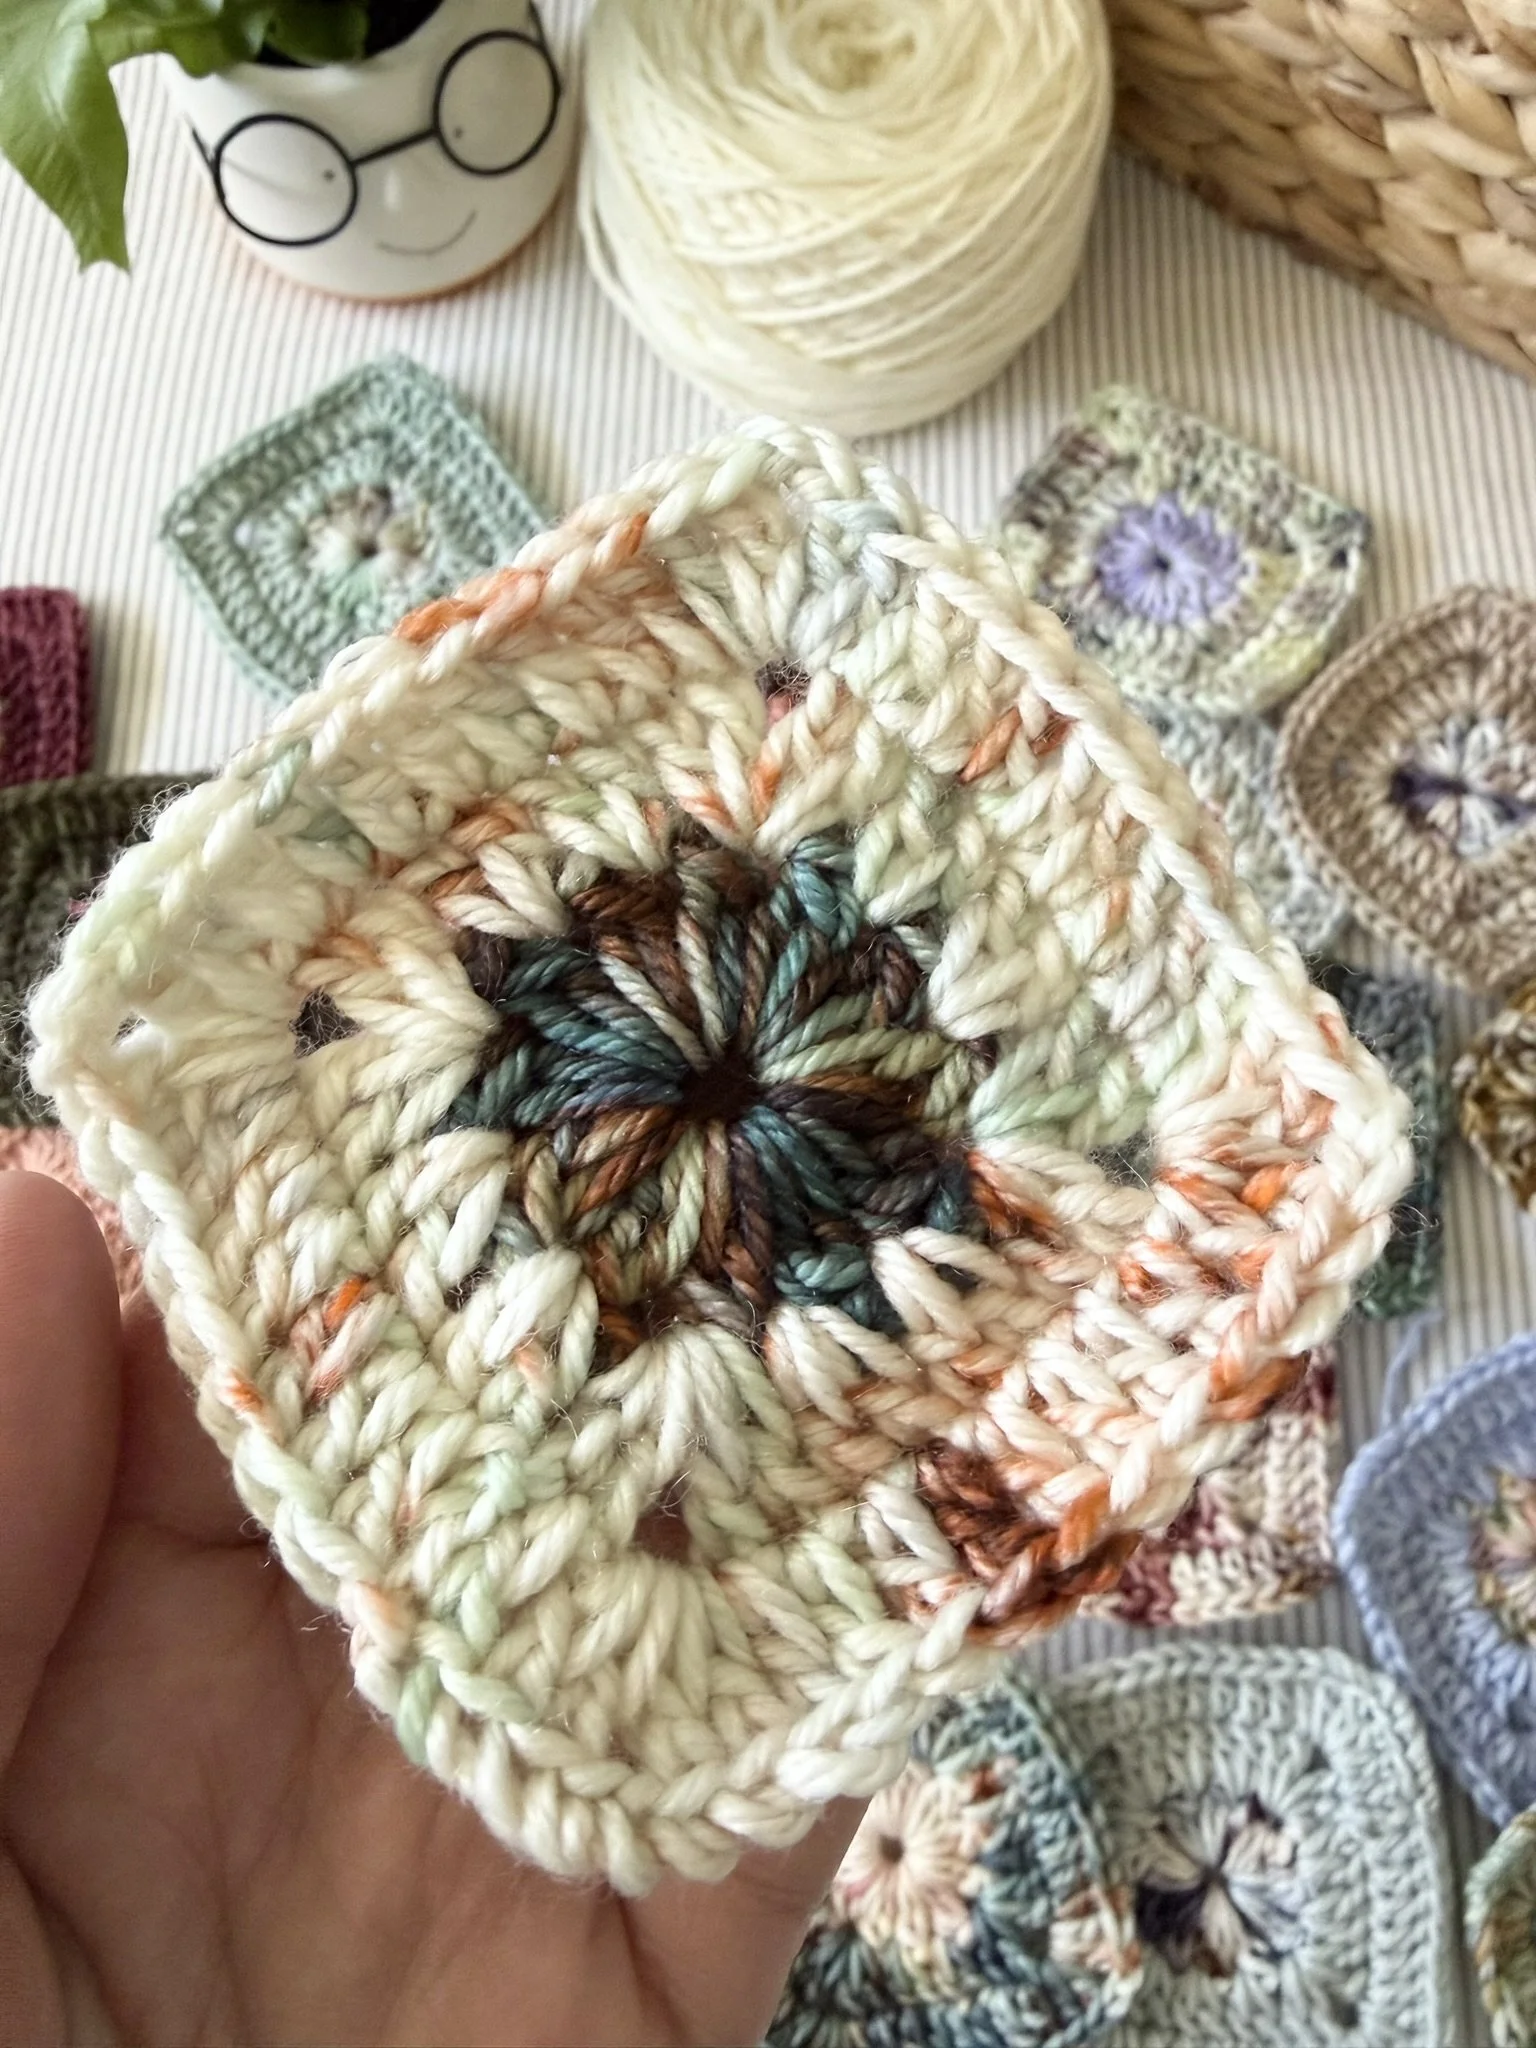
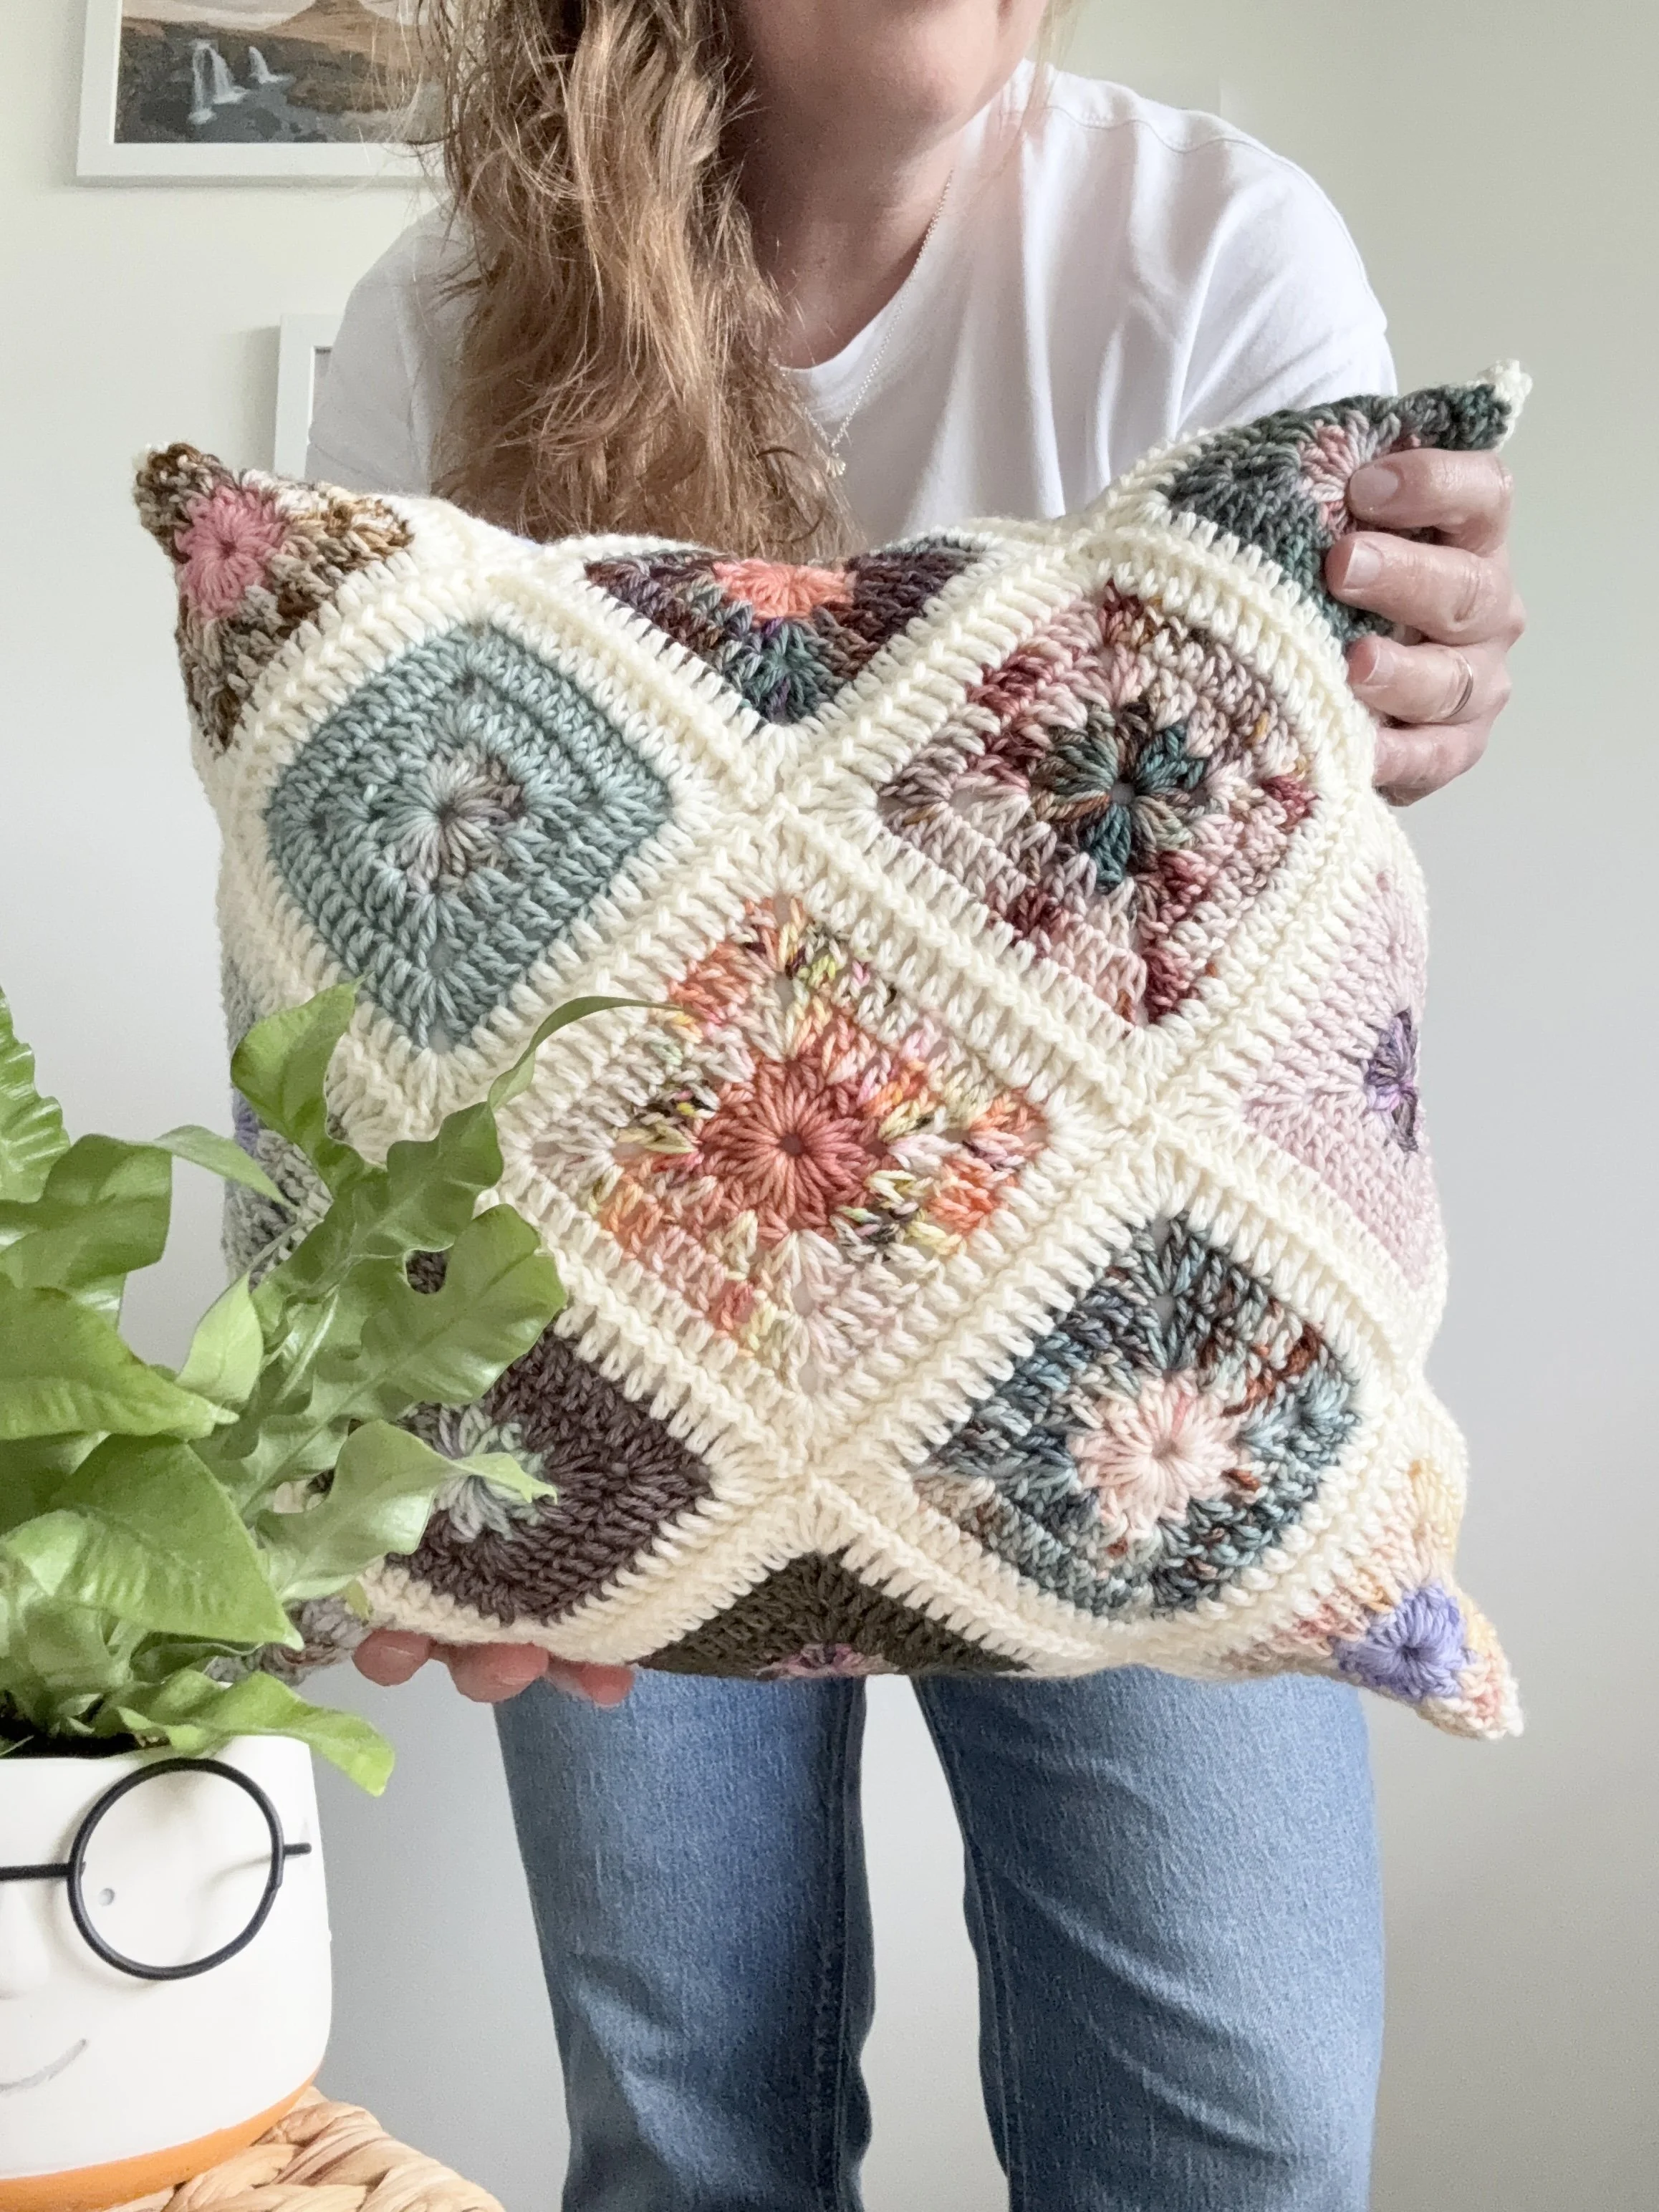
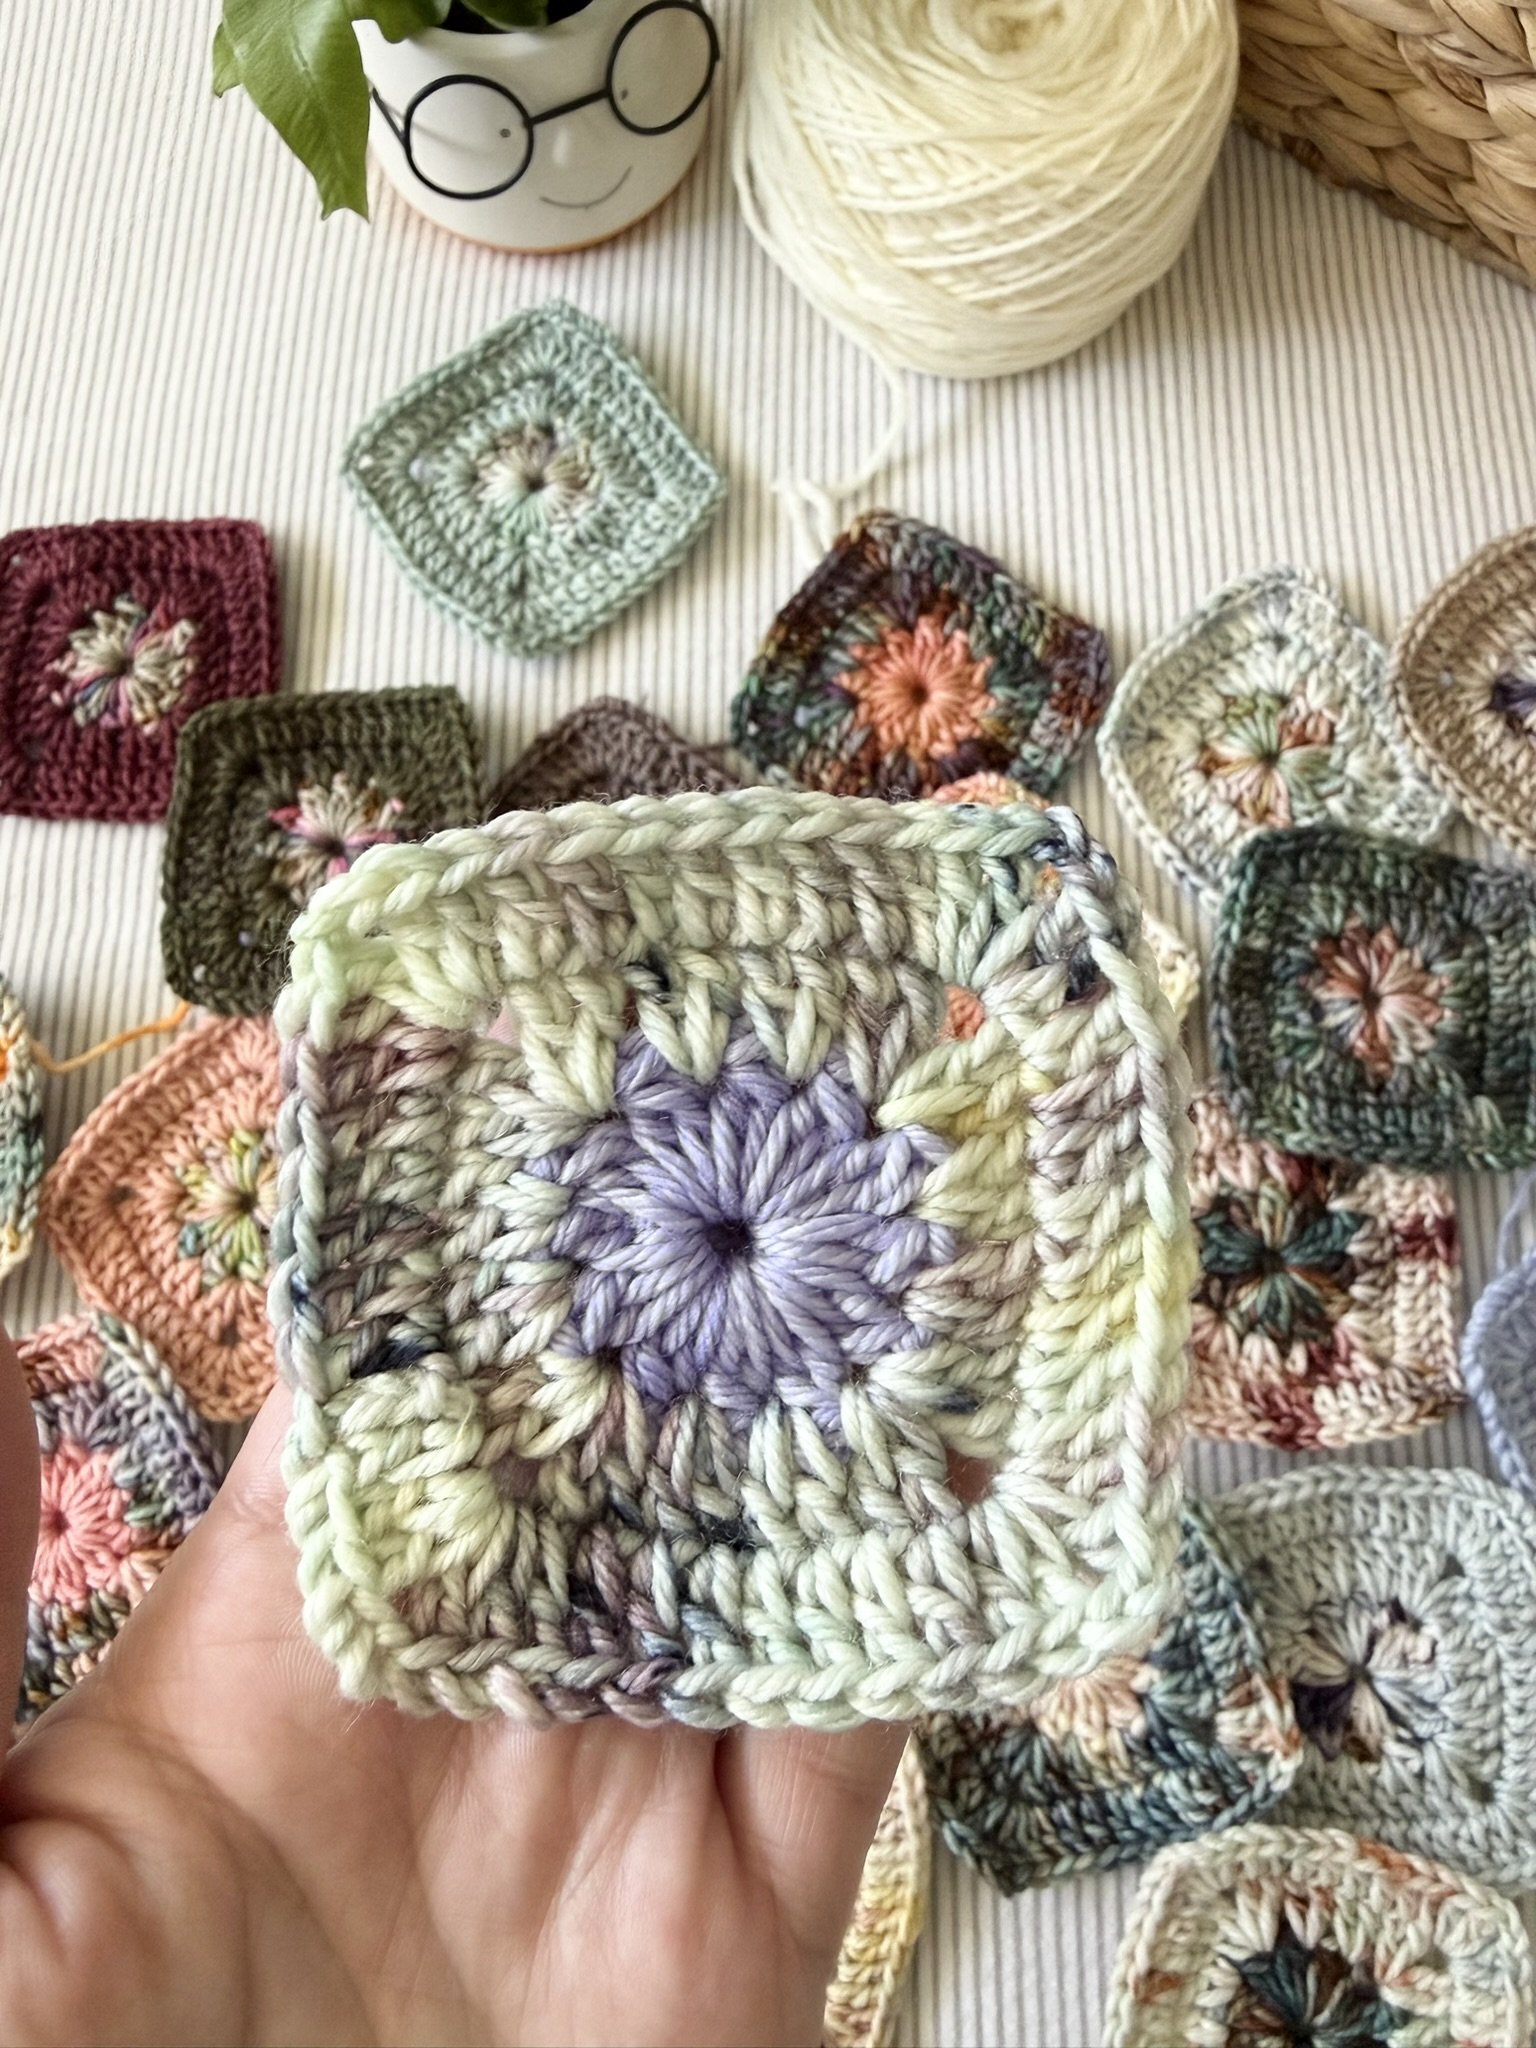
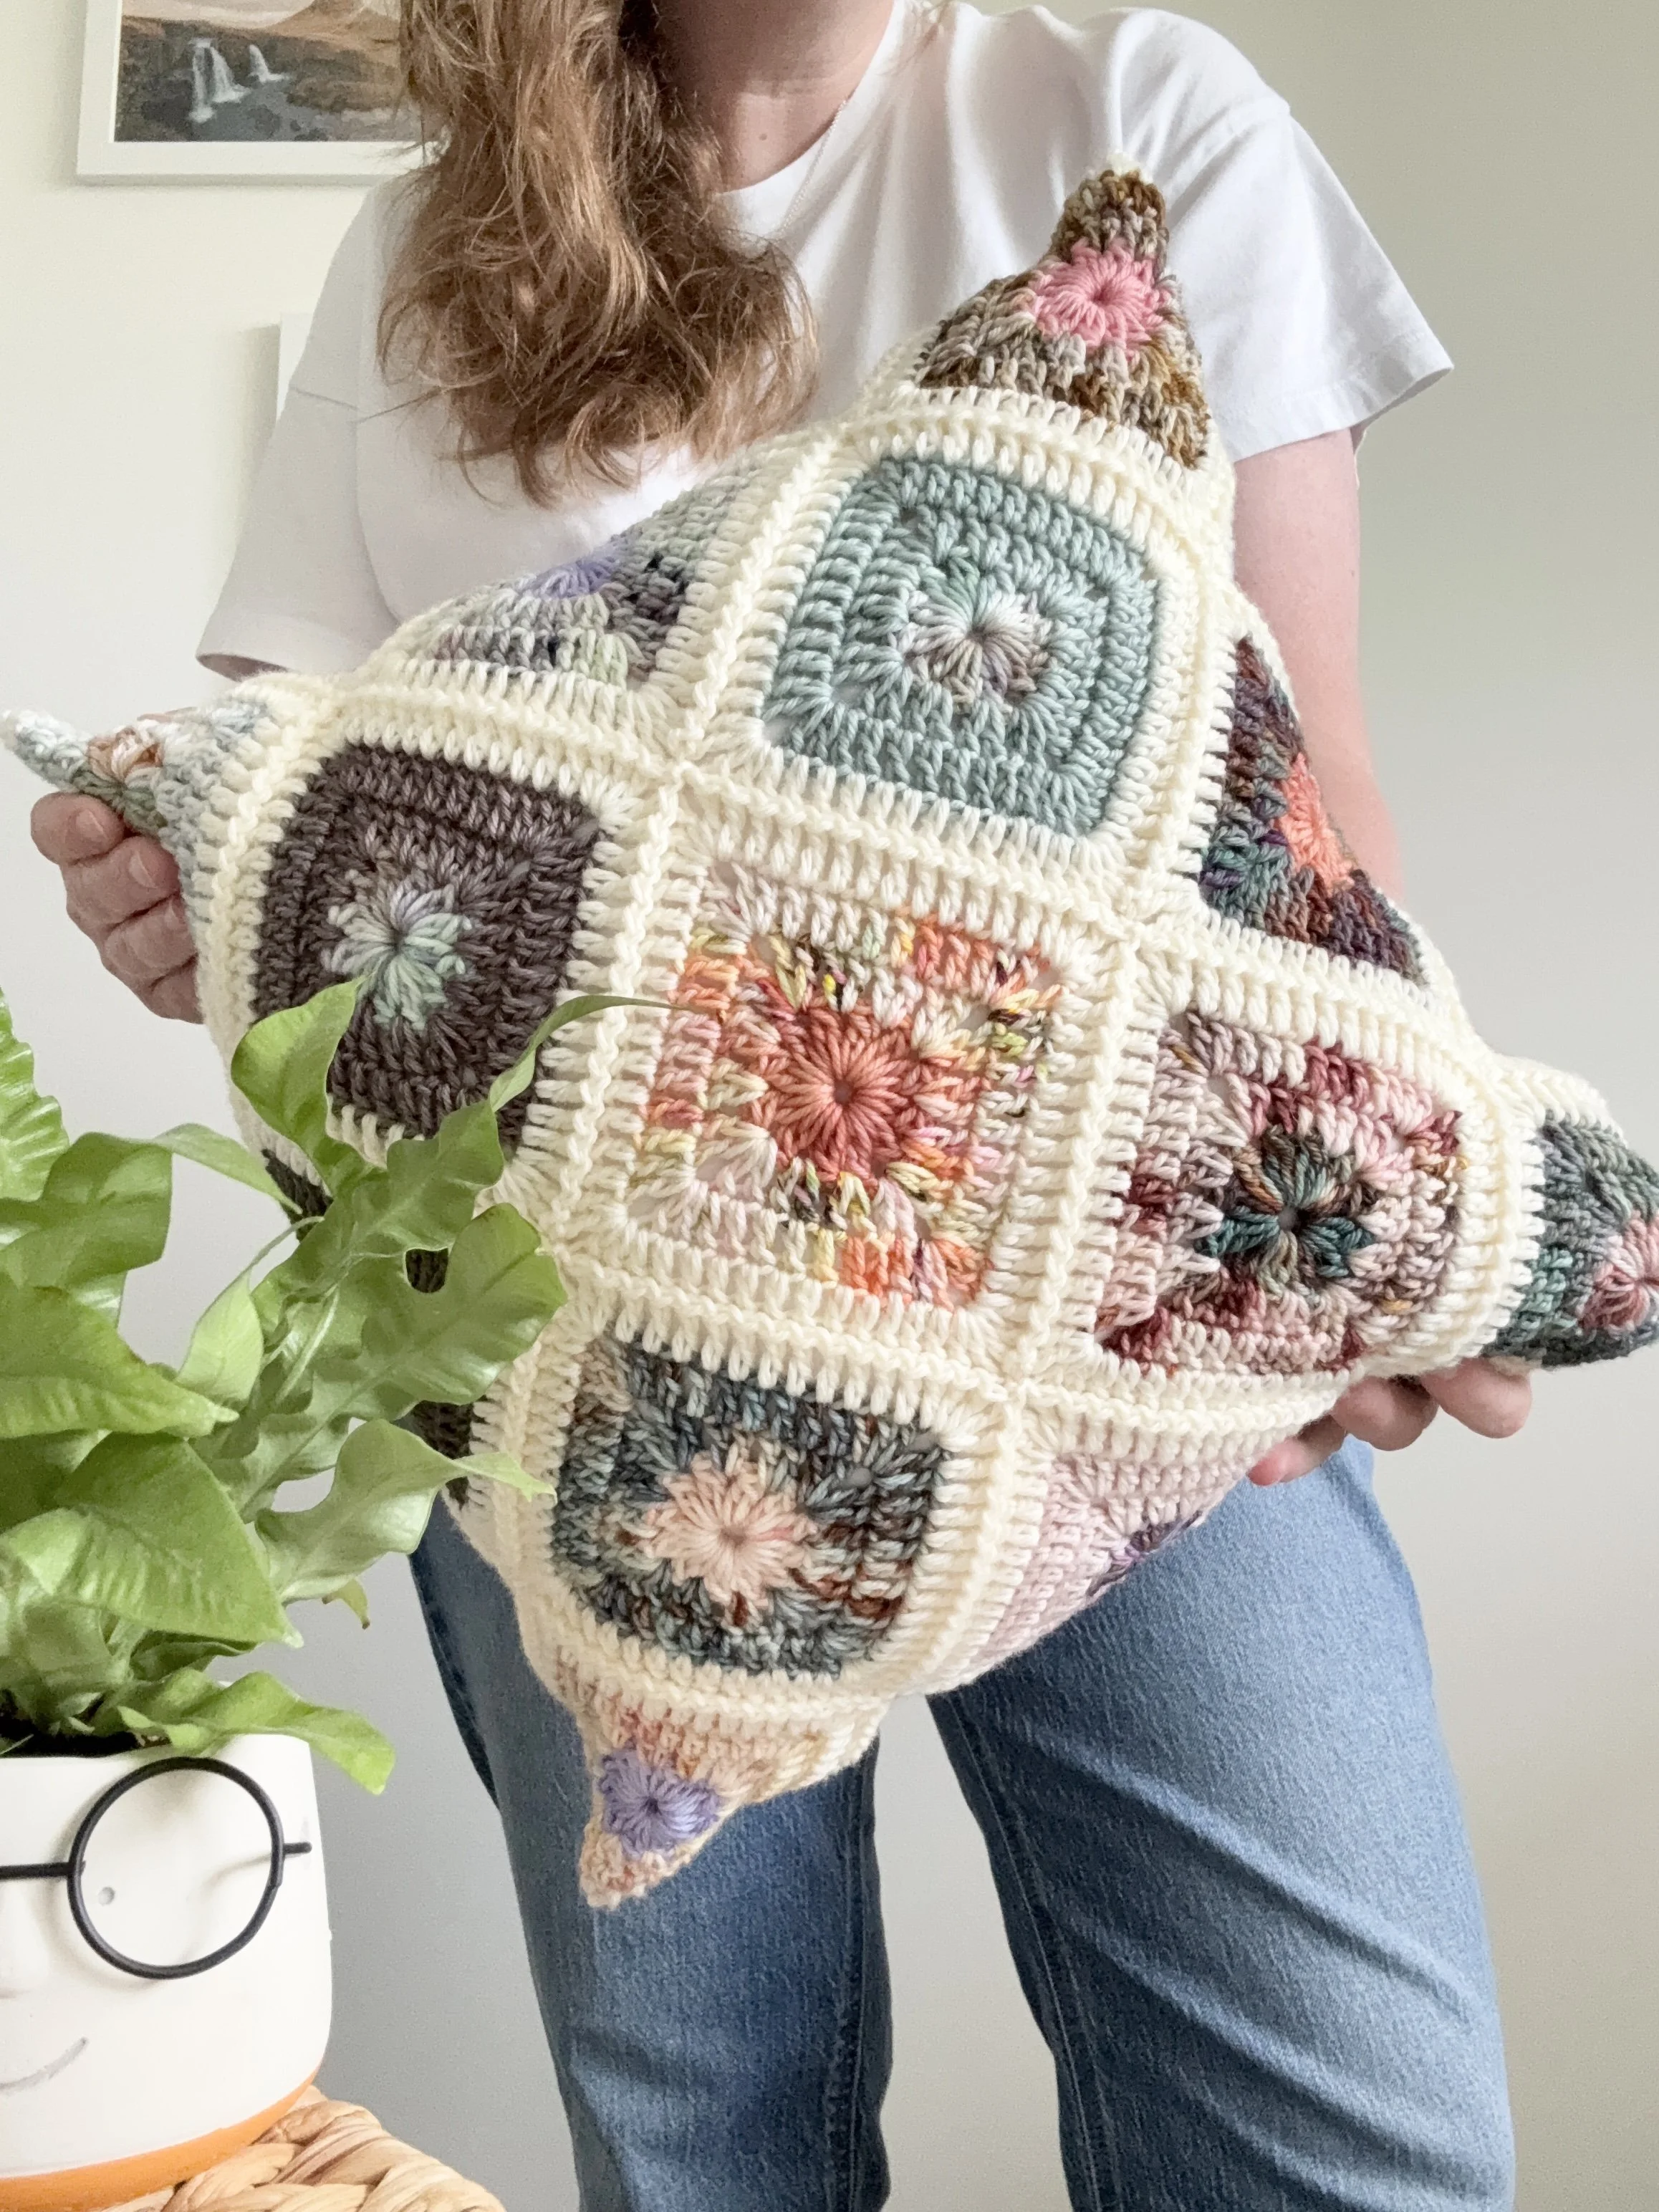
Summer fresh! The Aurelia Pillow Pattern features a cute little twelve point star in the centre of a solid granny square. She’s easy to make, easy to join and ready for cottages and couches alike.
Happy Crocheting Everyone :)
L, M
ps. Sick of ads? Grab the PDF in my Etsy or Ravelry pattern shops below:
ETSY: Aurelia Pillow Pattern x Limoncello Collection by Hue Loco
Ravelry: Aurelia Pillow Pattern x Limoncello Collection by Hue Loco
Notions
US 4.5 mm crochet hook (size 7).
Needle for weaving in ends.
Scissors.
Yarn
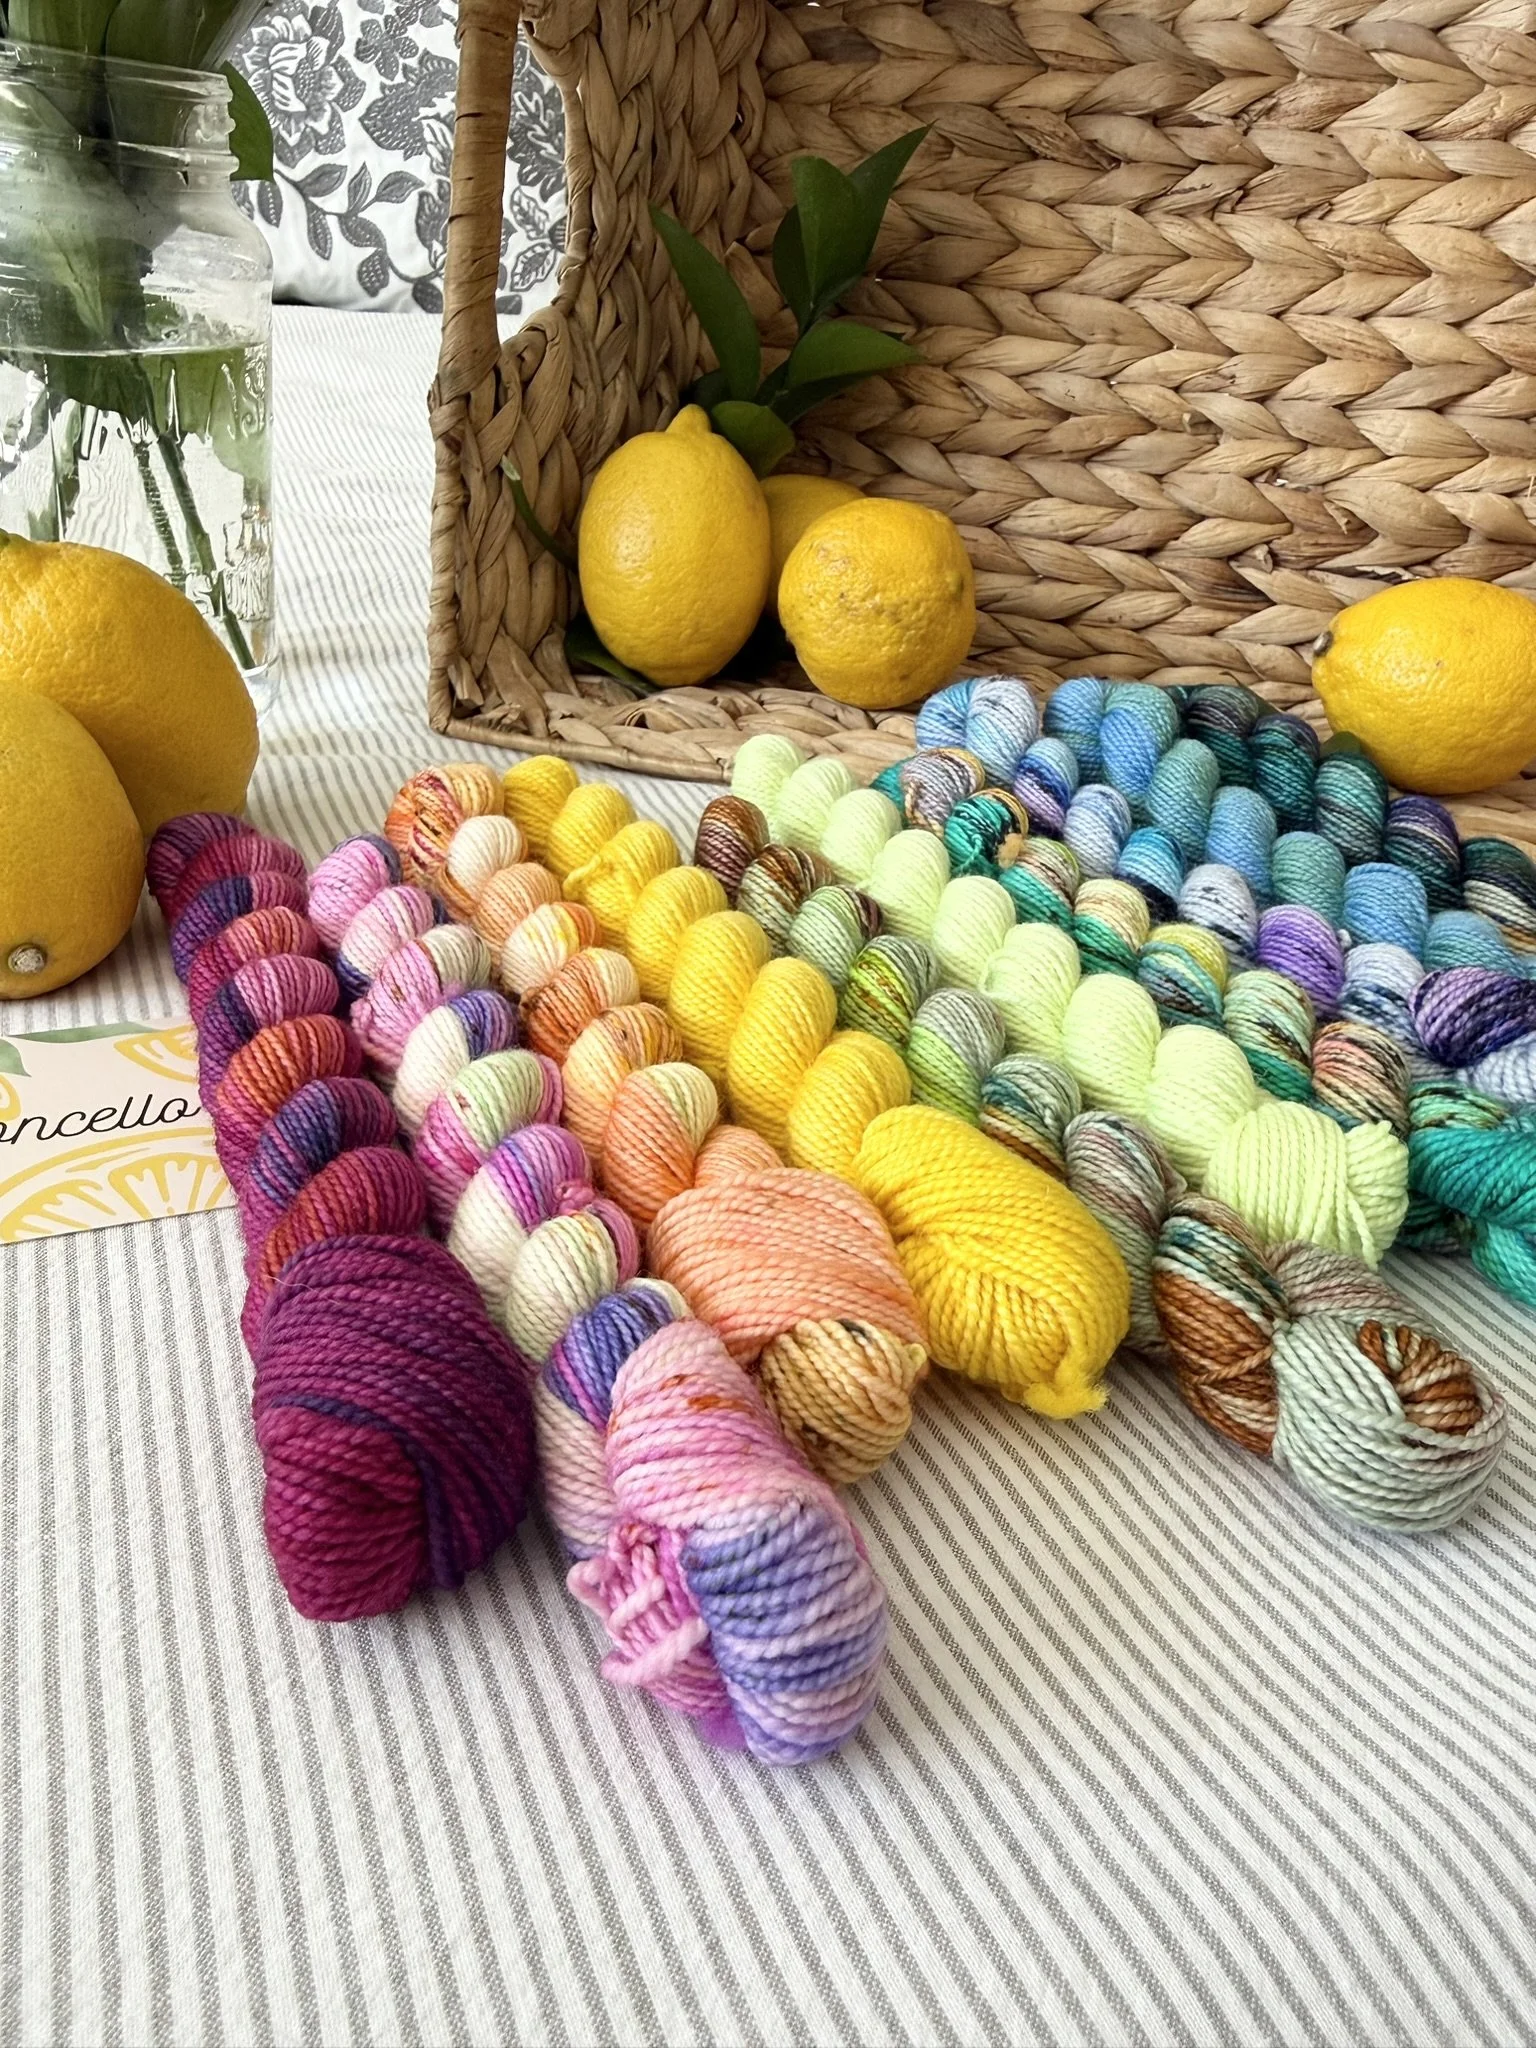
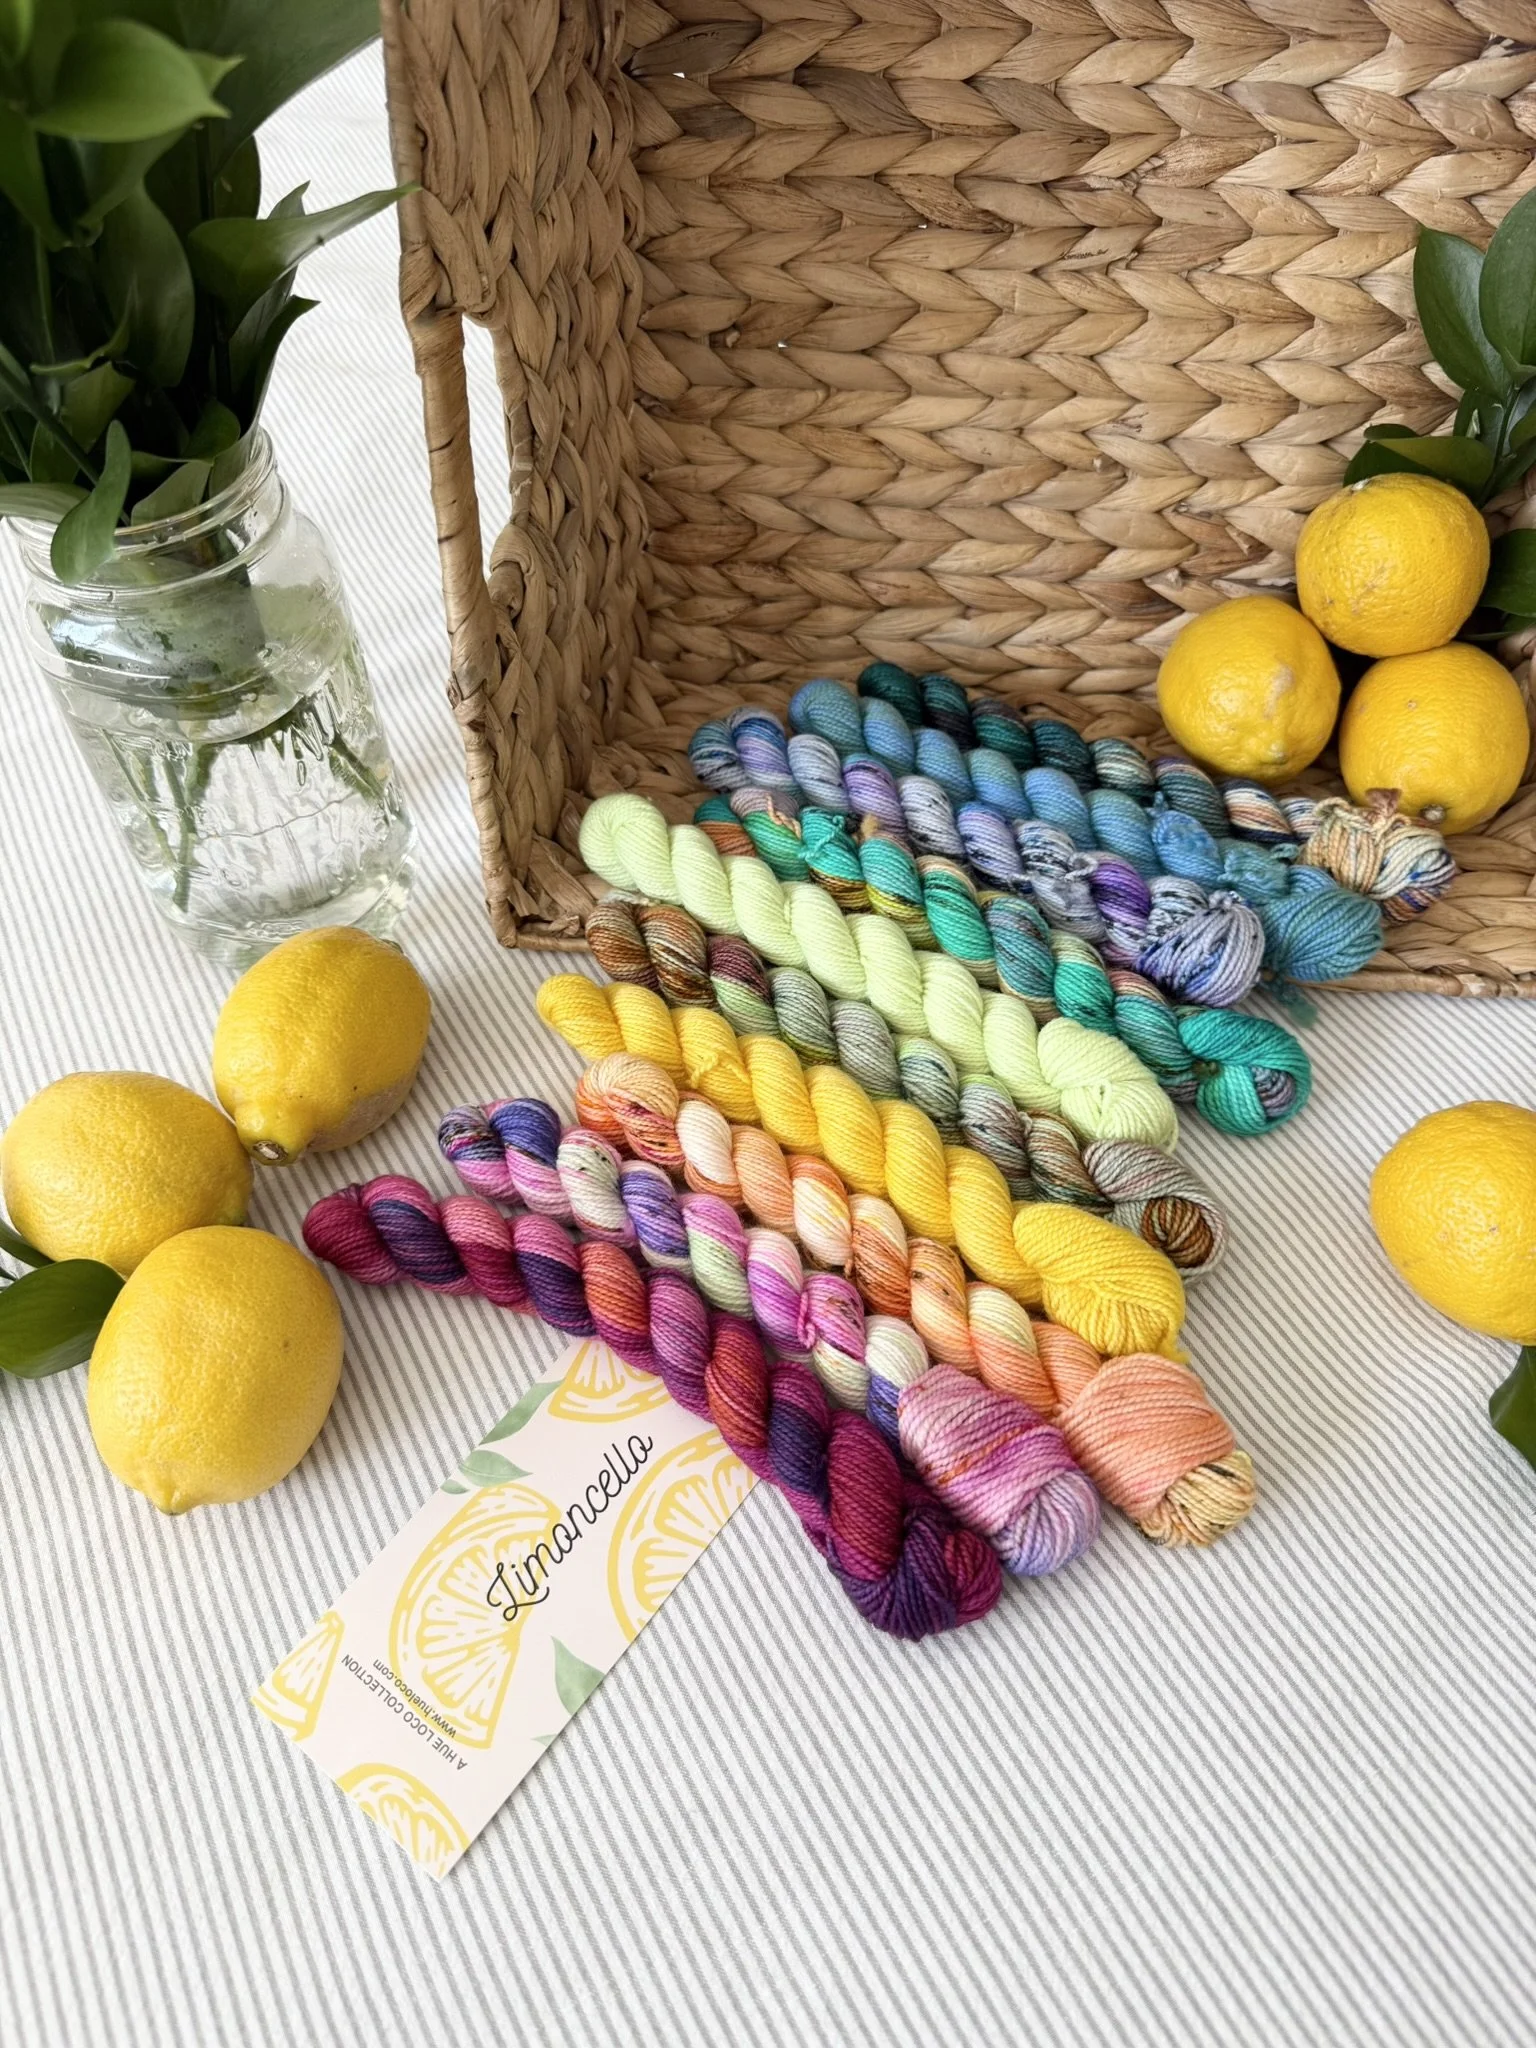
Hue Loco Limoncello Collection Mini Set- Merino Sock 80/20 SW Merino/Nylon (800yds/200g):
Colour A: Grove (68yds/17g) 1 mini skein
Colour B: Sea Stack (68yds/17g) 1 mini skein
Colour C: Sunsoaked (68yds/17g) 1 mini skein
Colour D: Zest (60yds/15g) 1 mini skein
Colour E: Amalfi Coast (52yds/13g) 1 mini skein
Colour F: Pucker (52yds/13g) 1 mini skein
Colour G: Capri (68yds/17g) 1 mini skein
Colour H: Salt Air (68yds/17g) 1 mini skein
Colour I: Blue Grotto (56yds/14g) 1 mini skein
Colour J: Piazzetta (56yds/14g) 1 mini skein
Joining Yarn, Merino Sock 100g skein:
Snowshoe (364yds/91g) 1 skein
Alternative Yarn Recommendations & Links:
Aurelia Pillow Pattern x Limoncello Pillow Kit by Hue Loco Yarn (for those wanting this exact colour combination & joining yarn)
Hue Loco Sets DK (100% merino) —any mini set of 10 colours will work brilliantly!
Hue Loco Mini’s (make your own set, DK or sock weight!)
WeCrochet Swish DK Bare (100% SW merino)
WeCrochet Swish DK (100% SW merino)
WeCrochet Stroll Mini Packs (75/25% SW Merino, Nylon) -need to hold double to meet gauge
WeCrochet CotLin Value Packs (70/30% Tanguis Cotton, Linen)
Brava Baby DK Yarn (100% Acrylic)
LoveCrafts Malabrigo Rios Yarn (100% SW merino)
Gauge
3 rnd Aurelia square:
3.25” (unblocked)
4” with join (unblocked)
Finished Size
16” x 16” Pillow
Glossary (using US Crochet Terminology)
st(s)- stitch(es)
ch- chain
ch-sp- chain space
sl st- slip stitch
YO- yarn over
rnd- round
SC- single crochet
HDC- half double crochet
DC- double crochet
tr- treble crochet
CJAYG- continuous join-as-you-go
cl st(s)- cluster stitch(es)
2 DC cl – 2 double crochet cluster stitch
WS- wrong side
RS- right side
How to 2 DC cl: YO and insert hook into center of circle, YO and pull up a loop, YO and pull through 2. Repeat one more time. YO and pull through 3 loops on hook, Ch 1.
Pattern Notes
Gauge will affect yarn quantities, please adjust hook size to meet gauge. IF GAUGE IS NOT MET, YOU MAY RUN OUT OF YARN OR END UP WITH A PILLOW PANEL THAT DOES NOT FIT.
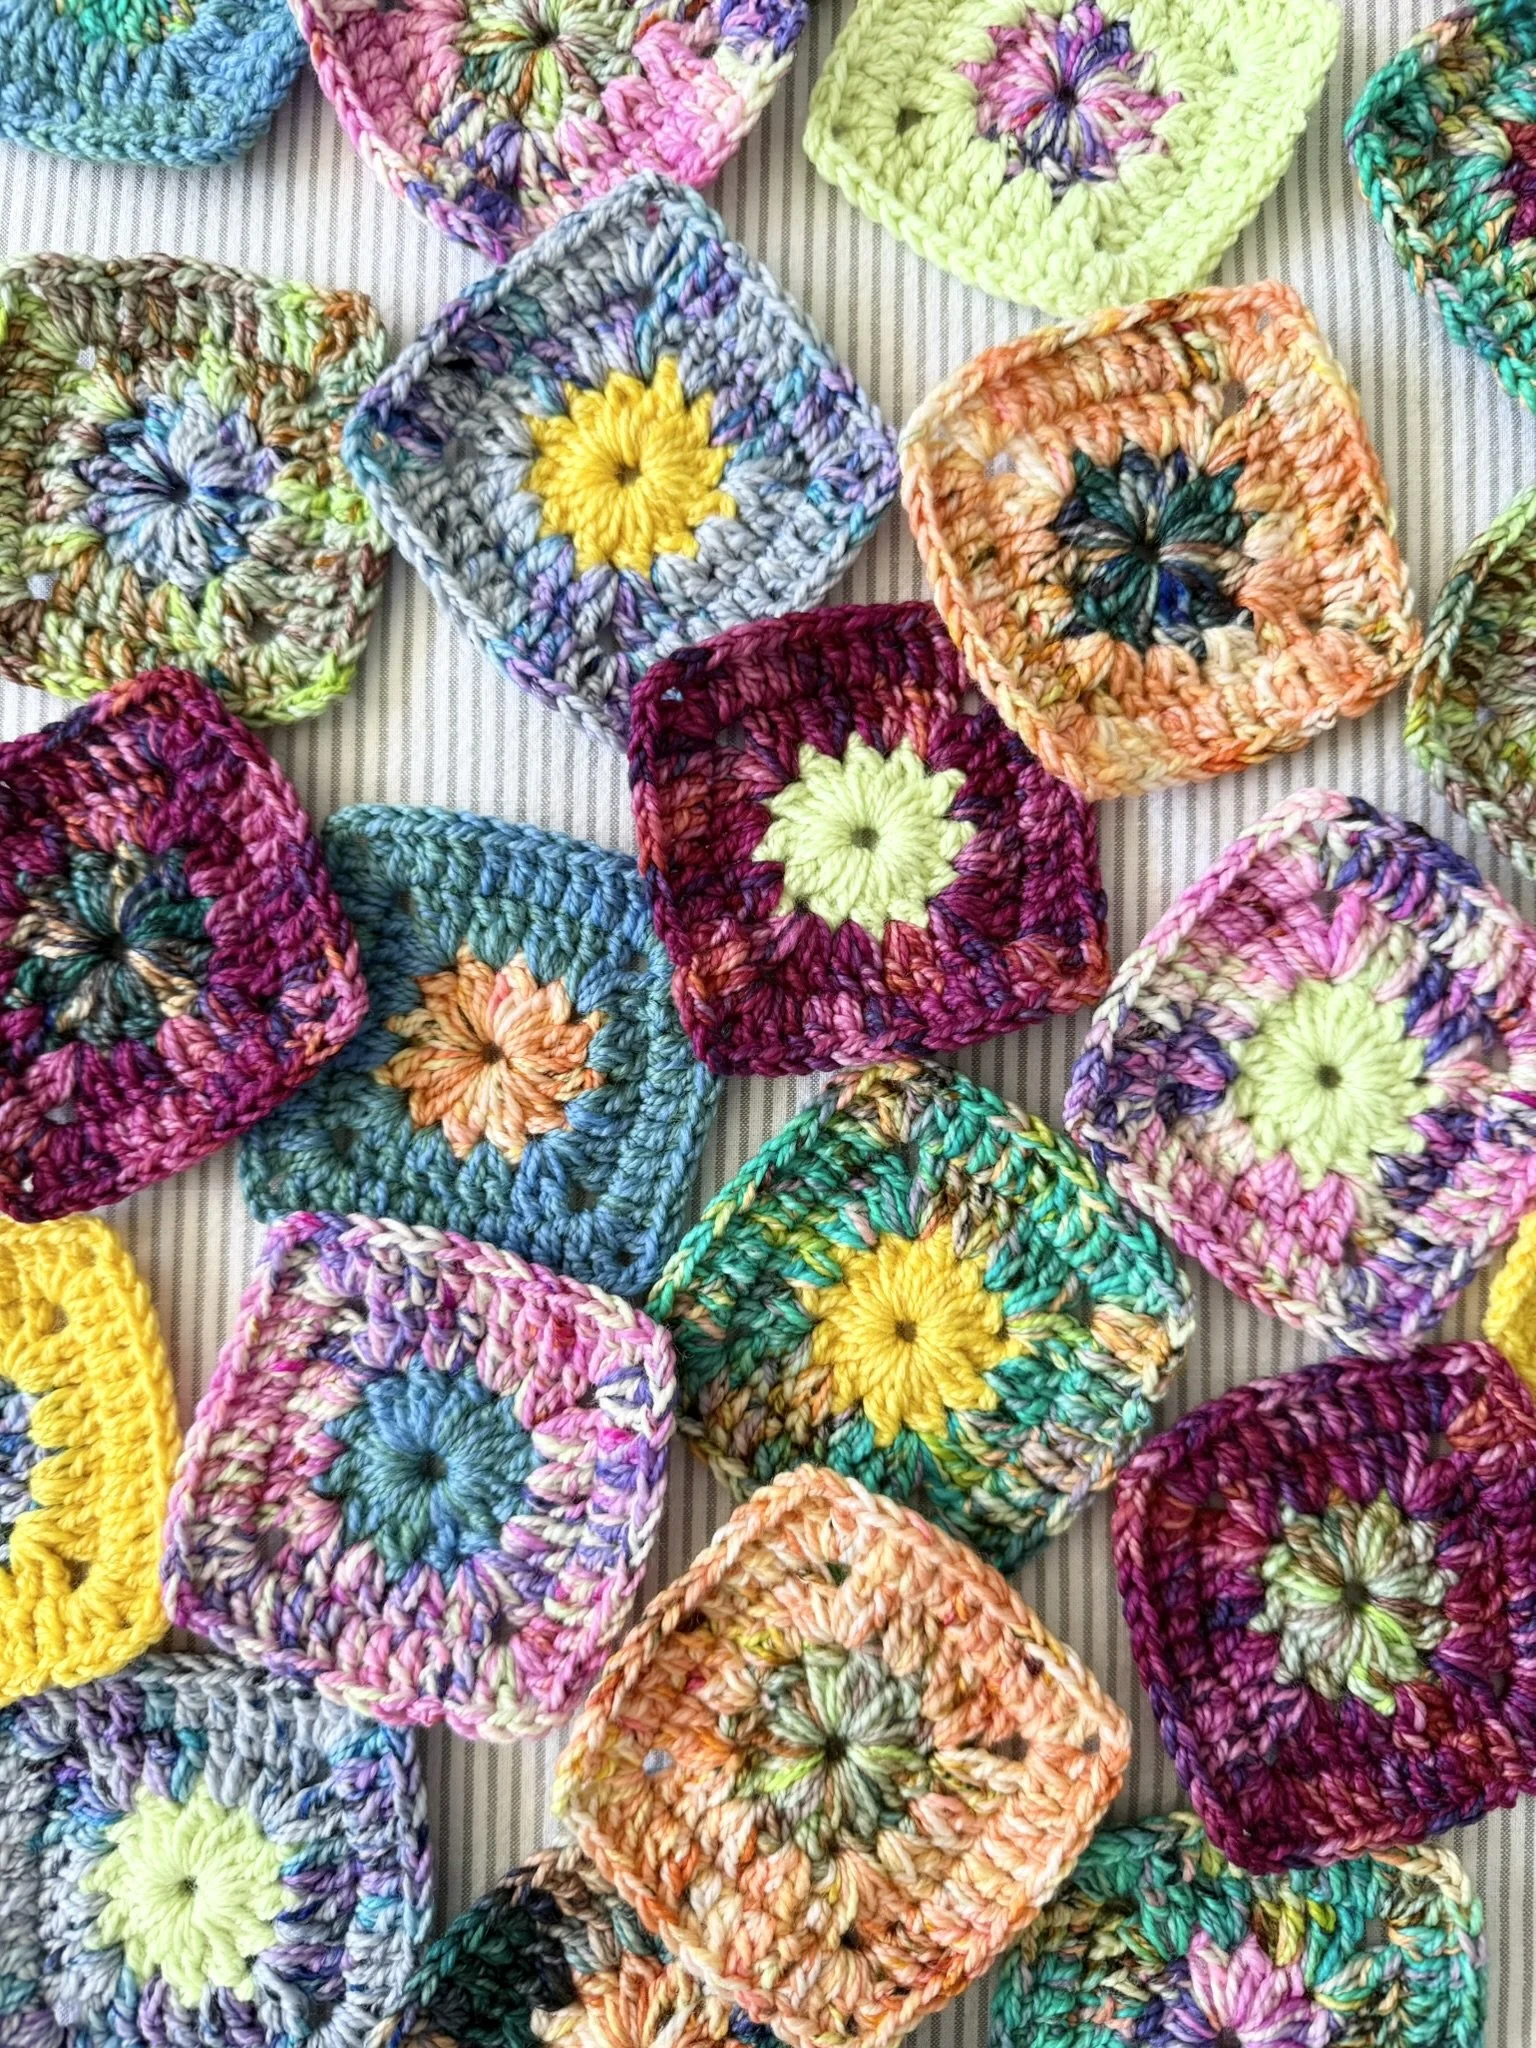
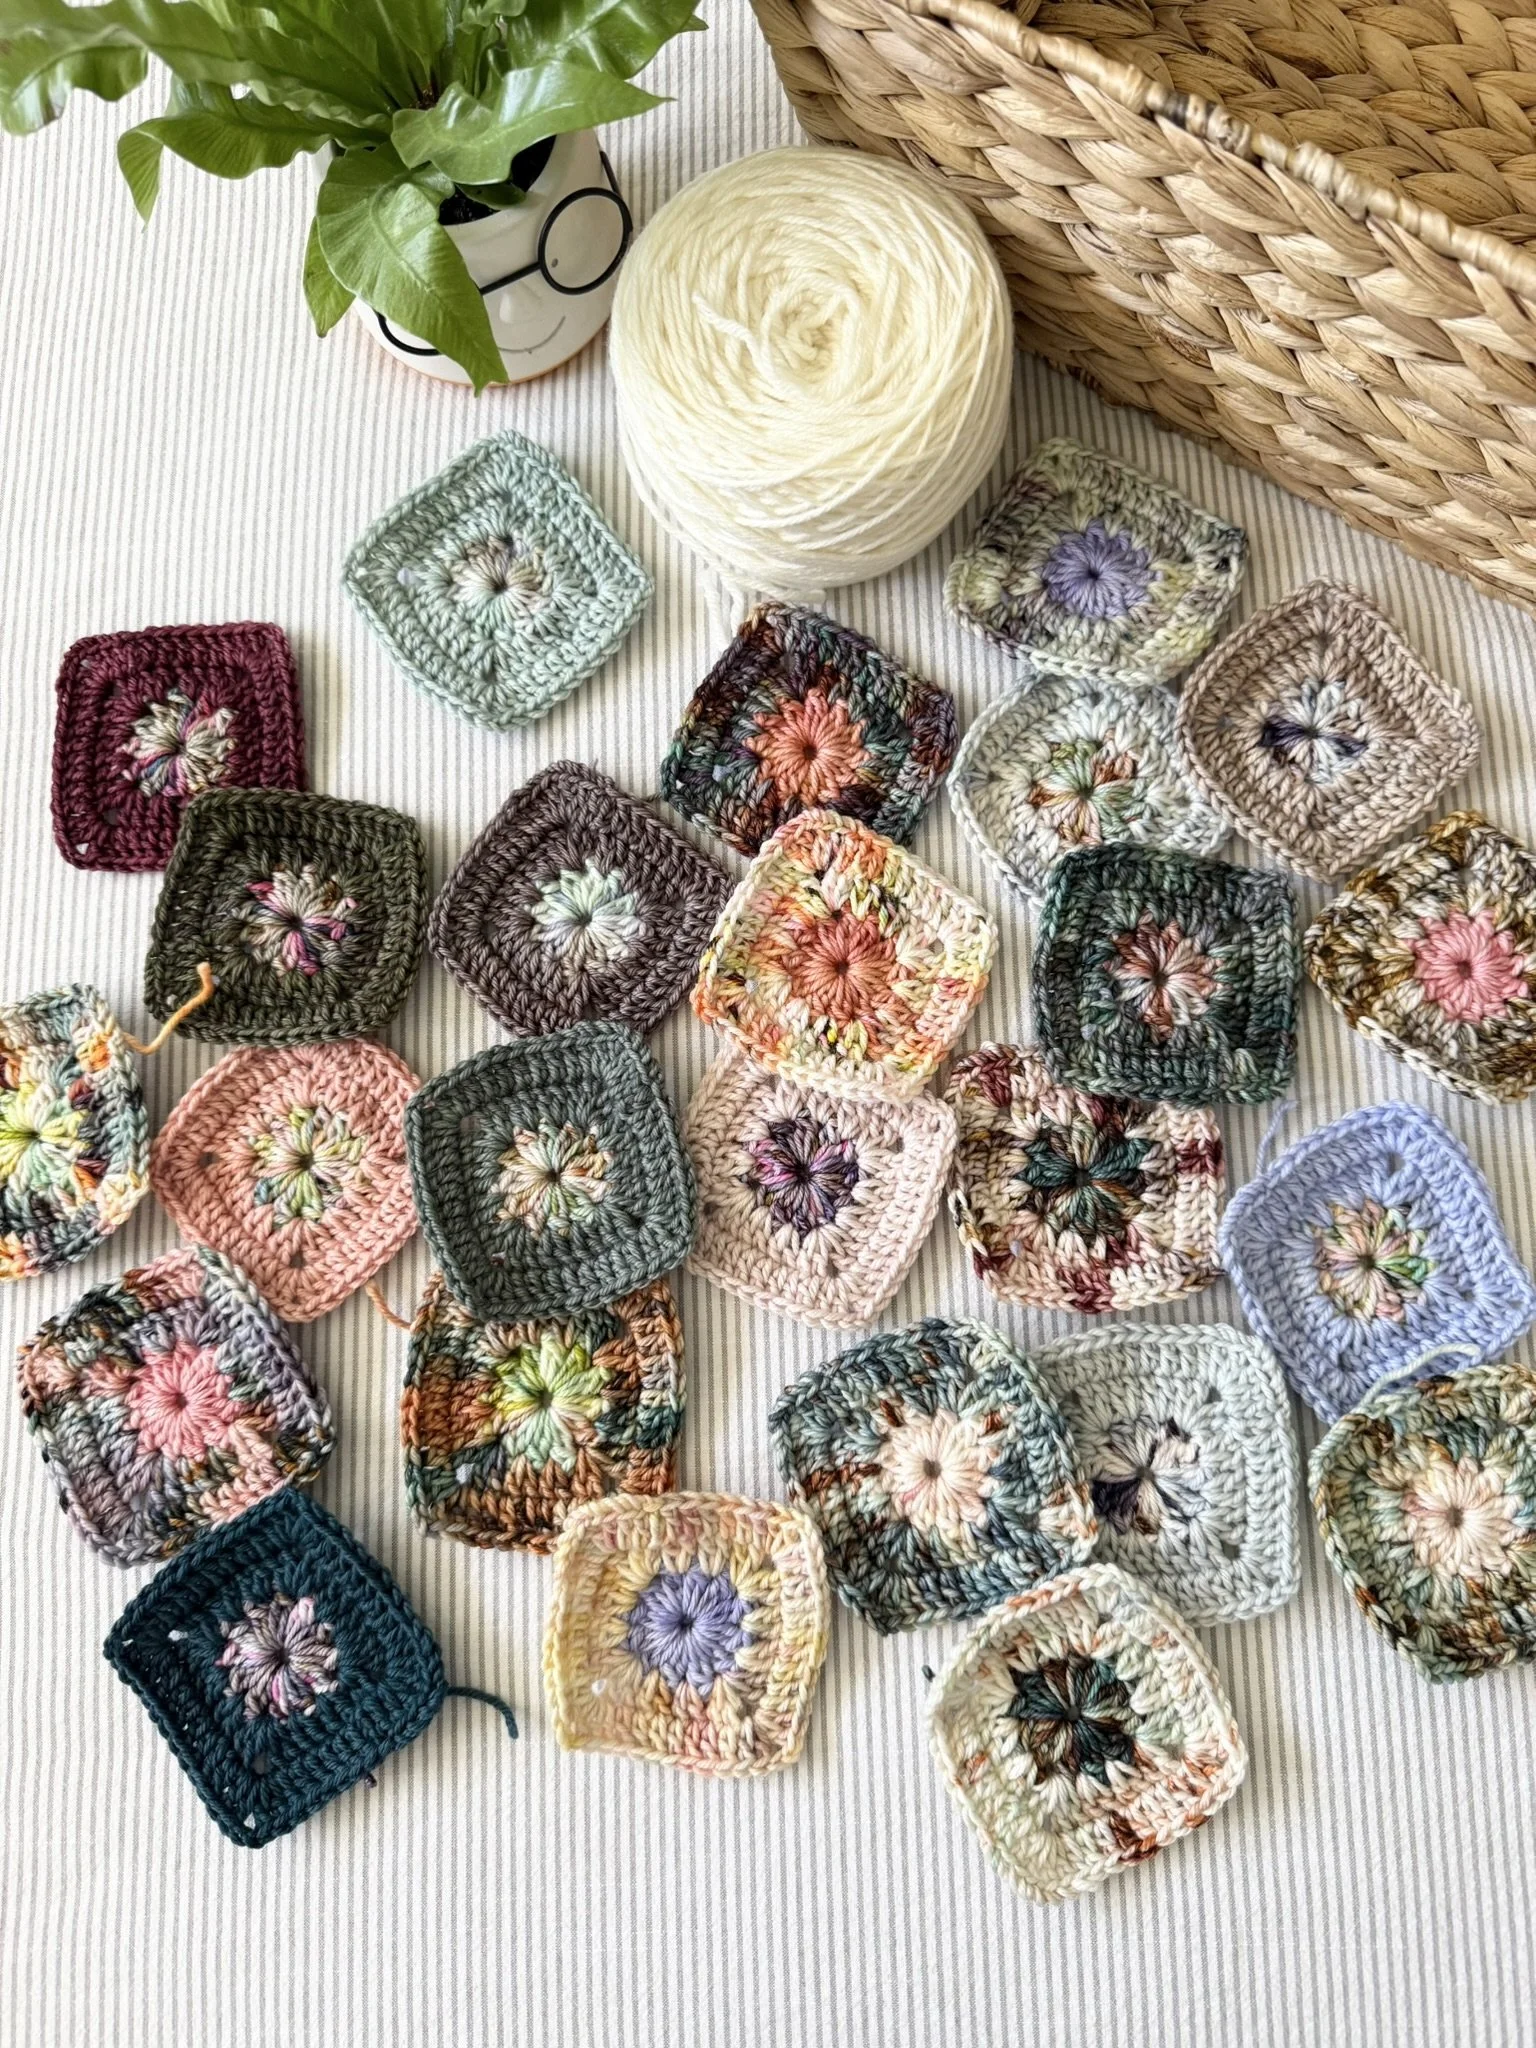
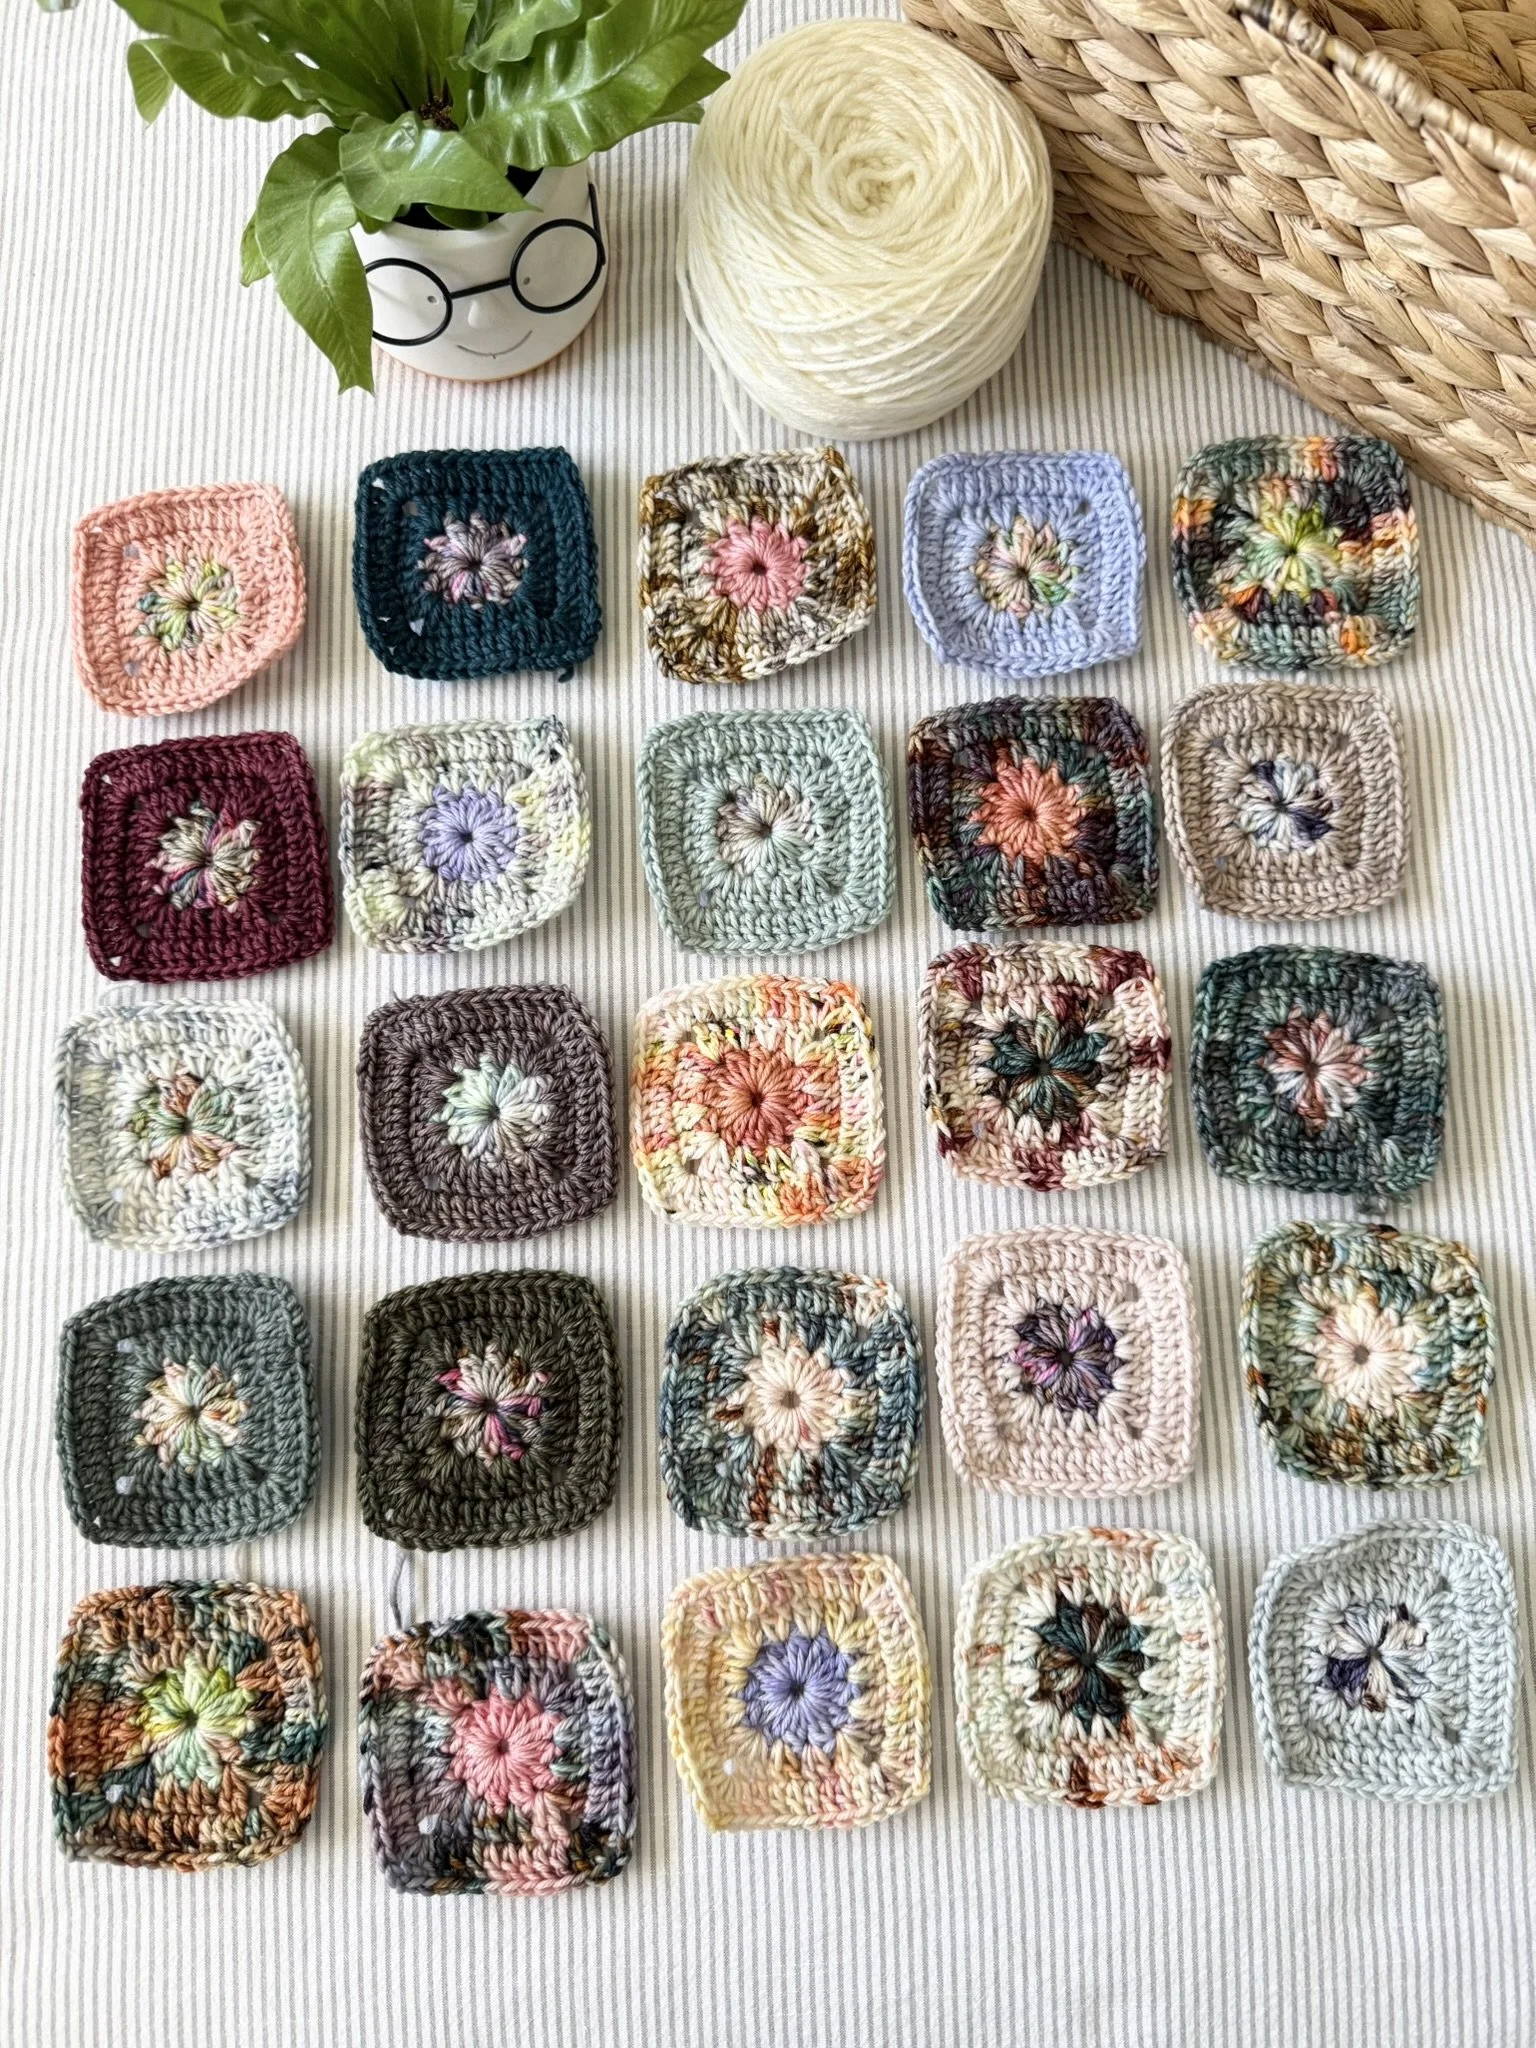
The granny squares for this pattern are made holding sock weight/fingering yarn double stranded. To do this: Cake each mini skein; pull from centre, while also pulling from outside to work up each square. Voila!
The yarn used is a sock weight/fingering weight yarn (held double) which equates to a light worsted or DK weight yarn (held single/normal). Any of these weights can be used, as long as gauge is met.
In some cases, the video tutorials have been used for other patterns. Please follow the yarn recommendations, hook size and stitch counts in the written pattern- the videos are only meant as visual guides.
Ch 2 counts as DC throughout.
If using your own colours for this pattern here’s a breakdown of how to use the colours evenly (you can also follow the colour combo’s written recipe style in the Schematic Below):
Using 10 colours: make two centres for 5 of the colours. Make 3 centres for the remaining 5 colours.
Once centres are all made, evenly (as possible) distribute them with the next colour you want as the second and third round.
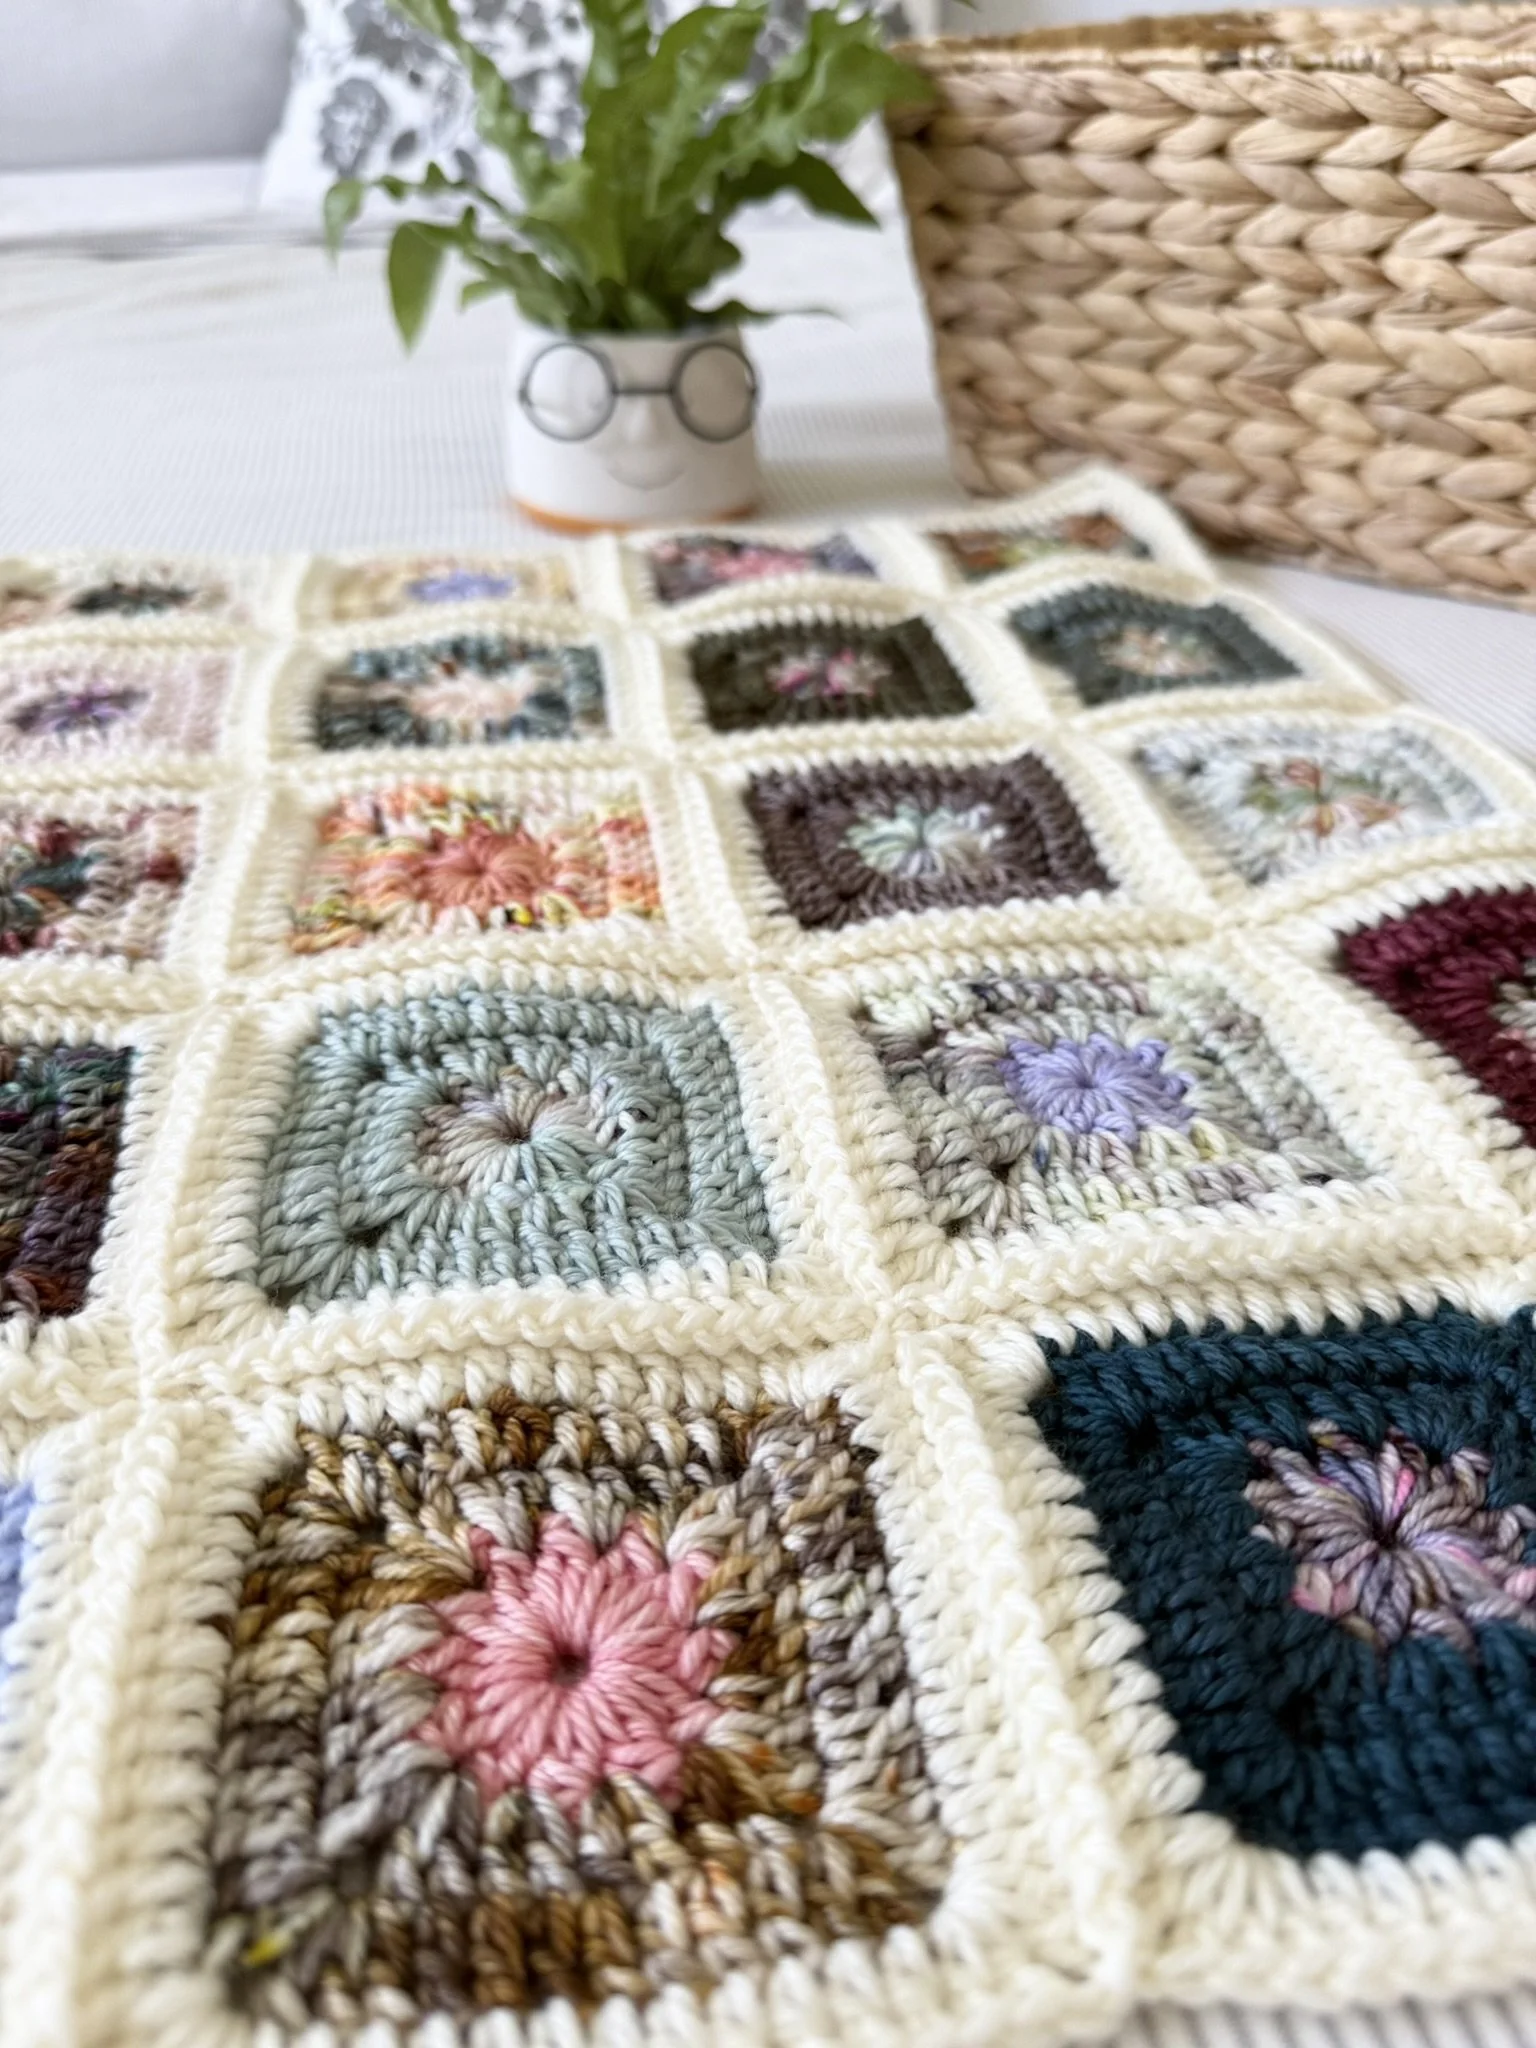
Aurelia squares are joined with CJAYG; where each square is joined to the next in a continuous fashion while working an extra round to each square.
Don’t forget to share your makes on Instagram and Facebook! I always love seeing what you’ve all worked up. Tag me on Instagram @nautikrallcrochet or Facebook @nautikrall_crochet
Colour Legend

Pattern Graph/Schematic
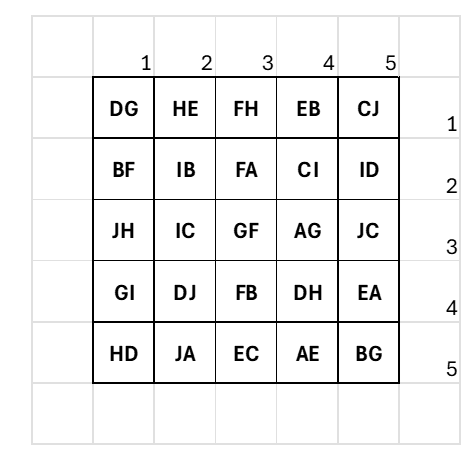
Pillow Panel Dimensions: 5 squares x 5 squares = 25 squares total
*The schematic above is written out (Rnd 1 and Rnd 2-3). The First Letter indicating colour for Rnd 1 as the Aurelia Centres. The Second Letter denotes the colour used in the last Rnds 2-3.
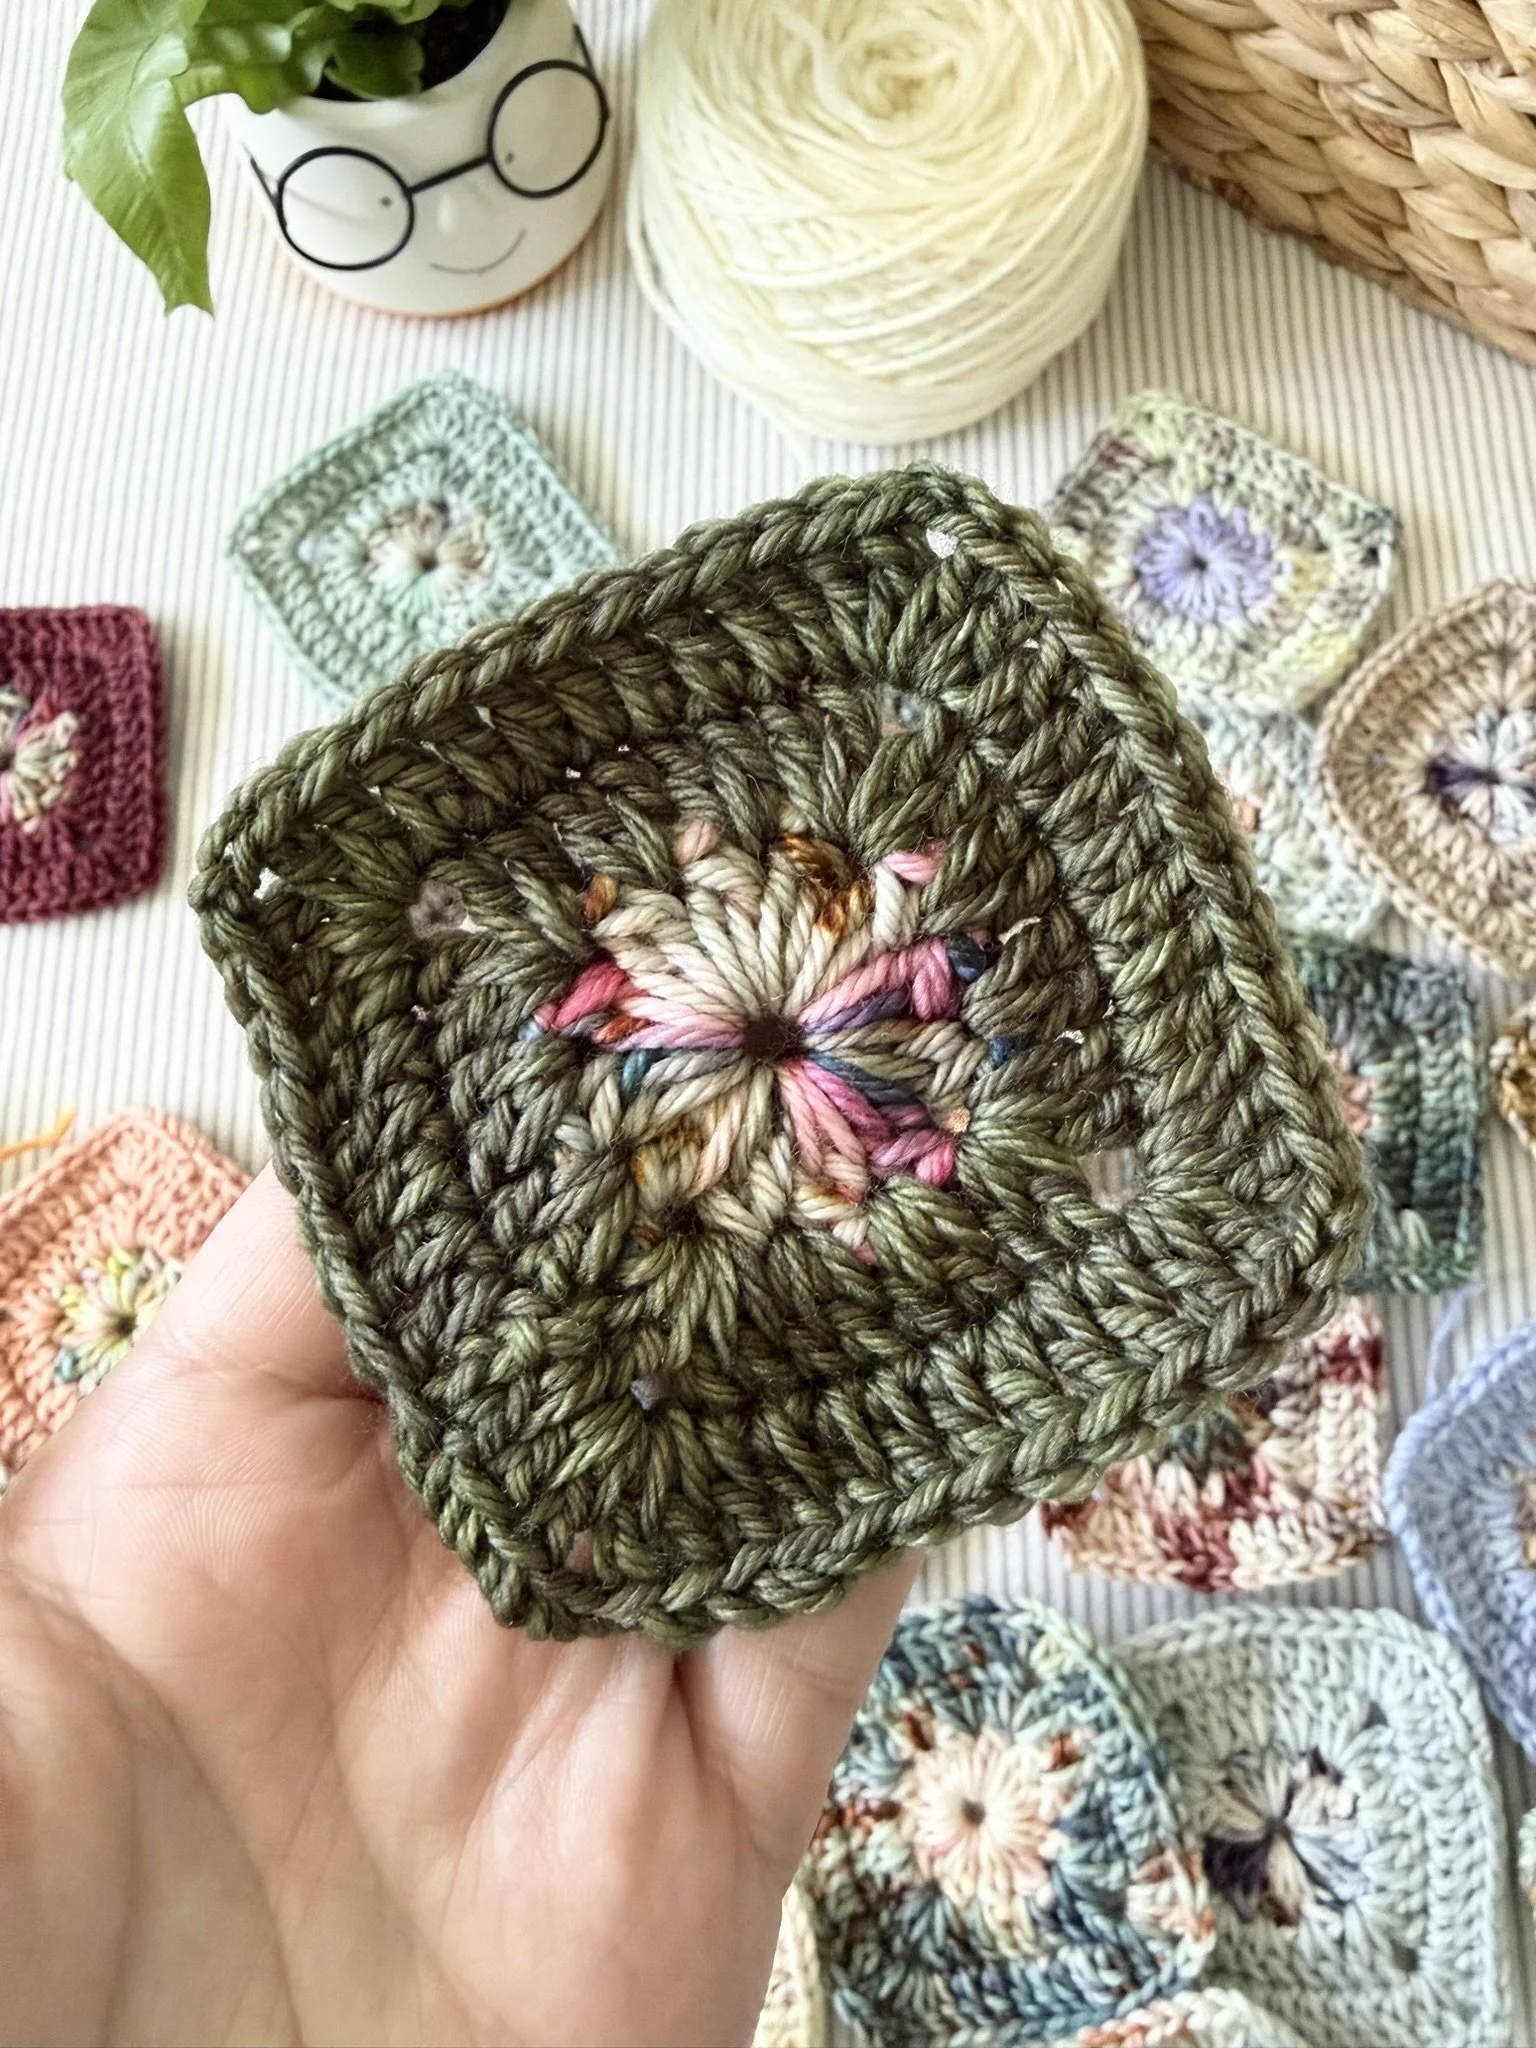
Pattern Aurelia Granny Square
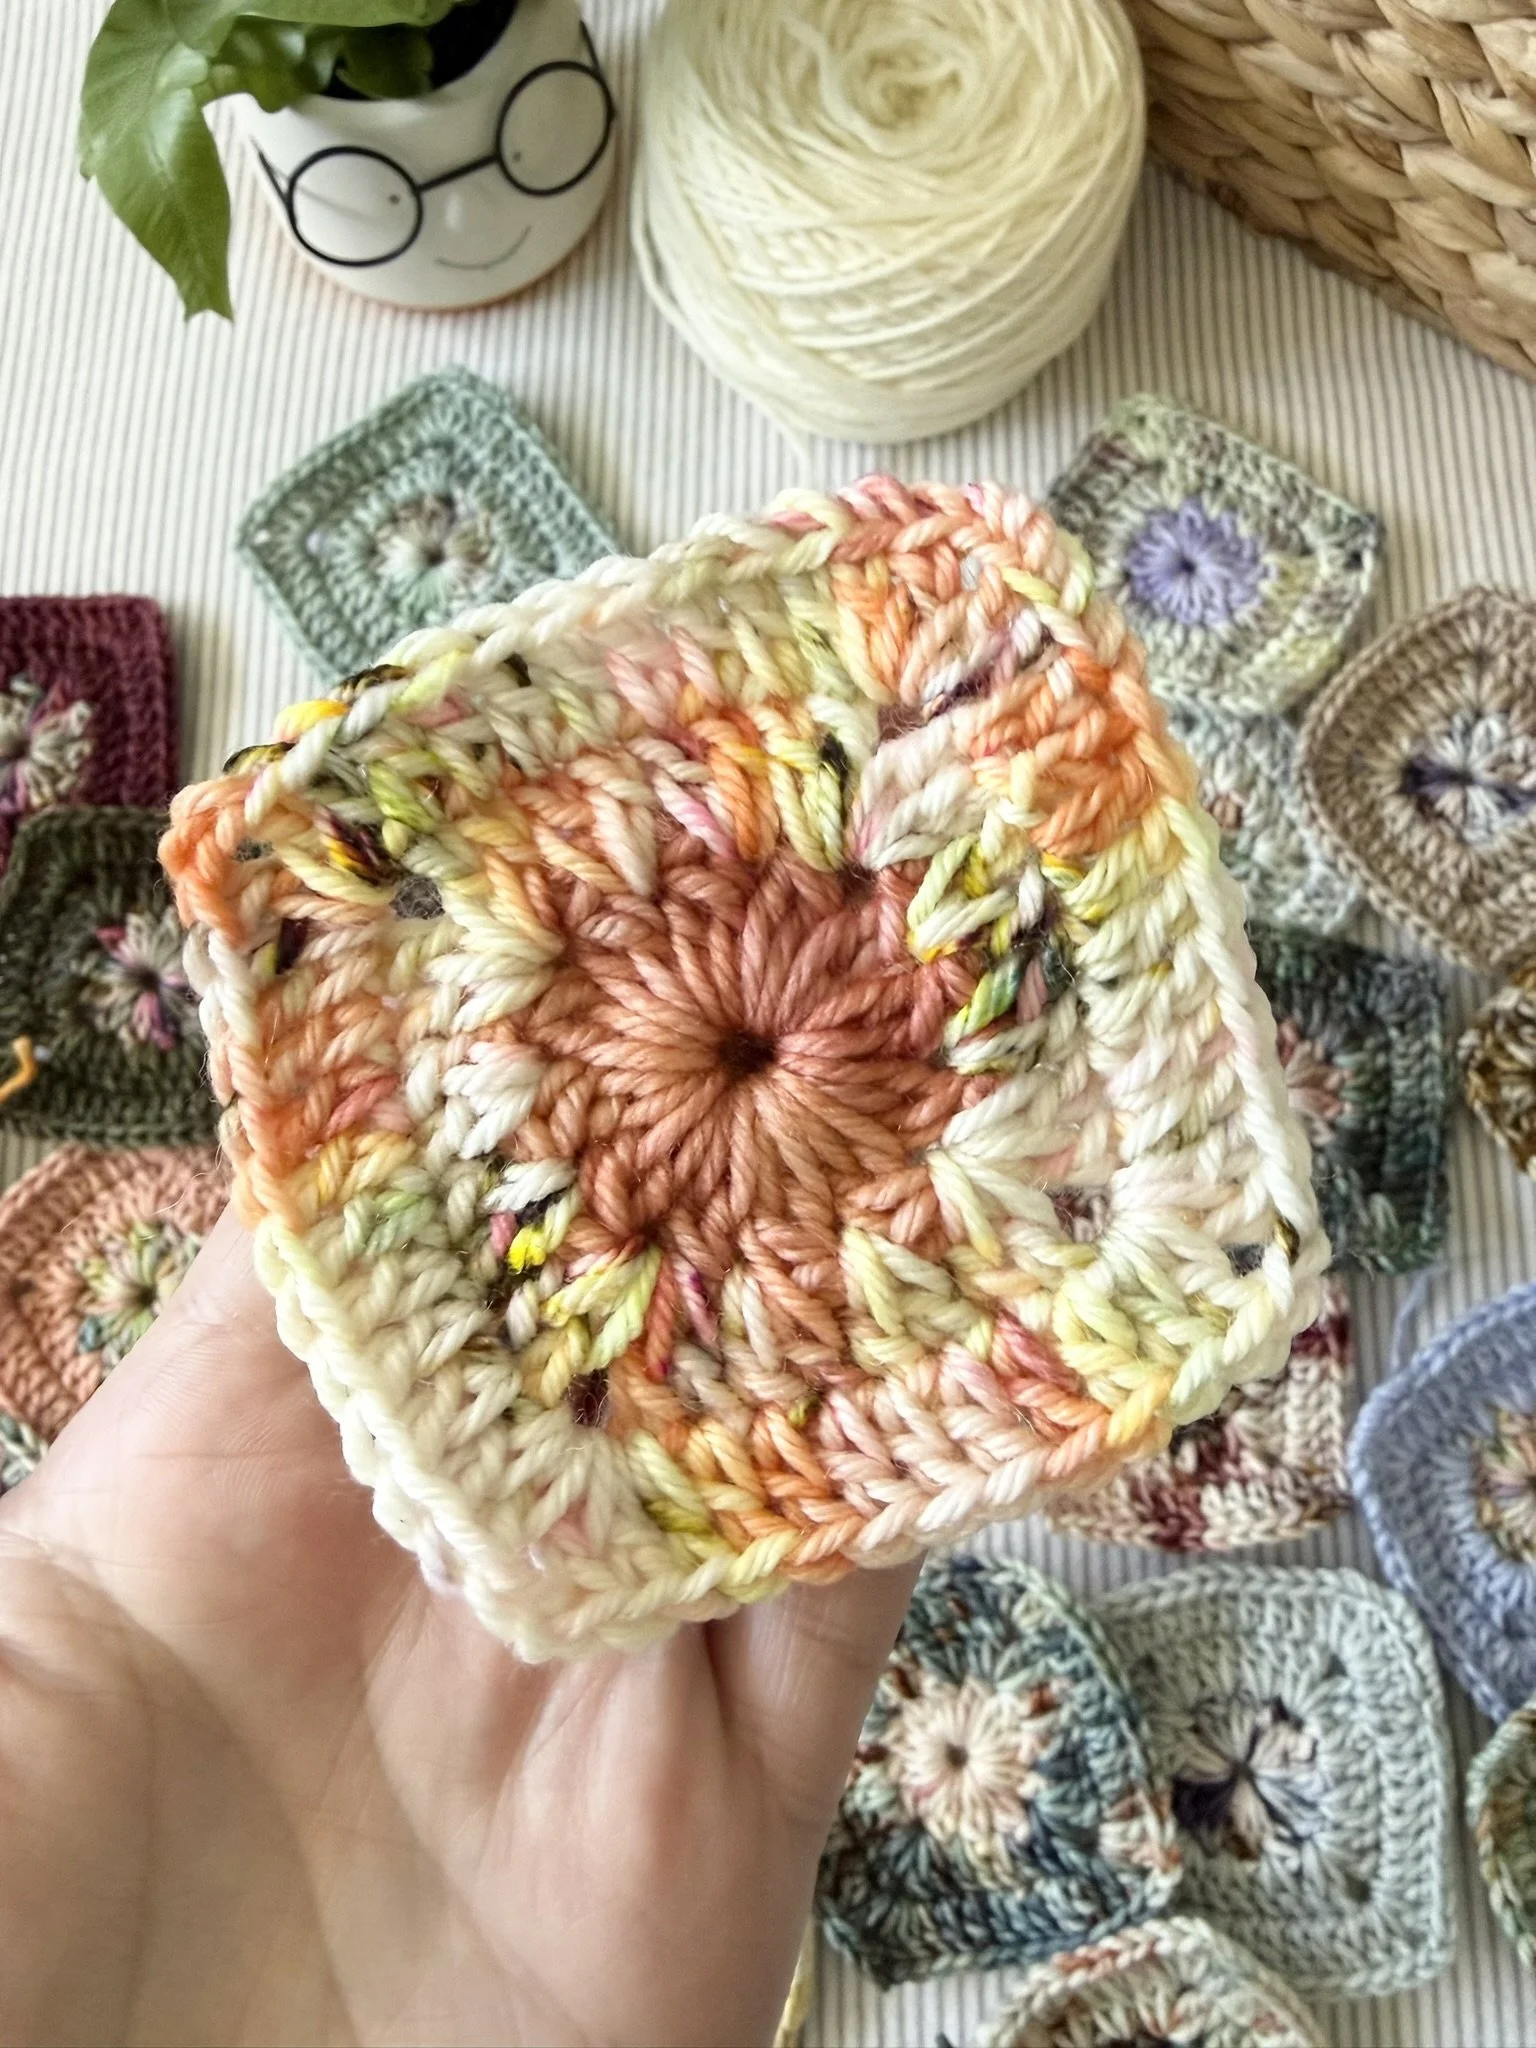
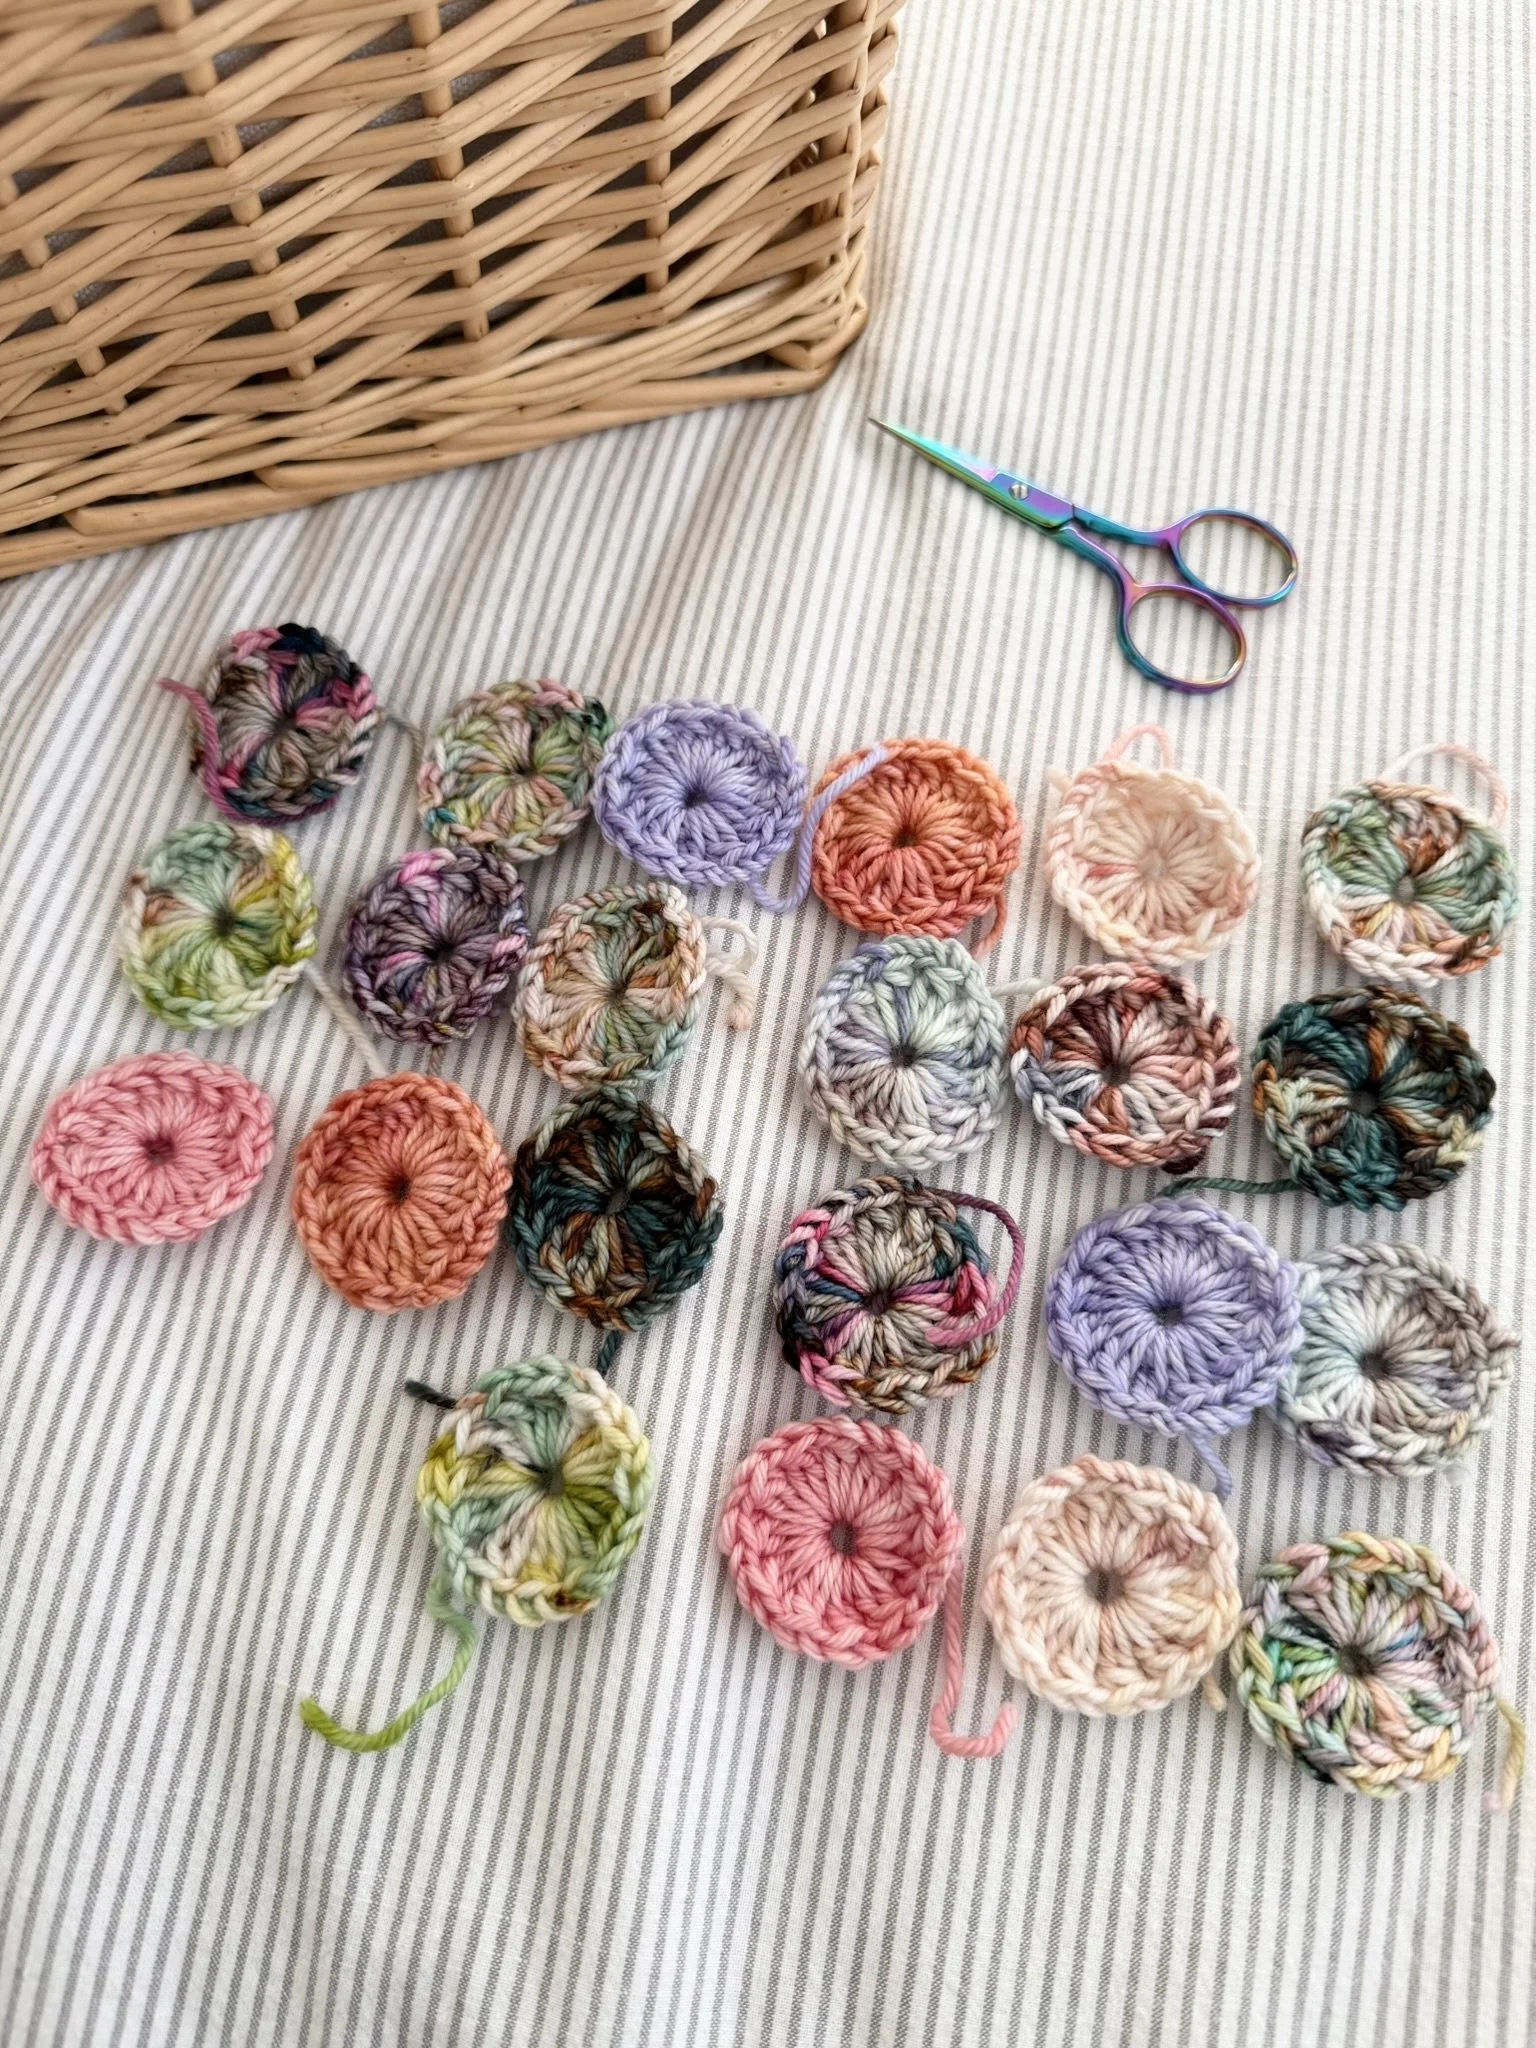
Round 1
Ch 5, sl st into 5th ch from hook to create centre ring.
Ch 2, work 1 DC into centre ring, ch 1 (this counts as first cl st).
Work 11 [2 DC cl] into centre ring (12 cl sts).
Join rnd with sl st to the ch-1 sp between the first and second cl sts at beginning of rnd, fasten off.
Round 2
Join new colour into any ch-1 sp and ch 2.
[1 DC, ch 2, 2 DC] into same sp (first corner).
*Work 2 DC into next ch-1 sp, twice.
Work [2 DC, ch 2, 2 DC] into next ch-1 sp.*
Repeat from to 2 more times.
Work 2 DC into next ch-1 sp, twice.
Join rnd with sl st into top of first DC (not the ch-2), do not fasten off.
Round 3
Ch 2, DC into same st.
Work [2 DC, ch 2, 2 DC] into corner sp.
Work a DC st into the top of each st across (8).*
Repeat from to 2 times.
Work [2 DC, ch 2, 2 DC] into corner sp.
Work a DC st into the top of each st across (6).
Join rnd with sl st into top of first DC (not the ch-2).
Fasten off, weave in all ends.
***Please see the YouTube video tutorial below on how to make the Aurelia Solid Granny Squares (NOTE: for this pillow we’re only using 3 rounds of the square):
Assembling Motifs with Continuous Join-As-You-Go (CJAYGO)
Lay out all squares in the arrangement from the schematic above.
Starting from the top right-hand corner join squares across the rows using joining colour Snowshoe.
Example: First row will be joined from square number 5 (CJ) across to square 1 (DG). Second row will be joined from number 10 (ID) to 6 (BF) etc…
Following along with the video tutorial below, crochet squares together until panel is complete.
Fasten off, weave in all ends
**Please see video tutorial below for how create pillow panel with CJAYG:
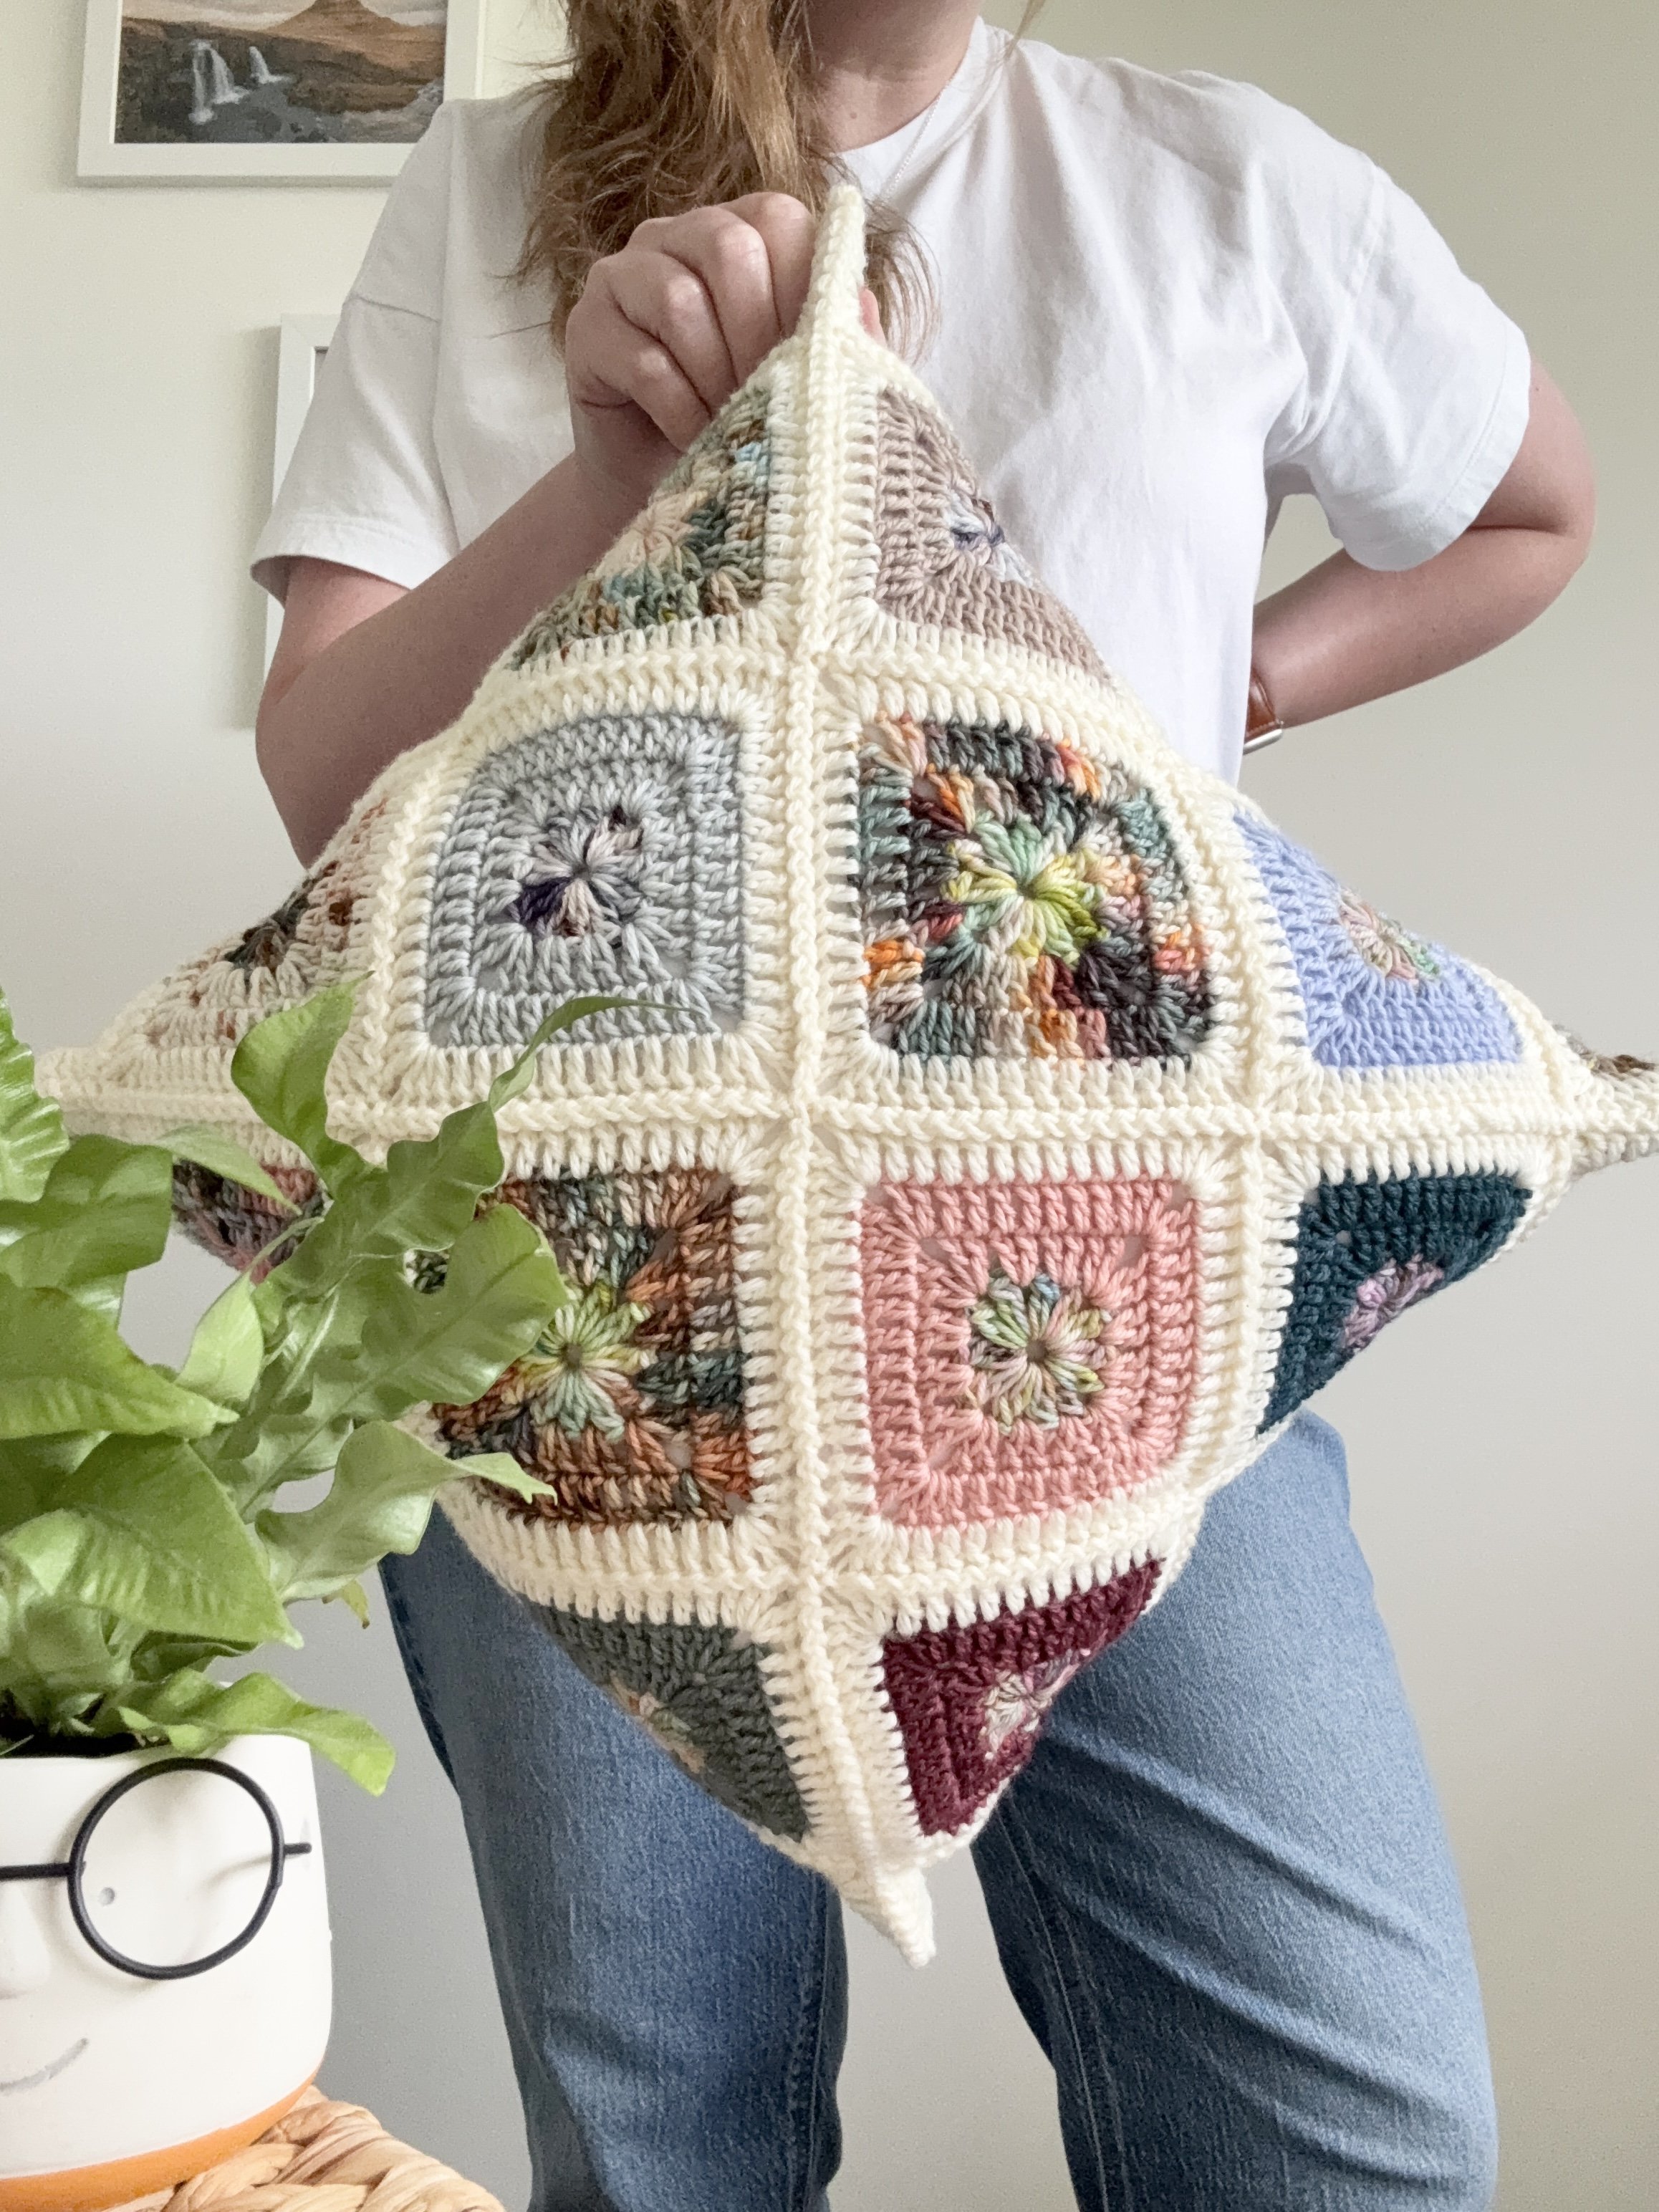
Assembling Finished Pillow Cover
Place pillow cover down with WS up.
Fold corners of pillow cover into the centre; seam together using zig zag sl st.
On the final seam, remember to leave enough room to stuff pillow into the cover before seaming all the way shut.
Fasten off, weave in all ends.

**Please see video tutorial below for how to crochet the zig zag slip stitch and assemble your pillow cover:
~The End~
Aurelia Pillow Pattern x DK weight Scraps!

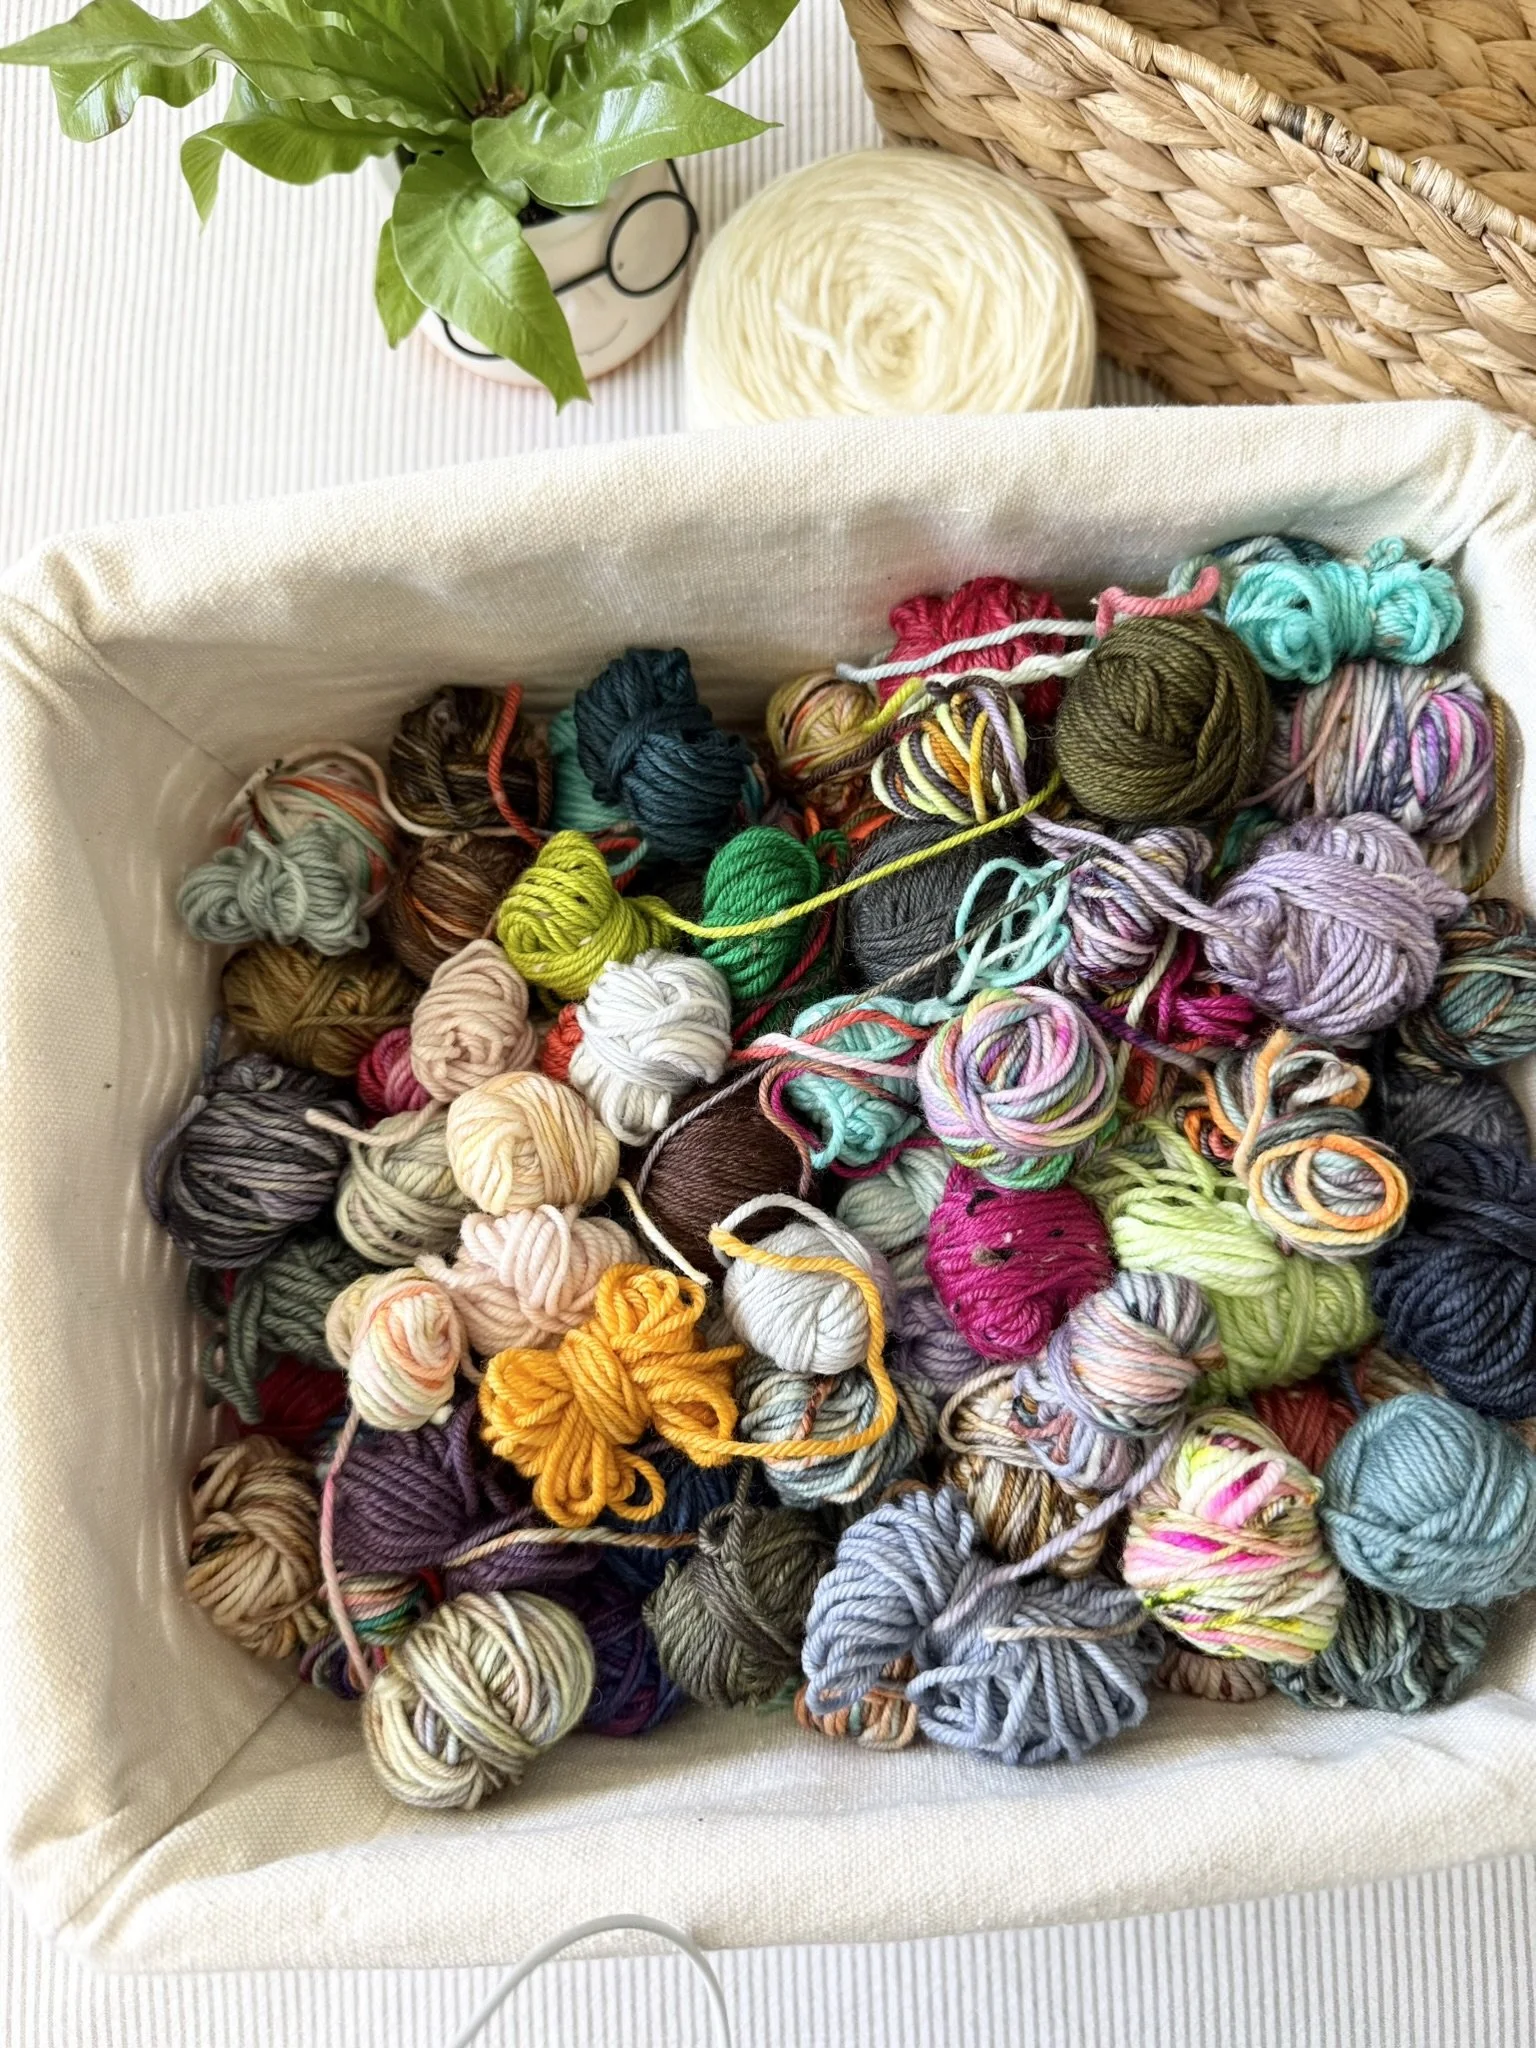
Yarn
DK weight scraps in 100% SW Merino, (230-246yds/100g) range:
Approximately (460yds/200g) for the squares
Joining yarn, WeCrochet Swish DK (246/100g):
Bare (165yds/67g) 1 skein
Finished Size
16” x 16” Pillow
Pattern Notes
Use the same Hook size, Gauge and Pattern as listed in the original above.
I use a basic kitchen scale to measure out my tiny scraps to ensure I have enough to complete the centres and rounds 2-3 of my squares. This will vary from fibre to fibre…but my quantities were as follows:
Round 1 required ~2g of yarn
Round 2-3 required ~6g of yarn.
All squares were made with different yarns and combinations. Just whatever colours I had enough to complete squares with.
If using a thicker scrap yarn; complete the pillow panel as normal and use a larger pillow form to stuff the pillow. To make this work you’ll need a final panel that measures 3-4” bigger than the intended pillow size. For example:
14” pillow needs a 17-18” panel
16” pillow needs a 19-20” panel
18” pillow needs a 21-22” panel
20” pillow needs a 23-24” panel etc…
The pattern, the photographs and video tutorials in this document are the property of NautiKrall Crochet. You may sell items you make from this pattern; but may not sell, reproduce, or distribute this pattern, in whole or in part, as your own.
Copyright © 2026 NautiKrall Crochet – All right reserved.